Introduction
Welcome to our guide on how to open the SD card slot on your LG G5 smartphone! The LG G5 is a versatile device that allows you to expand your storage capacity by inserting a microSD card into its dedicated slot. Whether you want to save more photos, videos, or apps, adding an SD card can provide you with the extra space you need.
If you’re new to the LG G5 or simply unsure how to access the SD card slot, don’t worry. In this guide, we will take you through the step-by-step process of opening the SD card slot on your LG G5. By following these instructions, you’ll be able to seamlessly insert or replace your microSD card without any hassle.
Before we get started, it’s important to note that the location of the SD card slot may vary depending on the exact model of the LG G5 you own. However, the general process of opening the SD card slot remains the same across all variations. So, let’s dive into the steps involved in accessing the SD card slot on your LG G5.
Step 1: Locate the SD card slot on your LG G5
The first step is to locate the SD card slot on your LG G5 smartphone. The position of the SD card slot can vary, but it is typically located on the side of the device. Take a moment to examine your LG G5 and look for a small rectangular slot that is covered by a flap or tray.
Once you have identified the SD card slot, you can proceed to the next step. It’s worth noting that some LG G5 models may have the SD card slot located on the top or bottom of the device, so be sure to check all sides to find the slot.
In addition, it’s important to handle your LG G5 with care while locating the SD card slot. Make sure your hands are clean and dry to prevent any accidental damage or contamination.
The SD card slot is designed to hold a microSD card, which is a smaller version of the standard SD card. MicroSD cards are widely available and come in different storage capacities, so you can choose the one that suits your needs.
Now that you have located the SD card slot on your LG G5, it’s time to move on to the next step and open the slot to insert or remove your microSD card.
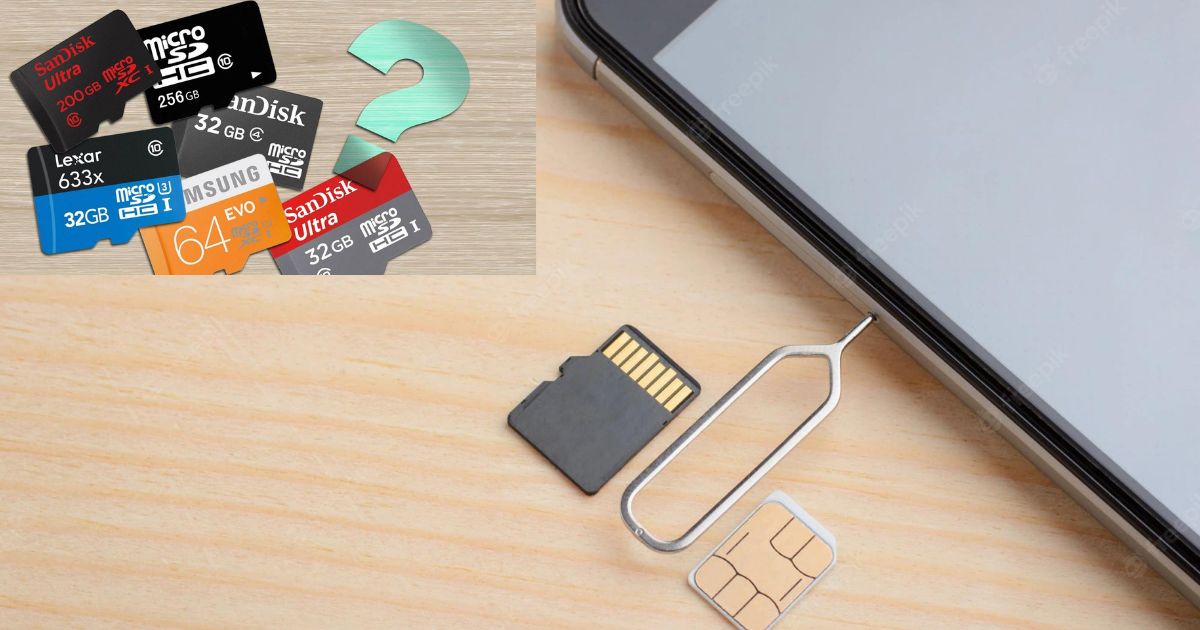
Step 2: Insert the ejector tool into the small hole next to the SD card slot
Once you have located the SD card slot on your LG G5 smartphone, the next step is to insert the ejector tool into the small hole located next to the SD card slot. The ejector tool is typically provided with your LG G5 or can be purchased separately.
The small hole next to the SD card slot is specifically designed to hold the ejector tool, which is a thin and pointed tool used to eject the SD card tray. This tool allows you to safely and easily remove the SD card tray without causing any damage to your device.
When inserting the ejector tool into the hole, make sure to apply gentle pressure. The tool should fit snugly into the hole without any excessive force. If you encounter any resistance, double-check the orientation of the tool and try again.
It’s important to note that using the ejector tool is recommended over using other objects, such as pins or paperclips, as these may not be the ideal size or shape for the job and can potentially damage the SD card slot or other components of your LG G5.
By inserting the ejector tool into the small hole next to the SD card slot, you’re now ready to proceed to the next step and eject the SD card tray from your LG G5.
Step 3: Push the ejector tool gently until the SD card tray pops out
With the ejector tool inserted into the small hole next to the SD card slot on your LG G5 smartphone, it’s time to proceed to the next step. Apply gentle pressure to the ejector tool and push it inwards until you feel a slight resistance.
As you push the ejector tool, you will notice that the SD card tray starts to move. Continue pushing gently until the SD card tray pops out of the device. It’s important to exert steady pressure and avoid using excessive force to prevent any damage to the SD card tray or the internal components of your LG G5.
Once the SD card tray has popped out, remove the ejector tool from the small hole. You can now safely handle the SD card tray to insert or remove your microSD card.
It’s worth noting that the SD card tray may be spring-loaded, which means it might come out with a bit of force. Be prepared to catch the SD card tray as it pops out, or make sure your LG G5 is on a stable surface to prevent it from falling or getting damaged.
By pushing the ejector tool gently until the SD card tray pops out, you have successfully completed this step. Now, let’s move on to the next step and proceed with inserting or removing your microSD card.
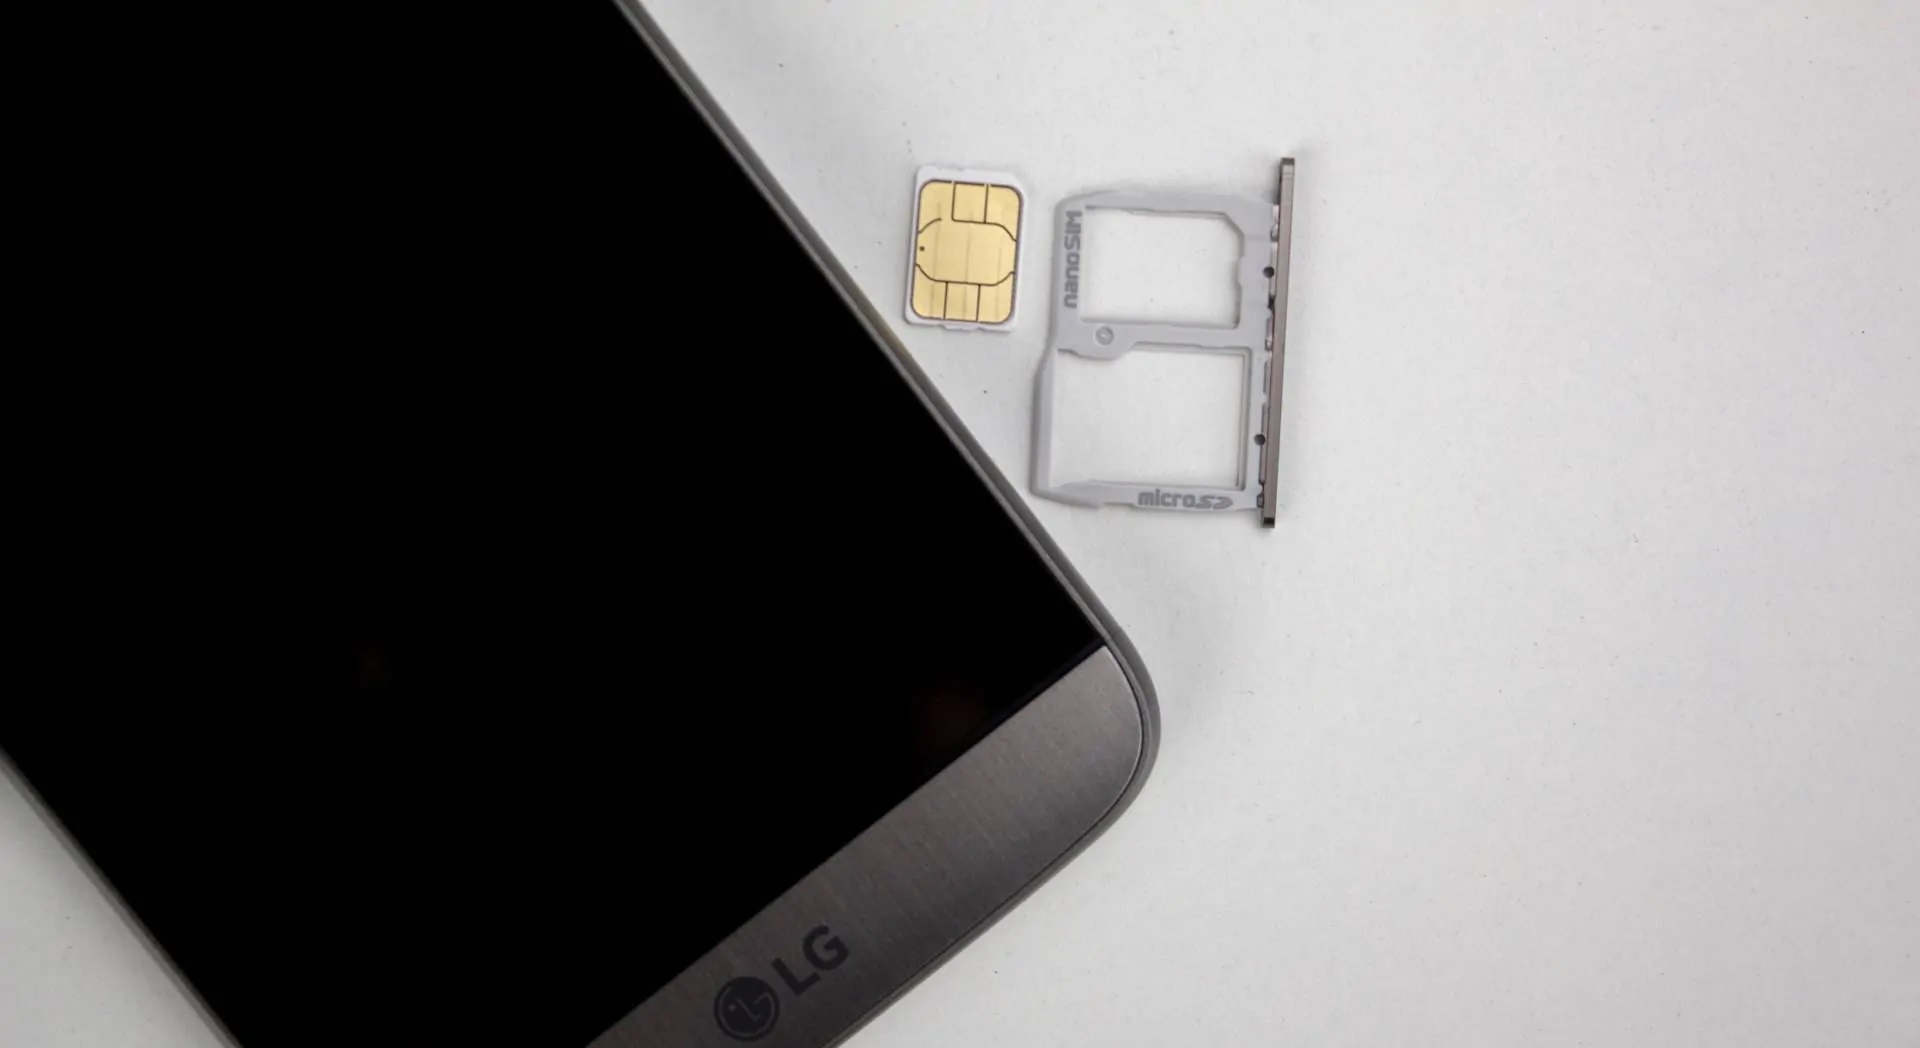
Step 4: Remove the SD card tray from the phone
Now that the SD card tray of your LG G5 smartphone has popped out, it’s time to remove it from the device. Carefully grab hold of the SD card tray, making sure to hold it securely to prevent dropping or damaging the tray.
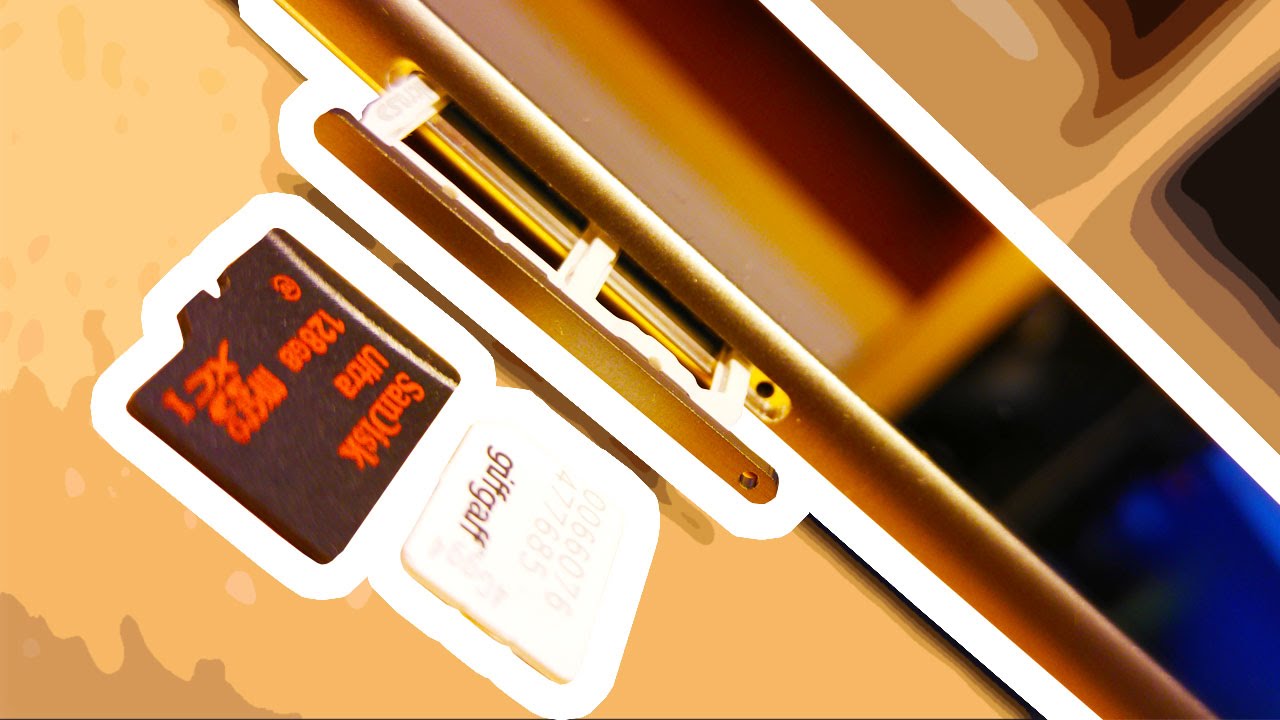
Once you have a firm grip on the SD card tray, pull it out of the device completely. You will notice that the tray is designed to hold both the microSD card as well as a nano-SIM card, depending on your device model. For the purpose of this guide, we will focus on the SD card slot.
Inspect the SD card tray to locate the specific slot designated for the microSD card. It is usually labeled or indicated by a small icon. The microSD card slot is where you will insert or remove your microSD card.
At this point, it is crucial to handle the SD card tray and microSD card with care. Avoid touching the gold-colored contacts on the back of the microSD card to prevent any damage. Additionally, ensure that the microSD card is clean and free from any dirt or debris before attempting to insert it into the tray.
By removing the SD card tray from your LG G5 smartphone, you have completed this step successfully. Now, let’s move on to the next step and learn how to insert the microSD card into the SD card tray.
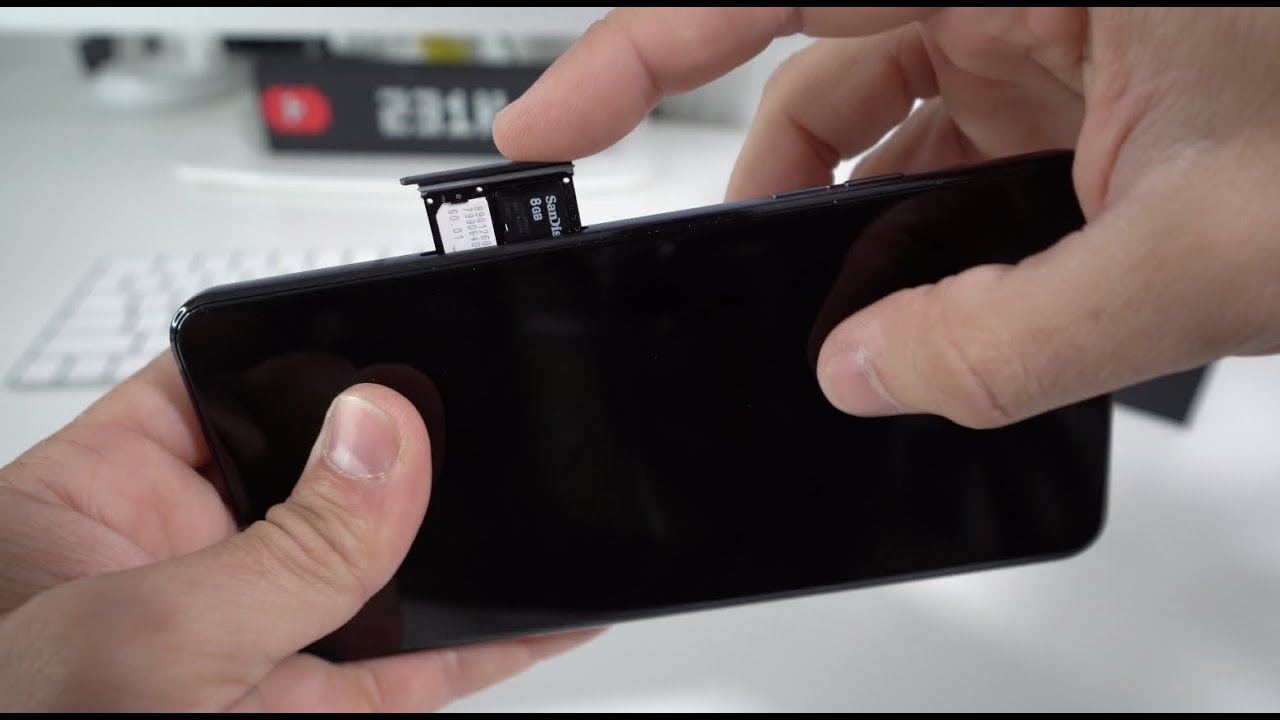
Step 5: Place the SD card into the SD card tray
Now that you have removed the SD card tray from your LG G5 smartphone, it’s time to move on to the next step: placing the SD card into the tray. Before proceeding, make sure you have a compatible microSD card that you wish to insert.
Take a careful look at the SD card tray and locate the slot that is designated for the microSD card. It is typically located on one side of the tray and may be labeled or indicated with an icon. Align the microSD card with the corresponding slot, ensuring that the gold-colored contacts on the back of the card are facing downwards.
Gently place the microSD card into the slot, making sure it fits securely and snugly. Avoid using force or causing any unnecessary pressure while inserting the card to prevent any damage to the SD card or the tray. Ensure that the microSD card is fully inserted into the slot and sits flush with the surface of the SD card tray.
It’s worth noting that the SD card slot on the LG G5 is designed to support microSD cards with different storage capacities. Make sure to choose a microSD card that suits your needs, whether it’s for storing photos, videos, music, or apps.
By carefully placing the SD card into the SD card tray, you have successfully completed this step. Now, it’s time to move on to the next step and reinsert the SD card tray back into your LG G5 smartphone.
Step 6: Reinsert the SD card tray into the phone
After placing the microSD card into the SD card tray of your LG G5 smartphone, it’s time to reinsert the tray back into the device. Take a moment to ensure that the microSD card is securely placed in the slot and aligned properly.
Hold the SD card tray with the microSD card facing downwards and carefully align it with the slot on your LG G5 phone. Make sure the tray is oriented in the correct direction to avoid any potential damage when inserting it.
Gently slide the SD card tray back into the phone until it fits snugly. Ensure that you apply an even and steady pressure to avoid any misalignment or resistance. The SD card tray should slide smoothly back into place without the need for excessive force.
Be cautious not to insert the SD card tray in the wrong slot, as this may cause compatibility issues or damage to the tray or the device. Take your time to ensure proper alignment before fully inserting the tray.
Once the SD card tray is fully inserted, give it a gentle push to ensure it clicks into place. This clicking sound indicates that the tray is securely seated and properly aligned within the LG G5 smartphone.
It’s important to make sure the SD card tray is fully inserted and secure before proceeding further. Double-check that the tray sits flush with the device’s frame and does not protrude or feel loose.
With the SD card tray reinserted into your LG G5, you have successfully completed this step. Now, let’s move on to the final step and finalize the process of opening the SD card slot.
Step 7: Push the SD card tray back into the phone until it clicks into place
In the final step of opening the SD card slot on your LG G5 smartphone, it’s time to push the SD card tray back into the device until it clicks into place. This step is important to ensure that the tray is securely positioned and properly aligned within the phone.
Before proceeding, double-check that the SD card tray is fully inserted and flush with the device’s frame. If necessary, gently push the tray further in to ensure a snug fit.
Once you are confident that the tray is properly positioned, apply gentle pressure and push the tray back into the phone. As you do this, you will feel a slight resistance before the tray eventually clicks into place.
The clicking sound indicates that the SD card tray is securely seated within the LG G5 smartphone. It ensures that the tray won’t accidentally slide out or become loose during regular use of the device.
After the tray clicks into place, give it a slight tug to confirm that it is firmly secured within the phone. If the tray doesn’t move or feels stable, then you have successfully completed the process of opening the SD card slot on your LG G5.
It’s crucial to ensure that the SD card tray is fully inserted and properly clicked into place before closing any covers or using the device. If the tray is not secured correctly, it may cause issues with the SD card or even disrupt the functioning of the phone.
By pushing the SD card tray back into the phone until it clicks into place, you have now completed all the necessary steps to open the SD card slot on your LG G5 smartphone. Congratulations!
Conclusion
Opening the SD card slot on your LG G5 smartphone is a straightforward process that allows you to expand your device’s storage capacity with ease. By following the steps outlined in this guide, you can conveniently insert or remove a microSD card to suit your storage needs.
We began by locating the SD card slot on the LG G5 and inserting the ejector tool into the small hole next to the slot. We then gently pressed the ejector tool to pop out the SD card tray. After removing the tray from the phone, we placed the microSD card into the designated slot.
Subsequently, we reinserted the SD card tray back into the phone, ensuring it was securely aligned and pushed it until it clicked into place. Attending to this crucial step avoids any potential issues and guarantees that the SD card remains securely seated within the device.
By following these steps, you can successfully complete the process of opening the SD card slot on your LG G5 smartphone. Remember to handle the microSD card and SD card tray with care to prevent any damage.
With the expanded storage capacity offered by the microSD card, you can now store more photos, videos, apps, and other files on your LG G5 smartphone without worrying about limited space.
Enjoy the convenience and flexibility of having extra storage on your device, and make the most out of your LG G5’s capabilities. Whether you’re capturing memorable moments or downloading your favorite apps, the expanded storage capacity will ensure you have enough space for all your needs.
Now that you’ve successfully opened the SD card slot on your LG G5, you’re ready to make the most of your smartphone’s storage capacity. Have fun and enjoy exploring all the possibilities that the additional space brings to your device!