Introduction
When it comes to keeping a personal computer (PC) cool and running efficiently, a reliable case fan is an absolute necessity. A case fan helps to dissipate heat generated by the components inside the PC case, preventing overheating, and ensuring optimal performance. Choosing the right case fan for your PC can greatly contribute to its overall functionality and longevity.
However, finding the right case fan involves more than just considering its brand or aesthetics. One crucial factor to consider is the size of the fan, as it directly affects its compatibility with your PC case. In this article, we will explore the importance of properly measuring for a PC case fan and provide you with a step-by-step guide on how to do it effectively.
Ensuring accurate measurements will save you time and prevent costly mistakes when purchasing a case fan. Whether you are upgrading your existing fan or building a new PC, this guide will equip you with the necessary knowledge to make informed decisions about sizing your case fan.
Before diving into the measuring process, let’s highlight some important aspects to consider when choosing a case fan.
Factors to Consider When Choosing a PC Case Fan
Choosing the right PC case fan involves considering various factors to ensure optimal cooling performance and compatibility with your setup. Here are some key factors to keep in mind:
1. Fan Size: The size of the case fan is crucial for compatibility with your PC case. Common sizes include 80mm, 120mm, 140mm, and 200mm fans. Larger fans tend to provide better cooling performance, but they might not fit in all cases. Measure your available space to determine the maximum fan size your case can accommodate.
2. Airflow: Assess the airflow requirements of your PC components, as different hardware configurations have varying cooling needs. High-performance systems may require fans with a higher airflow capacity to maintain optimal temperatures. Consider the cubic feet per minute (CFM) rating of a fan, which indicates the amount of air it can move.
3. Noise Level: Consider the noise level of the fan, especially if you are sensitive to noise or desire a quieter PC. Fans with larger diameters generally produce less noise since they can move the same amount of air at lower speeds, resulting in reduced fan noise.
4. Static Pressure: For cooling components such as heatsinks or radiators, static pressure becomes crucial. Static pressure measures the fan’s ability to push air through restricted spaces. Fans with higher static pressure are more suitable for these scenarios.
5. Bearing Type: Case fans come with different bearing types, including sleeve, ball, and fluid dynamic bearings. Sleeve bearings are cost-effective but have shorter lifespans. Ball bearings are durable but can generate more noise. Fluid dynamic bearings are quieter and longer-lasting, making them a popular choice.
6. Fan Control: Consider whether you need fan control features to adjust fan speed according to your preferences or system requirements. Some fans come with built-in controller switches or can be controlled through software.
By taking these factors into account, you can narrow down your options and choose a case fan that best suits your PC’s cooling needs. Now that we have covered the factors to consider, let’s move on to the process of measuring the size of a PC case fan.
Measuring the Size of the PC Case Fan
Accurately measuring the size of a PC case fan is crucial to ensure compatibility with your computer case. Here’s a step-by-step guide on how to measure the size of a PC case fan:
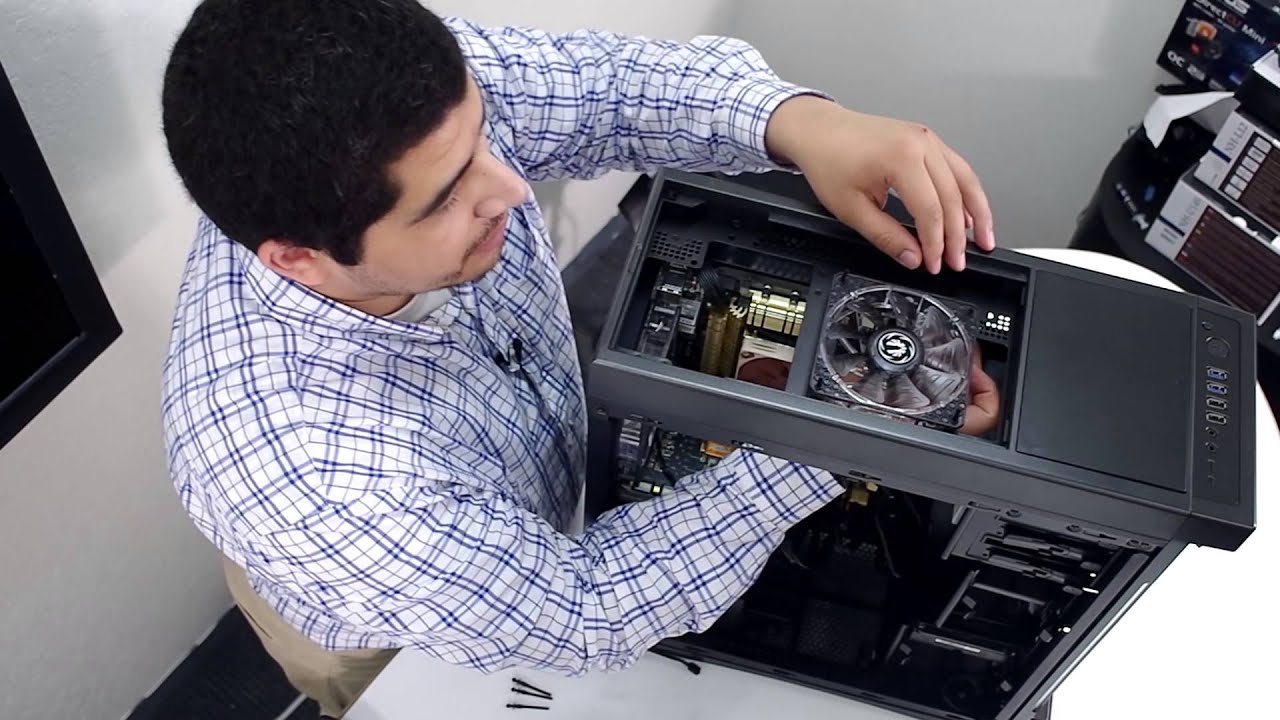
Step 1: Power Off and Open the PC Case: Before proceeding with any measurements, power off your PC and unplug it from the electrical outlet. Remove the side panel of your computer case to access the internal components.
Step 2: Locate the Existing Fan: Identify the fan you intend to replace or measure within the PC case. Typically, case fans are located at the front, rear, or top of the case, and they provide airflow to cool specific components.
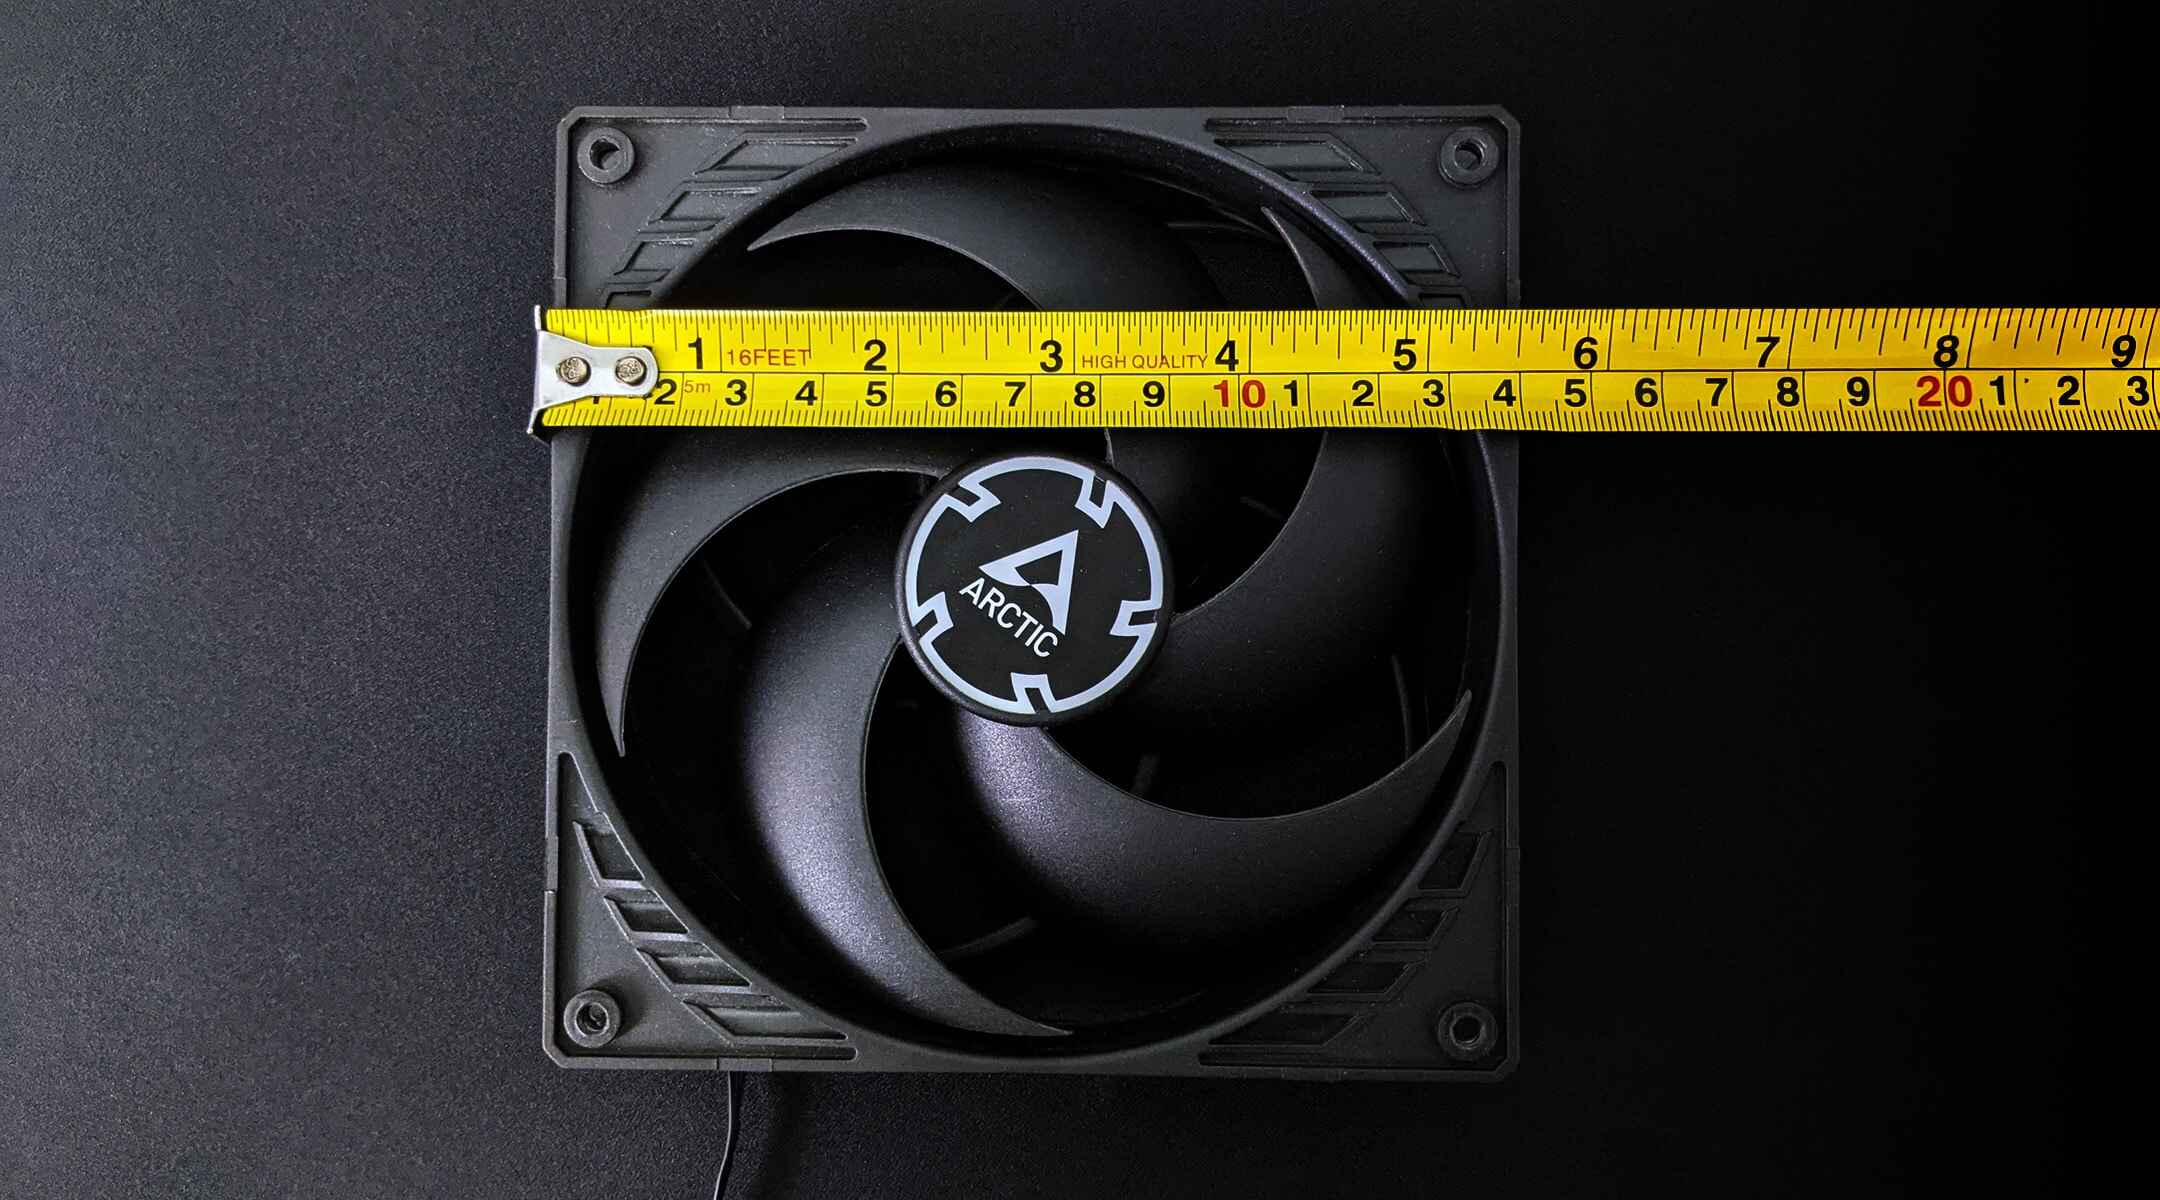
Step 3: Measure the Diameter: The most crucial measurement for a case fan is its diameter. To measure the diameter, position your measuring tape or ruler at the center of the fan’s hub (the middle part where the blades connect). Reach across to the opposite edge, measuring straight across. The measurement you obtain represents the diameter of the fan.
Step 4: Determine the Mounting Hole Spacing: In addition to measuring the fan’s diameter, you should also measure the mounting hole spacing. This measurement ensures that the replacement fan will align properly with the holes in your PC case. With the measuring tape or ruler, measure the distance between the centers of two adjacent mounting holes on the fan. Repeat this process for a few different sets of mounting holes to ensure accuracy, as sometimes hole spacings may vary.
Step 5: Note the Thickness: While not as critical as the diameter and mounting hole spacing, it’s also beneficial to measure the thickness of the fan. Use a measuring tape or caliper to determine the thickness from the front (where the blades are) to the back (where the fan motor is located).
By following these steps, you can accurately measure the diameter, mounting hole spacing, and thickness of a PC case fan. These measurements will help you select a suitable replacement fan or determine compatibility when upgrading your computer’s cooling system.
Understanding the Importance of Fan Sizes
Choosing the correct size for a PC case fan is essential for ensuring optimal cooling performance and compatibility with your computer case. The size of a fan directly affects its airflow capacity and the amount of heat it can dissipate from your PC components. Here’s why understanding fan sizes is crucial:
1. Cooling Efficiency: The size of a fan directly impacts its cooling efficiency. Larger fans, such as 120mm or 140mm, have bigger blades and can move more air at lower speeds, resulting in improved cooling performance. They are ideal for dissipating heat from high-performance hardware, such as gaming GPUs or overclocked CPUs.
2. Compatibility: Different computer cases have specific fan sizes they can accommodate. Understanding the compatible fan sizes for your case ensures that you choose a fan that fits properly without any clearance issues. Installing a fan that is too large for your case can lead to installation problems and obstructed airflow.
3. Noise Level: The size of a fan can also impact its noise level. Larger fans, with their ability to move more air even at lower speeds, often generate less noise compared to smaller fans that need to spin faster to achieve similar airflow. This can result in a quieter PC, promoting a more comfortable and peaceful computing experience.
4. Airflow and Heat Dissipation: Fan sizes determine the amount of airflow and heat dissipation in your PC case. Adequate airflow is crucial to prevent overheating, as it helps cool down critical components such as the CPU, GPU, and motherboard. Choosing the right fan size ensures that sufficient airflow reaches all the areas within the case, effectively dissipating heat and maintaining optimal temperatures.
5. Aesthetic Considerations: Fan sizes also play a role in the aesthetic appeal of your PC. Some computer cases are designed to showcase fans as part of the overall visual experience. In such cases, choosing the right fan size ensures a seamless fit and enhances the overall look and feel of your PC build.
Understanding the importance of fan sizes allows you to make informed decisions when selecting case fans for your PC. By considering cooling efficiency, compatibility, noise level, airflow, heat dissipation, and aesthetics, you can choose the appropriate fan size to optimize performance and create a visually pleasing PC setup.
Tools Needed for Measuring the PC Case Fan
When it comes to measuring the size of a PC case fan, you’ll need a few basic tools to ensure accurate measurements. Here are the essential tools you’ll need:
1. Measuring Tape: A measuring tape or ruler is crucial for measuring the diameter of the case fan. It allows you to accurately determine the distance across the fan’s hub, providing the fan’s diameter measurement.
2. Caliper: While not necessary, a caliper can be handy for measuring the thickness of the fan blades. This tool provides precise measurements and eliminates potential errors that may occur when using a measuring tape or ruler.
3. Flashlight: A flashlight can be helpful in ensuring you have clear visibility when taking measurements inside the PC case. It illuminates the area, making it easier to identify the fan and accurately measure its size.
4. Screwdriver or Allen Wrench: Depending on your computer case, you may need a screwdriver or an Allen wrench to remove the fan from its mounting position. This allows you to take more accurate measurements without obstruction.
5. Pen and Paper: While not a physical tool, having a pen and paper handy enables you to jot down the measurements you take. This ensures you don’t forget or mix up the dimensions when comparing and purchasing a replacement case fan.
These tools are readily available and should be accessible to anyone looking to measure the size of a PC case fan. Having them on hand will make the process efficient and ensure accurate measurements, ultimately leading to the selection of a properly fitting fan for your computer case.
Step-by-Step Guide on How to Measure for a PC Case Fan
Measuring for a PC case fan may seem intimidating, but it is a straightforward process. By following these step-by-step instructions, you can accurately measure the size of your case fan:
Step 1: Power Off and Open the PC Case: Before you begin measuring, ensure that your PC is powered off and unplugged. Take off the side panel of your computer case so that you have clear access to the internal components.
Step 2: Locate the Fan: Identify the fan you want to measure within your PC case. Common areas for case fans include the front, rear, or top of the case, as well as the side panel. Determine which fan you need to measure or replace.
Step 3: Measure the Diameter: Using a measuring tape or ruler, position it at the center of the fan’s hub—the part where the blades are connected. Reach across to the opposite edge of the fan, measuring straight across. This measurement represents the diameter of the fan. Note it down for reference.
Step 4: Measure the Mounting Hole Spacing: To ensure proper fitting, measure the distance between the centers of two adjacent mounting holes on the fan. Repeat this process for a few different sets of mounting holes to ensure accuracy, as hole spacings can vary. Note down the measurements, as this will help you identify compatible replacement fans.
Step 5: Determine the Thickness: Measure the thickness of the fan by using a measuring tape or caliper. Measure from the front (where the blades are) to the back (where the fan motor is located). Make sure to note down this measurement as well.
Step 6: Check for Additional Considerations: Depending on your PC case, there might be additional factors to consider, such as the presence of liquid cooling systems, radiator compatibility, or clearance for other components. Take note of any special considerations that may impact the selection of your case fan.
By following these steps, you can accurately measure the size of your PC case fan. These measurements will help you in selecting a replacement fan of the appropriate size and ensure compatibility with your case, resulting in optimal airflow and cooling performance for your computer components.
Tips for Accurate Measurements
Accurate measurements are crucial when measuring the size of a PC case fan to ensure compatibility and proper airflow. Here are some helpful tips to ensure accurate measurements:
1. Use a Stable Surface: When measuring the fan’s diameter, ensure that the fan is on a stable surface to avoid any wobbling or movement that could affect the accuracy of your measurement. This will help you obtain a more precise measurement.
2. Double-Check Measurements: To ensure accuracy, double-check your measurements before finalizing them. It’s easy to make mistakes, especially when measuring small or crowded spaces inside a PC case. Take multiple measurements and compare them to ensure consistency.
3. Measure Twice: As the saying goes, “measure twice, cut once.” Apply this same principle to measuring your PC case fan. Take multiple measurements of the diameter, mounting hole spacing, and thickness to minimize errors and ensure you have reliable measurements.
4. Note the Units: When noting down your fan measurements, clearly indicate the units you are using (e.g., millimeters, inches, etc.). Being consistent with your units will prevent confusion and help you correctly compare and select replacement fans.
5. Account for Fan Blades: When measuring the diameter, ensure that you measure from one edge of the fan blade to the opposite edge. Exclude the fan blades themselves from your measurement, as you want to measure the actual diameter of the fan housing rather than the span of the blades.
6. Consider Future Upgrades: If you anticipate upgrading your PC components in the future, measure the available space within your PC case to accommodate larger fans. This will give you flexibility when choosing new components and prevent the need for future adjustments or replacements.
7. Refer to the Manufacturer’s Specifications: When in doubt, consult the manufacturer’s specifications for your PC case and the fan you are using. This information will provide detailed measurements and compatibility guidelines, ensuring a more accurate selection of case fans.
By following these tips, you can ensure accurate and precise measurements when determining the size of your PC case fan. These measurements will guide you in selecting the right replacement or upgrade, contributing to optimal cooling performance and maintaining the longevity of your PC components.
Common Mistakes to Avoid When Measuring for a PC Case Fan
Measuring for a PC case fan requires precision and accuracy to ensure compatibility and proper airflow. However, there are some common mistakes that people make during the measuring process. Here are a few mistakes to avoid:
1. Neglecting to Power Off the PC and Unplug: Safety should always be a priority when working inside a computer case. Failing to power off the PC and unplug it from the electrical outlet can put you at risk of electric shocks or damaging the components. Always ensure the PC is offline and unplugged before working on it.
2. Measuring the Blade Span Instead of the Fan Diameter: It’s essential to measure the diameter of the fan housing rather than the span of the blades. Including the blade span in your measurement will lead to inaccurate sizing, potentially resulting in incompatible replacements.
3. Taking Measurements with Inaccurate or Non-standard Units: When measuring, use consistent and accurate units, such as millimeters or inches. Avoid using improper measuring units or mixing different units of measurement. Inconsistencies can lead to incorrect sizing and complicate the process of selecting a replacement fan.
4. Measuring Too Close to the Fan Blades: When measuring the diameter, ensure that you measure from one edge of the fan housing to the opposite edge, excluding the fan blades. Including the blades in your measurement can result in an inaccurate size, leading to improper fan selection.
5. Ignoring Mounting Hole Spacing: Measuring only the diameter of the fan without considering the mounting hole spacing is a common mistake. Neglecting to measure the spacing between mounting holes can lead to compatibility issues, as fans with different mounting hole spacing may not fit properly.
6. Failing to Double-Check Measurements: Mistakes happen, and taking measurements can be prone to errors. Failing to double-check your measurements increases the risk of selecting incorrect fan sizes. Always double-check your measurements to ensure accuracy and consistency.
7. Overlooking Special Considerations: Every PC case is unique, and there may be special considerations to keep in mind when selecting a replacement fan, such as clearance for certain components or compatibility with liquid cooling systems. Ignoring these special considerations can lead to improper sizing and functionality issues.
By avoiding these common mistakes, you can ensure accurate measurements when sizing a PC case fan. Taking the time to measure correctly contributes to a seamless replacement process and ensures optimal cooling performance for your PC components.
Concluding Thoughts
Measuring the size of a PC case fan is a vital step when it comes to selecting the right fan for your computer setup. Accurate measurements ensure compatibility, proper airflow, and optimal cooling performance. By following the step-by-step guide and considering the factors discussed, you can make informed decisions when selecting a case fan.
Remember to use the appropriate tools, take accurate measurements, and avoid common mistakes. Taking the time to measure correctly will save you from compatibility issues and potential hassle down the line. Additionally, considering factors such as fan size, airflow, noise level, and bearing type will help ensure that your chosen case fan meets your specific cooling requirements.
Lastly, always refer to the manufacturer’s specifications and guidelines for your PC case and fan. These resources provide valuable information and ensure that you have the most accurate measurements and compatibility details at your disposal.
By understanding the importance of fan sizes, knowing how to measure for a PC case fan, and avoiding common mistakes, you can confidently select the right fan to keep your PC cool, running smoothly, and performing at its best.