Introduction
LED TVs have become increasingly popular due to their sleek design, energy efficiency, and vibrant display. However, one common issue that can occur with LED TVs is image burn. Image burn, also known as screen burn-in, is when a static image gets permanently etched into the screen, leading to a ghost-like image that appears even when the TV is turned off. This can be frustrating and diminish the overall viewing experience.
Image burn can happen due to various factors, including prolonged display of static images, high brightness levels, and improper usage. While it’s best to prevent image burn from happening in the first place, there are ways to fix it if it does occur.
In this article, we will explore the causes of image burn on LED TVs, how to prevent it, and the methods you can use to fix image burn if you encounter this issue. By following these steps, you can restore the display quality of your LED TV and enjoy a seamless viewing experience.
What is Image Burn on LED TV?
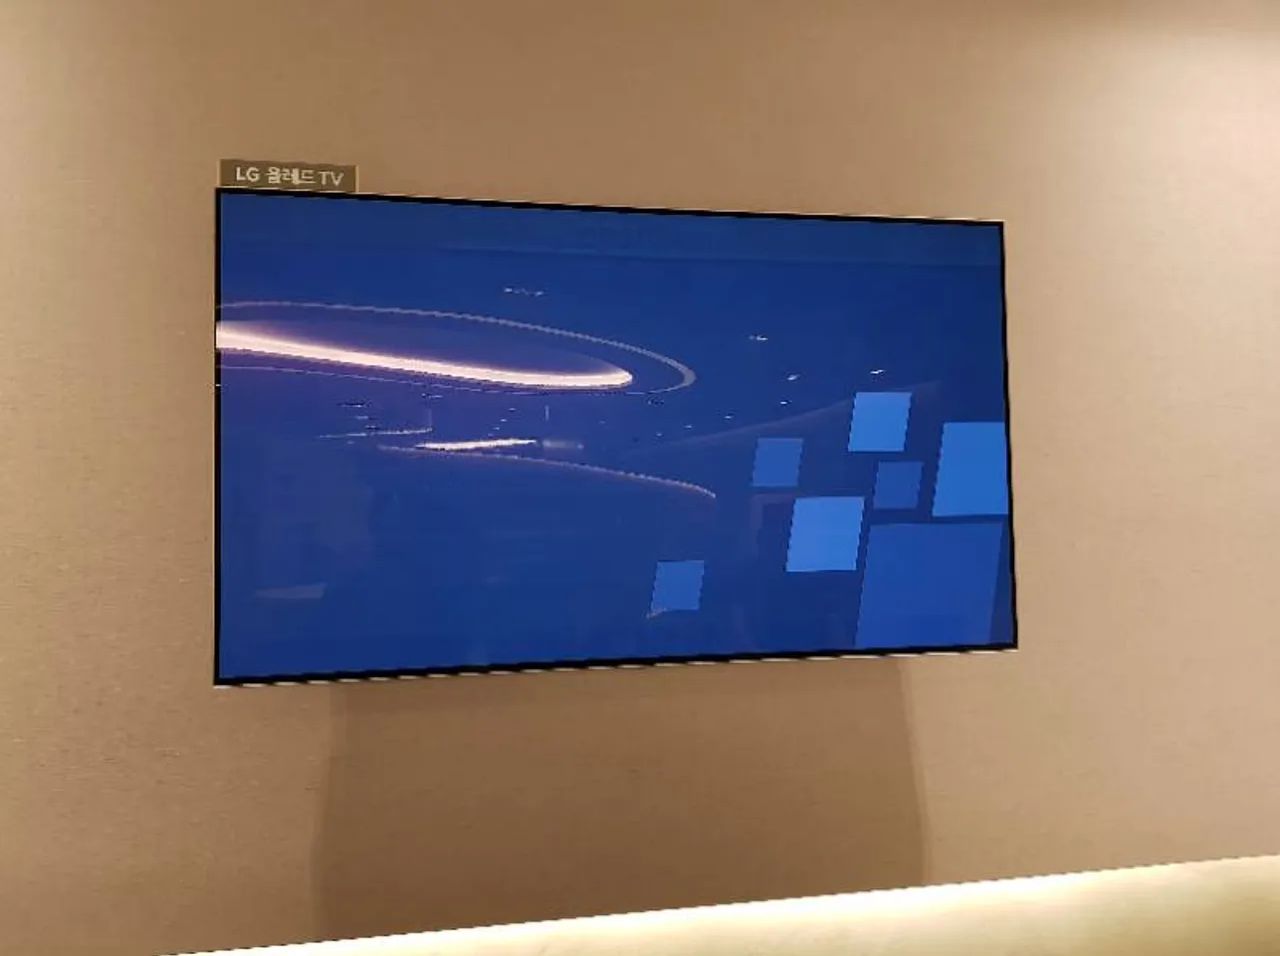
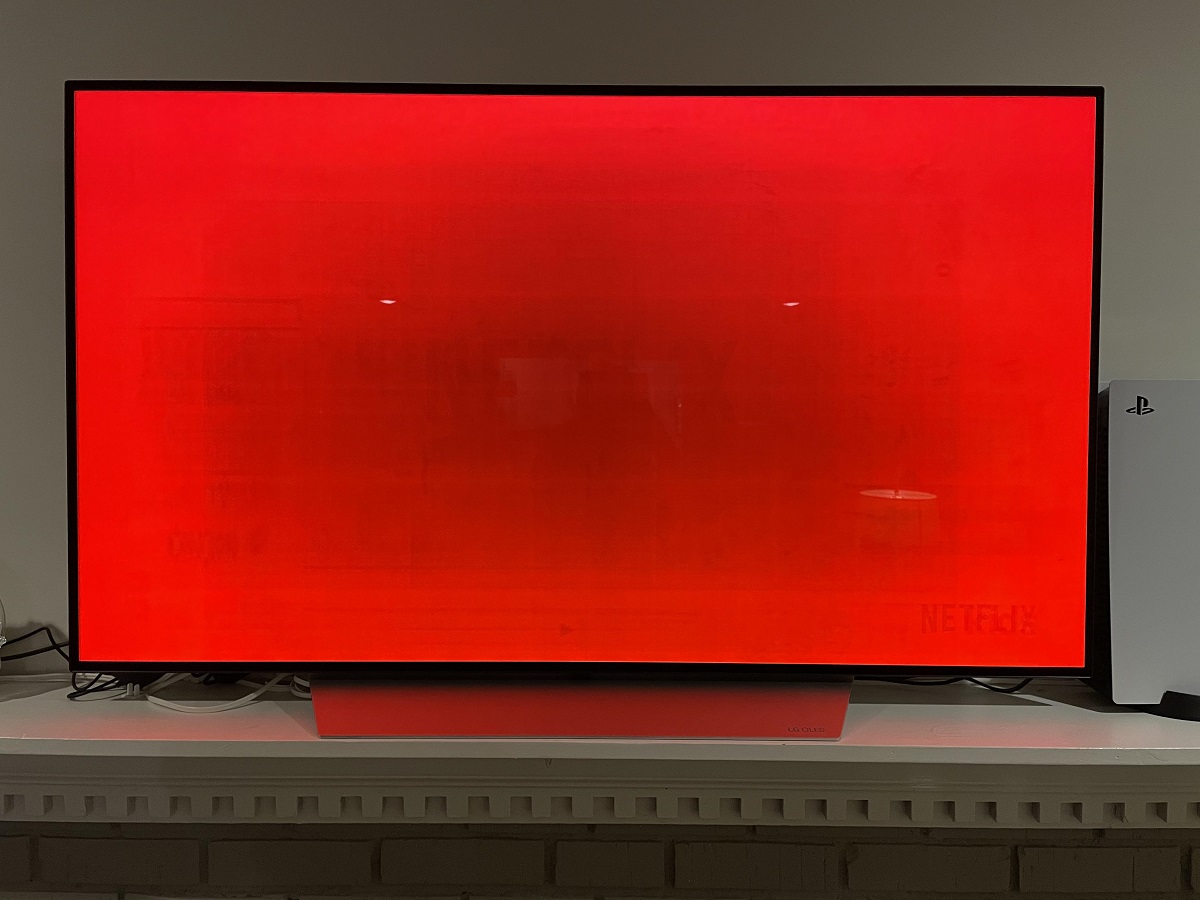
Image burn, also known as screen burn-in, is a phenomenon that occurs when a static image or pattern is displayed on an LED TV for an extended period of time, causing it to leave a permanent mark on the screen. This can result in a ghost-like image being visible, even when the TV is turned off or displaying a different image.
LED TVs work by utilizing light-emitting diodes to produce images on the screen. When a static image is displayed for a long duration, the pixels associated with that image can age unevenly, leading to image retention. This can happen on any part of the screen where the static image was displayed, including logos, channel logos, video game HUDs, or any other element that remains stationary for a significant amount of time.
Image burn is more common with older LED TVs, as newer models often come equipped with technology that helps prevent or reduce the chances of burn-in. However, it is still possible to experience image burn on newer models if proper precautions are not taken.
It’s important to note that image burn is different from temporary image retention. Temporary image retention is when a ghost-like image appears on the screen but fades away after a short period of time. Image burn, on the other hand, is permanent and requires specific methods to fix it.
Now that we understand what image burn is, let’s explore the common causes of this issue on LED TVs in the next section.
Common Causes of Image Burn
Image burn on LED TVs can occur due to several factors. Understanding these causes will help you take preventive measures and avoid this issue. Here are the most common reasons for image burn:
- Prolonged display of static images: When a static image is displayed on the screen for long periods, certain pixels can age at a different rate than others. This imbalance can result in image retention and eventual burn-in.
- High brightness levels: Keeping your LED TV’s brightness settings too high for extended periods can contribute to image burn. Higher brightness levels increase the chances of pixel degradation and make the static image more likely to cause burn-in.
- Static elements in video games or TV shows: Video games with HUD elements or TV shows with network logos that remain on the screen for extended periods can increase the risk of image burn. These elements are often displayed in the same location on the screen, leading to uneven pixel wear.
- Improper usage: Mishandling or improperly using your LED TV can also result in image burn. For example, leaving the TV on a paused menu screen for hours or not implementing proper screen-saver settings can contribute to burn-in.
While newer LED TV models come with features to mitigate the risk of burn-in, it’s important to be aware of these causes to prevent image burn. By minimizing the exposure of static images, adjusting brightness settings, and utilizing preventive measures, you can significantly reduce the chances of experiencing image burn on your LED TV.
How to Prevent Image Burn
Preventing image burn on your LED TV is crucial for maintaining its display quality and longevity. By following these preventative measures, you can minimize the risk of encountering image burn:
- Enable screen savers: Most modern LED TVs have built-in screen saver options. You can set the TV to automatically activate a screen saver after a certain period of inactivity. Screen savers help prevent static images from being displayed for too long, reducing the risk of burn-in.
- Adjust brightness settings: Keeping the TV’s brightness level within the manufacturer’s recommended range is essential. Avoid setting the brightness too high for prolonged periods, as this can accelerate pixel degradation and increase the likelihood of image burn.
- Turn off the TV when not in use: If you’re not actively watching or using your LED TV, turn it off instead of leaving it on a static image. This simple precaution can go a long way in preventing image burn and conserving energy.
- Vary content: Displaying a variety of content on your LED TV can help distribute pixel usage evenly. Don’t keep the TV on the same static image or video game screen for an extended period. Regularly switching between different channels, shows, movies, or video games can minimize the risk of burn-in.
- Use logo dimming: Some LED TVs come with a feature called logo dimming that automatically adjusts the brightness of static logos or channel identifiers to prevent burn-in. Consult your TV’s user manual or menu settings to see if this feature is available.
By incorporating these preventative measures into your TV usage habits, you can significantly reduce the chances of image burn on your LED TV. It’s important to prioritize the long-term health of your TV’s screen by taking proactive steps to avoid burn-in.
How to Fix Image Burn on LED TV
If you notice image burn on your LED TV, don’t worry. There are several methods you can try to fix this issue and restore the screen’s quality. Here are some effective methods to fix image burn:
- Method 1: Manual pixel cycling: Display a pixel cycling video or use an online pixel-fixing tool that rapidly changes the colors on the affected area. This technique aims to force the stuck pixels to reset and gradually diminish the ghost-like image. Be patient, as it may take several hours or even days for noticeable improvements.
- Method 2: Using screen savers: Enable a screen saver that constantly moves and changes the image on the screen. This can help reduce the visibility of the burned-in image by distributing the pixel activity across different areas of the screen.
- Method 3: Using white noise: Displaying white noise or a solid white image on the screen can help alleviate image burn. The constant movement of different pixels can help fade the burned-in image over time. However, this method may not be as effective as manual pixel cycling or using screen savers.
- Method 4: Professional help: If the above methods don’t yield satisfactory results, seeking professional assistance from a TV repair specialist or contacting the manufacturer’s support team may be the best course of action. They have the expertise and specialized equipment to address more severe cases of image burn.
It’s important to note that the effectiveness of these methods may vary depending on the severity and duration of the image burn. Regularly monitor the progress and be patient, as fixing image burn can take time.
Remember, prevention is always better than cure. Once you have successfully fixed the image burn on your LED TV, make sure to implement preventive measures to minimize the chances of it happening again in the future. This includes adjusting display settings, using screen savers, and avoiding prolonged display of static images.
Method 1: Manual Pixel Cycling
Manual pixel cycling is a technique that can help fix image burn on your LED TV by rapidly changing the colors on the affected area. This method aims to reset the stuck pixels and gradually diminish the ghost-like image. Here’s how you can perform manual pixel cycling:
- Find a pixel cycling video: Look for a pixel cycling video on platforms like YouTube or download one from reputable sources. These videos rapidly cycle through different colors, stimulating the pixels and encouraging them to reset.
- Play the video on full screen: Once you have the pixel cycling video, play it on your LED TV on full screen mode. Ensure that the affected area is covered by the video to target the burned-in image.
- Give it time: Pixel cycling is a gradual process, and it may take several hours or even days to see noticeable improvements. It’s important to be patient and let the pixel cycling video run continuously for an extended period.
- Monitor the progress: Regularly check the affected area to see if the burned-in image is fading. It might take multiple cycles before the image is completely gone, so don’t expect immediate results.
During the pixel cycling process, avoid using the TV for other purposes. Leaving the pixel cycling video on overnight or when you’re not actively using the TV can speed up the progress. However, be mindful of energy consumption and avoid leaving the TV unattended for extended periods.
If you don’t have access to a pixel cycling video, you can also use online pixel-fixing tools that perform a similar function. These tools display patterns that rapidly change colors, helping to reset the stuck pixels.
Remember to always refer to your TV’s user manual for specific instructions or contact the manufacturer’s support team if you’re unsure about performing manual pixel cycling on your LED TV.
Method 2: Using Screen Savers
Using screen savers is another effective method to fix image burn on your LED TV. Screen savers display constantly moving images or patterns on the screen to prevent static images from being displayed for too long, reducing the risk of burn-in. Here’s how you can use screen savers to fix image burn:
- Access the screen saver settings: Navigate to the settings menu of your LED TV using the remote control. Look for the display or screen settings and locate the screen saver option.
- Enable the screen saver: Once you find the screen saver option, enable it and choose a screen saver style or pattern that constantly moves and changes on the screen.
- Set the timer: Adjust the timer settings if available, determining how long the TV should remain inactive before the screen saver activates. This helps ensure that the screen saver kicks in when the TV is left idle for a specific period.
- Let it run: Allow the screen saver to run whenever you’re not actively using the TV. This will distribute the pixel activity across different areas of the screen, reducing the visibility of the burned-in image over time.
Screen savers vary depending on the TV model, and some may offer customizable options or different styles to choose from. Experiment with different screen saver patterns to find the one that works best for your situation.
It’s important to note that using screen savers alone may take some time to completely fix image burn. Be patient and monitor the progress periodically. In combination with other methods, such as pixel cycling or utilizing preventive measures, screen savers can significantly help in reducing the visibility of the burned-in image.
If your LED TV doesn’t have built-in screen savers, you can consider connecting external devices like media streaming devices or gaming consoles that have their own screen saver options. These devices can provide additional screen saver options to help prevent or fix image burn.
Always refer to your TV’s user manual for specific instructions on enabling and customizing screen savers or consult the manufacturer’s support team for assistance.
Method 3: Using White Noise
Using white noise is another technique that can help fix image burn on your LED TV. Displaying a solid white image or white noise on the screen can help alleviate the visibility of the burned-in image. The constant movement and variation of different pixels can help fade the image over time. Here’s how you can use white noise to fix image burn:
- Find a solid white image: Look for a solid white image or white noise pattern on the internet. You can search for images specifically designed for fixing image burn on LED TVs.
- Display the white image: Display the solid white image on your LED TV. Ensure that the burned-in area is covered by the white image to target the affected pixels.
- Let it run: Allow the white image or white noise to display continuously for an extended period, preferably when you’re not actively using the TV. The constant movement of pixels can help weaken the burned-in image and reduce its visibility over time.
- Monitor the progress: Regularly check the affected area to see if the image burn is fading. It may take several hours or even days to see noticeable improvements, so be patient and give it time.
Using white noise may not be as effective as manual pixel cycling or using screen savers, but it can still contribute to reducing the visibility of the burned-in image. Combining this method with other techniques and implementing preventive measures can yield better results.
If your LED TV doesn’t have the option to display a solid white image or white noise, you can connect external devices such as media streaming devices or gaming consoles that have the capability to display different patterns or static images. Experiment with different patterns and images to find the one that helps in mitigating image burn on your TV.
Always refer to your TV’s user manual for specific instructions on displaying a white image or consult the manufacturer’s support team for further guidance.
Method 4: Professional Help
If the previous methods don’t yield satisfactory results or if the image burn on your LED TV is severe, seeking professional help may be the best option. TV repair specialists and the manufacturer’s support team have the expertise and specialized equipment to address more severe cases of image burn. Here’s how you can seek professional help to fix image burn:
- Contact a TV repair specialist: Look for reputable TV repair shops or technicians who specialize in troubleshooting and fixing issues with LED TVs. They will have the necessary knowledge and experience to assess the extent of the image burn and provide potential solutions.
- Consult the manufacturer’s support team: Reach out to the manufacturer’s support team for guidance. They can offer specific instructions or recommend authorized service centers where you can take your LED TV for repair.
- Provide detailed information: When seeking professional help, be prepared to provide detailed information about the issue, including the model of your LED TV, the duration of the image burn, and any steps you have already taken to try and fix the problem.
- Follow their recommendations: Once you receive recommendations or instructions from the TV repair specialist or manufacturer’s support team, follow them diligently. They may suggest advanced techniques or tools to remove the image burn effectively.
- Consider warranty coverage: If your LED TV is still under warranty, check whether image burn is covered. If it is, you may be able to have the repair or replacement costs covered by the manufacturer. Review your warranty terms and contact the manufacturer directly to inquire about warranty coverage for image burn.
It’s important to note that seeking professional help may incur additional costs, especially if your LED TV is out of warranty. However, if the image burn is severe or other methods haven’t been successful, professional assistance can provide the best chance of fully resolving the issue.
Keep in mind that prevention is always preferable to fixing image burn. After resolving the issue, make sure to implement preventive measures, such as using screen savers, adjusting brightness settings, and avoiding prolonged display of static images, to minimize the chances of image burn occurring again in the future.
Conclusion
Image burn on LED TVs can be a frustrating issue, but with the right knowledge and techniques, it can be addressed effectively. In this article, we explored what image burn is, the common causes behind it, and various methods to prevent and fix this problem.
Prevention plays a crucial role in avoiding image burn on your LED TV. By enabling screen savers, adjusting brightness settings, turning off the TV when not in use, and varying the content displayed, you can minimize the risk of static images causing burn-in. These preventive measures help ensure the longevity and optimal performance of your LED TV.
If you do encounter image burn, there are several methods you can try to fix the issue. Manual pixel cycling, using screen savers, displaying white noise, and seeking professional help are all viable options to address the burned-in image. Remember to be patient and monitor the progress regularly, as it may take time for noticeable improvements.
However, it’s important to note that the effectiveness of these methods may vary based on the severity and duration of the image burn. In some cases, professional assistance may be required, especially if the burn-in is severe or other methods haven’t been successful. TV repair specialists and the manufacturer’s support team have the expertise and specialized tools to address more complex cases.
Once you have fixed the image burn on your LED TV, it’s crucial to implement preventive measures to minimize the chances of it happening in the future. By being proactive and taking steps to prevent prolonged display of static images, you can reduce the risk of encountering image burn and prolong the life of your LED TV.
By understanding the causes of image burn, practicing preventive measures, and utilizing appropriate methods for fixing the issue, you can enjoy a smooth and high-quality viewing experience on your LED TV for years to come.