Introduction
Welcome to the world of Amazon Music, where you can stream millions of songs and discover new music across various genres. While enjoying the vast library of music, you may come across a song that simply does not resonate with your taste. Perhaps it’s a track that you find repetitive, or maybe the lyrics don’t appeal to you. In such cases, you might want to express your dislike for that particular song.
Luckily, Amazon Music provides an easy and convenient way to indicate your dislike for a song. By utilizing the built-in feature, you can ensure that similar songs are less likely to appear in your personalized playlists or recommendations. In this article, we will guide you through the step-by-step process of how to dislike a song on Amazon Music.
Whether you’re using the Amazon Music app on your mobile device or the web player on your computer, the steps we will outline below apply to both platforms. So, let’s get started and discover how you can express your distaste for a song and customize your music listening experience on Amazon Music.
Step 1: Open the Amazon Music app
The first step to disliking a song on Amazon Music is to open the Amazon Music app on your mobile device. If you haven’t already done so, you can download the app from your device’s app store. Once installed, locate the Amazon Music app icon on your home screen or app drawer and tap on it to launch the app.
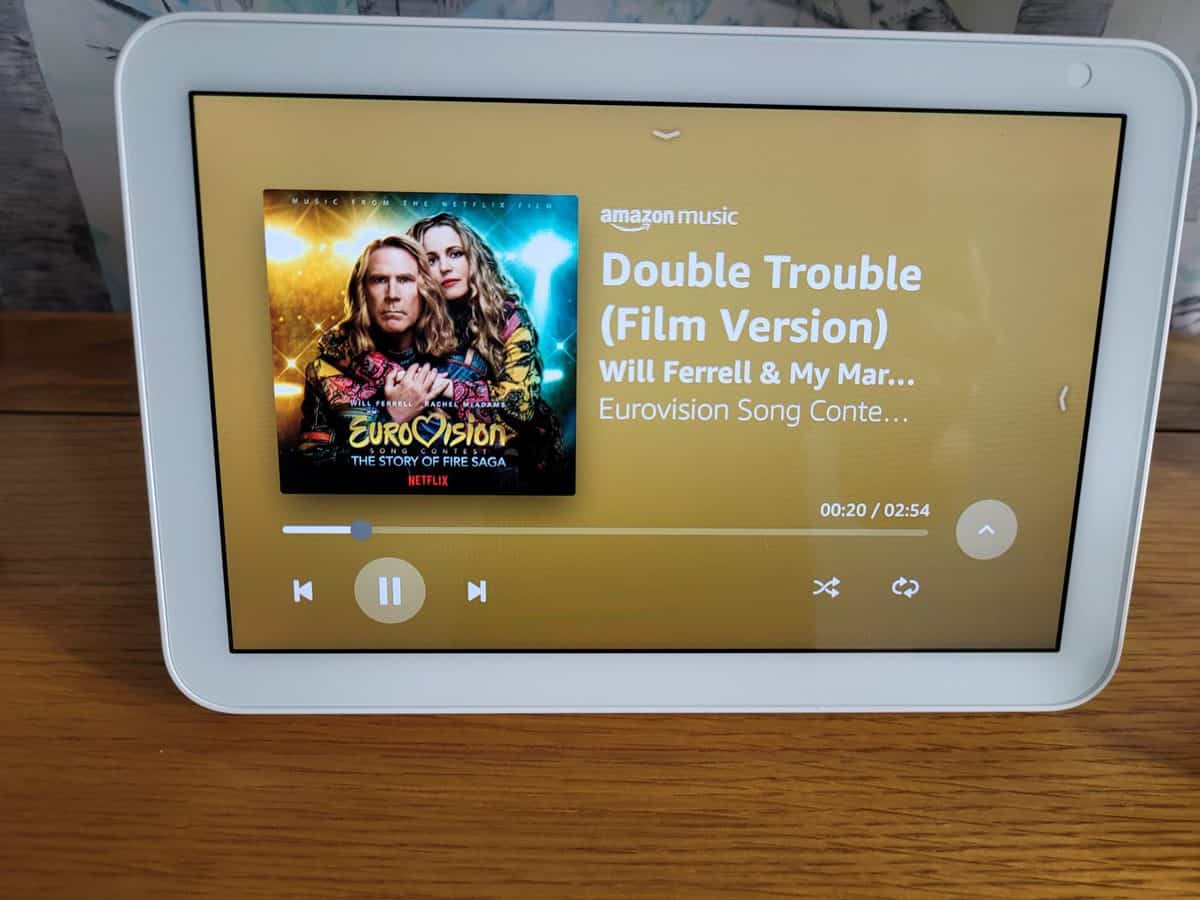
Upon opening the app, you will be greeted with the Amazon Music home screen, which showcases new releases, popular playlists, and personalized recommendations based on your listening habits. Take a moment to explore the various features and sections of the app to familiarize yourself with the layout and options available to you.
Note that if you prefer to use Amazon Music’s web player on your computer, you can open your favorite web browser and navigate to the Amazon Music website. Sign in to your Amazon account to access your music library and proceed with the remaining steps outlined in this article.
Once you have the Amazon Music app open or have accessed the web player, you’re ready to move on to the next step.
Step 2: Navigate to the song you want to dislike
Now that you have the Amazon Music app open or have accessed the web player, it’s time to find the song that you want to dislike. There are a few different ways you can do this:
– If you already know the name of the song, you can use the search bar at the top of the screen. Simply type in the name of the song or the artist and tap on the search icon. The app will then display the search results related to your query. Scroll through the search results to locate the specific song you want to dislike.
– Another way to find the song is by browsing through your music library. On the mobile app, tap on the “Library” tab at the bottom of the screen. From there, you can explore your playlists, artists, albums, and songs. Scroll through your library until you find the song you want to dislike.
– If you recently played the song or it is currently playing, you can tap on the “Now Playing” bar at the bottom of the screen (on the mobile app) to access the Now Playing screen. From there, you can tap on the song title to view the song details and options.
Once you have found the song you want to dislike, proceed to the next step to express your dislike.
Step 3: Tap on the three-dot menu icon
After you have successfully navigated to the song you want to dislike on the Amazon Music app, it’s time to access the options menu for that song. In order to do this, you will need to locate the three-dot menu icon, also known as the overflow menu icon, which signifies additional options for that particular item.
On the mobile app, the three-dot menu icon is typically located to the right of the song title or album art. It is a common symbol used in many apps to indicate additional actions or settings. Look for the three dots arranged vertically or horizontally and tap on them to reveal a drop-down menu of options.
If you’re using the web player on your computer, the three-dot menu icon is usually located beside the song title or album cover image. The icon may be positioned in the upper right corner or next to the song details. Simply click on the icon to display a similar drop-down menu of options.
By tapping or clicking on the three-dot menu icon, you will open up a series of options that allow you to customize your interaction with the song. One of these options will be the ability to dislike the song, which we will cover in the next step.
Step 4: Select “Dislike” from the options
Once you have accessed the options menu by tapping on the three-dot menu icon, it’s time to select the “Dislike” option to express your dislike for the song you’re currently viewing. The “Dislike” option is typically listed among other actions or settings that you can perform on the song.
On the mobile app, scroll through the options in the drop-down menu and look for the “Dislike” button or label. It may be labeled as “I don’t like this song” or a similar phrase. Once you have located the “Dislike” option, tap on it to indicate your dislike for the song.
If you’re using the web player on your computer, you will also find the “Dislike” option located among the other options in the drop-down menu. Once you see it, click on the “Dislike” option to express your dislike for the song.
By selecting the “Dislike” option, you are informing Amazon Music of your preference to avoid similar songs in the future. This feedback helps personalize your music recommendations and ensure that you are presented with content that aligns more closely with your taste.
Now that you have successfully disliked the song, let’s move on to the next step to confirm your dislike.
Step 5: Confirm your dislike
After selecting the “Dislike” option for the song you want to express your dislike towards, you will typically be prompted to confirm your action. This confirmation step ensures that you intended to dislike the song and prevents accidental dislikes.
On the mobile app, a confirmation message or dialog box may appear on the screen, asking you to confirm or cancel the dislike action. Take a moment to review the message, and if you’re certain about your dislike, tap on the confirm or “Yes” button to proceed.
If you’re using the web player on your computer, the confirmation step might involve a pop-up window or a similar message appearing on the screen. Again, carefully read the message and click on the confirm or “Yes” button to confirm your dislike.
Once you have confirmed your dislike, Amazon Music will update its algorithms and take your preference into account when suggesting similar songs or creating personalized playlists for you. Your feedback helps fine-tune your music listening experience and ensures that you’re presented with content that better aligns with your preferences.
Now that you have successfully confirmed your dislike, let’s move on to the next step to learn how to manage disliked songs in your account settings.
Step 6: Manage disliked songs in your account settings
Once you have expressed your dislike for a song on Amazon Music, you also have the option to manage and view the list of songs you have disliked. This can be useful if you want to revisit or modify your dislikes in the future.
To manage your disliked songs, you can access your account settings within the Amazon Music app or on the web player. Here’s how:
– On the mobile app, tap on the “My Music” tab at the bottom of the screen. Then, tap on the gear icon or the three-line menu icon in the top-left corner to access the settings menu. From there, look for the “Account Settings” or a similar option. Navigate to the section related to your preferences or personalization options, where you can find your “Disliked Songs” list.
– If you’re using the web player, click on the profile icon or the gear icon in the top-right corner of the screen to access your account settings. Look for the section related to your preferences or account settings, and within that section, you should find a link to your “Disliked Songs” list.
Once you have located your “Disliked Songs” list, you can view all the songs you have disliked. From here, you may have further options available, such as undoing a dislike or clearing your entire disliked songs list.
It’s important to note that managing your disliked songs list allows Amazon Music to further tailor your recommendations and provide a more personalized music experience.
Congratulations! You have successfully learned how to dislike a song on Amazon Music and manage your disliked songs. By expressing your preferences, you can curate a music library and recommendations that truly resonate with your taste.
Remember, music enjoyment is subjective, and the ability to dislike songs empowers you to have greater control over your listening experience. So go ahead and explore the vast array of music available on Amazon Music, knowing that you can easily dislike any songs that don’t quite hit the mark for you.
Conclusion
Expressing your dislike for a song on Amazon Music is a simple and effective way to customize your music listening experience. By following the step-by-step guide outlined in this article, you can easily dislike a song that doesn’t resonate with your taste and avoid similar songs in the future.
The Amazon Music app, available on both mobile devices and web players, provides a user-friendly interface to navigate through your music library, search for specific songs, and access the necessary options to express your dislike. Remember to tap on the three-dot menu icon, select the “Dislike” option, and confirm your action to ensure that your feedback is accurately recorded.
Additionally, managing your disliked songs in your account settings allows you to review and modify your preferences at any time. This feature further enhances the personalization of your music recommendations, ensuring that you are presented with content that aligns with your musical preferences.
So, whether you’re looking to curate a meticulously crafted playlist or simply want to avoid certain songs, Amazon Music’s ability to dislike songs provides you with the freedom to shape your music listening journey.
Enjoy exploring the vast musical landscape available on Amazon Music, knowing that you have the power to express your preferences and create a customized music experience that truly reflects your taste.