Introduction
Welcome to our guide on how to delete a web browser! As technology continues to evolve, so do our browsing habits. There may come a time when you want to switch to a different web browser or completely remove a browser from your system. Whether it’s due to performance issues, compatibility problems, or simply trying out a new option, deleting a web browser can be a necessary step.
Deleting a web browser involves more than just uninstalling the application, as there may be remnants of the browser left behind on your computer. In this guide, we’ll walk you through the steps to completely remove a web browser from different operating systems, including Windows, macOS, and Linux. We’ll also cover extra steps you can take to ensure a thorough removal.
Before we dive into the process, it’s important to note that deleting a web browser will also remove your browsing history, bookmarks, and other related data. If you want to retain this information, we recommend backing up your bookmarks and data before proceeding.
So, whether you’re looking to transition to a different web browser or experiencing issues that require a complete removal, let’s explore the steps to delete a web browser. Follow the instructions for your specific operating system, and you’ll be on your way to a fresh browsing experience!
Why delete web browser?
There can be several reasons why you might want to delete a web browser from your system. Let’s explore some of the common motivations behind this decision:
1. Performance issues: Over time, web browsers can become slow and sluggish due to accumulated cache, cookies, and extensions. If you find that your browser takes ages to load pages or crashes frequently, deleting and reinstalling it can help resolve these performance issues.
2. Compatibility problems: Certain websites or web applications may not work properly on a particular browser. In such cases, deleting the problematic browser and switching to a different one can improve compatibility and ensure a seamless browsing experience.
3. Security concerns: Web browsers are one of the primary gateways to the internet, making them potential targets for malware and security threats. If you suspect that your browser may have been compromised or you have concerns about its security features, deleting and reinstalling it can help mitigate these risks.
4. Trying out a new browser: With numerous web browsers available today, you may want to explore different options and see which one suits your needs and preferences the best. Deleting an existing browser allows you to start fresh with a new one and evaluate its features, speed, and user interface.
5. Streamlining your system: If you have multiple web browsers installed on your computer, it can take up valuable storage space and clutter your system. Deleting unnecessary browsers can help streamline your computer and optimize its performance.
6. Remote work requirements: In some cases, certain employers or organizations may require employees to use specific web browsers for security or compatibility reasons. If you no longer need a browser that was installed for work purposes, deleting it can help keep your system organized.
7. Personal preferences: Ultimately, it may simply come down to personal preference. You may have tried a particular browser and found that it doesn’t meet your expectations or align with your browsing habits. Deleting it allows you to try other options until you find the one that suits you best.
Now that we’ve explored the reasons why you might want to delete a web browser, let’s move on to the practical steps you can take to uninstall a browser from different operating systems.
Step 1: Back up your bookmarks and data
Before you proceed with deleting a web browser, it’s essential to back up your bookmarks, browsing history, saved passwords, and any other significant data you want to retain. This step ensures that you won’t lose valuable information during the removal process. Here’s how you can back up your data:
1. Export bookmarks: In your web browser, locate the option to export bookmarks. This feature may be found under the bookmarks or settings menu. Choose the export option and save the bookmarks file to a desired location on your computer.
2. Save passwords: If your browser has a password manager, make sure to export or save your stored passwords. Look for the option to export or back up passwords within the browser’s settings or security menu. Follow the prompts to create a file or save the passwords in a secure location.
3. Copy browsing history: If you wish to retain your browsing history, you can manually copy it by accessing the browser’s history menu and selecting the option to export or save the browsing history. Save the file in a location where you can easily retrieve it later.
4. Save other data: Consider any other data or preferences you want to keep, such as autofill form data, extensions, or customized settings. Take note of these details or explore the browser’s settings to find options for exporting or saving this information.
By following these steps, you’ll have a comprehensive backup of your bookmarks, passwords, browsing history, and other relevant data. Once you’ve secured your information, you can confidently proceed with uninstalling the web browser.
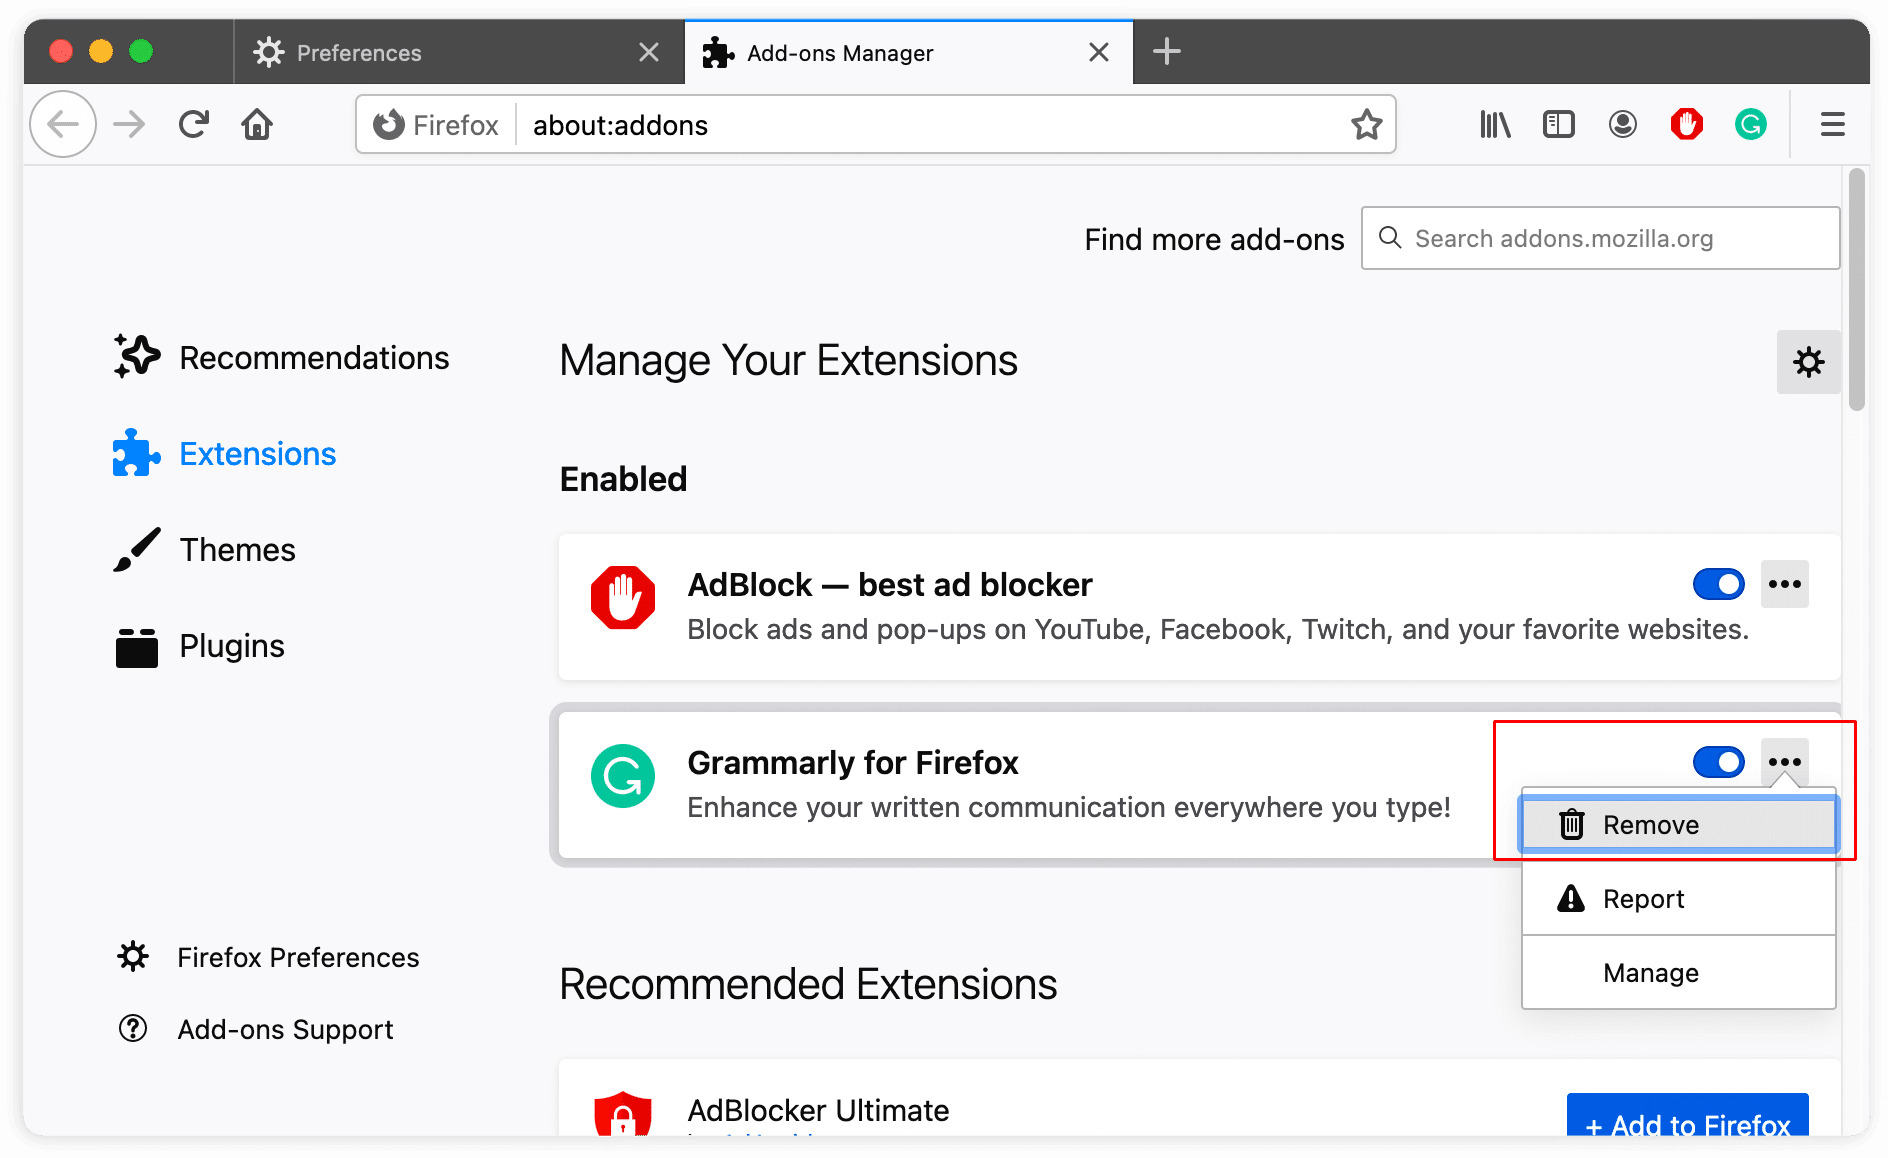
Step 2: Uninstalling the web browser
Now that you have backed up your bookmarks and data, it’s time to uninstall the web browser from your system. The process may vary slightly depending on your operating system. Here are the methods to uninstall a web browser on different platforms:
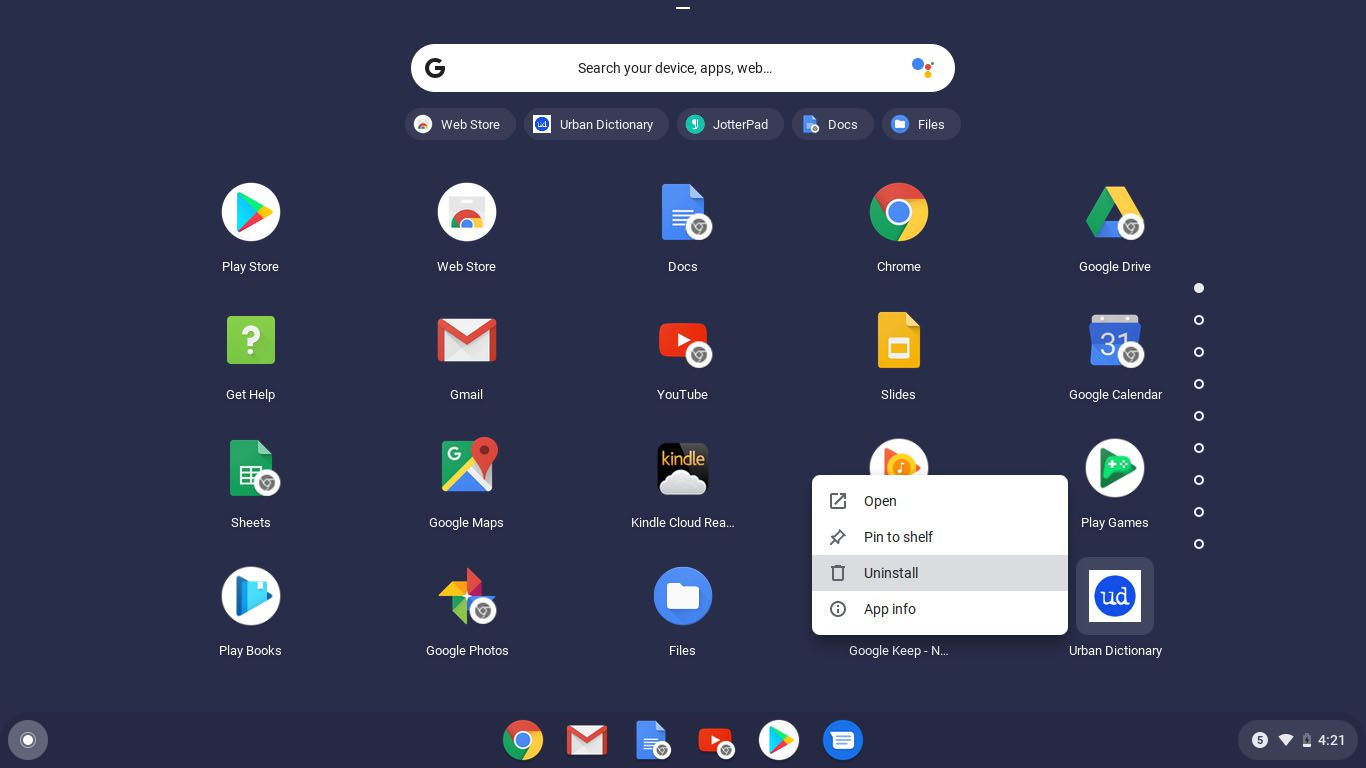
Method 1: Windows:
- Click on the “Start” button and go to “Settings” (gear icon).
- Select “Apps” or “Apps & features” from the menu.
- In the list of installed applications, locate the web browser you want to uninstall.
- Click on the browser and then click the “Uninstall” button.
- Follow the on-screen prompts to complete the uninstallation process.
Method 2: macOS:
- Open the “Finder” by clicking on the blue smiley face icon in your Dock.
- In the menu bar at the top of the screen, click on “Go” and select “Applications” from the drop-down menu.
- Locate the web browser you want to uninstall.
- Drag the browser icon to the Trash bin in the Dock.
- To complete the uninstallation, right-click the Trash bin and select “Empty Trash”.
Method 3: Linux:
- Open the terminal by pressing
Ctrl + Alt + Tor searching for “Terminal” in the applications menu. - Enter the appropriate command to uninstall the browser based on your Linux distribution. For example, for Ubuntu, you can use
sudo apt-get remove [browser-name]. - Press Enter and provide your administrator password if prompted.
- Follow any additional instructions displayed in the terminal to complete the uninstallation process.
These methods should help you uninstall the web browser from your system. It’s important to note that some browsers may have additional uninstallation steps or require the use of dedicated uninstaller programs provided by the browser developers. Check the browser’s official documentation or support website for specific instructions if needed.
Once you have successfully uninstalled the web browser, you can proceed to the additional steps for complete removal, which we will cover in the next section.
Method 1: Windows
If you’re using the Windows operating system, follow these steps to uninstall a web browser:
- Click on the “Start” button located at the bottom-left corner of the screen.
- Select the “Settings” (gear icon) option from the start menu.
- In the Settings window, click on “Apps” or “Apps & features.”
- Scroll down the list of installed applications until you find the web browser you want to uninstall.
- Click on the browser name to expand the options.
- Click the “Uninstall” button, which should appear beneath the browser name and details.
- Follow the on-screen prompts to complete the uninstallation process. This may involve confirming the action, waiting for the process to finish, and restarting your computer.
It’s important to note that the exact steps and labels may vary slightly depending on the version of Windows you are using. If you encounter any discrepancies, you can refer to the browser’s official documentation or support website for detailed uninstallation instructions specific to your version of Windows.
Once you have successfully uninstalled the web browser, you can proceed with the additional steps to ensure a complete removal, which we will discuss in the next section.
Method 2: macOS
If you’re using a macOS-based system, follow these steps to uninstall a web browser:
- Open the “Finder” by clicking on the blue smiley face icon in your Dock.
- In the menu bar at the top of the screen, click on “Go” and select “Applications” from the drop-down menu. This will open the Applications folder.
- Scroll through the Applications folder and locate the web browser you want to uninstall.
- Click and hold on the browser icon, then drag it to the Trash bin in the Dock. Alternatively, you can right-click on the browser icon and select “Move to Trash.”
- To complete the uninstallation, right-click or Ctrl-click on the Trash bin icon in the Dock and select “Empty Trash.” Confirm the action when prompted.
By following these steps, you will remove the web browser from your macOS system. It’s important to note that uninstalling the browser using this method may not remove all associated files and preferences. For a more thorough removal, you can utilize third-party uninstaller applications or refer to the browser’s official documentation for specific instructions on manually deleting leftover files and folders.
Once you have successfully uninstalled the web browser, you can move on to the additional steps to ensure a complete removal, which we will discuss in the next section.
Method 3: Linux
If you are using a Linux-based distribution, the process to uninstall a web browser may vary depending on the package manager and distribution you are using. Here is a general method to uninstall a web browser on Linux:
- Open the terminal by pressing
Ctrl + Alt + Tor searching for “Terminal” in the applications menu. - Once the terminal is open, enter the appropriate command to uninstall the browser. The command may vary depending on your Linux distribution. For example, if you are using Ubuntu, you can use the command
sudo apt-get remove [browser-name]. Replace[browser-name]with the actual name of the browser you want to uninstall. - Press Enter to execute the command.
- Depending on your system setup, you may need to enter your administrator password to proceed with the uninstallation.
- Follow any additional instructions displayed in the terminal to complete the uninstallation process. This may involve confirming the removal, waiting for the process to finish, and resolving any dependencies or conflicts.
It’s important to note that the command and package manager may vary depending on the Linux distribution you are using. If you are unsure about the specific commands or package manager for your distribution, you can refer to the official documentation or community forums for instructions tailored to your system.
For a more thorough removal, you may also consider using package management tools or third-party uninstaller applications specific to your Linux distribution. These tools can help identify and remove any remaining files or dependencies associated with the web browser.
Once you have successfully uninstalled the web browser using the appropriate method for your Linux distribution, you can continue to the additional steps for a complete removal, which we will cover in the next section.
Additional Steps for Complete Removal
Uninstalling a web browser using the methods outlined earlier will remove the main application, but there may still be remnants left behind on your system. To ensure a thorough and complete removal, you can perform additional steps to clean up any remaining files and data. Here are some recommended actions:
1. Delete browser data: After uninstalling the browser, navigate to your user directory and delete any lingering browser data folders. This may include “AppData” or “Roaming” folders on Windows, or the “~/.config” or “~/.cache” directories on Linux and macOS. Be cautious when deleting folders to avoid accidentally removing important system files.
2. Remove browser extensions and plugins: Open your file manager or finder and browse to the appropriate extension or plugin directories depending on your operating system. Delete any folders related to the uninstalled browser to ensure complete removal of extensions or plugins.
3. Clean up browser shortcuts and bookmarks: Check your desktop, taskbar, or applications menu for any leftover shortcuts or bookmarks associated with the uninstalled browser. Remove them to avoid confusion and clutter.
4. Clear browser-related registry entries (Windows only): If you are using Windows, you can use the Registry Editor to remove any remaining registry entries associated with the uninstalled browser. Before making any changes to the registry, it’s crucial to create a backup and proceed with caution to avoid system issues.
5. Reinstall or update your new browser: If you plan to switch to a different web browser, it’s a good practice to install the latest version or update your preferred browser to ensure you have the most up-to-date features and security patches.
6. Restart your computer: After completing the removal and cleanup steps, it’s recommended to restart your computer. This helps ensure that any remaining processes or temporary files related to the uninstalled browser are cleared from memory.
By following these additional steps, you can achieve a more comprehensive removal of the web browser, minimizing any leftover files or data on your system.
Conclusion
Deleting a web browser may become necessary for various reasons, including performance issues, compatibility problems, or simply wanting to try out a different browser. By following the steps outlined in this guide, you can successfully uninstall a web browser from your system, regardless of whether you’re using Windows, macOS, or Linux.
It’s important to remember to back up your bookmarks and data before proceeding with the uninstallation. This ensures that you don’t lose any important information during the process. Take the time to export your bookmarks, save passwords, and copy any other relevant data that you want to retain.
Once you’ve backed up your data, you can proceed with uninstalling the web browser using the appropriate method for your operating system. For Windows, navigate to the Apps or Apps & features settings to uninstall the browser. On macOS, drag the browser icon to the Trash bin and empty it. Linux users can use the terminal to execute specific commands to remove the browser.
To ensure a complete removal, don’t forget to perform additional steps. These may include deleting browser data folders, removing extensions and plugins, clearing shortcuts and bookmarks, and cleaning up browser-related registry entries on Windows.
After completing the removal process, you can consider installing a new browser or updating your existing one. This ensures that you have the latest features, security patches, and a fresh browsing experience.
Remember to restart your computer after completing all the steps to ensure that any remaining processes or temporary files related to the uninstalled browser are cleared from memory.
We hope this guide has been helpful in assisting you with deleting a web browser from your system. By following these steps, you can ensure a clean and thorough removal, allowing you to switch browsers or address any issues you may have encountered.