Introduction
Creating an eBook is a fantastic way to share your expertise, tell a story, or distribute your content to a wide audience. With the help of Adobe InDesign, a powerful desktop publishing software, you can turn your ideas into a professional and visually captivating eBook.
Adobe InDesign offers a wide range of features and tools that allow you to design, format, and customize every aspect of your eBook. Whether you’re a seasoned designer or a beginner, this article will guide you through the steps of creating an eBook using Adobe InDesign.
Throughout this guide, you will learn how to structure your eBook, add text and images, format the styles and typography, create chapters and sections, insert tables of contents, hyperlinks, and interactive elements. You will also discover how to export your eBook in various formats such as PDF or EPUB, and test and preview your eBook to ensure a flawless reading experience.
Not only does Adobe InDesign provide you with the necessary tools to create visually appealing eBooks, but it also offers seamless compatibility with other Adobe Creative Cloud applications. This means you can easily import assets from Adobe Photoshop or Adobe Illustrator and incorporate them into your eBook design.
So, don’t hold back your creative ideas and knowledge. Let’s dive into the world of Adobe InDesign and start crafting your very own eBook masterpiece.
Getting Started with Adobe InDesign
Before you begin creating your eBook, it’s important to familiarize yourself with Adobe InDesign and its interface. Adobe InDesign is a robust desktop publishing software that allows you to design and format publications such as eBooks, magazines, and brochures.
When you launch Adobe InDesign, you’ll be greeted with a workspace that consists of various panels, toolbars, and menus. Take a moment to explore these components and customize the interface to your preference. You can rearrange the panels, create custom workspaces, and even save your own keyboard shortcuts.
Next, create a new document by going to “File” -> “New” -> “Document”. In the document setup window, you can specify the number of pages, the page size, and other layout settings. For an eBook, you typically want to choose a standard eBook size such as 6×9 inches (or 153×229 mm), which is commonly used for fiction and non-fiction eBooks.
Once your document is created, you can start adding elements to your eBook. The tools panel on the left side of the interface provides you with a wide range of tools for drawing shapes, adding text, placing images, and more. Familiarize yourself with these tools and their functions to make the most out of Adobe InDesign.
Managing pages in your eBook is an essential part of the design process. In Adobe InDesign, you can easily add, rearrange, and delete pages using the Pages panel. This panel allows you to create master pages, which are templates that can be applied to multiple pages to maintain consistency in your eBook design.
To navigate through your eBook, use the Pages panel as well as the Zoom tool to zoom in and out of your pages. You can also use the Hand tool to move around your eBook layout.
As you become more comfortable with Adobe InDesign’s interface and tools, you’ll be ready to take the next steps in designing your eBook layout. In the following sections, we’ll explore how to add text and images, format styles and typography, create chapters and sections, insert tables of contents and hyperlinks, add interactive elements and media, and export your eBook in various formats. Let’s dive in!
Designing Your eBook Layout
The layout of your eBook plays a crucial role in capturing the attention of your readers and providing a seamless reading experience. With Adobe InDesign, you have full control over the design elements and can create a visually appealing and organized layout.
Begin by considering the overall aesthetic and theme of your eBook. Are you aiming for a clean and minimalist design, or a more vibrant and colorful one? Keep in mind the genre and target audience of your eBook when making design decisions.
One of the key aspects of designing your eBook layout is setting up a consistent grid system. A grid helps maintain alignment and helps create a cohesive look throughout your eBook. To set up a grid, go to “View” -> “Grids & Guides” -> “Preferences” and define the number of columns and gutter space that best suits your design.
In addition to the grid, pay attention to the margins and spacing between text and images. Ample white space can enhance readability and make the visual elements stand out. You can adjust these settings in the “Margins and Columns” panel under the “Layout” menu.
Consider using master pages to achieve a consistent layout across all pages of your eBook. Create a master page with common elements such as headers, footers, and page numbers. Apply this master page to your document to ensure a uniform look throughout.
Experiment with typography to enhance the visual appeal of your eBook. Choose fonts that are legible and suitable for digital reading. Adobe InDesign offers a wide selection of fonts, and you can also import custom fonts to use in your eBook.
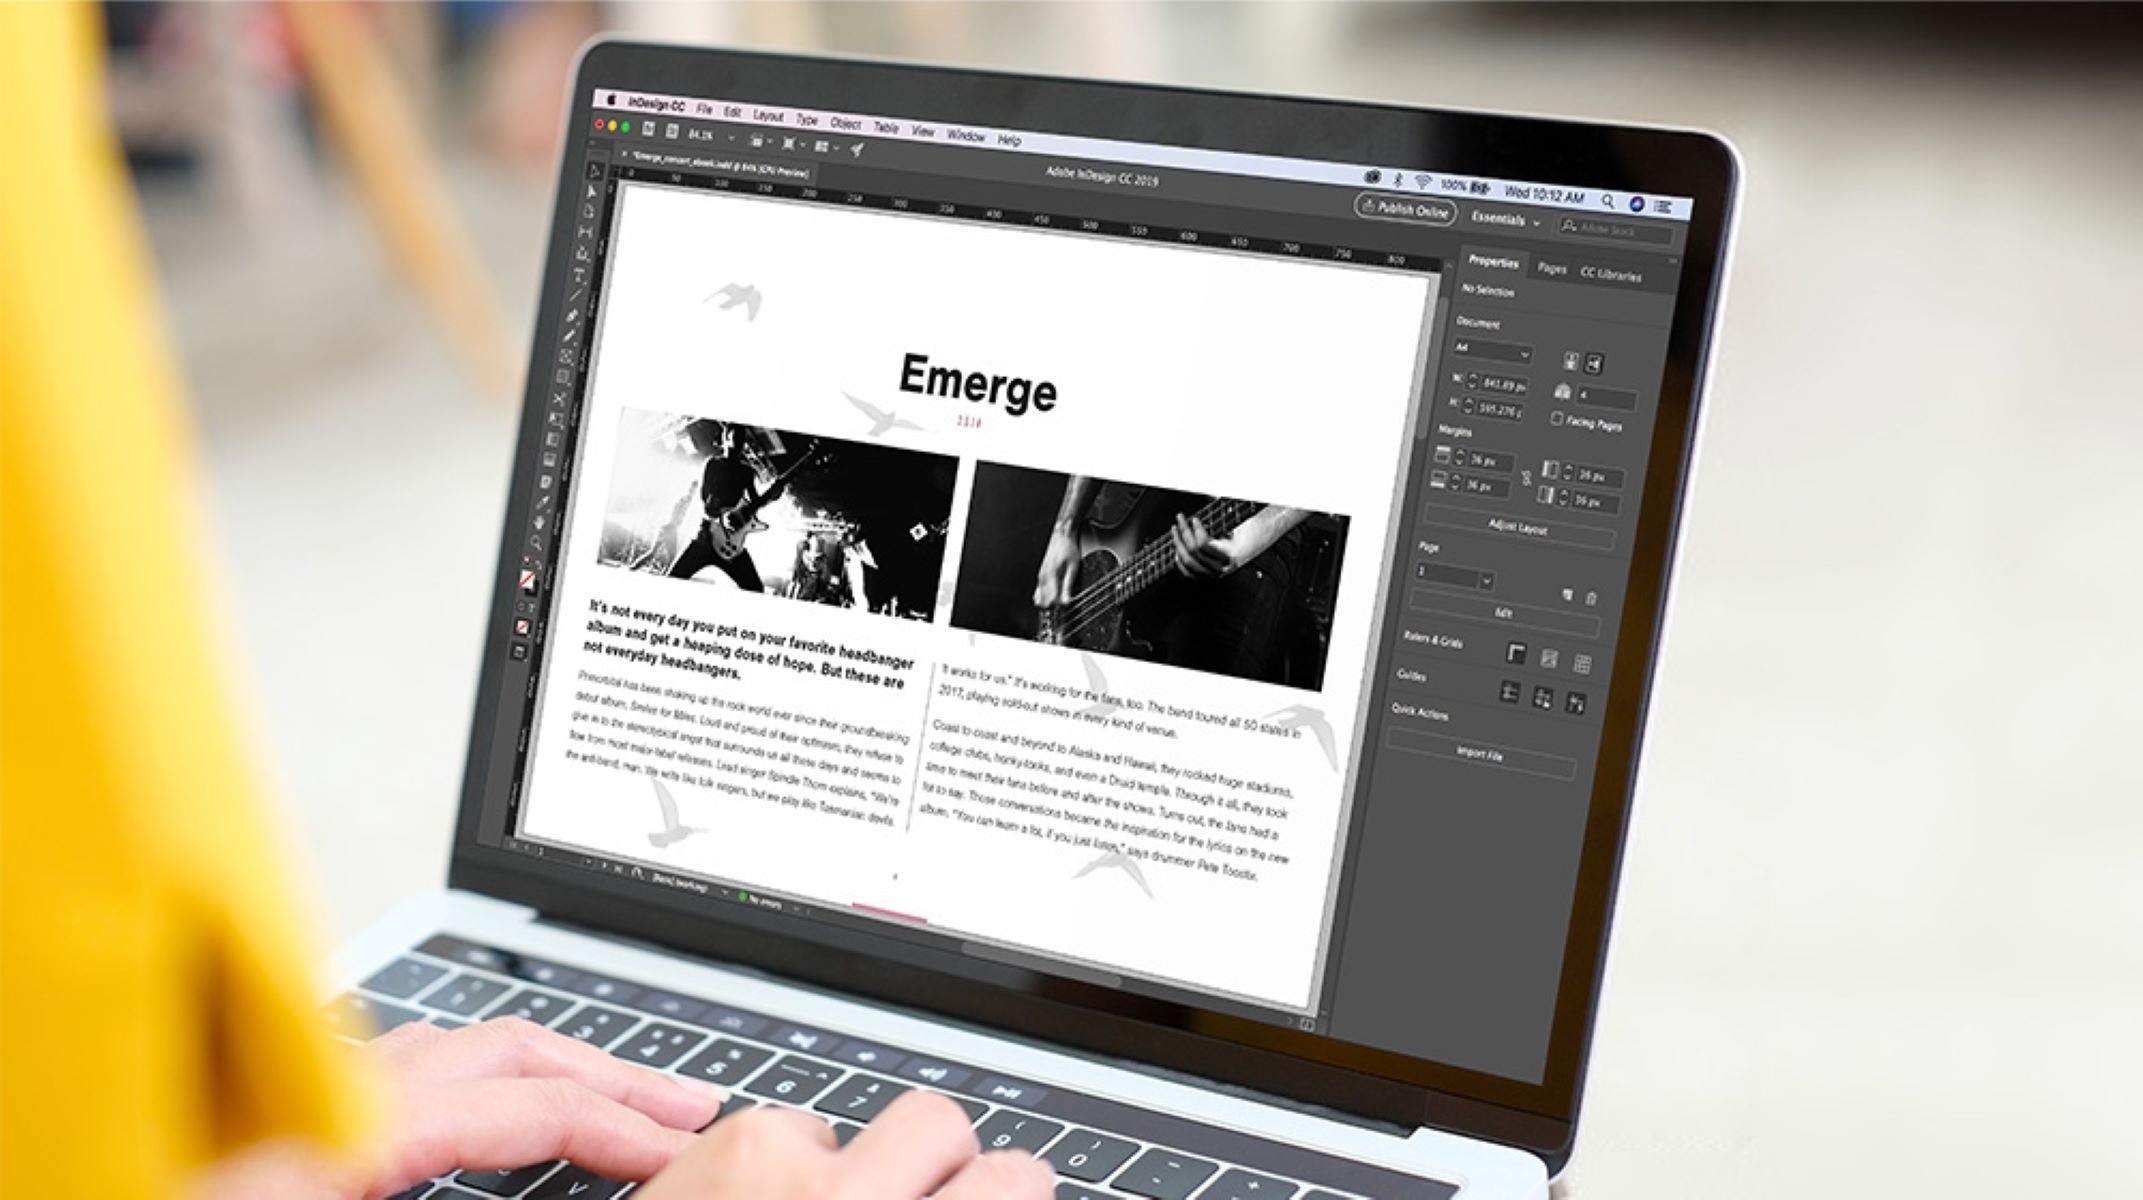
When placing images in your eBook, ensure they are of high quality and appropriately sized. Use the “Place” command to insert images into your document. You can then resize, position, and crop them as needed. Consider using captions or alt text to provide additional information about the images.
Remember that consistency is key when it comes to designing your eBook layout. Maintain a consistent color scheme, font styles, and element placement throughout your eBook. This will create a professional and visually pleasing experience for your readers.
By paying attention to details and utilizing Adobe InDesign’s tools and features, you can create a stunning and engaging eBook layout. In the following sections, we’ll cover how to add text and images, format styles and typography, create chapters and sections, insert tables of contents and hyperlinks, add interactive elements and media, and export your eBook in various formats. Let’s continue the journey!
Adding Text and Images
Text and images are the foundation of any eBook, and Adobe InDesign makes it easy to incorporate them into your design. Whether you’re adding paragraphs of text or captivating images, this section will guide you through the process.
To add text, select the Type tool from the toolbar on the left side of the interface. Click and drag on the page to create a text frame, then start typing or paste your content into the frame. You can adjust the font, size, alignment, and other text attributes using the options in the Control panel.
When it comes to images, Adobe InDesign allows you to import them in various formats. Go to “File” -> “Place” and select the image you want to insert. Click on the page to position and scale the image. To crop an image, use the “Direct Selection” tool or the “Crop” tool from the toolbar.
Ensure that your text and images work harmoniously together. Leave enough space around images to prevent overcrowding and maintain readability. Consider wrapping text around images or creating text boxes with flowing text for a more dynamic layout.
Incorporating captions for your images can provide additional context or commentary. Simply add a text box below or beside the image and type in the caption. Customize the font, size, and alignment to match your eBook’s style.
If you have a large amount of text, it’s essential to organize it into logical sections and chapters. Use headers and subheadings to differentiate between different sections of your eBook. You can apply styles to these headings to maintain consistency throughout your eBook.
For long passages of text, consider breaking them up with bullet points or numbered lists to improve readability. You can create lists by selecting the desired text and clicking on the appropriate list button in the Control panel.
Adobe InDesign also allows you to create text effects and styles to make your text more visually appealing. Experiment with drop shadows, gradients, and other effects to highlight important text or create emphasis.
By effectively incorporating text and images, you can create an engaging and visually appealing eBook. In the next sections, we’ll explore how to format styles and typography, create chapters and sections, insert tables of contents and hyperlinks, add interactive elements and media, and export your eBook in various formats. Let’s continue our journey to create an exceptional eBook!
Formatting Styles and Typography
Formatting styles and typography play a significant role in the overall design and readability of your eBook. With Adobe InDesign, you have a plethora of options to customize your text and create a visually appealing typography.
Start by selecting a font that fits the tone and style of your eBook. Adobe InDesign offers a wide range of fonts, and you can also import custom fonts to use in your design. Keep in mind that it’s recommended to choose fonts that are easy to read on digital screens.
Once you’ve chosen your font, consider creating a set of paragraph and character styles to maintain consistency throughout your eBook. Styles allow you to apply pre-defined formatting to text with a single click, making it easy to update the design if needed.
To create paragraph styles, go to the “Paragraph Styles” panel and click on the “New Style” button. Define the attributes you want to apply, such as font size, color, alignment, indents, and spacing. Apply the paragraph style to your text by selecting the desired text and choosing the appropriate style from the panel.
Character styles are perfect for adding emphasis to specific words or phrases within a paragraph. For example, you can create a character style for bold or italic text. Apply character styles by selecting the text and choosing the desired style from the “Character Styles” panel.
In addition to paragraph and character styles, Adobe InDesign allows you to use nested styles. Nested styles apply different formatting to specific parts of a paragraph, based on predefined rules. This can be useful for adding visual hierarchy to your text, such as making the first sentence of each paragraph bold.
Consider using drop caps at the beginning of chapters or sections to grab readers’ attention. You can apply drop caps by selecting the first character or word of a paragraph and choosing the desired drop cap style from the “Control” panel.
Leading, or line spacing, is another important factor in typography. Adjusting the leading can significantly impact the readability of your text. Ensure that the leading is appropriate for the font size and line length to provide a comfortable reading experience.
To enhance the visual appeal of your eBook, add text effects such as drop shadows, strokes, or gradients. However, use these effects sparingly and ensure they don’t compromise readability.
By paying attention to the style and typography of your eBook, you can create a visually stunning and reader-friendly design. Now, let’s move on to the next sections, where we’ll cover how to create chapters and sections, insert tables of contents and hyperlinks, add interactive elements and media, and export your eBook in various formats. Let’s continue to create a captivating eBook!
Creating Chapters and Sections
Organizing your eBook into chapters and sections not only helps in structuring your content but also makes it easier for readers to navigate through your eBook. Adobe InDesign provides several features to help you create and maintain a well-organized eBook structure.
To create chapters and sections, start by designating chapter titles and section headers. These headings can be styled differently from regular text to visually distinguish them. You can use larger font sizes, bold or italic styles, and different colors to make these headings stand out.
In Adobe InDesign, you can use the tools in the “Paragraph Styles” panel to define custom styles for your chapter titles and section headers. Apply these styles consistently throughout your eBook to maintain visual consistency.
One helpful feature in Adobe InDesign is the ability to create a table of contents automatically. To do this, you’ll need to assign paragraph styles to your chapter titles and section headers. Once you’ve done that, go to “Layout” -> “Table of Contents” -> “Create Table of Contents”. Customize the options as per your preference and click “OK” to generate the table of contents.
The table of contents will dynamically update as you add or modify chapters and sections in your eBook. This feature saves time and ensures that your table of contents is always accurate and up to date.
Consider adding page numbers to your eBook to help readers navigate through different chapters and sections. In Adobe InDesign, you can insert page numbers using the “Type” -> “Insert Special Character” -> “Markers” -> “Current Page Number” option. Customize the font style and placement of page numbers to suit your eBook design.
If your eBook requires subsections or subheadings within chapters, you can create nested styles to automatically apply formatting to these subsections. For example, you can use a different font style or color for subheadings to visually separate them from regular text.
By creating clear chapters and sections, you make your eBook more organized and reader-friendly. In the following sections, we’ll explore how to insert tables of contents and hyperlinks, add interactive elements and media, and export your eBook in various formats. Let’s continue our journey to create an exceptional eBook!
Inserting Tables of Contents and Hyperlinks
Tables of contents and hyperlinks are essential elements in creating an interactive and user-friendly eBook. They allow readers to easily navigate through chapters, sections, and specific content within your eBook. With Adobe InDesign, you can seamlessly insert tables of contents and hyperlinks to enhance the accessibility of your eBook.
To insert a table of contents, you can take advantage of the built-in feature in Adobe InDesign. First, make sure that you have applied paragraph styles to your chapter titles and section headers. Then, go to “Layout” -> “Table of Contents” -> “Create Table of Contents”. Customize the appearance and structure of the table of contents, such as the font style, indentation, and leading. Adobe InDesign will automatically generate a table of contents based on the assigned styles.
It’s important to note that the table of contents will dynamically update whenever you add or modify chapters and sections in your eBook. This ensures that the table of contents remains accurate and reflects the current structure of your eBook.
Another powerful feature in Adobe InDesign is the ability to insert hyperlinks within your eBook. Hyperlinks allow readers to jump directly to different sections or external resources with a simple click. To create a hyperlink, select the text or object you want to link, and go to “Window” -> “Interactive” -> “Hyperlinks”. Click on the “New Hyperlink” button, choose the destination (internal or external) and customize the appearance of the hyperlink. You can link to specific pages within your eBook, websites, email addresses, and more.
To enhance the user experience, you can also create interactive buttons or navigation elements within your eBook. Adobe InDesign provides an array of tools to design buttons and assign various actions to them. For example, you can create a button that links to a specific chapter or triggers a media playback.
When inserting hyperlinks, make sure to test them thoroughly to ensure they function correctly. Check the target destinations, verify that external links open in the appropriate browser, and confirm that internal links navigate to the intended sections.
By incorporating tables of contents and hyperlinks, you provide readers with easy navigation and quick access to specific content within your eBook. In the next sections, we’ll cover how to add interactive elements and media, export your eBook in various formats, and test and preview your eBook. Let’s continue our journey to create an exceptional eBook!
Adding Interactive Elements and Media
To create a dynamic and engaging eBook, incorporating interactive elements and media can greatly enhance the reading experience. With Adobe InDesign, you have the power to add interactive elements and embed various media types into your eBook.
One popular interactive feature is the inclusion of interactive buttons. Adobe InDesign provides an intuitive and user-friendly interface to design buttons with custom appearances. You can assign different actions to these buttons, such as navigating to specific pages, showing or hiding content, or playing multimedia files.
Adding multimedia elements, such as audio or video, can bring your eBook to life. With Adobe InDesign, you can easily embed audio and video files into your eBook. Simply use the “Place” command to insert the media file into your document and adjust its size and position as needed. You can also customize the playback settings and controls of the media to suit your design preferences.
Interactive slideshows provide an excellent way to showcase a series of images or illustrations within your eBook. Using Adobe InDesign’s built-in Object States panel, you can create interactive slideshows that allow readers to browse through multiple images with a swipe or click. This adds an interactive element and keeps readers engaged with your content.
If your eBook contains forms, such as surveys or quizzes, you can easily create interactive form fields using Adobe InDesign. Options like checkboxes, radio buttons, and text input fields can be added to your eBook, making it interactive and allowing readers to actively participate.
Ensure that any interactive elements or media you include are relevant and add value to your eBook. Avoid overloading your eBook with unnecessary interactive features that may distract readers from the main content.
Another important consideration is file size. Incorporating interactive elements and media can increase the overall file size of your eBook. Optimize media files to reduce their size without sacrificing quality. Compress images, convert videos to appropriate formats, and adjust audio settings to maintain a balance between file size and media quality.
By adding interactive elements and media to your eBook, you create an immersive and dynamic reading experience for your audience. In the following sections, we’ll explore how to export your eBook in various formats, test and preview your eBook, and conclude our journey to create an exceptional eBook.
Exporting Your eBook as PDF or EPUB
Once you have finished designing and adding content to your eBook in Adobe InDesign, it’s time to export and share it with your readers. Adobe InDesign provides options to export your eBook in different formats, such as PDF or EPUB, ensuring compatibility with various devices and platforms.
To export your eBook as a PDF, go to “File” -> “Export” -> “Adobe PDF (Print)”. In the export settings, you can choose the PDF preset that suits your needs. Consider selecting options that optimize the file size without compromising the quality of your eBook. You can also enable features like bookmarks, hyperlinks, and interactive elements to enhance the PDF reading experience.
When exporting your eBook as a PDF, ensure that all fonts and images are embedded in the file to prevent any formatting issues when viewed on different devices. You can check this option in the Adobe PDF export settings under the “Output” tab.
If you choose to export your eBook as an EPUB, go to “File” -> “Export” -> “Adobe EPUB (Digital Editions)”. EPUB is a widely supported format for eBooks and allows for a responsive layout that adapts to different screen sizes. In the export settings, you can specify the layout options, such as reflowable or fixed layout, and select the EPUB version compatibility.
EPUB exports from Adobe InDesign include important features like reflowable text, images, hyperlinks, and table of contents, making it easy for readers to navigate your eBook on various eReaders and devices.
Before exporting, make sure to thoroughly review your eBook to ensure all elements are displaying correctly and that there are no formatting or layout issues. Adjust any necessary settings or make changes to your design as needed.
Once you have exported your eBook as a PDF or EPUB, perform a final check by viewing it on different devices and eReaders to ensure that the formatting, images, hyperlinks, and interactive elements are working properly.
Remember to provide clear instructions to your readers on how to access and read the exported eBook file. You can provide a download link on your website, share it via email, or distribute it through digital platforms and eBook marketplaces.
By exporting your eBook as PDF or EPUB, you can confidently share your creation with readers across various devices and platforms. In the next section, we’ll cover how to test and preview your eBook to ensure its quality and functionality.
Testing and Previewing Your eBook
Before finalizing and distributing your eBook, it’s crucial to thoroughly test and preview it to ensure it meets your expectations and provides an optimal reading experience for your audience. Testing and previewing your eBook allows you to identify any potential issues and make necessary adjustments.
Start by reviewing the layout and formatting of your eBook on different devices, including desktops, laptops, tablets, and smartphones. This will help you ensure that your eBook is responsive and displays correctly across various screen sizes and orientations.
Test the functionality of interactive elements, hyperlinks, and media. Click on hyperlinks to verify that they navigate to the correct sections or external resources. Play audio and video files to confirm they are working properly. Interact with interactive buttons, forms, and other interactive elements to ensure they function as intended.
Pay attention to the consistency of your eBook’s design and formatting. Check for any discrepancies in font styles, sizes, and colors. Look for any overlapping elements or text that may affect readability.
Test the performance of your eBook by flipping through pages, scrolling, and zooming in and out. Your eBook should have a smooth reading experience with no lag or slowdowns.
Once you have tested your eBook on various devices and platforms, consider seeking feedback from a small group of beta readers. Their insights and suggestions can help you identify any remaining issues and make necessary improvements before releasing your eBook to a wider audience.
In addition, remember to proofread your eBook for spelling, grammar, and formatting errors. Even small mistakes can distract readers from the content of your eBook, so it’s important to give it a final review before publishing.
Utilize the preview options within Adobe InDesign, such as the “Preview” function, to get a realistic view of how your eBook will appear to readers. This allows you to make further adjustments and polish the overall presentation of your eBook.
By thoroughly testing and previewing your eBook, you can ensure that it is error-free, visually appealing, and provides an enjoyable reading experience. Taking the time to refine your eBook will help you deliver a high-quality product to your readers.
Now that you’ve completed the testing and previewing stage, you can confidently distribute your eBook to your intended audience and share your knowledge or story with the world.
Conclusion
Congratulations! You have completed the journey of creating an exceptional eBook using Adobe InDesign. Throughout this guide, we have explored various aspects of eBook creation, from designing the layout to adding text, images, styles, and interactive elements. We have also learned how to insert tables of contents and hyperlinks, and export and test our eBook in different formats.
By utilizing Adobe InDesign’s powerful features and tools, you have been able to craft a visually appealing and engaging eBook. Remember to pay attention to details such as typography, layout, and interactive elements to create a seamless and captivating reading experience for your audience.
Testing and previewing your eBook on different devices and platforms is essential to ensure that everything is functioning properly. By thoroughly reviewing and addressing any issues, you can present a polished and high-quality eBook to your readers.
Now that your eBook is ready, it’s time to share it with the world. Consider distributing it through your website, email, or digital platforms and eBook marketplaces. Promote your eBook on social media platforms and engage with your readers to generate interest and gather feedback.
Remember, an eBook can open doors to new opportunities, whether it’s sharing knowledge, showcasing your expertise, or promoting your brand. Continuously seek ways to improve your eBook creation skills and stay updated with the latest developments in Adobe InDesign to enhance your future projects.
Thank you for joining us on this eBook creation journey with Adobe InDesign. We hope this guide has equipped you with the knowledge and confidence to create stunning and impactful eBooks. Best of luck, and happy eBook designing!