Introduction
Welcome to the world of USB-C and HDMI connections! In this digital age, we are constantly seeking ways to connect our devices to larger screens for a more immersive experience. One popular option is connecting a USB-C device to an HDMI TV. Whether you want to stream videos, display presentations, or simply enjoy your favorite content on a bigger screen, this guide will help you achieve just that.
So, what exactly is USB-C? USB-C, also known as USB Type-C, is a versatile and powerful connector that has gained popularity in recent years. It is characterized by its small and reversible design, allowing it to be plugged in either way. USB-C offers numerous benefits such as fast data transfer speeds, power delivery capabilities, and support for multiple protocols like DisplayPort and HDMI.
On the other hand, HDMI (High-Definition Multimedia Interface) is a widely used audio/video interface that allows for the transmission of high-quality digital signals. It is commonly found on TVs, monitors, projectors, and other display devices. HDMI offers excellent video and audio quality, making it the preferred choice for connecting devices.
Now, you might wonder, why connect a USB-C device to an HDMI TV? Well, there are several reasons to consider. Firstly, it allows you to enjoy your favorite movies, shows, and other multimedia content on a larger screen. Whether it’s a movie night with friends or a presentation at work, the bigger display enhances the overall experience. Secondly, connecting your USB-C device to an HDMI TV can enable you to mirror or extend your device’s screen, giving you more screen real estate to work with. Lastly, it offers convenience and versatility by allowing you to connect different devices, regardless of their ports, and enjoy seamless connectivity.
Now that you understand the benefits of connecting a USB-C device to an HDMI TV, let’s dive into the steps required to make this connection. We will guide you through each step, from checking your device’s compatibility to adjusting the TV settings. So, grab your USB-C to HDMI adapter or cable, and let’s get started!
What is USB-C?
USB-C, also known as USB Type-C, is a versatile and powerful connector that has revolutionized the world of digital connectivity. It is a small, reversible connector that can be plugged in either way, making it incredibly convenient to use. While traditional USB connectors had different shapes and sizes, USB-C has become the standard for modern devices, including smartphones, tablets, laptops, and even some gaming consoles.
One of the key advantages of USB-C is its incredible flexibility. It is capable of handling multiple tasks simultaneously, such as transferring data, charging devices, and even supporting video output. USB-C ports can transfer data at incredibly fast speeds, allowing for quick file transfers and efficient data syncing. Additionally, USB-C supports a technology called Power Delivery, which enables fast charging of devices, sometimes even capable of powering laptops.
Another remarkable feature of USB-C is its compatibility with multiple protocols, including DisplayPort and HDMI. This means that USB-C can transmit audio and video signals, allowing you to connect your device to an external display, such as an HDMI TV. With a USB-C to HDMI adapter or cable, you can enjoy high-quality video and audio on a larger screen.
It’s worth noting that not all USB-C ports are created equal. Some devices may have USB-C ports that only support data transfer and charging, without the ability to output video signals. Therefore, it is essential to check your device’s specifications to ensure it has video output capabilities via USB-C. This information can usually be found in the device’s user manual or on the manufacturer’s website.
USB-C has quickly become the industry standard due to its versatility, convenience, and enhanced capabilities compared to traditional USB connectors. Its small size and reversible design have made it a favorite among tech enthusiasts worldwide. With USB-C, connecting devices and enjoying high-speed data transfer, fast charging, and video output has become easier than ever before.
What is HDMI?
HDMI, which stands for High-Definition Multimedia Interface, is a widely used audio/video interface that has become a standard connection for digital devices. It allows for the transmission of high-quality digital signals from one device to another, ensuring crisp and clear audio and video output. HDMI is commonly found on televisions, computer monitors, projectors, and other display devices.
One of the main advantages of HDMI is its ability to transmit high-definition audio and video signals. Whether you’re watching movies, playing video games, or viewing photos, HDMI ensures that you experience vibrant colors, sharp images, and immersive sound. It supports various video resolutions, including standard definition (SD), high definition (HD), and even the latest 4K Ultra HD and HDR formats, delivering stunning visuals.
In addition to video and audio transmission, HDMI also offers other useful features. One notable feature is the ability to transmit control signals between devices. This feature, known as Consumer Electronics Control (CEC), allows you to control multiple HDMI-connected devices with a single remote control. For example, if your television is connected to a Blu-ray player and a sound system, CEC enables you to control all three devices with the TV remote, eliminating the need for multiple remotes.
HDMI cables come in various versions, with each version offering different capabilities. Newer versions, such as HDMI 2.0 and HDMI 2.1, support higher resolutions, faster refresh rates, and additional features like Dynamic HDR and eARC (Enhanced Audio Return Channel). It’s important to ensure that your HDMI cable supports the features you need for optimal performance.
Overall, HDMI has emerged as the dominant standard for audio and video connectivity due to its versatility, compatibility, and superior audio-visual quality. Whether you’re connecting your laptop to a big screen for work presentations, watching movies on your TV, or gaming with friends, HDMI ensures that you enjoy the best possible audio and visual experience.
Why Connect USB-C to HDMI TV?
The ability to connect a USB-C device to an HDMI TV offers numerous benefits and opens up a world of possibilities. Here are a few reasons why you might want to consider making this connection:
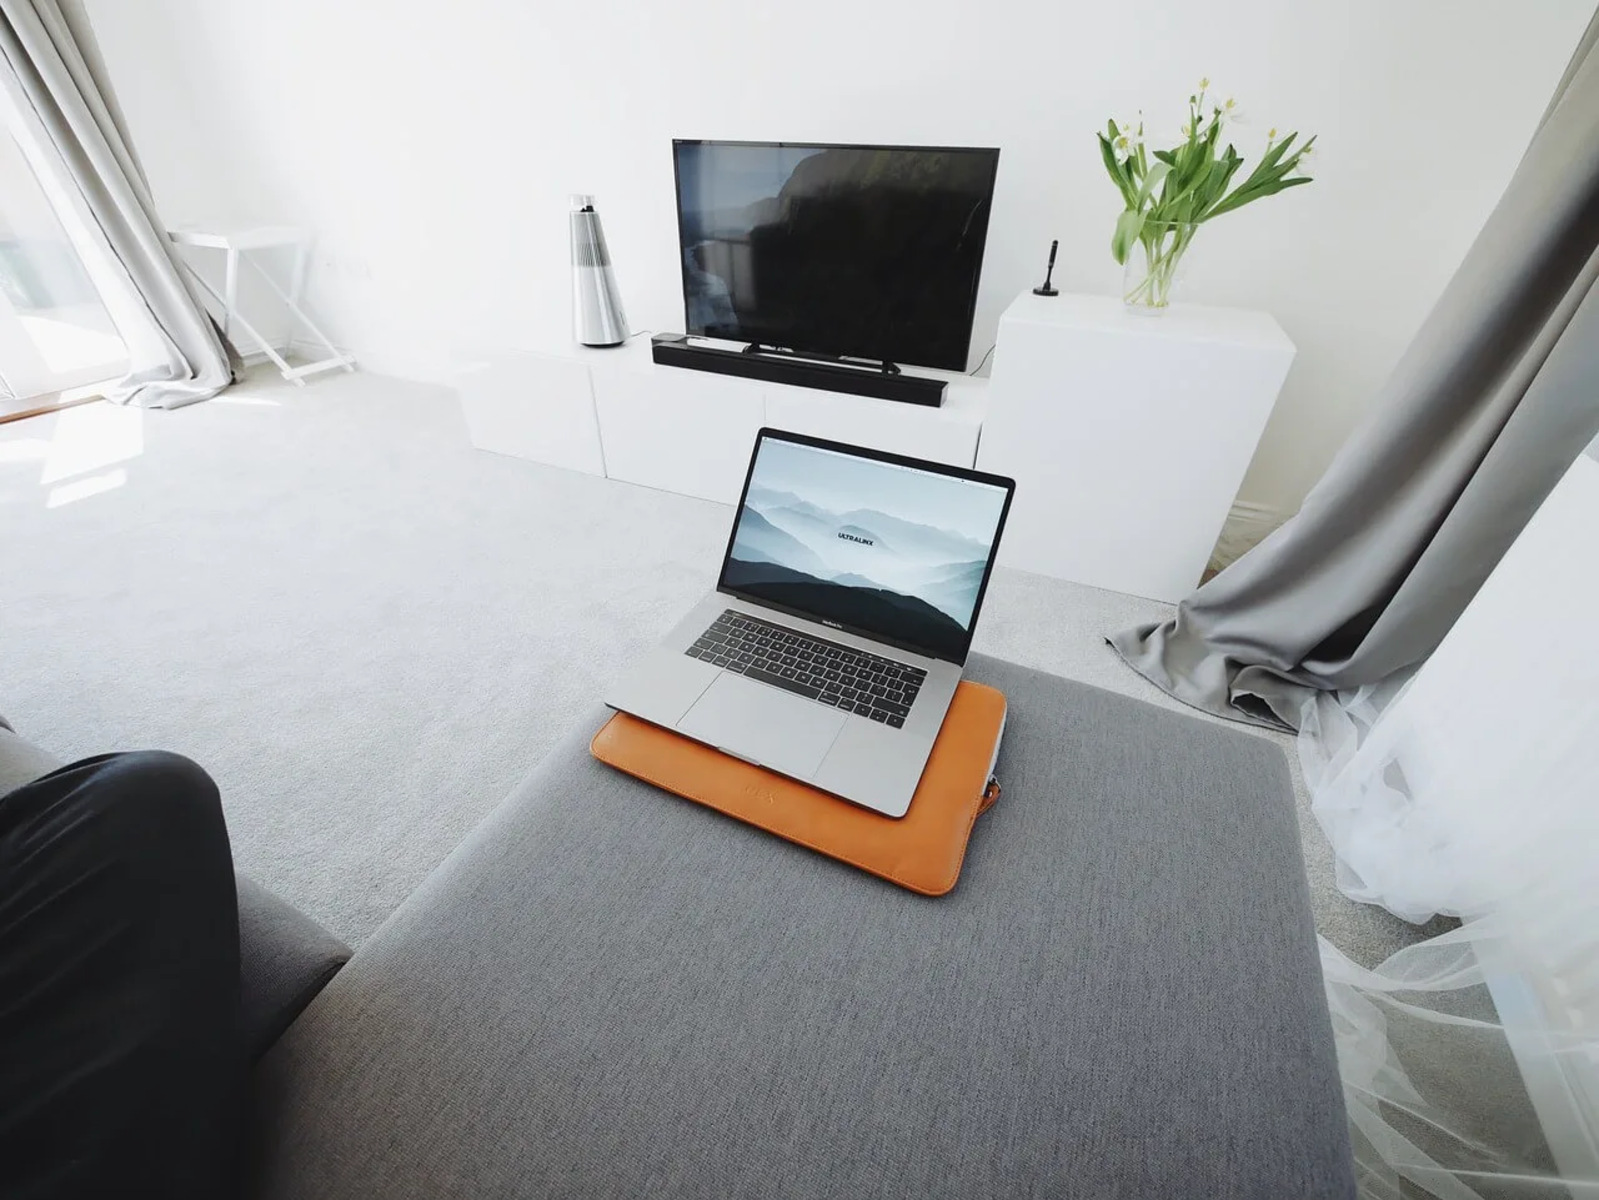
- Enjoy content on a larger screen: One of the primary reasons for connecting a USB-C device to an HDMI TV is to enjoy your favorite content on a bigger display. Whether you’re watching movies, TV shows, or streaming videos, the larger screen size enhances the overall viewing experience, making it more immersive and enjoyable.
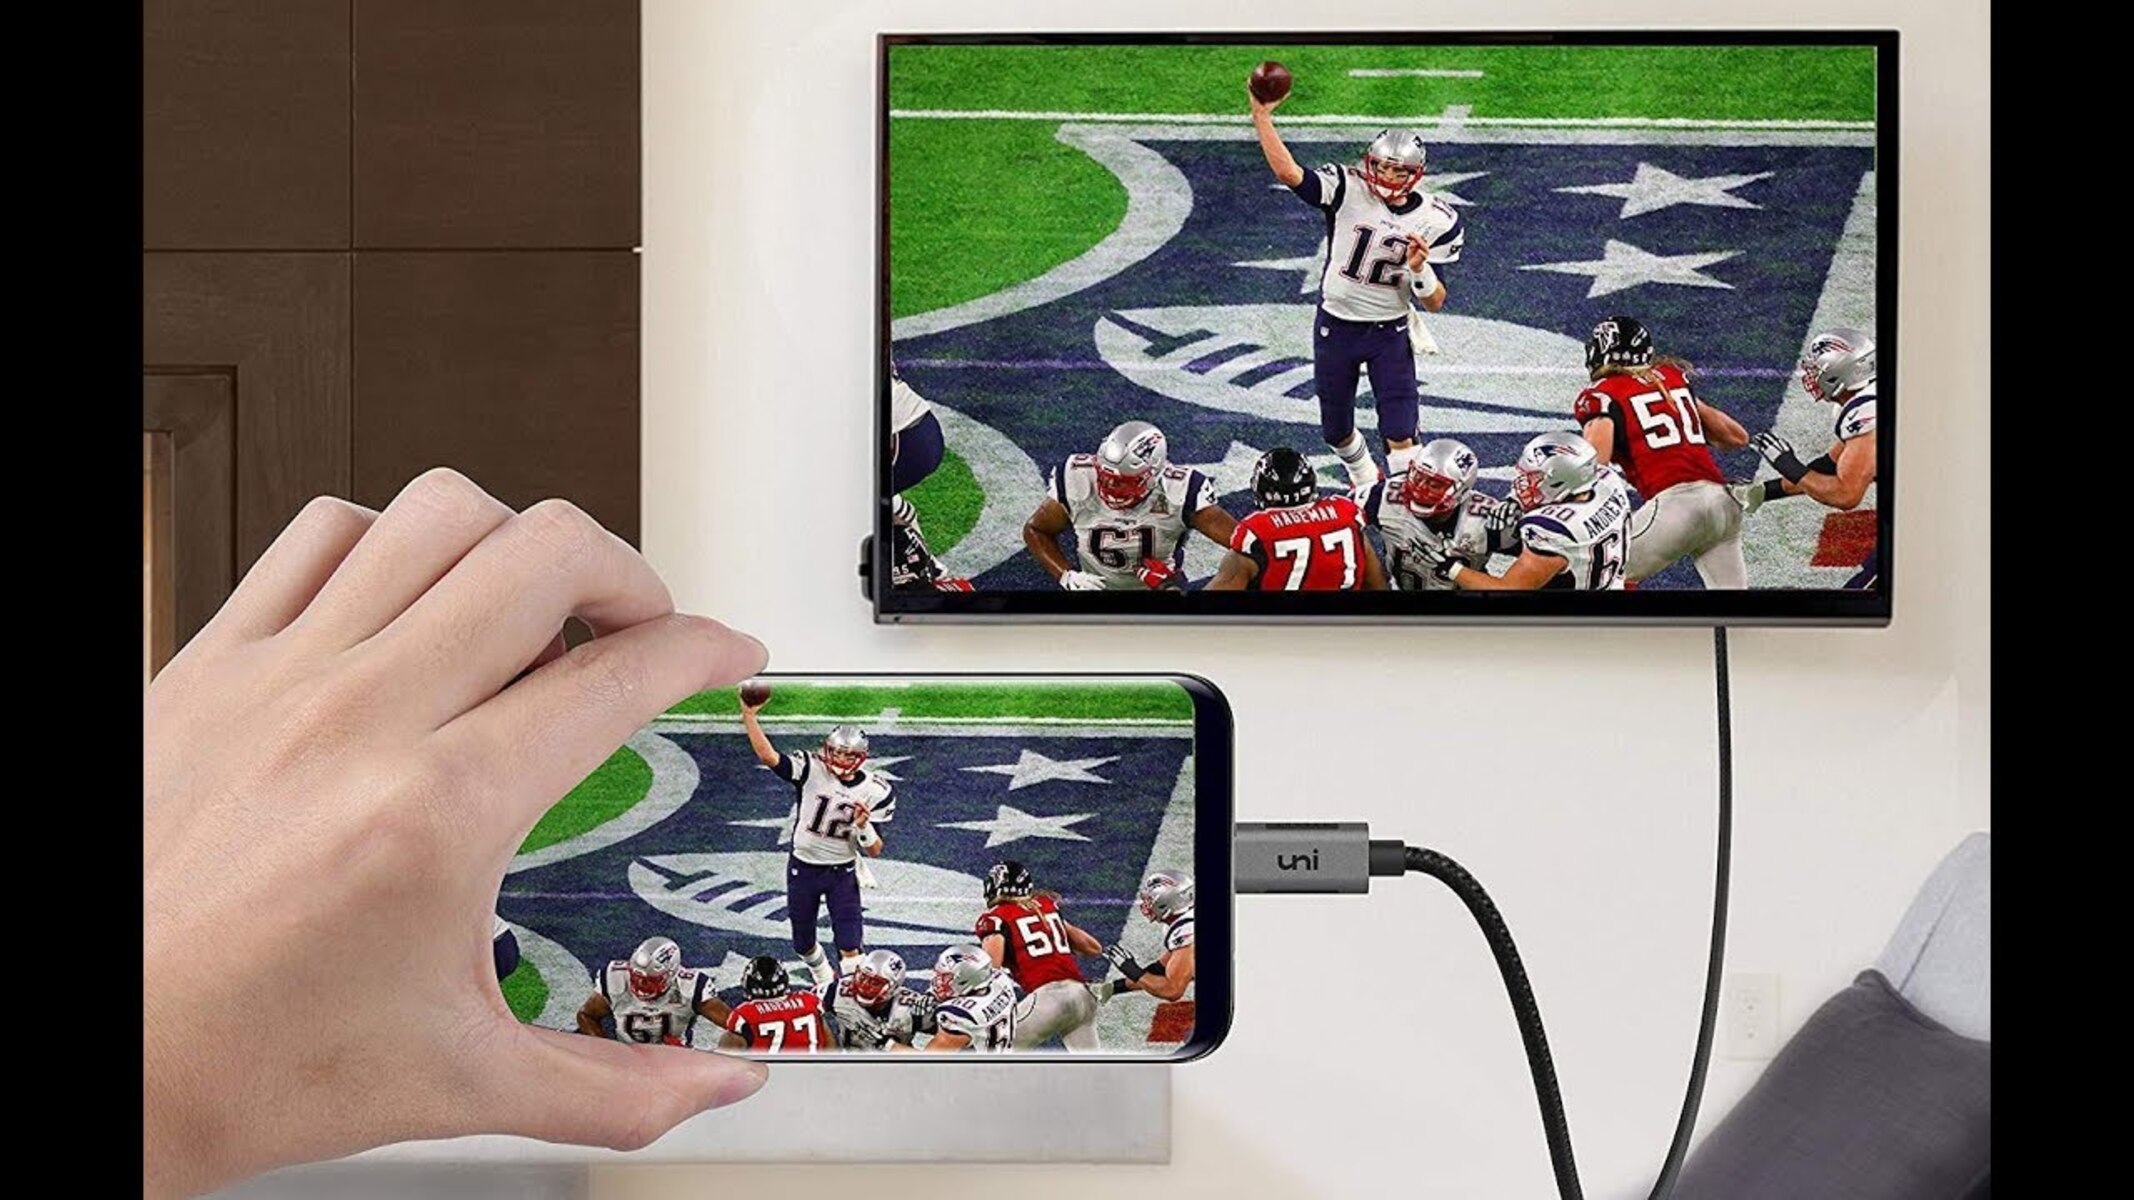
- Mirror or extend your device’s screen: Connecting your USB-C device to an HDMI TV allows you to mirror or extend your device’s screen onto the TV. This means you can show presentations, slideshows, or even play mobile games on a larger display, making it easier for others to view and enhancing collaboration and interaction.
- High-quality video and audio: HDMI provides excellent video and audio quality, ensuring that you enjoy crisp, vibrant visuals and immersive sound. By connecting your USB-C device to an HDMI TV, you can take advantage of the HDMI technology to experience your content in its full glory.
- Connectivity and versatility: USB-C to HDMI connectivity offers convenience and versatility by allowing you to connect different devices, regardless of their ports. If your device has a USB-C port and your TV has an HDMI port, you can easily bridge the connection using a USB-C to HDMI adapter or cable, enabling seamless connectivity between devices.
- Work presentations and collaborations: Connecting your USB-C device to an HDMI TV is particularly useful for work-related tasks. You can use it to deliver presentations, showcase designs, or collaborate on projects with colleagues, all on a larger screen. This facilitates better communication, clearer visibility, and improved productivity.
Whether you’re a multimedia enthusiast, a professional seeking better display options, or simply someone who wants to enjoy their favorite content on a bigger screen, connecting your USB-C device to an HDMI TV offers a range of advantages. It enhances the overall viewing experience, provides high-quality video and audio, and opens up new possibilities for collaboration and entertainment.
Step 1: Check Your Device’s USB-C Compatibility
Before you embark on connecting your USB-C device to an HDMI TV, it’s essential to ensure that your device has USB-C video output capabilities. Not all USB-C ports support video transmission, so it’s crucial to check the specifications of your device to confirm its compatibility.
Here’s how you can determine if your USB-C device supports video output:
- Read the device’s manual: The user manual or product documentation of your device often contains information about its USB-C capabilities. Look for any mentions of video output or HDMI support.
- Check the manufacturer’s website: Visit the manufacturer’s website and search for your device’s specifications. Look for details regarding video output through USB-C. Some manufacturers specifically list the supported video resolutions and the maximum refresh rates.
- Contact customer support: If you’re still uncertain about your device’s video output capabilities, reach out to the manufacturer’s customer support. They should be able to provide you with accurate information and clarify any doubts you may have.
Once you have confirmed that your device supports video output via USB-C, you can proceed to the next step of connecting it to an HDMI TV. It’s important to note that some devices may have specific requirements or limitations when it comes to USB-C video output. For example, certain devices may only support a specific range of resolutions or may require specific adapters or cables for video transmission.
By verifying your device’s USB-C compatibility, you can ensure a seamless and successful connection to an HDMI TV. Enjoy the convenience and versatility of USB-C technology as you immerse yourself in your favorite content on the big screen.
Step 2: Get the Right USB-C to HDMI Adapter or Cable
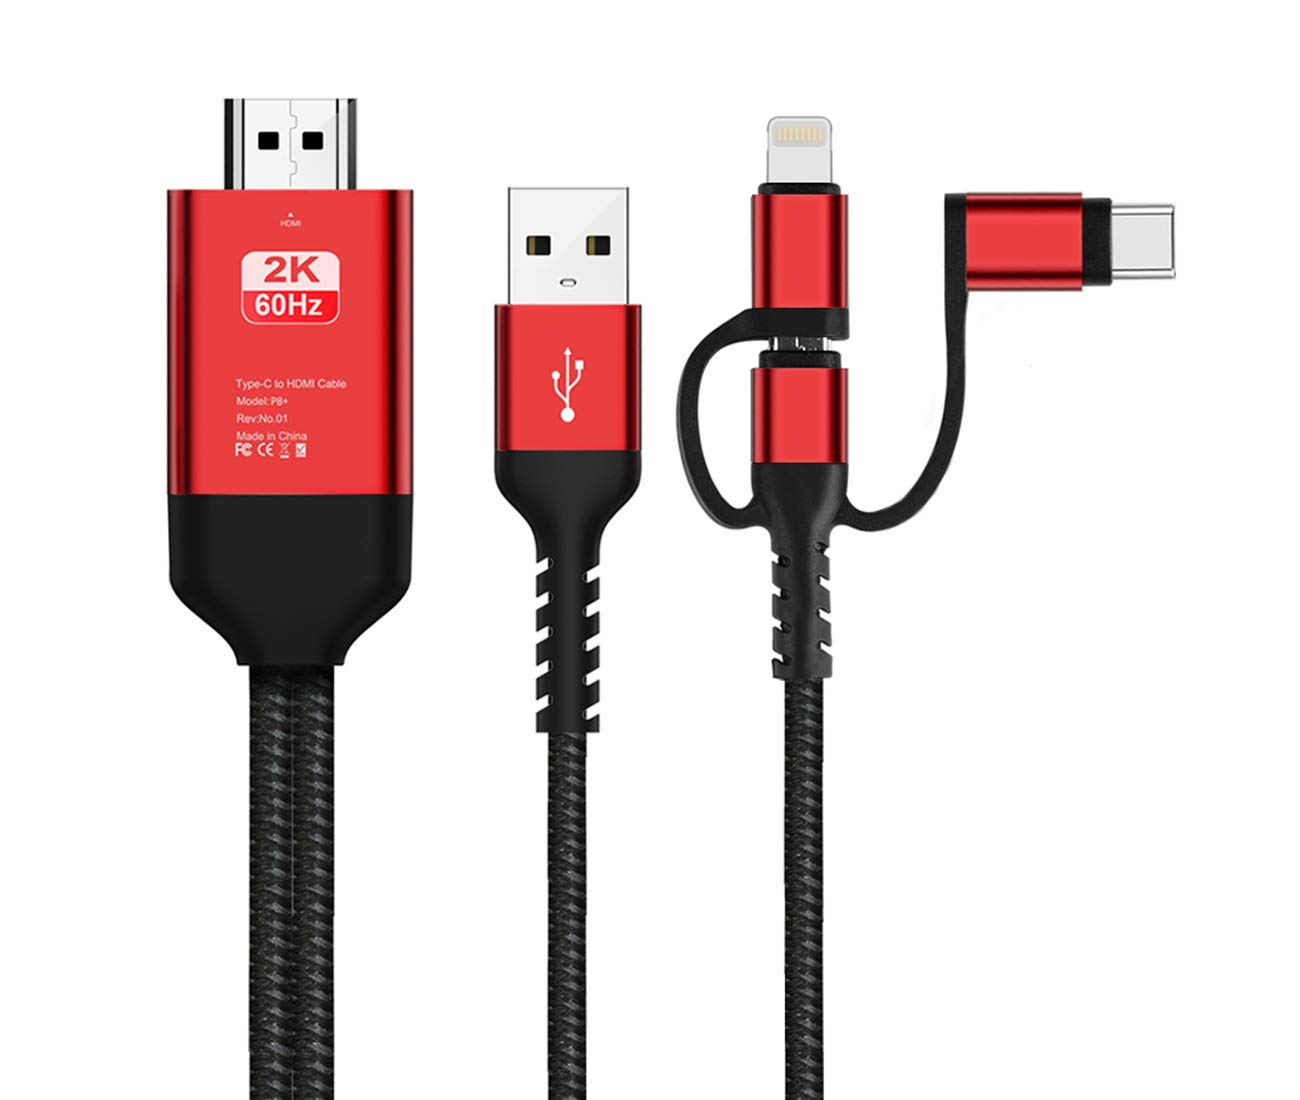
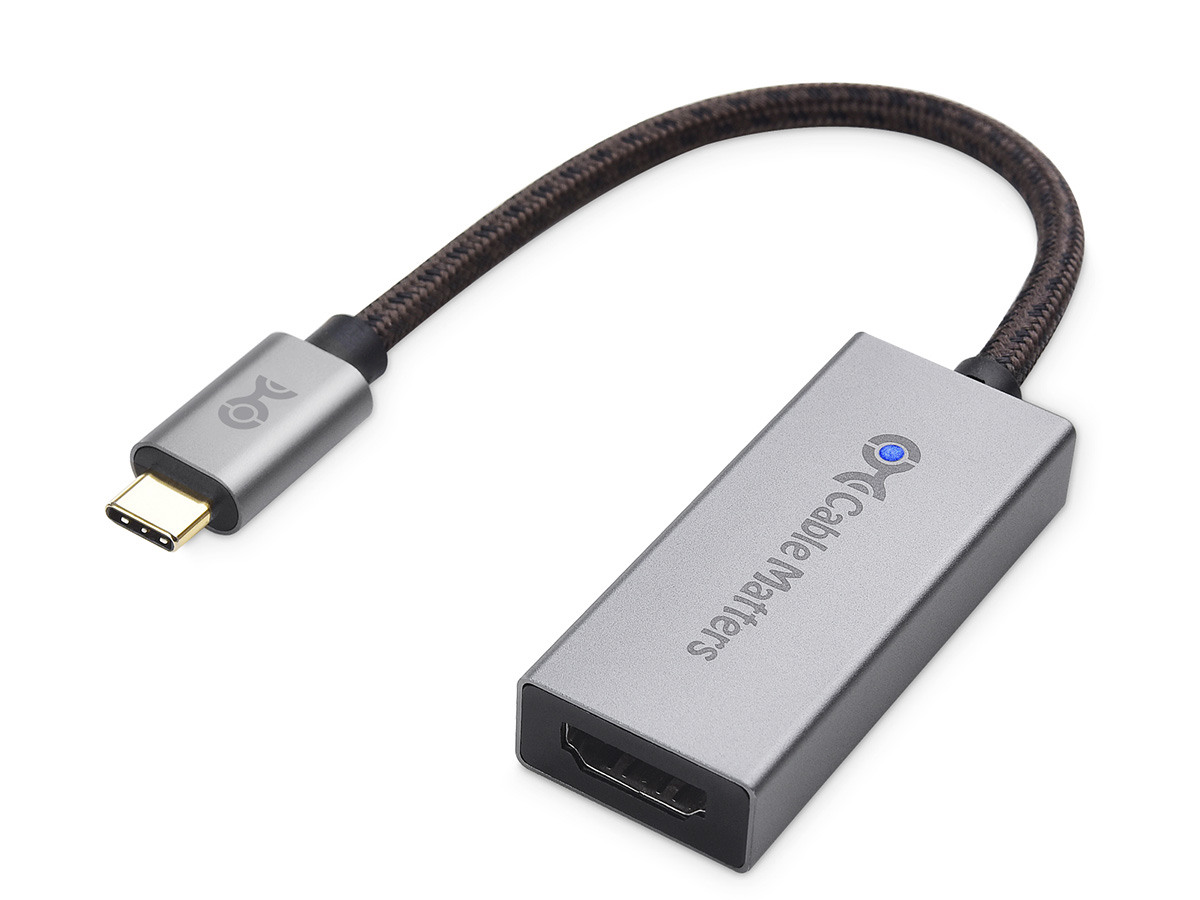
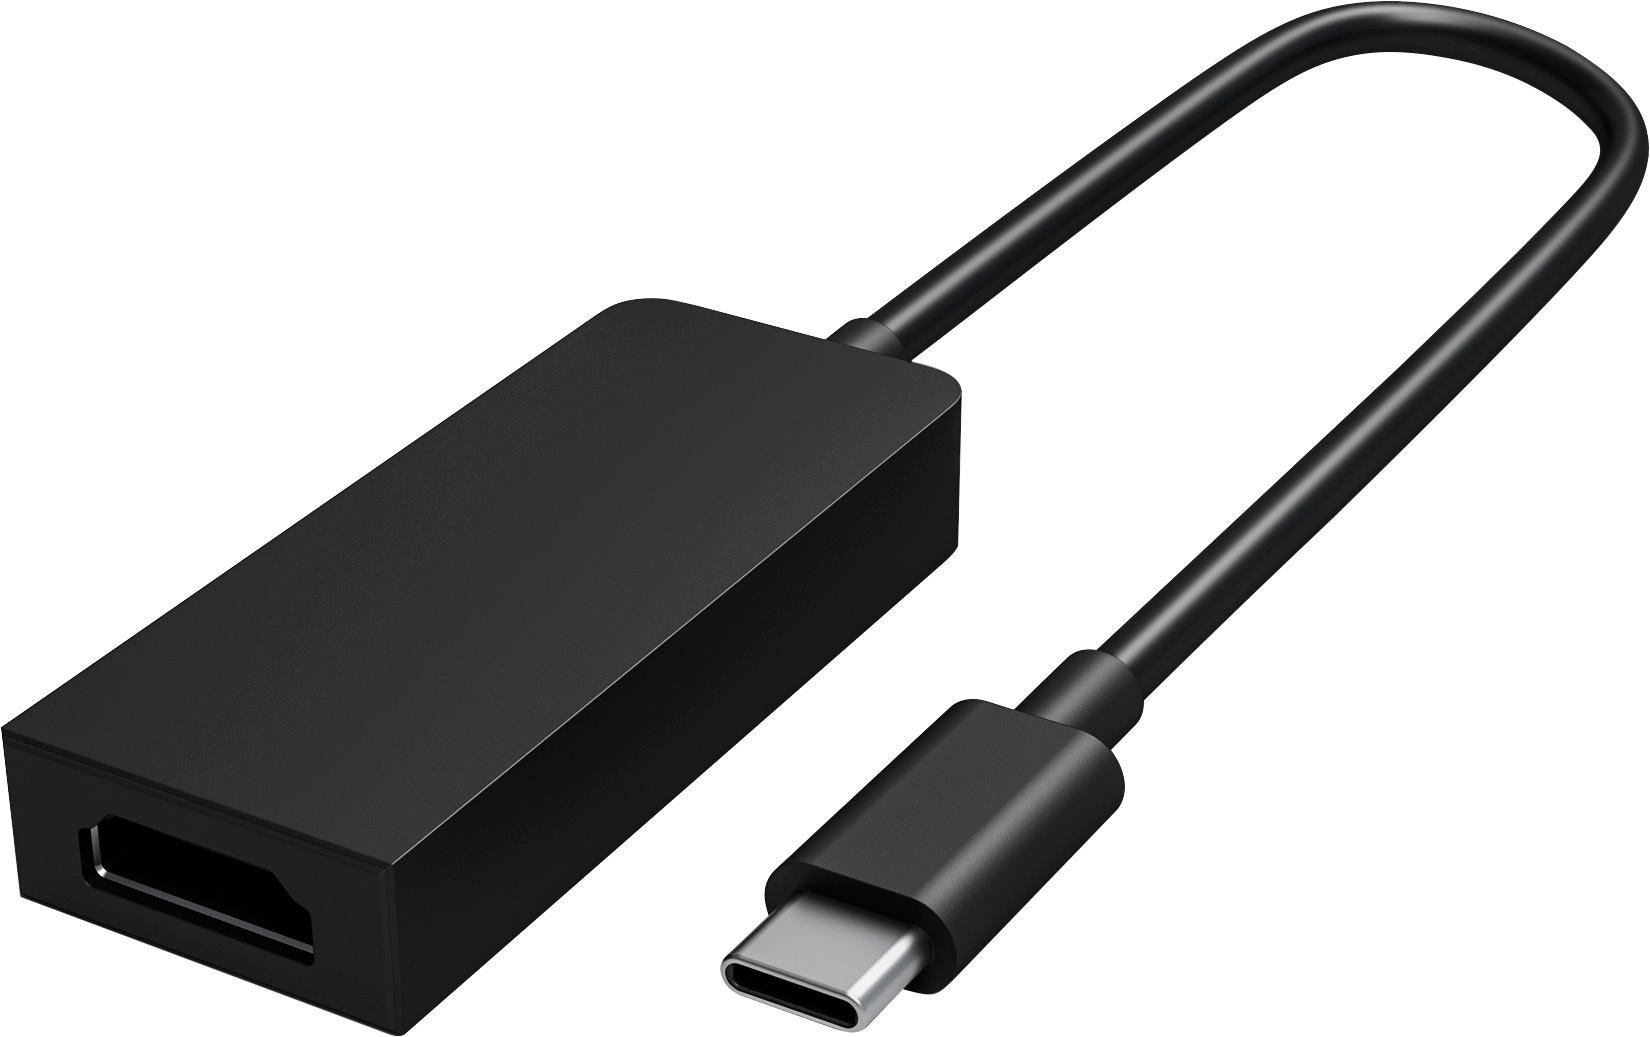
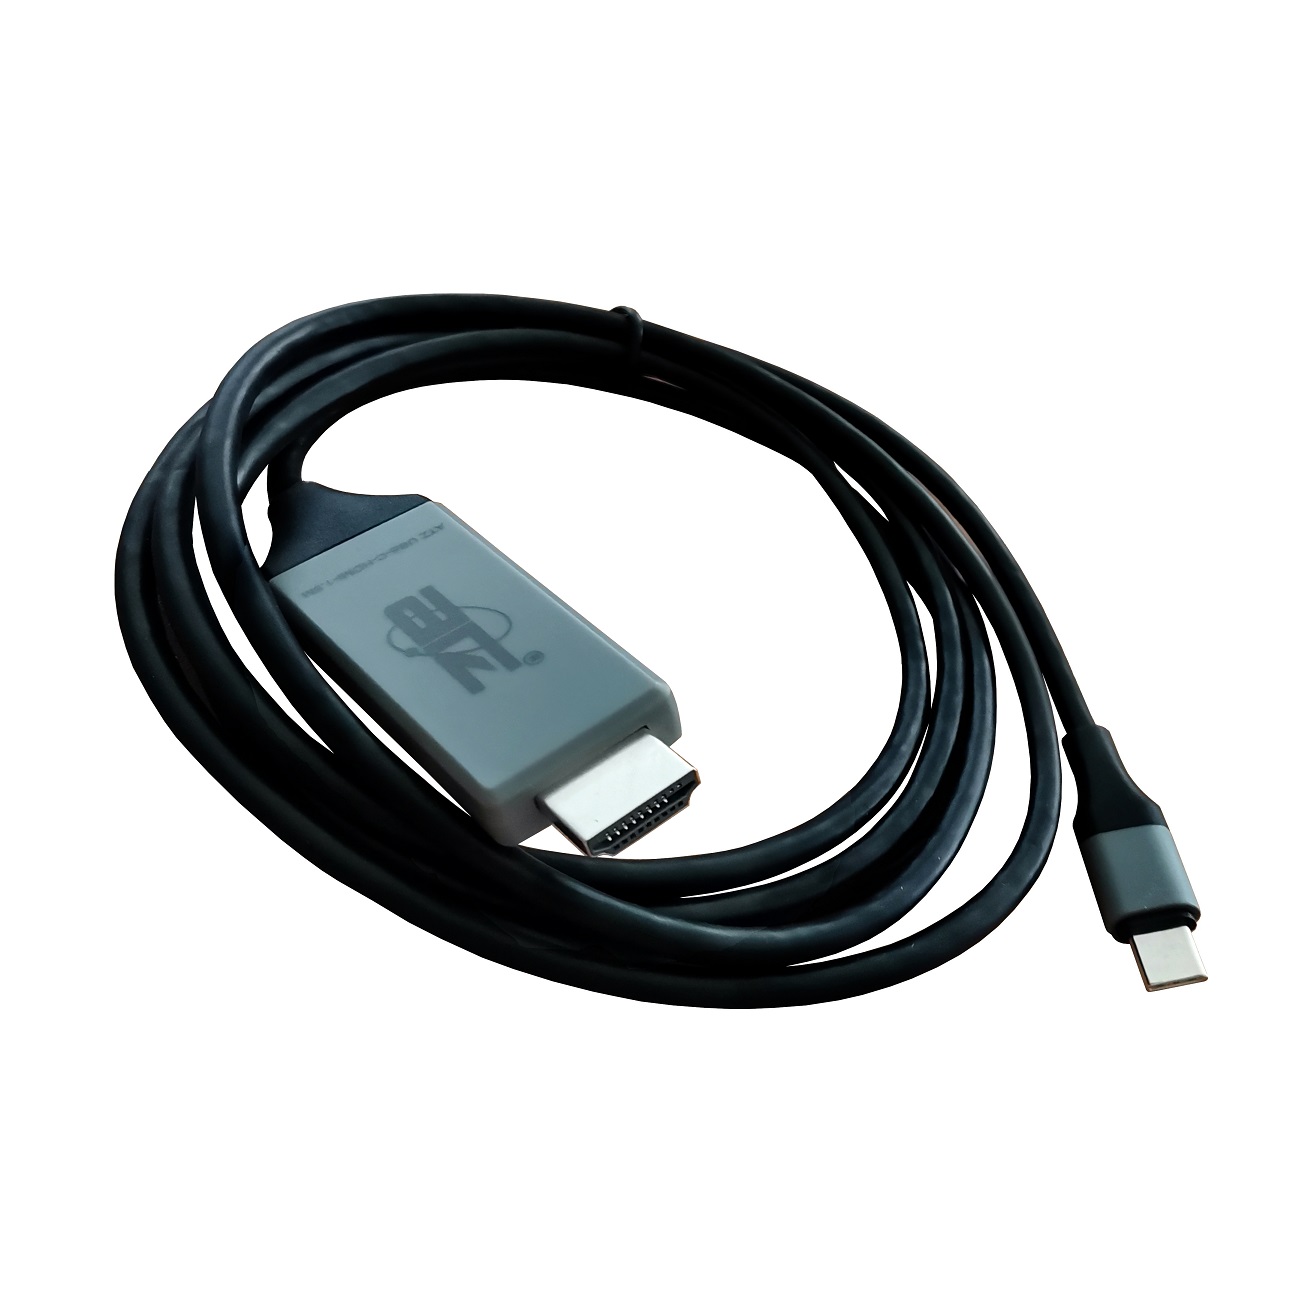
Now that you’ve confirmed your device’s USB-C compatibility, the next step is to acquire the appropriate USB-C to HDMI adapter or cable. This accessory will bridge the connection between your USB-C device and the HDMI TV, allowing you to transfer audio and video signals.
Here are a few factors to consider when choosing the right USB-C to HDMI adapter or cable:
- Type of USB-C port: USB-C ports come in different variations, such as USB 3.1, Thunderbolt 3, USB 4, and DisplayPort Alt Mode. Ensure that you select an adapter or cable that is compatible with your device’s specific USB-C port. Refer to your device’s manual or specifications to determine the type of USB-C port it has.
- HDMI Version: HDMI cables and adapters also come in different versions, such as HDMI 1.4, HDMI 2.0, and HDMI 2.1. Check the HDMI version supported by your HDMI TV and choose an adapter or cable that is compatible with that version. Newer versions offer higher resolutions, faster refresh rates, and additional features.
- Quality and Features: Consider the build quality and features of the adapter or cable. Look for ones that are made with durable materials to ensure longevity. Additionally, some adapters come with extra features like support for audio output or multiple display connections, which can be beneficial depending on your needs.
- Reviews and Recommendations: Read customer reviews and seek recommendations from reliable sources to gauge the performance and reliability of different adapters or cables. This can help you choose a product that is known for its quality and effectiveness.
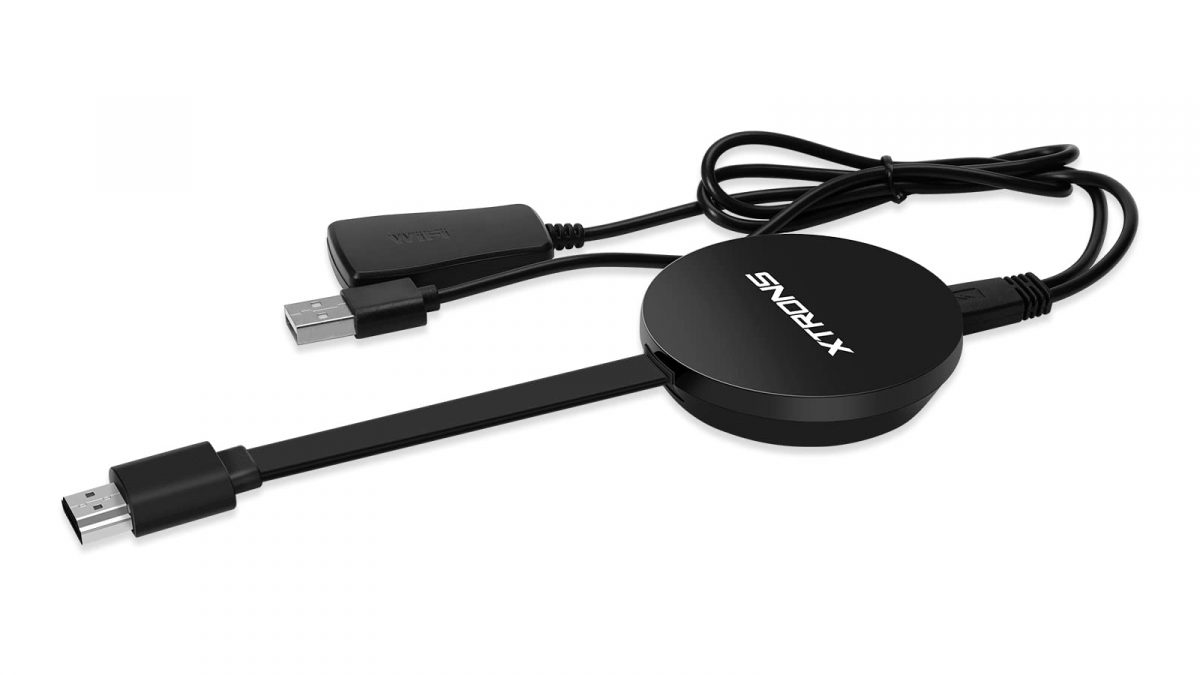
Keep in mind that adapters may require additional cables to connect to the HDMI TV. For example, some adapters have a standard HDMI port, while others have a Mini HDMI or Micro HDMI port. Ensure that you have the necessary cables to connect the adapter to your HDMI TV, or consider purchasing an adapter that includes the required cables.
By selecting the right USB-C to HDMI adapter or cable, you can ensure a seamless and reliable connection between your USB-C device and the HDMI TV. Enjoy the convenience of being able to share your favorite content on a larger screen with ease.
Step 3: Connect the USB-C End to Your Device
With the appropriate USB-C to HDMI adapter or cable in hand, it’s time to connect the USB-C end to your device. Follow these steps to ensure a proper and secure connection:
- Turn off your device: Before making any connections, ensure that your USB-C device is turned off to avoid any potential electrical issues.
- Locate the USB-C port: Identify the USB-C port on your device. It is usually a small, oval-shaped port labeled with the USB-C symbol. Refer to your device’s manual or specifications if you’re unsure about the exact location of the port.
- Insert the USB-C end: Take the USB-C end of your adapter or cable and insert it securely into the USB-C port on your device. Ensure that it is inserted in the correct orientation, as USB-C is a reversible connector, meaning it can be plugged in either way.
- Secure the connection: Once the USB-C end is inserted, gently push it in until you feel a secure connection. Ensure that it is plugged in fully to avoid any loose or unstable connections.
It’s worth noting that some devices may require you to enable video output through the USB-C port in their settings. Consult your device’s manual or settings menu to ensure that video output is enabled if necessary.
By properly connecting the USB-C end to your device, you are one step closer to enjoying your content on the big screen. Now, it’s time to move on to the next step—connecting the HDMI end to your TV.
Step 4: Connect the HDMI End to Your TV
After securely connecting the USB-C end to your device, it’s time to connect the HDMI end to your TV. Follow these steps to ensure a proper and stable connection:
- Locate the HDMI port on your TV: Look for the HDMI port on your TV. It is usually labeled “HDMI” and may be located on the back, side, or bottom of the TV. Take note of the HDMI port number if your TV has multiple HDMI inputs.
- Insert the HDMI end: Take the HDMI end of your adapter or cable and insert it securely into the HDMI port on your TV. Push it in firmly but gently, ensuring that it is properly seated in the port.
- Select the HDMI input: On your TV’s remote control, locate the “Input” or “Source” button. Press this button to access the TV’s input or source options. Select the HDMI input that corresponds to the HDMI port you used for the connection. This will switch the TV’s display to the input from your USB-C device.
It’s important to note that some TVs may have specific HDMI settings that need to be adjusted for optimal performance. You can access these settings by navigating through your TV’s menu system. Look for options related to HDMI output, resolution, refresh rate, or any other settings that may be relevant to your specific setup. Consult your TV’s user manual or contact the manufacturer for guidance if needed.
Once the HDMI end is securely connected to your TV and you’ve selected the corresponding HDMI input, your USB-C device’s audio and video output should be transmitted to the TV. You should now be able to see your device’s screen or content on the big screen of your HDMI TV.
With the USB-C and HDMI connection established, you’re ready to move on to the next step—adjusting the TV settings to optimize your viewing experience.
Step 5: Adjust the TV Settings
Now that your USB-C device is connected to your HDMI TV, it’s time to adjust the TV settings for the best possible viewing experience. By making a few tweaks, you can optimize the display and audio settings to suit your preferences. Follow these steps to adjust the TV settings:
- Picture settings: Access the picture settings menu on your TV. You can usually find this in the TV’s settings or menu system. Adjust parameters such as brightness, contrast, color saturation, and sharpness to suit your preference. Experiment with these settings to achieve the optimal balance that enhances your viewing experience.
- Display mode: Some TVs offer different display modes, such as Standard, Cinema, or Game modes. Each mode is designed to optimize the picture quality for specific scenarios. Select the mode that best suits your content or personal preference. For example, Cinema mode is ideal for movies and TV shows, while Game mode may enhance responsiveness for gaming.
- Audio settings: Access the audio settings menu on your TV and adjust settings such as volume, bass, treble, and audio mode. Depending on your TV model, you may have additional audio settings like surround sound or equalizer options. Tailor the audio settings to match your listening preferences and the content you’re enjoying.
- Aspect ratio: Check the aspect ratio settings on your TV to ensure that the content is displayed correctly. Most modern TVs have an option to automatically detect and adjust the aspect ratio. However, in some cases, you may need to manually select the appropriate aspect ratio, such as 16:9 for widescreen content.
- Other settings: Explore other settings on your TV that may enhance your viewing experience. This may include options like motion smoothing, noise reduction, or color temperature. Experiment with these settings to see if they improve the quality or aesthetics of the displayed content.
Remember, the optimum settings may vary based on personal preference and the content being viewed. Take some time to adjust and fine-tune the settings until you achieve the desired viewing experience.
Once you have adjusted the TV settings to your satisfaction, sit back, relax, and enjoy your USB-C device’s content on the big screen. Whether you’re watching movies, playing games, or giving presentations, the optimized TV settings will enhance your overall enjoyment.
Step 6: Enjoy Your Content on the Big Screen!
Congratulations! You’ve successfully connected your USB-C device to your HDMI TV, adjusted the settings, and now it’s time to sit back and enjoy your content on the big screen. Whether you’re streaming your favorite movies, displaying presentations, or enjoying multimedia content, the larger display will undoubtedly enhance your viewing experience.
Here are a few things to keep in mind as you indulge in your content on the big screen:
- Explore different content: Take advantage of the larger screen to explore a wide range of content. Whether it’s binge-watching your favorite TV series, discovering new movies, or playing games, the big screen offers a more immersive experience.
- Utilize multitasking capabilities: If your device supports it, you can take advantage of the extended screen real estate for multitasking. For example, you can have a presentation open on the TV while simultaneously taking notes or referring to other documents on your device’s screen.
- Share with others: The big screen allows you to share your favorite content with friends, family, or colleagues. Whether it’s enjoying a movie night, showcasing your photography skills, or collaborating on a project, the larger display makes it easier for everyone to enjoy and participate.
- Adjust settings as needed: While you’re enjoying your content, feel free to make further adjustments to the TV settings based on your preferences. Lighting conditions, content type, and personal preferences may warrant fine-tuning the picture and audio settings to enhance the overall experience.
- Disconnecting: When you’re finished using the USB-C to HDMI connection, always remember to properly disconnect your device and TV. This involves removing the USB-C cable or adapter from your device and the HDMI cable from your TV. Properly storing your cables and adapters will ensure their longevity.
Remember to take breaks and enjoy your content responsibly. The big screen experience can be captivating, but it’s important to maintain a healthy balance and practice good viewing habits.
With your USB-C device connected to your HDMI TV, you now have the ability to immerse yourself in a bigger and more captivating viewing experience. Enjoy the enhanced visuals, immersive audio, and the convenience of viewing your favorite content on the big screen.
Conclusion
Connecting your USB-C device to an HDMI TV opens up a world of possibilities and enhances your viewing experience. The convenience and versatility of USB-C technology, combined with the excellent video and audio quality of HDMI, make this connection a popular choice for a wide range of uses.
In this guide, we covered the steps involved in connecting your USB-C device to an HDMI TV. It all begins with checking your device’s USB-C compatibility and ensuring it supports video output. Then, selecting the right USB-C to HDMI adapter or cable is crucial to establish a secure and reliable connection. Once you have the adapter or cable, connecting the USB-C end to your device and the HDMI end to your TV is a straightforward process.
After the physical connections are made, adjusting your TV settings becomes essential to optimize the picture and audio quality. Finetune the settings to suit your preferences and the type of content you’re enjoying. From there, it’s time to sit back, relax, and immerse yourself in your favorite content on the big screen.
Whether you’re streaming movies, giving presentations, or gaming with friends, the USB-C to HDMI connection brings your content to life on a larger display. Share the experience with others, embrace multitasking capabilities, and explore a wider range of content with the enhanced visual and audio experience.
Now that you have a better understanding of how to connect your USB-C device to an HDMI TV, you can enjoy the benefits of a bigger screen and improved audio-visual quality. Embrace the flexibility and convenience of USB-C technology as you immerse yourself in your favorite movies, games, and multimedia content.