Introduction
Welcome to the digital age, where our devices are becoming increasingly interconnected. If you own a Samsung tablet and want to connect it to your PC, you’ve come to the right place. Connecting your Samsung tablet to a PC can unlock a world of possibilities, from transferring files to backing up data and even accessing your tablet’s screen on your PC.
In this guide, we’ll walk you through the step-by-step process of connecting your Samsung tablet to your PC, ensuring a seamless and effortless connection. Whether you need to transfer important documents or simply want to enjoy a bigger display for your tablet’s content, we’ve got you covered.
Connecting your Samsung tablet to your PC is generally straightforward, but it does require a few initial steps to ensure a successful connection. Don’t worry, though – we’ll provide you with detailed instructions along the way, ensuring that you can easily follow along regardless of your technical expertise.
The process primarily involves installing device drivers, connecting the tablet to your PC via a USB cable, enabling USB debugging, and selecting the appropriate USB connection type. By the end of this guide, you’ll have the knowledge and confidence to seamlessly connect your Samsung tablet to your PC and harness the full potential of these devices working together. So, let’s get started!
Step 1: Install Device Drivers
Before you can connect your Samsung tablet to your PC, it’s important to ensure that the necessary device drivers are installed. Device drivers serve as the communication bridge between your tablet and PC, allowing them to recognize and interact with each other.
To install the device drivers, follow these steps:
- Connect your Samsung tablet to your PC using a USB cable. Make sure both devices are powered on and properly connected.
- Once connected, your PC should recognize the tablet as a new device and prompt you to install the drivers. If this automatic installation does not occur, you may need to manually install the drivers.
- To manually install the drivers, visit the official Samsung website or the website of your tablet’s manufacturer. Look for the support or downloads section and locate the specific drivers for your tablet model and operating system.
- Download the appropriate drivers onto your PC and run the installation file. Follow the on-screen instructions to complete the installation process.
- Once the installation is complete, restart your PC to ensure that the drivers are fully installed and recognized.
After completing this step, your PC will have the necessary device drivers installed and ready to communicate with your Samsung tablet. This paves the way for the subsequent steps in establishing a successful connection between the two devices. Now, let’s move on to the next step: connecting your tablet via a USB cable.
Step 2: Connect via USB Cable
Once you have installed the required device drivers, it’s time to physically connect your Samsung tablet to your PC using a USB cable. This connection will allow your PC to recognize and communicate with your tablet, opening up a range of possibilities for file sharing and synchronization.
To connect your Samsung tablet via a USB cable, follow these simple steps:
- Locate the USB port on your Samsung tablet. This is typically located on the bottom or side of the device.
- Connect one end of the USB cable into the USB port on your tablet.
- Next, locate an available USB port on your PC. These are typically found on the sides or rear of the computer.
- Connect the other end of the USB cable into a USB port on your PC.
- Once both ends of the cable are securely connected, your PC will recognize the tablet and establish a connection.
It’s important to note that some Samsung tablets may require you to enable USB file transfer or other settings before the connection is established. If prompted on your tablet screen, follow the on-screen instructions to allow file transfer or change the USB connection mode to “File Transfer” or “MTP”. This will ensure that your PC recognizes the tablet as a storage device and allows for seamless data exchange.
With the physical connection established, you are now ready to move on to the next step: enabling USB debugging to unlock advanced connectivity options.
Step 3: Enable USB Debugging
USB debugging is an essential feature that allows your Samsung tablet to communicate with your PC on a deeper level. Enabling USB debugging grants your PC additional control over your tablet, enabling you to access advanced features and perform tasks such as screen mirroring, app development, and more.
To enable USB debugging on your Samsung tablet, follow these steps:
- On your tablet, go to the “Settings” app. You can usually find the settings icon in your app drawer or by swiping down from the top of the screen and selecting the gear-shaped icon.
- In the settings menu, scroll down and look for the “Developer options” or “About device” section. The location may vary depending on your tablet’s Android version.
- If you don’t see “Developer options” listed, go to “About device” and find the “Build number” or “Software information” option.
- Tap on the “Build number” or “Software information” option repeatedly (usually about 7-10 times) until you see a notification indicating that you are now a developer.
- Once you’ve unlocked the developer options, go back to the main settings menu and look for the “Developer options” section.
- Inside the “Developer options” menu, scroll down and find “USB debugging”. It will be listed under the “Debugging” or “Developer tools” section.
- Toggle the switch next to “USB debugging” to enable it. You may see a confirmation dialog warning you about the potential risks of enabling USB debugging. Read and accept the warning to proceed.
With USB debugging now enabled, your Samsung tablet is ready to establish a more advanced and seamless connection with your PC. In the next step, we will explore the various USB connection types available and how to select the appropriate one for your needs.
Step 4: Select USB Connection Type
Now that USB debugging is enabled on your Samsung tablet, it’s time to choose the appropriate USB connection type. The USB connection type determines how your PC interacts with your tablet and what features are available for use. Depending on your needs, you can select different connection types to suit your requirements.
To select the USB connection type, follow these steps:
- Ensure that your Samsung tablet is still connected to your PC via the USB cable.
- On your tablet, swipe down from the top of the screen to access the notification panel.
- Look for the “USB connection” or “USB options” notification. It may appear as a small alert or as an expanded notification.
- Tap on the notification to open the USB connection options menu.
- In the USB connection options menu, you will see various connection types such as “Charging only”, “Transfer files”, “Transfer photos”, “MIDI”, and more.
- Select the appropriate connection type based on your intended usage. For general file transfer between your tablet and PC, choose “Transfer files” or “Media device (MTP)”.
- Once you’ve selected the desired USB connection type, your tablet and PC will establish the connection based on this selection.
It’s important to note that the available USB connection types may vary depending on your tablet’s manufacturer and operating system version. Some tablets may have additional connection types such as “Smart view” or “Screen mirroring” for casting your tablet’s screen onto your PC.
By selecting the appropriate USB connection type, you can now enjoy seamless file transfers, media synchronization, and potentially even screen sharing between your Samsung tablet and your PC. In the final step, we will explore how to access and interact with your tablet’s content directly on your PC.
Step 5: Access Tablet on PC
Now that your Samsung tablet is connected to your PC, it’s time to explore how to access and interact with your tablet’s content directly on your computer. By accessing your tablet on your PC, you can manage files, transfer data, and even operate certain tablet functions from the comfort of your desktop.
Here are the steps to access your tablet on your PC:
- On your PC, open the File Explorer or My Computer application. This can usually be found in your taskbar or by searching in the Start menu.
- Look for the section labeled “Devices and drives” or “This PC”. Your connected Samsung tablet should appear as a separate device.
- Click on the icon representing your tablet. This will open a window displaying the folders and files on your tablet.
- You can now navigate through the folders on your tablet, just like you would on any other storage device. You can copy and paste files between your tablet and PC, delete files, create new folders, and more.
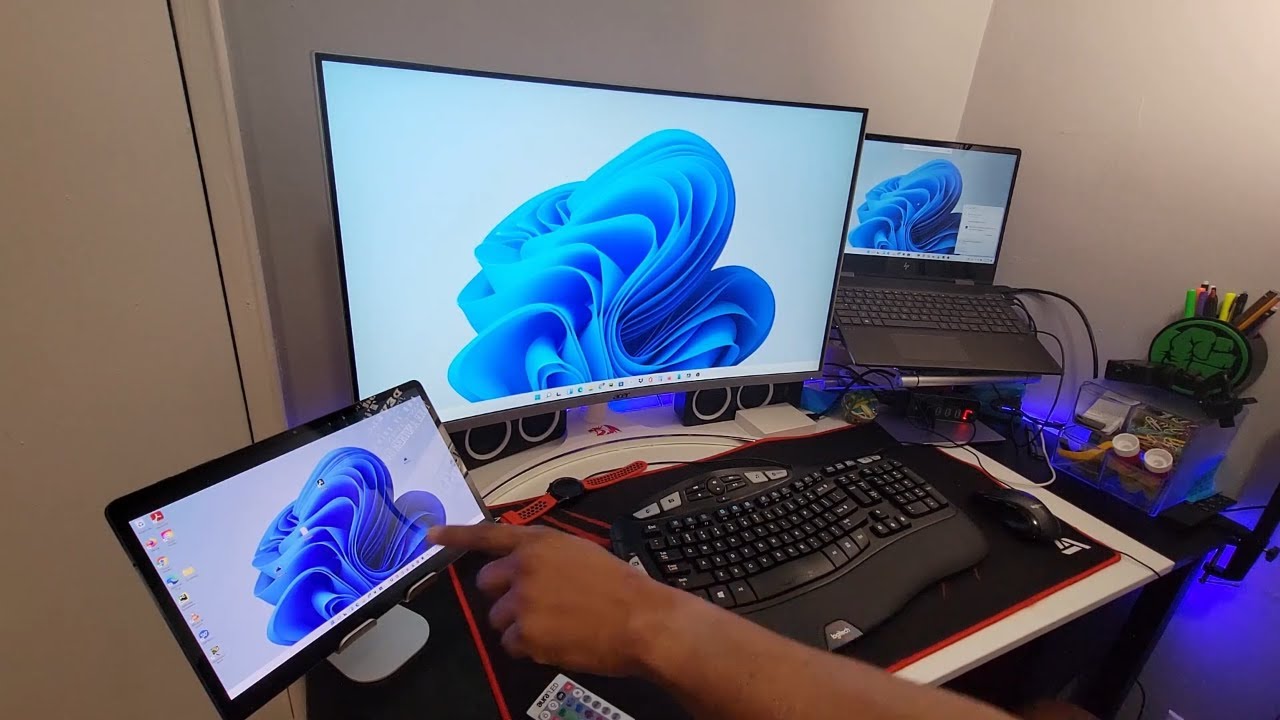
In addition to accessing your tablet’s files, some Samsung tablets also offer a feature called “SideSync” or “Samsung Flow”. These applications allow you to mirror your tablet’s screen on your PC, enabling you to interact with your tablet’s apps and functions directly from your computer.
To use SideSync or Samsung Flow, you will need to install the respective applications on both your tablet and PC. Follow the on-screen instructions provided by the application to establish the connection and enjoy the screen mirroring functionality.
With access to your tablet’s files and the potential for screen mirroring, you now have a seamless integration between your Samsung tablet and your PC. Enjoy the convenience of managing and interacting with your tablet’s content directly from your computer.
Conclusion
Congratulations! You have successfully learned how to connect your Samsung tablet to your PC. By following the simple steps outlined in this guide, you can now enjoy a seamless connection between your tablet and computer, enabling you to transfer files, access tablet content on your PC, and even mirror your tablet’s screen.
Throughout the process, we discussed the importance of installing device drivers, connecting via a USB cable, enabling USB debugging, selecting the appropriate USB connection type, and accessing your tablet on your PC. Each step plays a crucial role in establishing a smooth and efficient connection between your devices.
Remember to keep your device drivers up to date to ensure compatibility and optimal performance. Additionally, always make sure to safely disconnect your tablet from your PC to avoid any potential data loss or damage.
Connecting your Samsung tablet to your PC opens up a world of possibilities for file management, data synchronization, and enhanced productivity. Whether you need to back up important documents, transfer media files, or simply enjoy a larger display for your tablet’s content, this connection can greatly enhance your digital experience.
Explore the various features and functionalities at your disposal, and make the most of the interconnected world we live in. Stay connected, stay productive, and enjoy the seamless integration between your Samsung tablet and PC!


