Introduction
Welcome to the world of portable gaming! If you own a Nintendo DS, you’re probably eager to connect it to the internet and enjoy online multiplayer games, download new games and software updates, and access various online features. Connecting your DS to a Wi-Fi network is a straightforward process that will unlock a wealth of online gaming possibilities. In this guide, we’ll walk you through the steps to connect your DS to Wi-Fi, so you can start enjoying the online gaming experience.
Before we begin, it’s important to note that the Nintendo DS series includes several models, such as the DS Lite, DSi, and DSi XL, each with its own unique features and interface. However, the process of connecting to Wi-Fi is similar across these models, with some slight variations in menu navigation.
In the following sections, we’ll outline the steps you need to follow to connect your DS to Wi-Fi. We’ll cover powering on the DS, accessing the Settings menu, navigating to the Wi-Fi settings, scanning for available networks, selecting your Wi-Fi network, entering the network password, connecting to the network, and testing the connection. So, let’s get started and make sure you’re ready for an exceptional online gaming experience!
Step 1: Powering on the DS
The first step in connecting your DS to Wi-Fi is to power on the device. Locate the power button on your DS. Depending on the model, the power button may be located on the side, top, or front of the device. Once you’ve located the power button, press and hold it for a few seconds until the DS powers on. You will see the Nintendo logo appear on the screen, followed by the main menu.
It’s important to ensure that your DS has enough battery power to complete the Wi-Fi setup process. If the battery is running low, it’s a good idea to connect your DS to a charger before proceeding with the setup. This will prevent any interruptions during the process and ensure a smooth connection to Wi-Fi.
Additionally, make sure that your DS is within range of a Wi-Fi signal. The range will vary depending on the strength of the Wi-Fi router you’re connecting to. Generally, it’s best to be within 30 feet of the router for a stable connection.
Once your DS is powered on and ready to go, you can move on to the next step of accessing the Settings menu. This is where you’ll find the Wi-Fi settings and be able to connect to your network. So, let’s dive in and continue our journey toward Wi-Fi connectivity!
Step 2: Accessing the Settings menu
After you’ve powered on your DS, the next step is to access the Settings menu. This is where you’ll find the options to manage various settings, including the Wi-Fi settings.
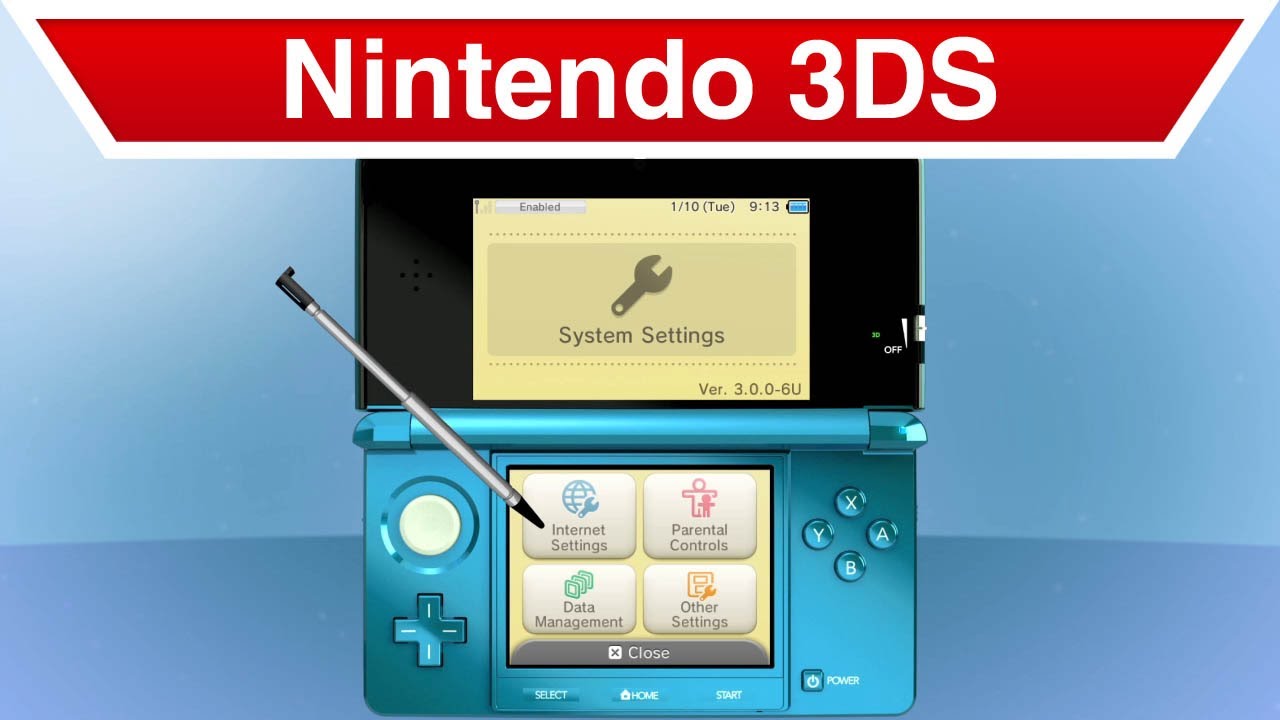
To access the Settings menu, look for an icon on the main menu that resembles a wrench or a gear. The exact location of this icon may vary depending on your DS model, but it’s typically located towards the bottom of the screen. Once you’ve located the Settings icon, tap on it to enter the Settings menu.
Once you’re in the Settings menu, you’ll see a list of different options. Scroll through the options by using the directional buttons on your DS until you find the one labeled “Internet Settings” or “Wi-Fi Settings.” This is the option you need to select in order to connect to a Wi-Fi network.
Depending on the DS model you have, the label for the Wi-Fi settings may have a different name or be located in a slightly different section of the Settings menu. However, the concept remains the same: you’re looking for the option that allows you to manage your Wi-Fi settings.
Once you’ve found the Wi-Fi settings option, tap on it to enter the Wi-Fi settings menu. You’re now one step closer to connecting your DS to Wi-Fi! In the next step, we’ll guide you through the process of navigating to the Wi-Fi settings where you can scan for available networks.
Step 3: Navigating to the Wi-Fi Settings
Now that you’re in the Settings menu, it’s time to navigate to the Wi-Fi settings. This is where you’ll find the options to scan for available networks and connect to your desired network.
Within the Wi-Fi settings menu, you’ll typically find two main options: “Search for an Access Point” and “Manual Setup.” These options may have slightly different labels depending on your DS model, but the functionality remains the same.
To initiate the process of connecting to Wi-Fi, select the option labeled “Search for an Access Point” or something similar. This option will make your DS scan for available Wi-Fi networks within range.
Once you’ve selected the “Search for an Access Point” option, you’ll see a list of available Wi-Fi networks appear on the screen. The DS will display the network names, also known as SSIDs, as well as any security icons that indicate password-protected networks.
Use the directional buttons on your DS to scroll through the list of available networks. Take note of the network names and security icons, as this information will be important when selecting your Wi-Fi network in the next step.
If you don’t see any networks listed, it’s possible that your DS is out of range or that there are no Wi-Fi networks available in your vicinity. In that case, try moving closer to your Wi-Fi router or check if your router is turned on and broadcasting the Wi-Fi signal.
Once you’ve successfully navigated to the Wi-Fi settings and scanned for available networks, you’re now ready for the next step: selecting your Wi-Fi network. We’ll guide you through this step in the following section.
Step 4: Scanning for available networks
Now that you’ve navigated to the Wi-Fi settings menu, it’s time to scan for available networks. This process will allow your DS to detect the Wi-Fi networks within range so that you can choose the one you want to connect to.
Within the Wi-Fi settings menu, you should see an option labeled “Search for an Access Point” or something similar. Select this option to initiate the scanning process. The DS will then scan the area for available Wi-Fi networks and display them on the screen.
As the DS scans for networks, you’ll see a list of network names, also known as Service Set Identifiers (SSIDs), along with any security icons that indicate password-protected networks. Take note of the network names, as you’ll need to select your desired network in the next step.
If the scanning process does not yield any results, ensure that your DS is within range of a Wi-Fi signal. Move closer to your Wi-Fi router and try scanning again. It’s also a good idea to check if your Wi-Fi router is powered on and broadcasting the Wi-Fi signal.
When scanning for available networks, keep in mind that you may see networks from neighbors or nearby businesses. Ensure that you select your own network, as connecting to someone else’s network without permission is not only ethically wrong but also potentially illegal.
Once the DS has finished scanning for available networks and displayed them on the screen, you’re now ready for the next step: selecting your Wi-Fi network. This will allow you to establish a connection to the desired network and move closer to enjoying the benefits of online gaming and more. We’ll guide you through the process of selecting your Wi-Fi network in the following section.
Step 5: Selecting your Wi-Fi network
After scanning for available networks, it’s time to select and connect to your desired Wi-Fi network. In this step, we’ll guide you through the process of selecting your Wi-Fi network on your DS.
In the Wi-Fi settings menu, you should see a list of available networks that were detected during the scanning process. These networks will be displayed with their respective network names or SSIDs.
Using the directional buttons on your DS, scroll through the list of available networks until you find your desired Wi-Fi network. Take note of the network name to ensure you’re selecting the correct one.
If your network is password-protected, you’ll see a security icon next to the network name. This indicates that you’ll need to enter the network password to connect to the Wi-Fi network. If your network does not require a password, you can proceed to the next step.
When selecting your Wi-Fi network, it’s crucial to choose the correct one. If you accidentally select the wrong network, you won’t be able to establish a successful connection. Double-check the network name and make sure it matches your intended network.
Note: If you don’t see your Wi-Fi network listed, it’s possible that your network is out of range or that the DS is not detecting it for other reasons. Try moving closer to your Wi-Fi router and rescan for networks. If the issue persists, there may be other factors affecting the network detection, which you should troubleshoot accordingly.
Once you’ve selected your Wi-Fi network, you’re now ready for the next step: entering the network password (if applicable). This is necessary for password-protected networks and ensures the security of your Wi-Fi connection. We’ll guide you through this step in the following section.
Step 6: Entering the network password
If you’ve selected a password-protected Wi-Fi network in the previous step, you will now need to enter the network password on your DS. This step ensures that you have permission to connect to the network and protects the security of the Wi-Fi connection.
When you select a password-protected network, your DS will prompt you to enter the network password. The password is case-sensitive, so be cautious when entering uppercase or lowercase letters.
Using the virtual keyboard on the DS screen, navigate to each character of the password and select it by tapping on the corresponding letter or number. Take your time to accurately enter the password to avoid any errors. You can use the directional buttons or the stylus to move between characters.
If you make a mistake while entering the password, use the backspace button on the virtual keyboard to delete the incorrect character and re-enter the correct one. If you’re unsure about the password, double-check with the Wi-Fi network owner or refer to your router’s documentation for the correct password.
It’s important to enter the correct password to establish a successful connection to the Wi-Fi network. If the password is entered incorrectly, your DS will be unable to connect, and you’ll need to re-enter the correct password.
Note: If your Wi-Fi network does not have a password, you can skip this step and proceed to the next step of connecting to the network. However, it’s always recommended to secure your Wi-Fi network with a password to protect your connection from unauthorized access.
Once you’ve entered the network password (if applicable), you’re now ready for the next step: connecting to the Wi-Fi network. This will establish a connection between your DS and the selected network, allowing you to access online features and enjoy online gaming. We’ll guide you through this final connection step in the following section.
Step 7: Connecting to the network
Now that you’ve selected your Wi-Fi network and entered the password (if applicable), it’s time to connect your DS to the Wi-Fi network. This step will establish a connection between your DS and the selected network, allowing you to access online features and enjoy online gaming.
After entering the network password, your DS will attempt to connect to the Wi-Fi network automatically. You will see a loading or connecting screen while the DS establishes the connection. The duration of this process may vary depending on the signal strength and network configuration.
If the connection is successful, your DS will display a confirmation message indicating that it has connected to the Wi-Fi network. This message may vary depending on your DS model, but it typically mentions a successful connection to the network.
If the connection is not successful, double-check that you’ve entered the correct network information and try connecting again. Ensure that you are within range of the Wi-Fi signal and that the network is functioning properly. If the issue persists, you may need to troubleshoot your network settings or seek assistance from your network administrator or Internet Service Provider (ISP).
Once your DS has successfully connected to the Wi-Fi network, you’re now ready for the final step: testing the connection. This step will verify that your DS is connected to the internet and can access online features correctly. We’ll guide you through the testing process in the next section.
Step 8: Testing the connection
After successfully connecting your DS to the Wi-Fi network, it’s important to test the connection to ensure that your DS can access the internet and all online features. This step will help you determine whether the connection was established correctly and if any further troubleshooting is necessary.
To test the connection on your DS, you can navigate to the online features or multiplayer section of a game that supports online play. Launch a game that you know has online capabilities, and look for an option to connect to the internet or access online features within the game’s menu.
Select the connect to the internet option within the game, and the DS will attempt to establish a connection to the game’s online servers. If the connection is successful, you’ll be able to access online features, such as multiplayer modes, downloadable content, or leaderboard rankings.
If you encounter any issues during the connection test, ensure that your Wi-Fi signal is strong and that you are within range of the Wi-Fi router. Check that the game or software you’re using is up to date and compatible with online play. If necessary, refer to the game’s manual or consult the online support resources for troubleshooting steps specific to your game or software.
If you’re able to access online features without any complications, congratulations! Your DS is successfully connected to the internet, and you can fully enjoy the online gaming experience and other online features.
Note: It’s always a good idea to test the connection periodically to ensure it remains stable. Wi-Fi connections can sometimes be affected by interference or changes in network settings. If you experience any issues with the connection, you may need to troubleshoot your network router or seek assistance from your network administrator or ISP.
With the connection successfully tested, you can now fully immerse yourself in the world of online gaming and enjoy the various online features available for your DS. Have fun exploring new games, downloading updates, and competing with players from around the world!
Conclusion
Connecting your DS to a Wi-Fi network allows you to unlock a world of online gaming and access various online features. By following the step-by-step process outlined in this guide, you can easily connect your DS to Wi-Fi and start enjoying the benefits of online connectivity.
Throughout the process, we covered powering on the DS, accessing the Settings menu, navigating to the Wi-Fi settings, scanning for available networks, selecting your Wi-Fi network, entering the network password (if applicable), connecting to the network, and testing the connection. Each step is essential to ensure a successful and stable Wi-Fi connection for your DS.
Remember to keep your DS within range of the Wi-Fi signal, and ensure that your network is functioning properly. If you encounter any issues during the process, refer to the troubleshooting tips mentioned or seek assistance from your network administrator or ISP.
Once your DS is connected to Wi-Fi, you can join online multiplayer matches, download new games and updates, access online leaderboards, and enjoy a wide range of online features available for your DS.
Stay up to date with the latest firmware updates for your DS model to ensure compatibility with online features and enhanced stability. Regularly testing the connection and maintaining a secure network environment will contribute to a smooth online gaming experience.
Now that you’re equipped with the knowledge of connecting your DS to Wi-Fi, it’s time to dive into the exciting world of online gaming. Get ready to explore, compete, and connect with gamers from all around the globe. Happy gaming!