Introduction
Welcome to this comprehensive guide on how to access a solid state drive (SSD) in an Asus laptop. Upgrading your laptop’s storage to an SSD can significantly enhance its performance and speed, allowing you to enjoy faster boot times, quicker file access, and a more responsive overall experience. Whether you’re a tech enthusiast or a casual user looking to optimize your laptop, this step-by-step tutorial will provide you with all the information you need to successfully access the SSD slot in your Asus laptop.
Asus is a well-known brand in the laptop industry, known for producing high-quality devices with advanced features. Many Asus laptops have a user-friendly design that makes accessing and upgrading components relatively straightforward. With a few simple tools and careful navigation, you’ll be able to locate and install the SSD into your Asus laptop with ease.
In this guide, we’ll walk you through the entire process, from gathering the necessary tools and materials to powering off the laptop, removing the access panel, and identifying the SSD slot. We’ll also cover how to properly install the SSD, secure the access panel, and power on your laptop again. By following these steps, you’ll be well on your way to unlocking the full potential of your Asus laptop and enjoying the benefits of improved storage performance.
Before we dive into the steps, it’s important to note that accessing and upgrading the SSD in your Asus laptop may void the warranty. If your device is still under warranty, it’s advisable to consult with the manufacturer or authorized service center to avoid any potential issues. However, if you’re confident in your technical abilities and understand the risks involved, let’s get started on accessing your Asus laptop’s solid state drive.
Step 1: Gather the necessary tools and materials
Before you begin accessing the solid state drive (SSD) in your Asus laptop, it’s essential to have the right tools and materials at hand. Ensuring that you have everything you need will make the process smoother and more efficient.
Here are the tools and materials you’ll need for this procedure:
- Phillips screwdriver: Most Asus laptops use Phillips screws, so having a screwdriver with the appropriate head size is crucial for removing the necessary screws.
- Anti-static wrist strap: An anti-static wrist strap is used to ground yourself and prevent any static electricity buildup that could potentially damage the internal components of your laptop.
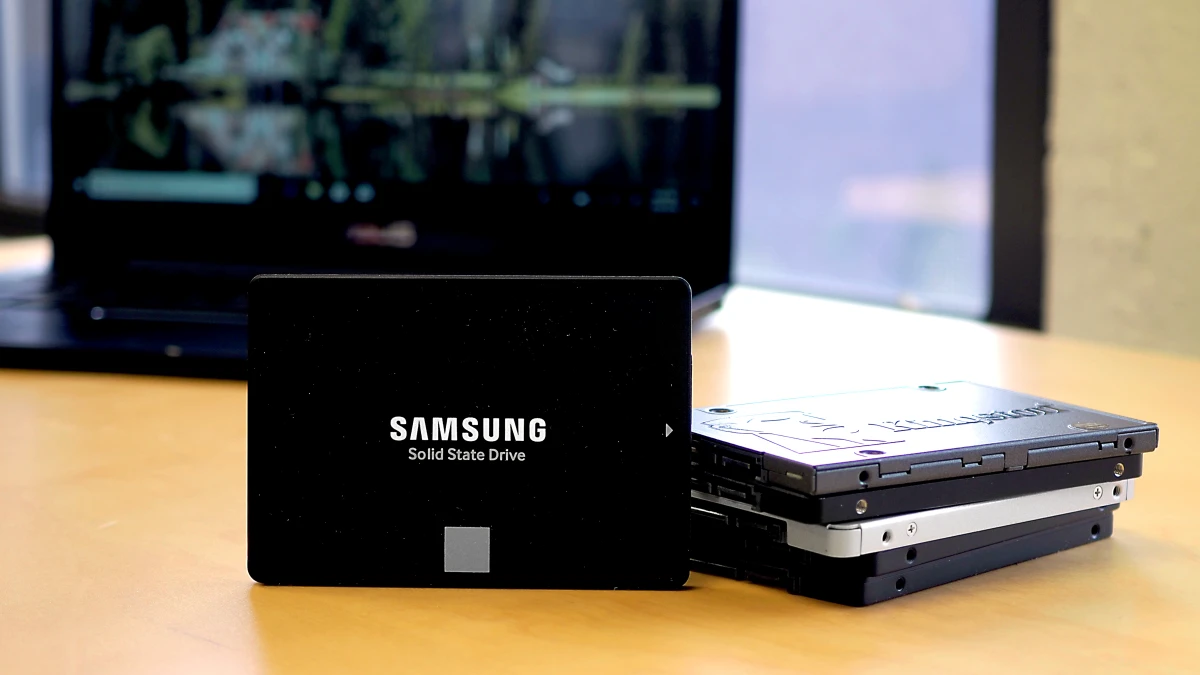
- SSD: Of course, you’ll need the SSD itself to upgrade your laptop’s storage. Ensure that it is compatible with your Asus laptop model.
- External storage: It’s a good idea to have an external storage device or cloud storage to back up your important files before performing any hardware changes.
- Cleaning cloth: A soft, lint-free cloth is useful for wiping off any dust or smudges that may accumulate during the process.
Having these tools and materials prepared will make the SSD installation process easier and more efficient. Make sure the screwdriver fits the screws on your specific Asus laptop model.
It’s worth noting that some Asus laptop models may require additional tools or have specific requirements during the SSD installation process. Checking the user manual or consulting Asus customer support can provide specific details for your laptop model.
Now that you have gathered all the necessary tools and materials, you’re ready to move on to the next step: powering off the Asus laptop and removing the battery.
Step 2: Power off the Asus laptop and remove the battery
Before accessing the solid state drive (SSD) in your Asus laptop, it’s important to power off the device and remove the battery. This ensures your safety and prevents any potential damage during the process.
Here’s how you can safely power off your Asus laptop and remove the battery:
- Save your work and close all applications: Before shutting down the laptop, save any unsaved work and close all open applications to prevent data loss.
- Shut down the laptop: Click on the Windows Start button and select the “Shut Down” option from the power menu. Allow the laptop to fully shut down before proceeding.
- Unplug the power adapter: Disconnect the power adapter from the laptop. This ensures that the device is not receiving any power during the process.
- Flip the laptop over: Turn the laptop over and place it on a flat, stable surface. Make sure the surface is clean and non-conductive.
- Locate the battery release latch or screws: Look for the battery release latch or screws on the bottom panel of your Asus laptop. The location may vary depending on the model.
- Remove the battery: If your laptop has a battery release latch, slide or push it in the direction indicated to release the battery. If there are screws, use the appropriate screwdriver to carefully unscrew and remove them. Gently lift the battery out of its compartment.
Removing the battery ensures that there is no power running through the laptop, reducing the risk of electrical damage during the SSD installation process.
Once you have successfully powered off your Asus laptop and removed the battery, you’re ready to move on to the next step: locating and removing the access panel.
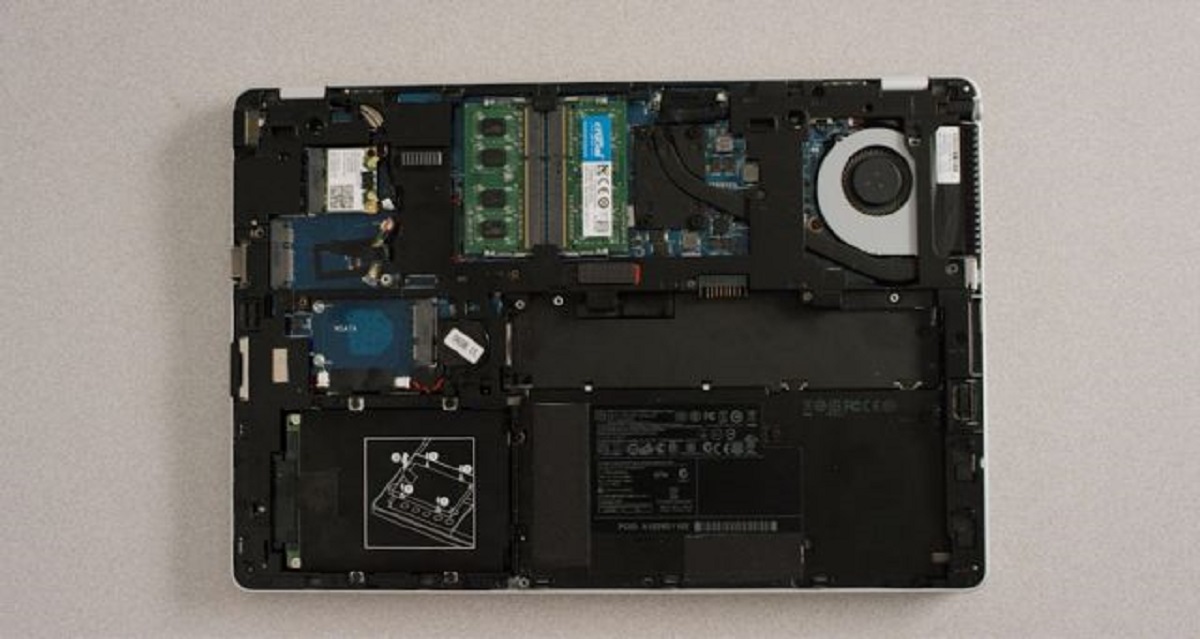
Step 3: Locate and remove the access panel
After powering off your Asus laptop and removing the battery, the next step in accessing the solid state drive (SSD) is to locate and remove the access panel. The access panel will provide you with direct access to the internal components of your laptop, including the SSD slot.
Follow these steps to locate and remove the access panel:
- Flip the laptop back over: Carefully flip your Asus laptop back to its original position.
- Examine the bottom panel: Inspect the bottom panel of your laptop and look for screws or a cover that is designed to be easily removed. The access panel is usually located on the underside of the laptop.
- Remove the screws or release the clips: If there are screws holding the access panel in place, use a screwdriver to carefully unscrew them. If the access panel is secured with clips, use a plastic pry tool or your fingers to release the clips and gently pry the panel open.
- Set the screws aside: As you remove the screws, place them in a safe location so you don’t lose them. Keeping the screws organized will make it easier to reassemble the laptop later.
- Remove the access panel: Once the screws are removed or the clips are released, lift the access panel off the bottom of the laptop. Be gentle and ensure you don’t force or damage the panel.
With the access panel successfully removed, you have gained access to the internal components of your Asus laptop, including the SSD slot. Take a moment to familiarize yourself with the internal layout and components before proceeding to the next step.
Now that you have located and removed the access panel, you’re ready to move on to the next step: identifying the solid state drive (SSD) slot.
Step 4: Identify the solid state drive (SSD) slot
With the access panel successfully removed from your Asus laptop, it’s time to identify the solid state drive (SSD) slot. Locating the SSD slot is essential before you can proceed with installing the SSD.
Follow these steps to identify the SSD slot:
- Examine the internal components: Take a moment to observe the internal layout of your Asus laptop. Look for any labeled slots or connectors that indicate the presence of the SSD slot. The design and placement may vary depending on your laptop model.
- Consult the user manual: If you are unsure about the location of the SSD slot, refer to the laptop’s user manual. The manual will provide detailed information and illustrations to help you identify the slot.
- Look for a rectangular slot: In most cases, the SSD slot will be a rectangular opening designed to accommodate the size of the solid state drive. It may be marked with the letters “SSD” or a similar indication.
- Inspect for securing mechanisms: Take note of any securing mechanisms near the SSD slot, such as screws or brackets. These mechanisms ensure that the SSD remains firmly in place once installed.
Identifying the SSD slot is crucial, as it ensures that you install the SSD in the correct location and avoid any potential damage to other components of your Asus laptop.
Once you have successfully located the SSD slot, you are ready to move on to the next step: installing the SSD into the slot.
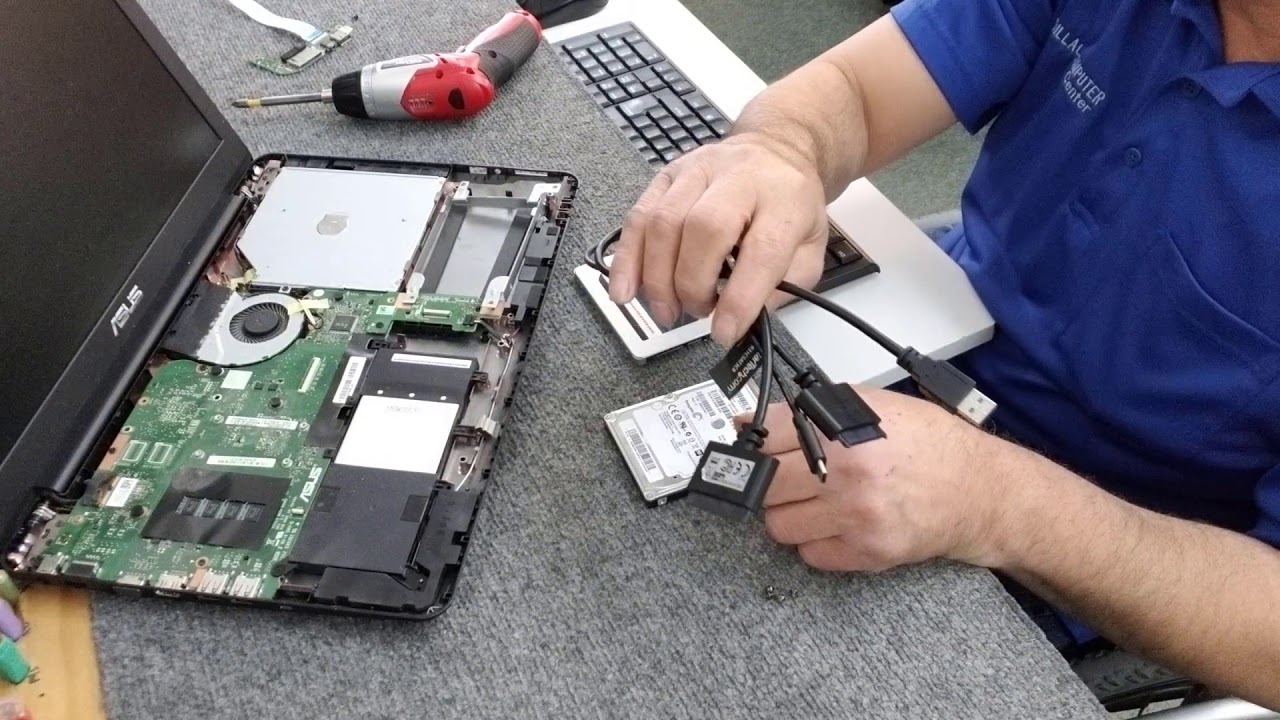
Step 5: Install the SSD into the slot
Now that you have identified the solid state drive (SSD) slot in your Asus laptop, it’s time to install the SSD into the slot. Proper installation ensures that the SSD is securely connected and ready to enhance the storage performance of your laptop.
Follow these steps to install the SSD into the slot:
- Handle the SSD with care: Avoid touching the golden connectors on the bottom of the SSD, as oil and dirt from your fingers may interfere with its performance. Hold the SSD by its sides or edges throughout the installation process.
- Align the SSD with the slot: Carefully align the SSD with the slot, ensuring that the connectors on the SSD align with the connectors in the slot. The SSD should fit snugly into the slot without any forceful pushing or wiggling.
- Slide the SSD into the slot: Gently push the SSD into the slot in a straight motion. Be cautious of any securing mechanisms or brackets near the slot and ensure that the SSD is properly attached to them, if applicable.
- Apply slight pressure: Once the SSD is fully inserted into the slot, apply slight pressure to ensure that it is properly seated. The SSD should be level with the surrounding surface of the laptop.
It’s important to note that different Asus laptop models may have varying installation procedures for the SSD. In some cases, you may need to use screws to secure the SSD in place. Refer to your laptop’s user manual or manufacturer’s instructions for any model-specific installation steps.
With the SSD successfully installed into the slot, you have taken a significant step towards improving the storage capabilities of your Asus laptop. Now, let’s move on to the next step: replacing the access panel and securing it.
Step 6: Replace the access panel and secure it
Now that you have installed the solid state drive (SSD) into the slot of your Asus laptop, it’s time to replace the access panel and securely fasten it. Properly securing the access panel is essential to protect the internal components and ensure the stability of your laptop.
Follow these steps to replace the access panel and secure it:
- Position the access panel: Align the access panel over the opening on the underside of your laptop. Make sure it is positioned correctly and matches the screw holes or clips.
- Replace the screws or fasten the clips: If your laptop’s access panel uses screws, carefully insert and tighten them using the appropriate screwdriver. If it utilizes clips, push down firmly but gently until the panel snaps into place.
- Tighten the screws appropriately: If your access panel requires screws, ensure that you tighten them snugly but not overly tight. Over-tightening can damage the panel or strip the screw threads.
- Double-check the alignment: Once the panel is back in place, inspect its alignment to ensure it sits flush and securely on the bottom of the laptop. There should be no gaps or loose areas.
Remember, different Asus laptop models may have various mechanisms for securing the access panel. If you encounter any difficulty or are unsure about the installation process, consult your laptop’s user manual or refer to the manufacturer’s instructions for specific guidance.
By properly replacing and securing the access panel, you have completed a crucial step in the SSD installation process. Now it’s time to move on to the final step: reinserting the laptop battery and powering on your Asus laptop.
Step 7: Reinsert the laptop battery and power on the Asus laptop
Now that you have successfully replaced and secured the access panel of your Asus laptop, it’s time to reinsert the battery and power on the device. This final step will allow you to complete the SSD installation process and start enjoying the improved storage performance.
Follow these steps to reinsert the battery and power on your Asus laptop:
- Retrieve the laptop battery: Take the battery that you removed earlier and ensure it is clean and free from any dust or debris. If necessary, wipe it with a soft, lint-free cloth.
- Align the battery: Position the battery correctly by aligning its connectors with the corresponding connectors inside the battery compartment of your Asus laptop.
- Press down to secure the battery: Once the battery is properly aligned, press it firmly into the compartment until you hear a click or feel it securely snap into place.
- Power on your Asus laptop: With the battery reinserted, press the power button on your laptop to turn it on. Wait for the laptop to boot up, and you should now have access to your newly installed SSD.
- Verify the SSD installation: After the laptop has finished booting, go to the system settings or the storage management section to confirm that your Asus laptop recognizes and detects the newly installed SSD.
If your laptop fails to recognize the SSD or you encounter any issues during the startup process, double-check the installation steps to ensure that the SSD is properly installed and securely connected. If problems persist, consult with the manufacturer or professional technicians for further assistance.
Congratulations! You have successfully completed the process of reinserting the laptop battery and powering on your Asus laptop. Enjoy the enhanced storage performance and the improved overall experience with your upgraded SSD.
Conclusion
Upgrading the storage of your Asus laptop by accessing and installing a solid state drive (SSD) is a rewarding process that can significantly enhance your laptop’s performance. By following the step-by-step guide provided in this article, you have learned how to successfully access the SSD slot in your Asus laptop and install the SSD with precision.
Throughout the process, we covered various key steps, including gathering the necessary tools and materials, powering off the laptop, removing the battery, locating and removing the access panel, identifying the SSD slot, installing the SSD, replacing and securing the access panel, and finally reinserting the laptop battery and powering on the Asus laptop.
It’s vital to remember that accessing and upgrading the SSD in your Asus laptop may void the warranty, and it’s crucial to consult the manufacturer’s guidelines or professional technicians if your device is still under warranty. Additionally, always handle the SSD and other internal components with care to prevent any damage.
By upgrading your laptop’s storage to an SSD, you can enjoy faster boot times, quicker file access, and an overall more responsive computing experience. Your Asus laptop will be able to handle multitasking, demanding applications, and data-intensive activities with ease.
Don’t forget to back up important files before performing any hardware changes and regularly maintain your laptop along with the newly installed SSD to ensure optimal performance. Regularly updating your system and software will also help to maximize the benefits of the new SSD.
Now that you have successfully accessed and installed the SSD in your Asus laptop, take some time to appreciate the improved performance and efficiency that comes with the upgrade. Enjoy the enhanced speed, responsiveness, and storage capacity as you continue to use your laptop for work, entertainment, or any other purpose.
Thank you for following this comprehensive guide, and we hope it has been helpful in your journey to upgrade your Asus laptop with an SSD.