Introduction
Updating your Android tablet is essential to ensure you have access to the latest features, improvements, and security patches. Regular updates can enhance your device’s performance and provide a better user experience. Whether you’ve just purchased a new tablet or are using an older model, keeping your Android operating system up to date should be a priority.
In this article, we will guide you through the process of updating your Android tablet. We’ll explore different methods, including updating over Wi-Fi and using your computer. Additionally, we’ll provide solutions for troubleshooting common update issues.
Before diving into the update process, it’s crucial to back up your important data, such as photos, videos, and documents. While updating your tablet shouldn’t erase any data, it’s always better to be safe than sorry. In case anything goes wrong during the update, having a backup will ensure you don’t lose any valuable information.
Remember that the update process may vary slightly depending on the tablet’s make, model, and version of the Android operating system. However, the overall steps remain similar across most devices.
So let’s get started and learn how to update your Android tablet to unlock its full potential!
Checking for Updates
Before you can update your Android tablet, you need to make sure that a new update is available. Here’s how you can check for updates:
- Open the “Settings” app on your tablet. You can usually find it in the app drawer or by swiping down from the top of the screen and tapping the gear icon.
- Scroll down and look for the “System” or “Software Update” option. The exact name may vary depending on your device.
- Tap on the “System” or “Software Update” option to access the update settings.
- Now, tap on the “Check for Updates” or “Check Now” button. Your tablet will then connect to the server to check for any available updates.
- If an update is available, you will be prompted to download and install it. Make sure you are connected to a stable Wi-Fi network to avoid any interruptions during the update process.
- Follow the on-screen instructions to initiate the update. Your tablet will restart during the update process, so be patient and do not turn off the device.
- If your tablet is up to date, you will see a message stating that “Your device is up to date” or something similar. In this case, you can continue using your tablet as usual.
It is important to note that not all tablets receive regular updates, especially older models. Manufacturers and carriers prioritize updates for newer and popular devices. However, checking for updates periodically ensures that you don’t miss any available updates for your tablet.
Now that you know how to check for updates, let’s move on to the next section to learn how to update your Android tablet over Wi-Fi.
Updating via Wi-Fi
Updating your Android tablet over Wi-Fi is the most common and convenient method. Follow these steps to update your tablet using Wi-Fi:
- Ensure that your tablet is connected to a stable Wi-Fi network. Open the “Settings” app and navigate to the “Wi-Fi” section. Select your Wi-Fi network and enter the password if prompted.
- Once connected, go back to the “Settings” app and scroll down to find the “System” or “Software Update” option. Tap on it to access the update settings.
- Tap on the “Check for Updates” or “Check Now” button to see if an update is available.
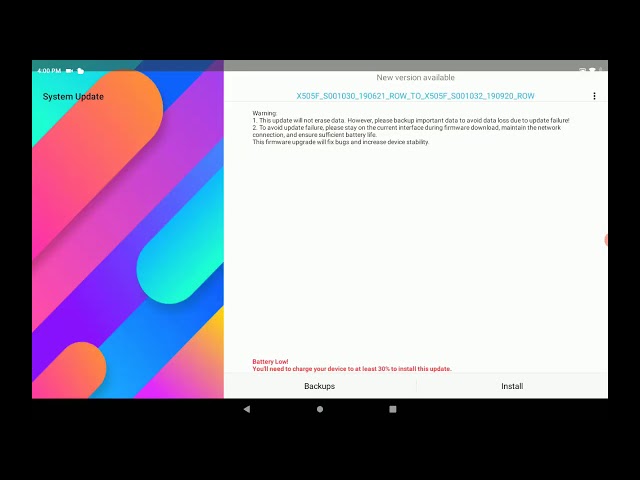
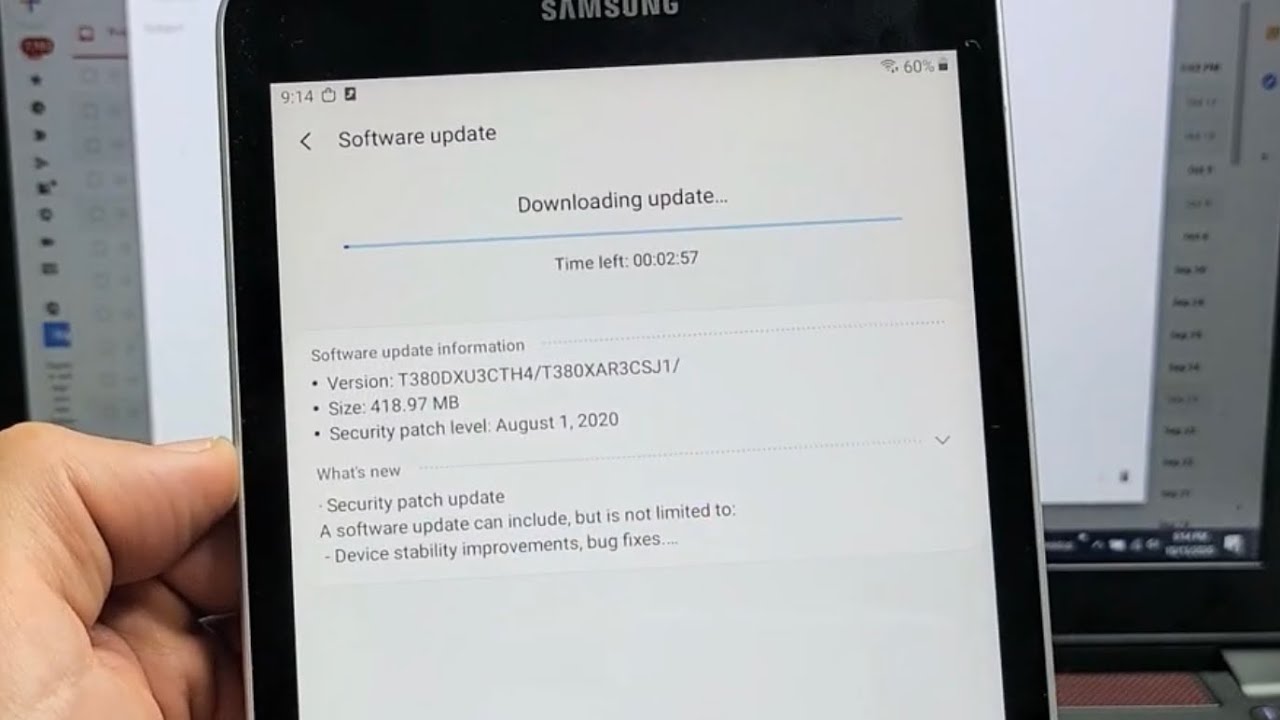
- If an update is available, you will be prompted to download and install it. Make sure your tablet is connected to a power source to avoid any interruptions during the update process.
- Tap on the “Download” button to initiate the update. The download time may vary depending on the size of the update and the speed of your internet connection. Be patient and avoid interrupting the download process.
- Once the download is complete, tap on the “Install” button to start the installation process. Your tablet will restart, and the installation may take some time. Do not turn off your tablet during this process.
- After the installation is complete, your tablet will restart again, and you’ll see a message confirming the successful update. You can now start using your tablet with the latest Android version.
If your tablet is not connected to Wi-Fi, you can still update it using mobile data. However, keep in mind that updates can be large in size, so make sure you have a generous mobile data plan to avoid excessive charges.
Now that you know how to update your tablet via Wi-Fi, let’s explore another method of updating using a computer in the next section.
Updating via PC
If you prefer to update your Android tablet using your computer, you can do so by following these steps:
- Connect your tablet to your computer using a USB cable. Ensure that the cable is properly connected to both the tablet and the computer.
- On your computer, open a web browser and visit the official website of your tablet’s manufacturer.
- Look for the “Support” or “Downloads” section on the manufacturer’s website. Navigate to the page that offers firmware or software updates for your tablet.
- Enter your tablet’s model number and the current version of the Android operating system to filter the available updates specifically for your device.
- Download the update file to your computer. It usually comes in the form of a compressed ZIP file.
- Extract the contents of the ZIP file to a folder on your computer.
- Locate the extracted update file, which typically has an extension like “.img” or “.bin”.
- Open the “Settings” app on your tablet and navigate to the “System” or “Software Update” section, just like in the previous methods.
- Tap on the “Check for Updates” or “Check Now” button to see if an update is available. If an update is found, you will see an option to install it manually.
- Select the option to install the update manually and browse to the folder where you extracted the update file on your computer.
- Follow the on-screen instructions to install the update from your computer to your tablet. Be patient as the installation process may take some time.
- Once the update is installed, your tablet will restart, and you can start using it with the latest Android version.
Updating your tablet via PC gives you more control over the update process and allows you to manually install updates if they are not available over Wi-Fi.
Now that you know how to update your tablet using both Wi-Fi and a computer, let’s move on to the next section to troubleshoot any update issues you may encounter.
Troubleshooting Update Issues
While updating your Android tablet is usually a smooth process, you may encounter some issues along the way. Here are some common problems and their possible solutions:
- Slow or Stuck Download: If the update download is taking longer than expected or appears to be stuck, make sure you have a stable internet connection. Switch to a different Wi-Fi network or restart your router if necessary. If the problem persists, try downloading the update at a later time.
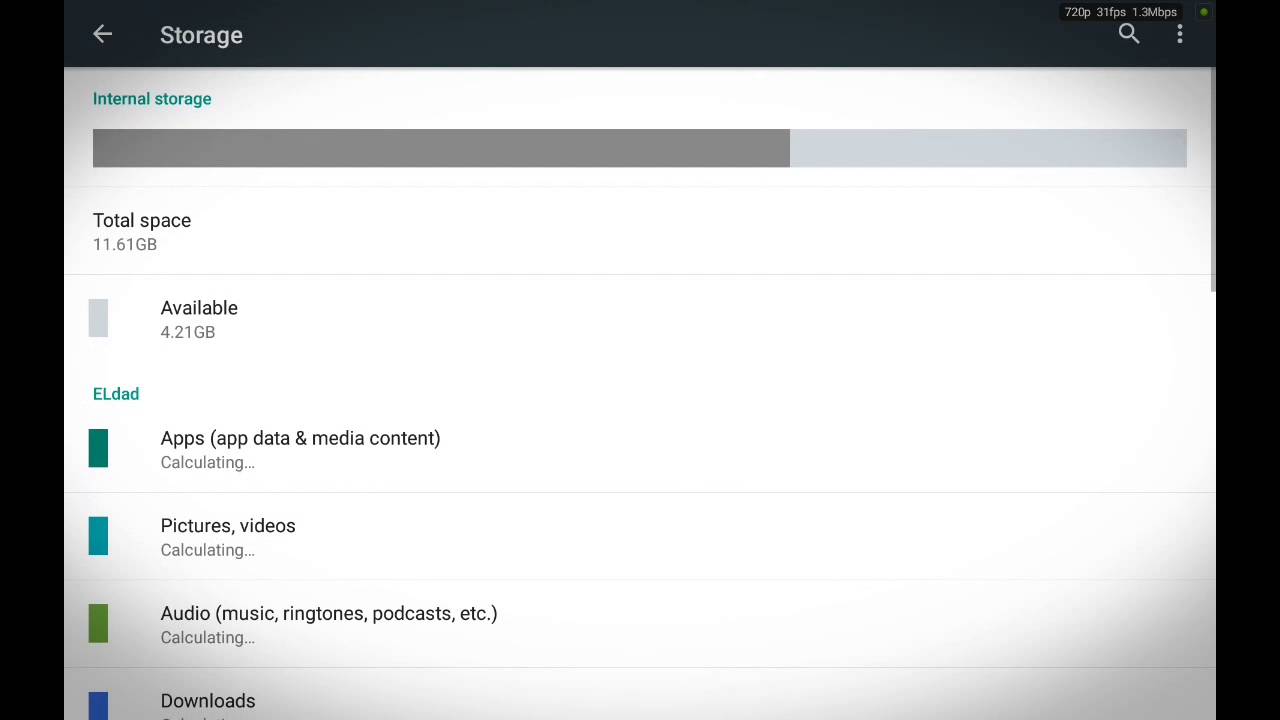
- Insufficient Storage: If your tablet doesn’t have enough free storage space, the update may fail to download or install. Check the available storage on your tablet and delete unnecessary files or apps to free up space. Alternatively, insert a microSD card and set it as the default storage location for downloads.
- Update Fails to Install: If the update fails to install, restart your tablet and try again. Make sure your tablet’s battery level is sufficient or connect it to a power source during the installation. If the problem persists, consider factory resetting your tablet and then attempting the update again.
- Wi-Fi Connection Drops: If your Wi-Fi connection keeps dropping during the update process, move closer to the router to ensure a stable signal. You can also restart your router or try connecting to a different network. If the issue persists, consider updating your tablet using a wired connection to your computer.
- System Error or Boot Loop: In rare cases, an update may cause your tablet to encounter a system error or get stuck in a boot loop. If this happens, try booting your tablet into recovery mode and clearing the system cache. If the problem persists, you might need to contact the manufacturer’s customer support or visit a service center for assistance.
If you are still experiencing difficulties with updating your Android tablet after trying these troubleshooting steps, it is recommended to reach out to the manufacturer’s support team for further assistance. They will be able to guide you through specific solutions for your tablet model and help resolve any issues you may encounter during the update process.
Now that you are aware of common update issues and their solutions, let’s wrap up this article.
Conclusion
Updating your Android tablet is crucial for optimizing performance, accessing new features, and ensuring the security of your device. In this article, we explored different methods for updating your tablet, including updating over Wi-Fi and using your computer. We also provided troubleshooting tips for common update issues.
Checking for updates is the first step in the update process. Make sure you have a stable Wi-Fi connection and navigate to the “System” or “Software Update” option in the “Settings” app to check for available updates. If your tablet is up to date, you will be notified accordingly.
Updating your tablet over Wi-Fi is the most convenient method. Simply ensure you are connected to a stable Wi-Fi network, check for updates, and follow the on-screen instructions to download and install the update. It is important to have your tablet connected to a power source during the process to avoid any interruptions.
If you prefer to update your tablet via your computer, visit the manufacturer’s website, download the update file, and follow the instructions to install it manually. Connecting your tablet to your computer using a USB cable is necessary for this method.
Throughout the update process, you may encounter certain issues. Slow downloads, insufficient storage, installation failures, and Wi-Fi connection drops are common problems you may face. However, following the troubleshooting steps provided can help resolve these issues and ensure a successful update.
Remember, it’s always a good practice to regularly check for updates for your tablet. Manufacturers frequently release updates to enhance performance, fix bugs, and improve security. By keeping your tablet up to date, you can enjoy the latest features and ensure the best possible user experience.
If you encounter persistent update issues or have specific questions regarding your tablet model, don’t hesitate to reach out to the manufacturer’s support team for further assistance. They will be able to provide you with personalized guidance to resolve any problems you may face during the update process.
Now that you have learned how to update your Android tablet, you can stay up to date with the latest software and unlock the full potential of your device. Enjoy your updated tablet and all the exciting features it has to offer!