Tools Needed
When it comes to changing the power supply unit (PSU) of your Mac Pro, it is essential to have the right tools on hand. Having the proper equipment will not only make the process smoother, but it will also ensure that you can complete the task safely and effectively. Here are the tools you will need to successfully change the PSU in your Mac Pro:
- Phillips screwdriver: A Phillips screwdriver is a must-have tool for removing the screws that hold the Mac Pro’s side panel in place.
- Torx screwdriver: Some Mac Pro models require a Torx screwdriver to remove specific screws. Check your Mac Pro’s documentation or consult with an expert to determine if you need a Torx screwdriver.
- Anti-static wrist strap: When working with delicate electronic components like the PSU, it is crucial to protect them from electrostatic discharge. An anti-static wrist strap will ground you and prevent any static electricity from damaging your Mac Pro.
- Soft cloth: A soft cloth will come in handy for wiping away any dust or debris from the internal components of your Mac Pro.
- Cable ties or Velcro straps: After installing the new PSU, you may need cable ties or Velcro straps to neatly organize and secure the cables inside your Mac Pro’s case.
Having these tools at your disposal will help you complete the power supply replacement process with ease. Remember to always exercise caution and follow proper safety precautions when working on any electronic device. Now that you’re equipped with the necessary tools, it’s time to move on to the next steps in replacing the power supply unit of your Mac Pro.
Safety Precautions
When working with electrical components, it is crucial to prioritize safety to avoid any accidents or damage. Before you begin changing the power supply unit (PSU) of your Mac Pro, be sure to follow these safety precautions:
- Turn off and unplug: Before you start any work on your Mac Pro, make sure it is turned off and unplugged from the power source. This will prevent any electric shock or accidental power surges.
- Ground yourself: To protect sensitive electronic components from electrostatic discharge, it is essential to ground yourself. Wear an anti-static wrist strap and connect it to a grounded object, such as a metal part of your Mac Pro’s chassis.
- Work in a clean environment: Choose a clean and dust-free workspace to avoid any dust or debris from entering your Mac Pro. Dust particles can cause damage to the internal components, especially when working with delicate components like the PSU.
- Handle components with care: Be gentle when handling the power supply unit and other internal components. Avoid applying excessive pressure or dropping them, as this can lead to damage or malfunction.
- Avoid static electricity: Avoid wearing clothing made from synthetic materials that generate static electricity. Additionally, do not work on carpeted surfaces or wear rubber-soled shoes, as both can contribute to the build-up of static charge.
- Follow manufacturer instructions: Always consult the manufacturer’s instructions for your specific Mac Pro model to ensure you are following the correct steps and guidelines for replacing the power supply unit.
- Double-check connections: After installing the new PSU, check that all cables and connections are securely and correctly in place. Loose or improperly connected cables can cause power issues or damage to your Mac Pro.
By adhering to these safety precautions, you can minimize the risk of accidents and protect your Mac Pro from potential damage. Remember, if you’re unsure about any step or encounter any difficulties during the process, it is always best to seek professional assistance. Now that you are familiar with the safety precautions, let’s move on to the step-by-step process of changing the PSU in your Mac Pro.
Step 1: Disconnect the Power
Before you begin working on your Mac Pro, it is crucial to disconnect the power to ensure your safety and prevent any electrical mishaps. Follow these steps to properly disconnect the power:
- Shut down your Mac Pro: If your Mac Pro is powered on, navigate to the Apple menu and choose the “Shut Down” option. Allow your Mac Pro to completely shut down before proceeding.
- Unplug the power cord: Locate the power cord connected to the back of your Mac Pro and gently unplug it from the power outlet. Make sure to grip the plug itself and not pull on the cord to avoid any damage.
- Disconnect all peripheral devices: If you have any external devices (such as monitors, speakers, or hard drives) connected to your Mac Pro, disconnect them as well. This will ensure that there are no additional power sources connected during the PSU replacement process.
- Wait for residual power to dissipate: Even after unplugging your Mac Pro and shutting it down, there may still be some residual power within the system. To be safe, wait for a few minutes to allow any remaining power to dissipate before proceeding to the next steps.
By following these steps, you have successfully disconnected the power from your Mac Pro. This ensures that you can work on the internal components without any risk of electrical shock. Remember, safety should always be your top priority when working with electronic devices. Now, let’s proceed to the next step of removing the side panel of your Mac Pro.
Step 2: Remove the Side Panel
Now that the power has been disconnected from your Mac Pro, it’s time to remove the side panel to gain access to the internal components. Follow these steps to remove the side panel:
- Lay your Mac Pro on a flat surface: Place your Mac Pro on a stable and flat surface to ensure stability and ease of access.
- Locate the side panel release latch: Look for the latch located at the rear of your Mac Pro. This latch is usually indicated by an arrow or a lock symbol.
- Slide the release latch: Slide the release latch in the direction indicated by the arrow or symbol. This will unlock the side panel from the chassis.
- Remove the side panel: Once the latch is released, gently slide the side panel towards the rear of the Mac Pro. The panel should slide off smoothly, revealing the internal components.
- Set aside the side panel in a safe place: Place the side panel in a secure location away from your work area to prevent any accidental damage or misplacement.
With the side panel removed, you now have clear access to the internal components of your Mac Pro. Remember to handle the side panel with care to avoid any dents, scratches, or other damage. Now that the side panel is safely removed, let’s move on to the next step of locating the power supply unit inside your Mac Pro.
Step 3: Locate the Power Supply
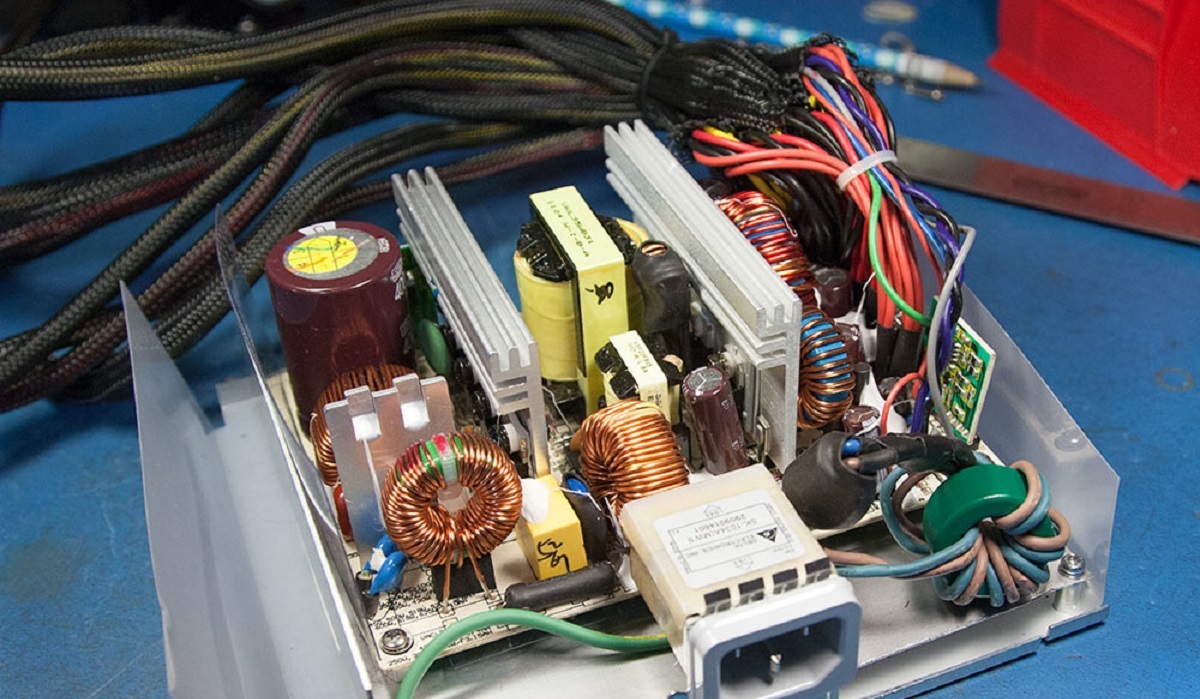
With the side panel of your Mac Pro removed, it’s time to locate the power supply unit (PSU) within the chassis. The PSU is a vital component that provides power to all the other hardware components. Follow these steps to locate the power supply:
- Take a look inside the Mac Pro: Gently examine the internal area of your Mac Pro, focusing on the lower rear section of the chassis. This is where the power supply unit is typically located.
- Identify the PSU enclosure: Look for a rectangular or square-shaped metal enclosure that houses the PSU. It will have a fan attached to it for cooling purposes.
- Check for cables connected to the PSU: Take note of the cables that are connected to the power supply unit. These cables provide power to various components within your Mac Pro, such as the motherboard and storage drives.
It’s important to familiarize yourself with the location and appearance of the power supply within your Mac Pro before proceeding further. This will make it easier to identify and safely disconnect the necessary cables in the next step. Now that you’ve located the power supply unit, let’s move on to the next step of disconnecting the cables.
Step 4: Disconnect Cables
Before removing the power supply unit (PSU) from your Mac Pro, it’s crucial to disconnect all the necessary cables attached to it. Following these steps will ensure a safe and successful disconnection of the cables:
- Refer to your Mac Pro’s documentation: Different Mac Pro models may have slightly different cable configurations. It’s important to consult the documentation specific to your model or seek expert advice to identify the cables that need to be disconnected.
- Identify the cables connected to the PSU: Locate the cables connected to the power supply unit. These typically include the main power cable, SATA power cables for storage drives, and any other peripheral power cables. Take note of their positions and connections to avoid confusion during reinstallation.
- Begin disconnecting the cables: Starting with the main power cable, gently unplug it from the PSU. Be careful not to pull on the cable itself to avoid damaging it. Proceed to disconnect the other cables, ensuring a firm yet gentle grip to avoid any accidental damage.
- Organize and secure the disconnected cables: As you disconnect each cable, it’s a good practice to organize and secure them using cable ties or Velcro straps. This will help prevent tangling and make the reconnection process easier.
By following these steps, you will properly disconnect the necessary cables from the power supply unit. Take your time during this process and ensure you handle the cables and connectors with care. Now that the cables are disconnected, let’s move on to the next step of removing the power supply unit from your Mac Pro.
Step 5: Remove the Power Supply
Now that you have disconnected all the necessary cables, it’s time to remove the power supply unit (PSU) from your Mac Pro. Follow these steps to safely remove the PSU:
- Locate the screws securing the power supply: Take a close look at the power supply unit and identify the screws that hold it in place. These screws can typically be found on the sides or the back of the power supply enclosure.
- Use a screwdriver to remove the screws: Select the appropriate screwdriver, typically a Phillips or Torx, based on the type of screws used. Carefully unscrew the screws, making sure not to strip them or cause any damage to the surrounding components.
- Gently slide out the power supply: Once the screws are removed, grasp the power supply unit firmly and gently slide it out of its housing. Take care not to tug on any remaining cables or components that may still be connected.
- Set aside the old power supply: Place the removed power supply in a safe and clean location to prevent any accidental damage. You may want to keep it for reference or disposal according to local regulations.
With the power supply unit successfully removed, you are one step closer to installing the new PSU in your Mac Pro. Keep the removed power supply in a secure place until you have completed the replacement process. Now, let’s move on to the next step of installing the new power supply unit.
Step 6: Install the New Power Supply
With the old power supply unit (PSU) removed, it’s time to install the new power supply in your Mac Pro. Follow these steps to ensure a proper and secure installation:
- Verify compatibility: Ensure that the new power supply is compatible with your specific Mac Pro model. Refer to the manufacturer’s documentation or consult an expert to confirm compatibility.
- Position the new PSU: Take the new power supply unit and align it with the empty slot where the old PSU was removed. Make sure the connections and ports are in the correct orientation.
- Slide the new power supply into place: Gently and firmly slide the new power supply unit into the slot, ensuring a snug fit. It should align properly with the screw holes and the chassis of your Mac Pro.
- Secure the new power supply: Use the screws that came with the new power supply to secure it in place. Gradually tighten the screws, alternating among them, to ensure even pressure and a secure installation.
- Double-check the connections: Verify that all the cables and connectors are properly aligned and connected to the new power supply unit. Ensure that nothing is loose or dangling.
Properly installing the new power supply is essential for the optimal functioning of your Mac Pro. Take your time and ensure that everything is securely in place before moving on to the next step. Now that the new power supply is installed, let’s proceed to the next step of reconnecting the cables.
Step 7: Reconnect Cables
Now that you have installed the new power supply unit (PSU), it’s important to reconnect all the cables to ensure proper functionality. Follow these steps to securely reconnect the cables:
- Refer to your documentation: Consult your Mac Pro’s documentation or the manufacturer’s instructions to identify the cables and their respective connections.
- Connect the main power cable: Start by reconnecting the main power cable to the appropriate port on the new power supply. Ensure a firm connection, but avoid using excessive force.
- Reattach the peripheral cables: Connect the SATA power cables to the storage drives, as well as any other peripheral power cables that were previously disconnected. Make sure each cable is securely plugged into its respective port.
- Organize and secure the cables: As you reconnect the cables, use cable ties or Velcro straps to organize and secure them. This helps maintain a clean and clutter-free internal environment.
- Carefully inspect the connections: Double-check that all the cables are properly connected and aligned. Ensure that no cables are twisted or pinched, as this could affect your Mac Pro’s functionality.
Taking the time to carefully reconnect all the cables ensures that your Mac Pro will receive the necessary power and function properly. Pay attention to the proper alignment and connections to avoid any potential issues. With the cables securely reconnected, it’s time to move on to the next step of replacing the side panel of your Mac Pro.
Step 8: Replace the Side Panel
With the power supply unit (PSU) in place and all the cables reconnected, it’s time to put the side panel back on your Mac Pro. Follow these steps to securely replace the side panel:
- Position the side panel: Hold the side panel in the correct orientation and align it with the opening on the Mac Pro’s chassis.
- Slide the side panel into place: Carefully slide the side panel towards the front of the Mac Pro until it fits snugly into the chassis. Be mindful of any cables or components that may interfere and gently adjust them if necessary.
- Ensure a secure fit: Once the side panel is in place, check for any gaps or misalignments. It should fit flush with the Mac Pro’s chassis, with no protrusions or loose edges.
- Secure the side panel: Locate the side panel release latch and slide it back into the locked position. This will secure the side panel in place and prevent it from accidentally coming off.
- Double-check the side panel: Give the side panel a gentle push to ensure it is securely fastened. Check all sides and edges to ensure a proper fit and a seamless appearance.
By following these steps, you have successfully replaced and secured the side panel of your Mac Pro. This ensures that all internal components are protected and helps maintain proper ventilation. With the side panel in place, you’re almost done. Let’s proceed to the final step of reconnecting the power to your Mac Pro.
Step 9: Reconnect the Power
After completing the necessary steps to replace the power supply unit (PSU) and securing the side panel, it’s time to reconnect the power to your Mac Pro. Follow these steps to safely reconnect the power:
- Check the power cord: Ensure that the power cord is in good condition, without any frayed ends or signs of damage. If there are any concerns, it’s best to replace the power cord.
- Plug in the power cord: Locate the power cord connection on the back of your Mac Pro and firmly plug it into the power outlet. Ensure that it is securely and properly connected.
- Switch on the power: Locate the power switch on your Mac Pro, usually located at the back or the side of the chassis. Flip the switch to the “On” position.
- Verify power supply functionality: Pay attention to any LED indicators or fans on the power supply to ensure it is receiving power and functioning properly.
- Power on your Mac Pro: Press the power button on your Mac Pro and allow the system to start up. Monitor the startup process to confirm that your Mac Pro is receiving power and functioning normally.
By following these steps, you have successfully reconnected the power to your Mac Pro after replacing the power supply unit. Take a moment to ensure that everything is functioning correctly and that your Mac Pro is powering up without any issues. Congratulations on completing the power supply replacement process!
Conclusion
Changing the power supply unit (PSU) in your Mac Pro may seem like a daunting task, but by following the step-by-step process outlined above, you can successfully replace the PSU with ease. Throughout this guide, we have covered the necessary tools needed, safety precautions to take, and the sequential steps required to complete the power supply replacement.
Remember to have the proper tools on hand, such as screwdrivers, an anti-static wrist strap, and cable ties or Velcro straps. Plus, always prioritize safety by disconnecting the power, working in a clean environment, and handling components with care to avoid any damage or accidents.
We covered the step-by-step process, including removing the side panel, locating the power supply, disconnecting the cables, removing the old power supply, installing the new power supply, reconnecting the cables, replacing the side panel, and finally, reconnecting the power. By following these steps, you can successfully replace the power supply unit in your Mac Pro.
It’s important to note that if you are unsure about any step or encounter any difficulties during the process, it is always recommended to seek professional assistance. They will have the expertise and knowledge to guide you through the process and ensure a successful replacement.
By replacing the power supply, you can ensure your Mac Pro continues to receive the necessary power for optimal performance and functionality. Whether you’re upgrading to a more powerful PSU or replacing a faulty one, taking the time to replace the PSU will greatly contribute to the overall performance and longevity of your Mac Pro.
Always refer to the manufacturer’s documentation for your specific Mac Pro model and consult an expert if needed. With proper preparation, safety precautions, and a careful step-by-step approach, you can confidently replace the power supply unit in your Mac Pro and continue using it for years to come.


