Introduction
Are you tired of your iPhone's default hotspot name and eager to personalize it to reflect your unique style or make it easier to identify among other available networks? Changing the hotspot name on your iPhone is a simple yet effective way to add a personal touch to your device and enhance its usability. Whether you want to give your hotspot a fun and memorable name or simply make it more recognizable, this user-friendly guide will walk you through the step-by-step process of updating your iPhone's hotspot name.
By customizing your hotspot name, you can make it more convenient for friends, family, or colleagues to connect to your network, especially in crowded Wi-Fi environments where multiple hotspots are available. Additionally, a personalized hotspot name can add a touch of personality to your device and make it easier to identify when you or others are searching for available networks.
In the following sections, we will explore the simple steps to access and modify your iPhone's hotspot name, allowing you to tailor it to your preferences with ease. Whether you're a tech-savvy individual or someone who is new to navigating device settings, this guide is designed to be accessible and straightforward, ensuring that you can effortlessly customize your hotspot name without any hassle.
Now, let's embark on this journey to personalize your iPhone's hotspot name and make it uniquely yours. With a few simple steps, you'll be able to give your hotspot a distinct identity and enhance your overall user experience. Let's get started!
Step 1: Accessing the Settings
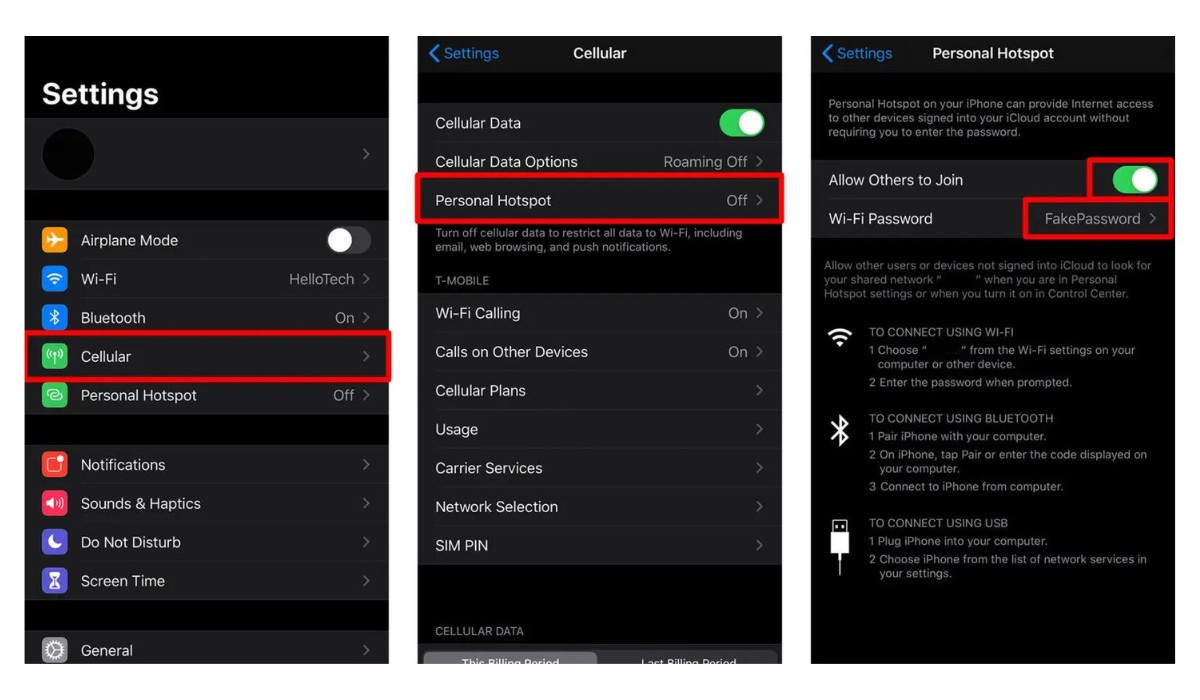
Accessing the settings on your iPhone is the first step towards customizing your hotspot name. To begin, unlock your iPhone by entering your passcode or using Face ID or Touch ID. Once you have accessed the home screen, look for the "Settings" app. This app is represented by a gear icon and is typically located on the first page of your home screen or within a folder labeled "Utilities."
Upon locating the "Settings" app, tap on it to open the settings menu. As you enter the settings, you will be greeted by a plethora of options, ranging from general preferences to personalized configurations for various apps and features. The settings menu serves as the control center for your iPhone, allowing you to tailor the device to your specific needs and preferences.
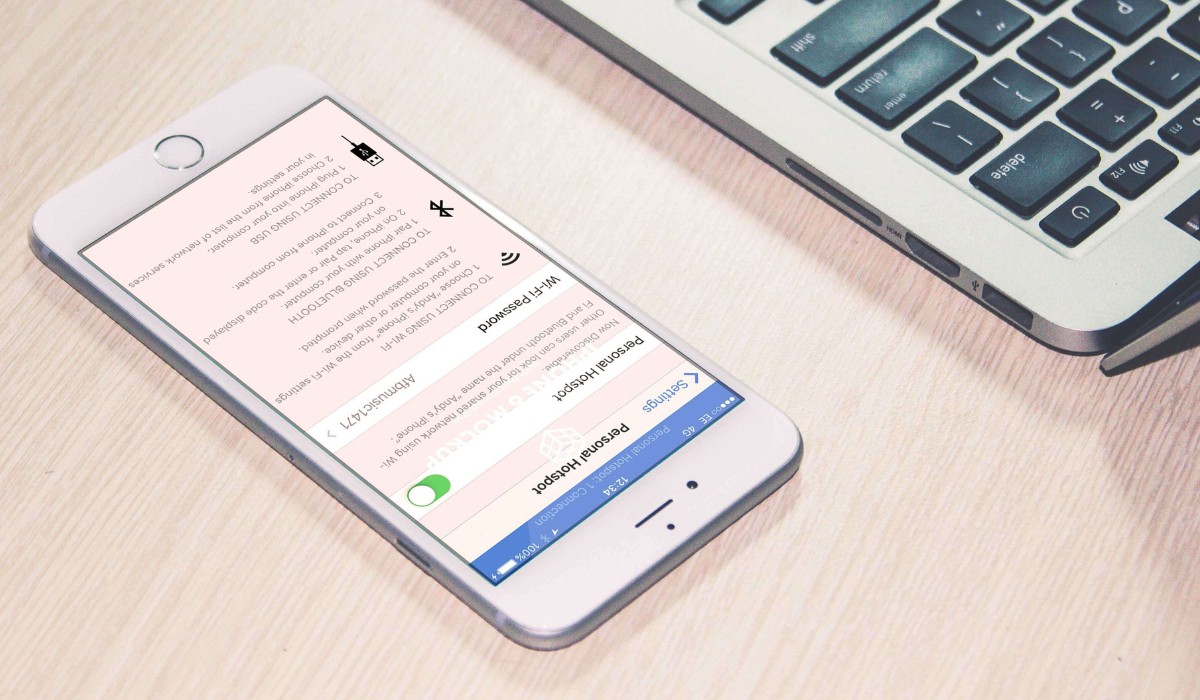
Next, scroll through the settings menu until you find the "Personal Hotspot" option. This feature enables you to share your iPhone's cellular data connection with other devices, effectively turning it into a portable Wi-Fi hotspot. Tapping on the "Personal Hotspot" option will lead you to a dedicated menu where you can manage and customize your hotspot settings.
Accessing the settings is a crucial initial step that sets the stage for modifying your iPhone's hotspot name. By navigating through the settings menu, you gain access to a wide array of customization options, empowering you to personalize your device and optimize its functionality according to your preferences.
With the settings menu at your fingertips, you are now ready to proceed to the next step and delve into the process of selecting the "Personal Hotspot" option, where you will have the opportunity to refine and personalize your hotspot name further. This seamless navigation through the settings menu sets the foundation for an effortless and user-friendly experience as you embark on the journey to customize your iPhone's hotspot name.
Step 2: Selecting Personal Hotspot
Once you have successfully accessed the settings menu on your iPhone, the next step involves selecting the "Personal Hotspot" option to initiate the customization process. The "Personal Hotspot" feature empowers you to share your iPhone's cellular data connection with other devices, effectively transforming it into a portable Wi-Fi hotspot. By selecting this option, you gain access to a dedicated menu where you can manage and personalize your hotspot settings according to your preferences.
Upon tapping the "Personal Hotspot" option within the settings menu, you will be directed to a screen that presents a range of configuration settings related to your hotspot. This menu serves as the central hub for customizing various aspects of your hotspot, including the network name, password, and other relevant settings.
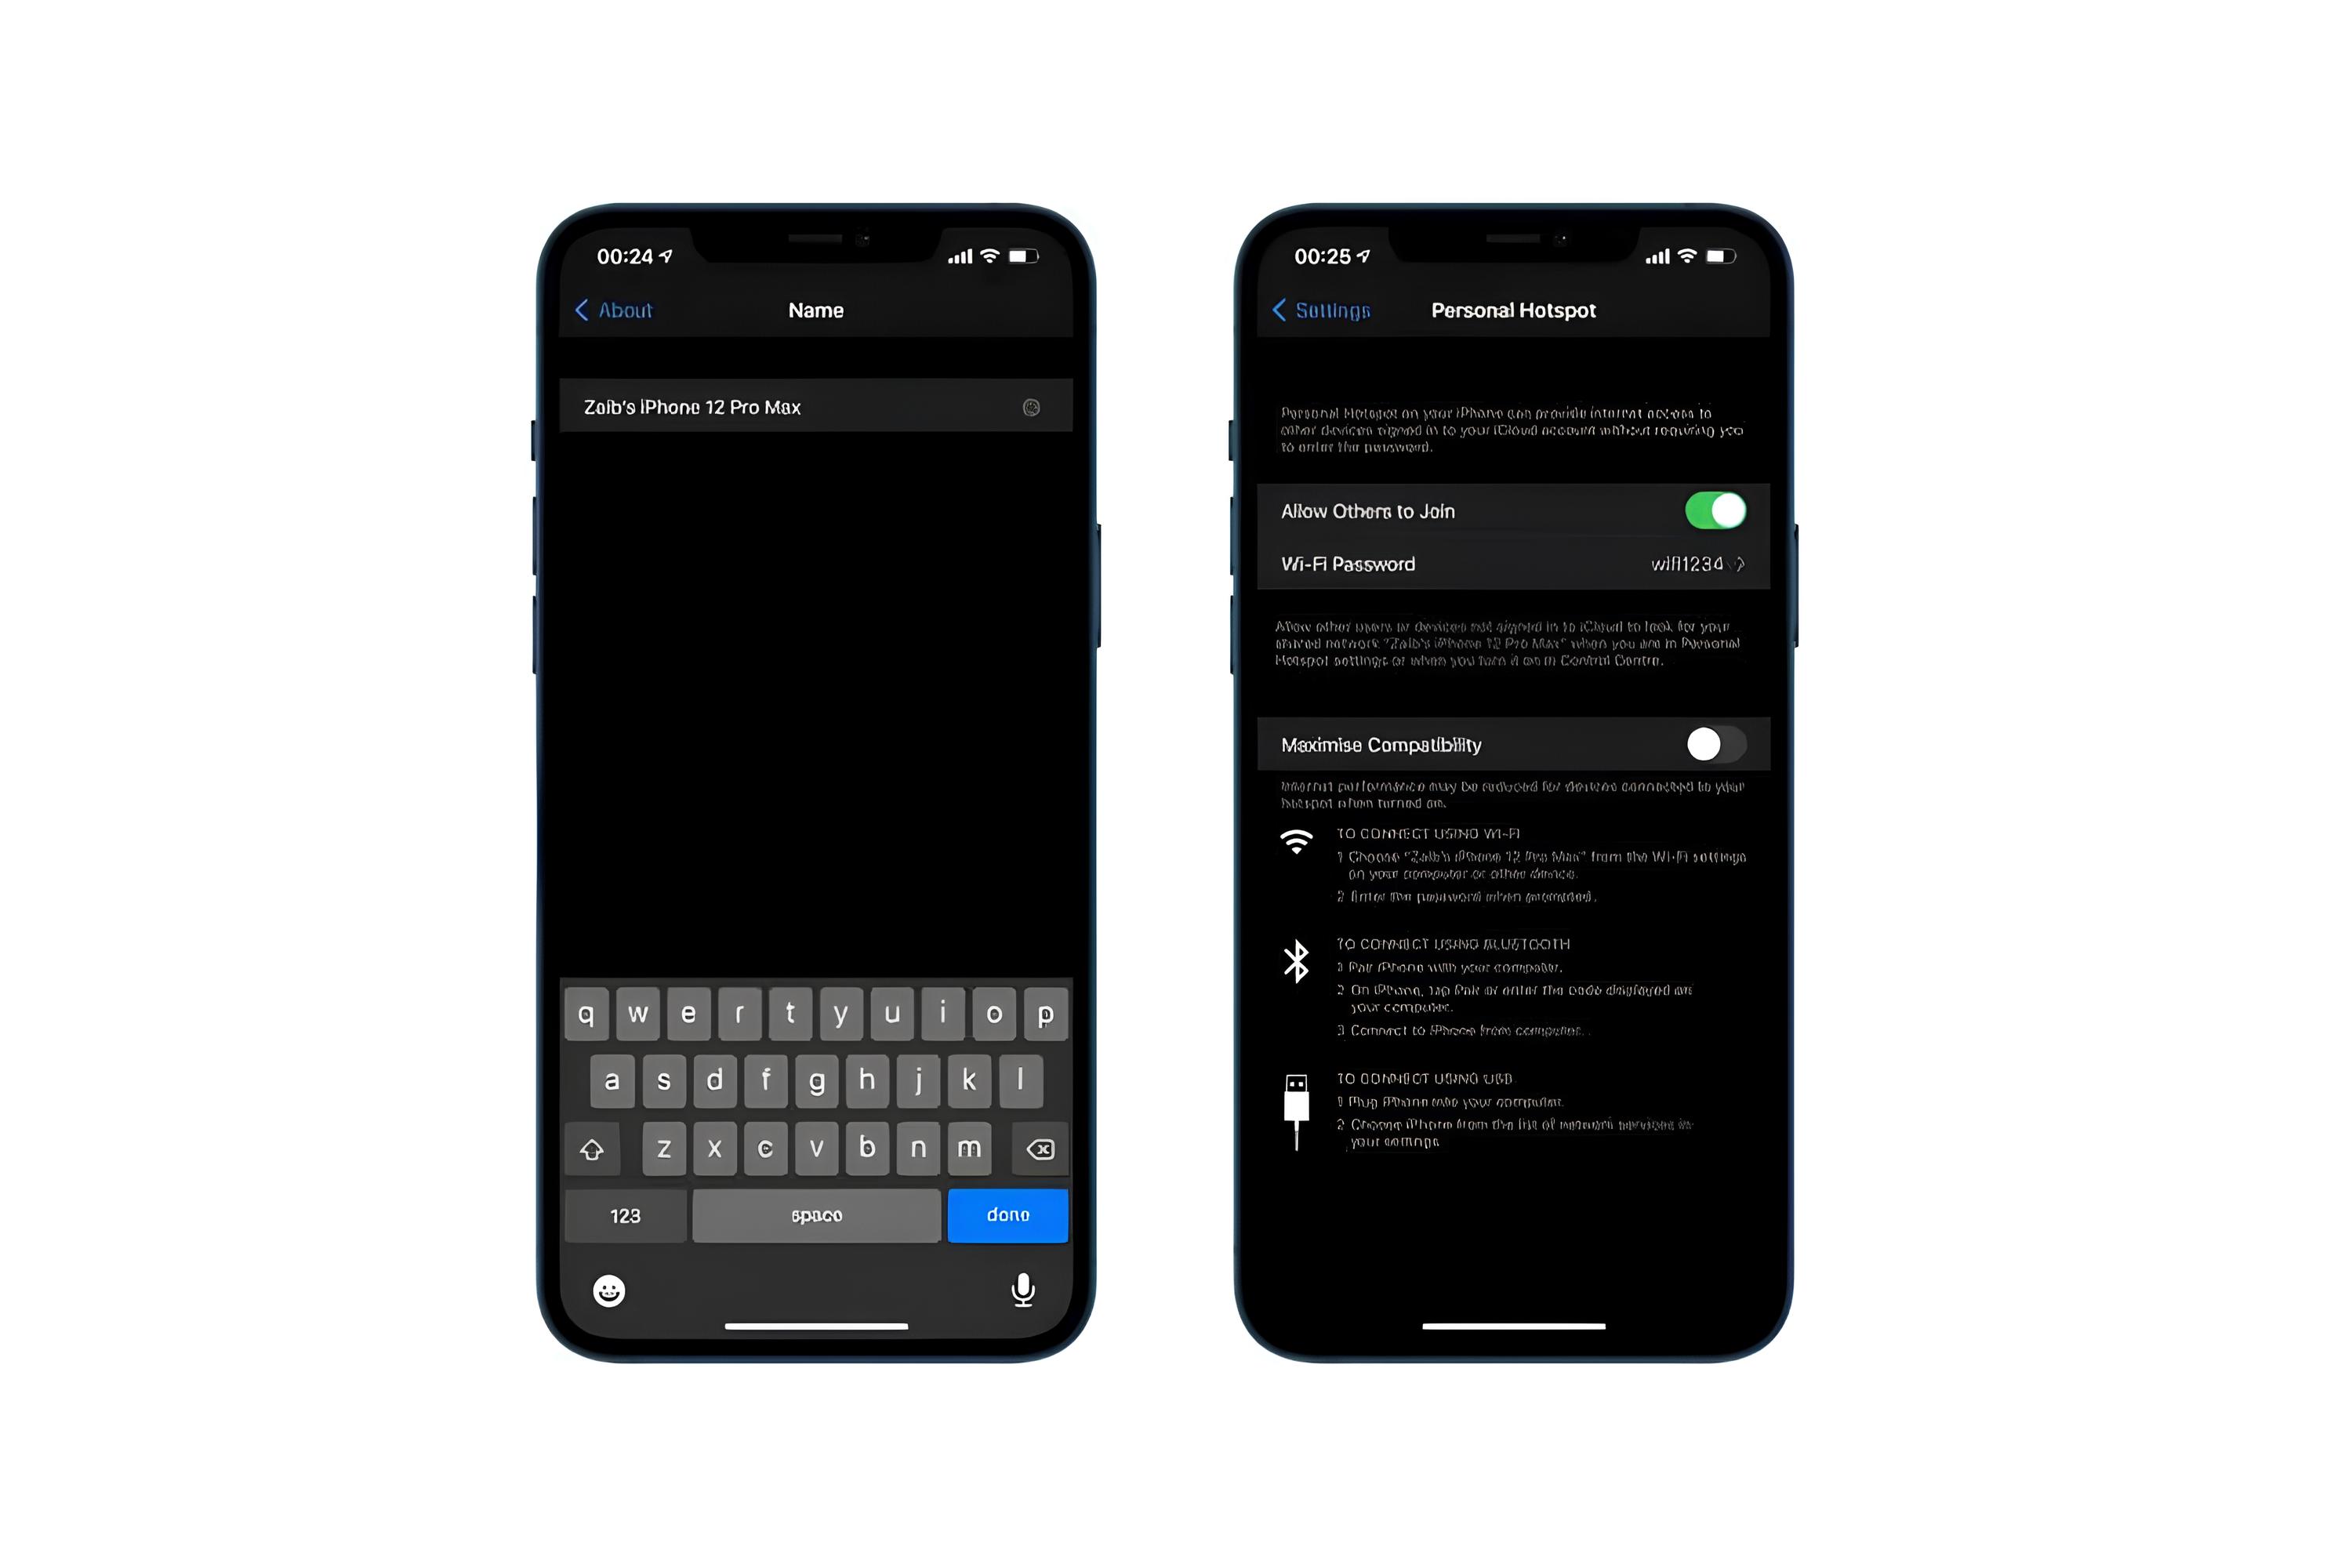
Within the "Personal Hotspot" menu, you will find the option to modify your hotspot's name, allowing you to replace the default name with a personalized identifier that resonates with you. This step is pivotal in tailoring your hotspot to reflect your individuality or make it more recognizable to those who wish to connect to your network.
In addition to customizing the hotspot name, the "Personal Hotspot" menu offers the flexibility to adjust other settings, such as the password for your hotspot network. By navigating through this menu, you can create a secure and memorable password that aligns with your preferences, enhancing the overall accessibility and security of your hotspot.
Selecting the "Personal Hotspot" option within the settings menu empowers you to take control of your hotspot's configuration, enabling you to fine-tune its settings to suit your specific needs. Whether you aim to streamline the process of connecting to your hotspot or simply infuse it with a touch of personalization, this menu serves as the gateway to a seamless and user-friendly customization experience.
By navigating through the "Personal Hotspot" menu, you are one step closer to transforming your iPhone's hotspot into a personalized and easily identifiable network. The ability to select this option seamlessly integrates with the overall process of customizing your hotspot name, laying the groundwork for a streamlined and intuitive user experience.
Step 3: Changing the Hotspot Name
Upon accessing the "Personal Hotspot" menu within the settings, you will encounter the pivotal option to change your iPhone's hotspot name. This step marks a significant opportunity to infuse your hotspot with a personalized touch, making it easily identifiable and reflective of your individuality.
To initiate the process of changing the hotspot name, navigate to the designated field where the current name is displayed. Upon locating this field, tap on it to activate the text input, allowing you to modify the existing hotspot name according to your preferences.
As you embark on this customization journey, consider selecting a name that resonates with you and aligns with the purpose of your hotspot. Whether you opt for a descriptive name that reflects the location or purpose of the network, a creative and memorable identifier, or a combination of both, the choice is yours to make.
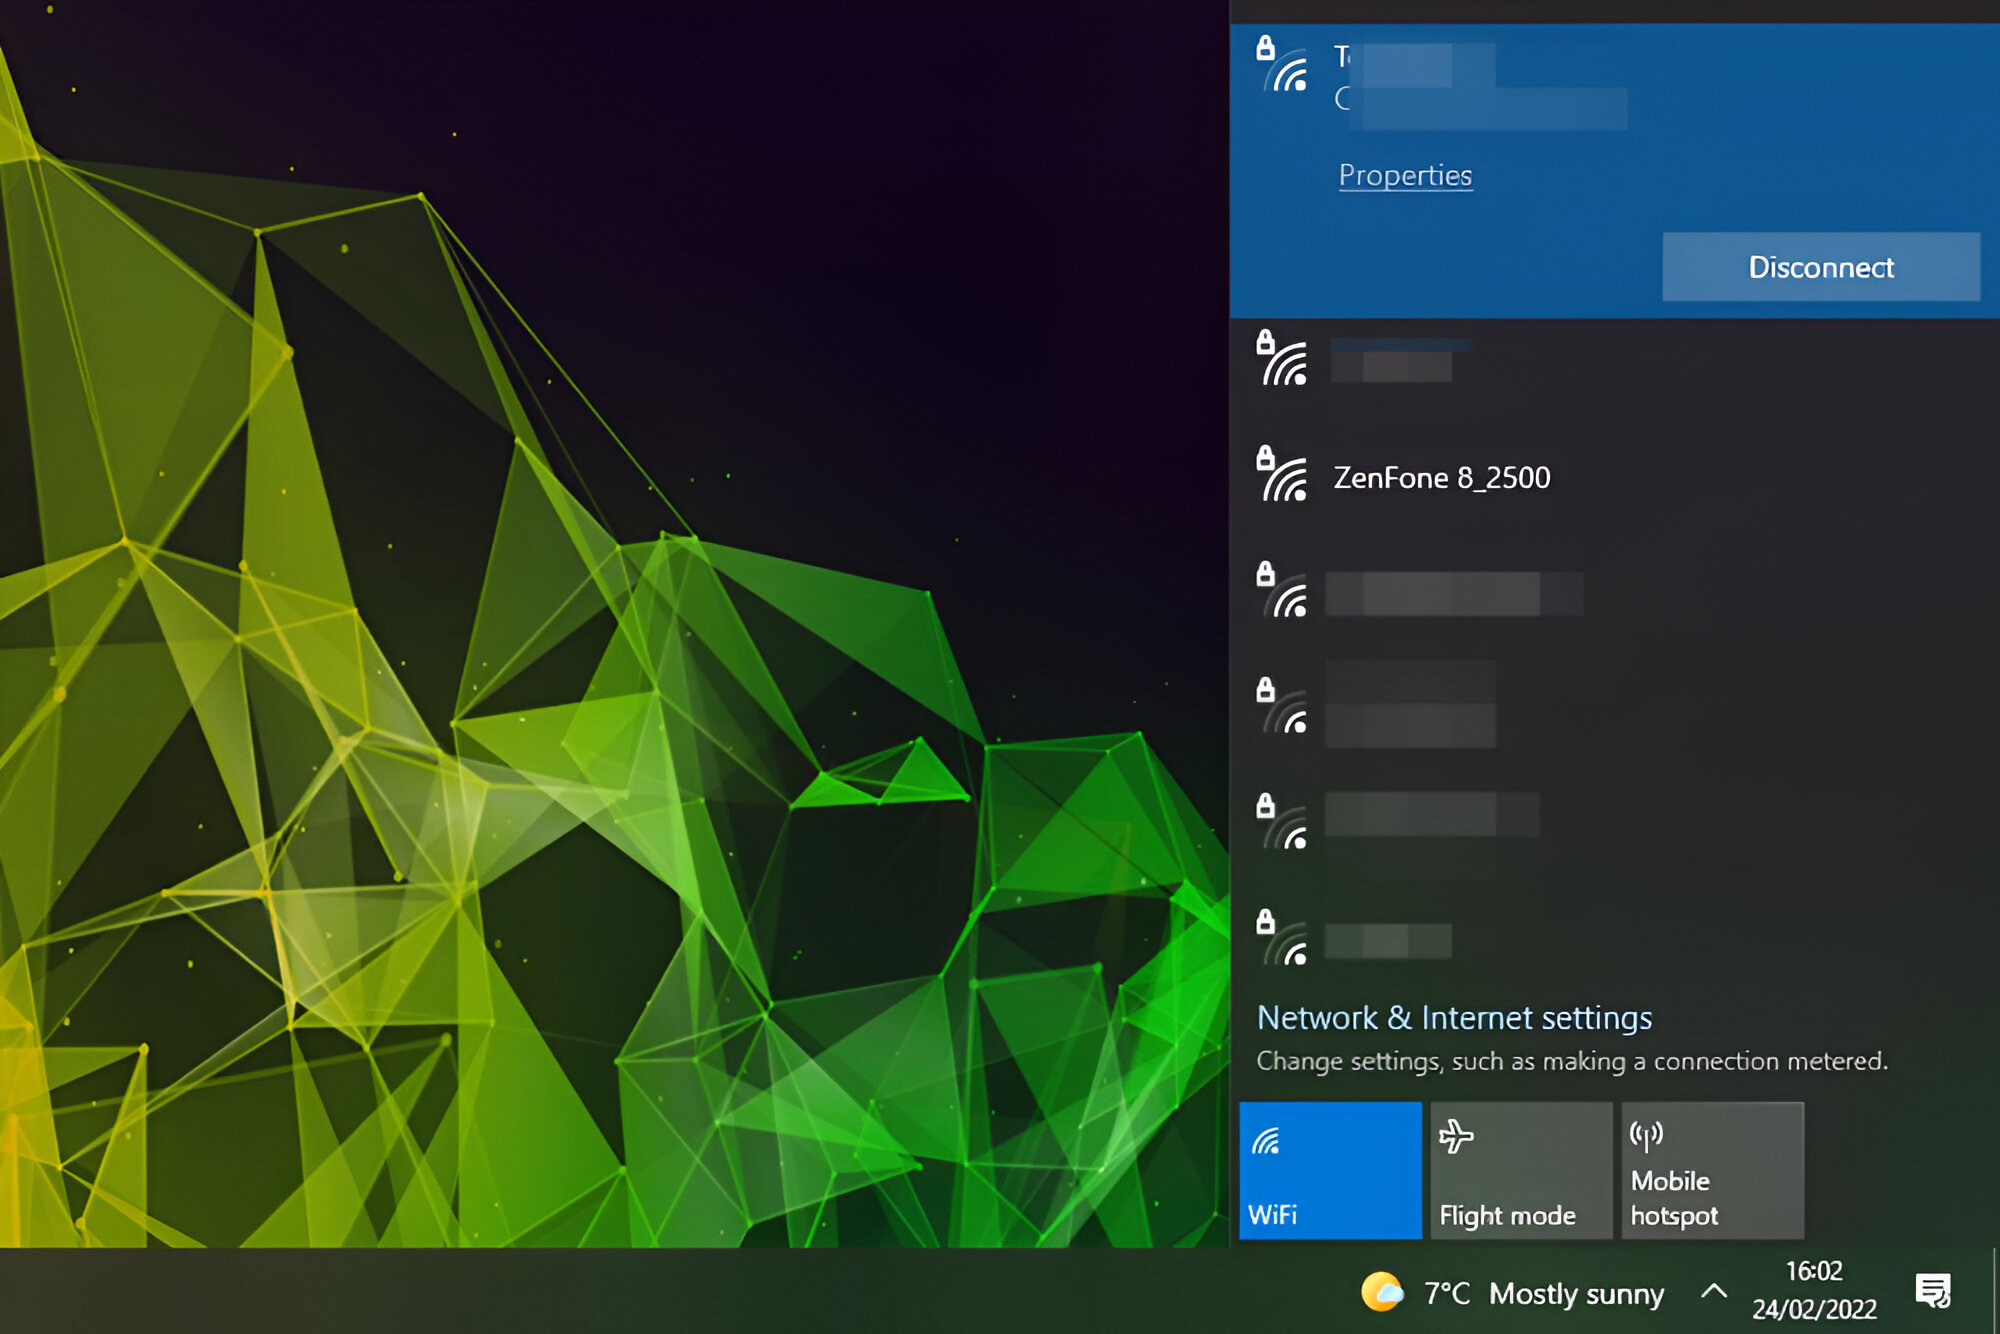
When crafting your new hotspot name, keep in mind the importance of clarity and distinctiveness. Opt for a name that is easy to remember and stands out amidst other available networks, especially in crowded Wi-Fi environments where multiple hotspots may be present.
Furthermore, the process of changing the hotspot name offers an opportunity to inject a touch of personality into your device. Whether you prefer a lighthearted and whimsical name that reflects your sense of humor or a sleek and professional identifier, the ability to customize the hotspot name empowers you to tailor your device to your unique style and preferences.
Once you have input your desired hotspot name, take a moment to review and ensure that it accurately reflects your intentions. Double-check for any potential typos or errors to guarantee that the name is presented exactly as you envision it.
By modifying the hotspot name to suit your individual preferences, you elevate the overall user experience, making it easier for others to identify and connect to your network. This simple yet impactful customization step enhances the functionality and personalization of your iPhone's hotspot, aligning it with your specific needs and reflecting your distinctive identity.
With the hotspot name successfully changed, you are poised to proceed to the next crucial step of saving the modifications, ensuring that your personalized hotspot name is securely set and ready for immediate use.
Step 4: Saving the Changes
After customizing your iPhone's hotspot name to align with your preferences and individuality, the final step involves saving the changes to ensure that your personalized hotspot name is securely set and ready for immediate use.
Upon completing the modification of your hotspot name, navigate to the interface's designated option for saving the changes. This pivotal step solidifies your customization efforts, preserving your newly crafted hotspot name and integrating it into the device's settings.
Once you have located the option to save the changes, tap on it to confirm and finalize the modification. This action ensures that your personalized hotspot name is officially adopted by your iPhone, replacing the default identifier with your chosen name.
By saving the changes, you cement the customizations made to your iPhone's hotspot name, ensuring that it reflects your unique style and preferences. This step marks the culmination of your efforts to infuse your device with a touch of personalization, making it easily identifiable and aligned with your individuality.
After saving the changes, take a moment to verify that your personalized hotspot name is displayed accurately. Double-check for any potential discrepancies to guarantee that the modified name is presented exactly as intended, reflecting your desired identity for the network.
With the changes securely saved, your iPhone's hotspot is now equipped with a distinct and personalized name, making it easier for others to identify and connect to your network. Whether you opted for a descriptive, whimsical, or professional name, the saved changes ensure that your hotspot resonates with your preferences and stands out amidst other available networks.
The process of saving the changes represents the final touch in customizing your iPhone's hotspot name, culminating in a seamless and user-friendly experience. By preserving your personalized hotspot name, you elevate the functionality and individuality of your device, enhancing its overall appeal and usability.
Conclusion
Congratulations! By following the user-friendly guide provided in this article, you have successfully personalized your iPhone's hotspot name, infusing it with a touch of individuality and enhancing its usability. The process of customizing your hotspot name has empowered you to create a distinct and easily recognizable network, tailored to your preferences and reflective of your unique style. As you conclude this journey of customization, it's essential to recognize the significance of the changes you've implemented and the impact they have on your overall user experience.
By accessing the settings and navigating to the "Personal Hotspot" option, you gained valuable insight into the customization capabilities of your iPhone, setting the stage for a seamless and intuitive modification process. Selecting the "Personal Hotspot" option allowed you to delve into a dedicated menu where you could refine and personalize your hotspot settings, including the pivotal task of changing the hotspot name. This step served as a gateway to infusing your device with a touch of personalization, aligning it with your preferences and making it more accessible to others.
Changing the hotspot name represented a pivotal opportunity to inject your device with individuality and personality. Whether you opted for a descriptive name that reflects the location or purpose of the network, a creative and memorable identifier, or a combination of both, the choice you made reflects your unique style and preferences. This customization step not only enhances the functionality of your hotspot but also adds a personal touch to your device, making it more than just a standard network identifier.
Saving the changes marked the final touch in this customization journey, ensuring that your personalized hotspot name is securely set and ready for immediate use. By preserving your modifications, you have solidified your device's individuality and made it easier for others to identify and connect to your network. Whether for personal or professional use, the customized hotspot name reflects your intentions and resonates with your desired identity for the network.
As you conclude this process, take a moment to appreciate the impact of your actions. By customizing your iPhone's hotspot name, you have transformed it into a personalized and easily identifiable network, reflecting your preferences and enhancing its overall appeal. Whether you aimed to streamline the process of connecting to your hotspot, infuse it with a touch of personalization, or simply make it more recognizable, the changes you've made have elevated the functionality and individuality of your device.
In conclusion, the journey to customize your iPhone's hotspot name has not only enhanced its usability but also provided a platform for self-expression and personalization. Your device now stands as a reflection of your unique style and preferences, making it more than just a standard network identifier. Embrace the impact of your customized hotspot name and enjoy the enhanced user experience it brings to your daily interactions with your iPhone.