Introduction
Accessing the Web User Interface (WebUI) on a hotspot device is essential for configuring and managing its settings. Whether you're setting up a new hotspot or troubleshooting network issues, accessing the WebUI provides a user-friendly way to interact with the device's settings and features. This quick tutorial will guide you through the simple steps to access the WebUI on your hotspot, empowering you to make necessary adjustments and optimize your network experience.
The WebUI serves as a gateway to the hotspot's configuration dashboard, allowing users to customize network settings, security parameters, and other essential features. By accessing the WebUI, you gain the ability to monitor network performance, manage connected devices, and implement security protocols to safeguard your network from potential threats.
In this tutorial, we will walk you through the step-by-step process of accessing the WebUI on your hotspot. Whether you're a novice user or a seasoned tech enthusiast, this guide will equip you with the knowledge to effortlessly navigate the WebUI and harness the full potential of your hotspot device.
Now, let's dive into the simple yet crucial steps that will enable you to access the WebUI on your hotspot and take control of your network's configuration and management.
Step 1: Connect to the Hotspot
Before diving into the WebUI setup, the initial step is to establish a connection to the hotspot. This process involves connecting your device to the hotspot's network, enabling seamless communication between your device and the hotspot.
-
Locate the Hotspot: Firstly, identify the physical hotspot device or access point. It may be a standalone device or integrated into a modem or router. The hotspot typically emits a wireless network signal, allowing nearby devices to connect to it.
-
Enable Wi-Fi on Your Device: Ensure that the Wi-Fi feature on your device, whether it's a smartphone, laptop, or tablet, is turned on. This enables your device to detect and connect to available wireless networks, including the hotspot's network.
-
Scan for Networks: Access the Wi-Fi settings on your device and scan for available networks. The hotspot's network name (SSID) should appear in the list of available networks. Select the hotspot's network from the list to initiate the connection process.
-
Enter the Network Password (if applicable): If the hotspot's network is secured with a password, you will be prompted to enter the password to establish the connection. Ensure that you enter the correct password to successfully connect to the hotspot's network.
-
Establish Connection: Once the correct password is entered, your device will establish a connection to the hotspot's network. Upon successful connection, a Wi-Fi symbol or network indicator on your device should reflect the active connection to the hotspot.
-
Verify Connection: To confirm the successful connection, open a web browser or any internet-dependent application on your device. If you can access the internet or load a webpage, it indicates that your device is successfully connected to the hotspot's network.
By completing these steps, you have successfully connected your device to the hotspot's network, laying the groundwork for accessing the WebUI and initiating the configuration process. With the connection established, you are now ready to proceed to the next step and access the hotspot's WebUI to further customize and manage its settings.
Step 2: Open a Web Browser
After successfully connecting your device to the hotspot's network, the next crucial step is to open a web browser to access the hotspot's Web User Interface (WebUI). The WebUI serves as a user-friendly portal for configuring and managing the hotspot's settings, making it essential to access it for network customization and optimization.
To open a web browser, locate and launch the web browser application on your device. This can be a popular browser such as Google Chrome, Mozilla Firefox, Microsoft Edge, Safari, or any other browser installed on your device. Once the web browser is launched, you are ready to proceed to the next step of accessing the hotspot's WebUI.
Upon launching the web browser, you will be presented with a search bar or address bar where website URLs or search queries can be entered. This is where you will input the IP address of the hotspot to access its WebUI. The address bar is typically located at the top of the browser window and may be preceded by a magnifying glass icon for initiating web searches.
It's important to note that the hotspot's WebUI can be accessed using its specific IP address. This IP address is unique to the hotspot and serves as the gateway to its WebUI. To access the WebUI, you will need to enter the hotspot's IP address into the web browser's address bar and press "Enter" or tap the "Go" button, initiating the connection to the hotspot's configuration dashboard.
In most cases, the hotspot's IP address can be found in the device's user manual, packaging, or by contacting the hotspot's manufacturer or service provider. Additionally, common hotspot IP addresses include "192.168.1.1" and "192.168.0.1", but it's important to verify the specific IP address associated with your hotspot device.
By opening a web browser and entering the hotspot's IP address into the address bar, you are one step closer to accessing the WebUI and gaining control over the hotspot's configuration and management. This seamless process sets the stage for utilizing the WebUI to customize network settings, monitor performance, and implement security measures to enhance your network experience.
With the web browser open and the hotspot's IP address entered, you are now prepared to proceed to the next step of entering the WebUI and unlocking the full potential of your hotspot device.
Step 3: Enter the Hotspot IP Address
Entering the hotspot's IP address into the web browser's address bar is a pivotal step in accessing the Web User Interface (WebUI) and gaining control over the hotspot's configuration and management. The IP address serves as the gateway to the WebUI, providing a direct link to the hotspot's settings and features.
To begin, ensure that the web browser is open and ready for input. The address bar, typically located at the top of the browser window, is where you will enter the hotspot's IP address. This address bar may be preceded by a magnifying glass icon for initiating web searches. It's important to enter the IP address accurately to establish a seamless connection to the hotspot's WebUI.
The hotspot's IP address is unique to the device and is essential for accessing its WebUI. While common hotspot IP addresses include "192.168.1.1" and "192.168.0.1", it's crucial to verify the specific IP address associated with your hotspot device. This information can typically be found in the device's user manual, packaging, or by contacting the hotspot's manufacturer or service provider.
Once you have obtained the correct IP address, carefully input it into the address bar of the web browser. After entering the IP address, press "Enter" on the keyboard or tap the "Go" button within the browser. This action initiates the connection to the hotspot's WebUI, allowing you to access its configuration dashboard and begin customizing network settings, monitoring performance, and implementing security measures.
Upon entering the hotspot's IP address and initiating the connection, the web browser will establish a secure link to the hotspot's WebUI, providing you with direct access to its comprehensive set of configuration options. This empowers you to customize network parameters, manage connected devices, and optimize security settings to create an efficient and secure network environment.
By successfully entering the hotspot's IP address into the web browser's address bar, you have taken a significant stride towards unlocking the full potential of your hotspot device. This seamless process sets the stage for harnessing the power of the WebUI and leveraging its features to enhance your network experience.
Step 4: Log in to the WebUI
Upon successfully entering the hotspot's IP address into the web browser's address bar, you are now poised to log in to the Web User Interface (WebUI) and gain access to the full spectrum of configuration and management features offered by the hotspot device. Logging in to the WebUI provides a gateway to customize network settings, monitor performance, and implement security measures, empowering you to optimize your network experience.
To initiate the login process, the WebUI typically prompts you to enter your credentials, including a username and password. It's important to note that the login credentials for the WebUI may differ based on the hotspot device and its configuration. Commonly, the default login credentials can be found in the device's user manual, packaging, or by contacting the hotspot's manufacturer or service provider. If the default credentials have been modified, it's essential to use the updated login information to access the WebUI.
Once you have obtained the necessary login credentials, proceed to the WebUI login page within the web browser. This page may present fields for entering the username and password, providing a secure gateway to the hotspot's configuration dashboard. Carefully input the username and password into the designated fields, ensuring accuracy to facilitate a seamless login process.
Upon entering the correct credentials, proceed to submit the login information. This action initiates the authentication process, validating the provided credentials and granting access to the WebUI upon successful authentication. If the provided credentials are accurate, the WebUI will seamlessly transition to the configuration dashboard, presenting a comprehensive array of settings and features for network customization and management.
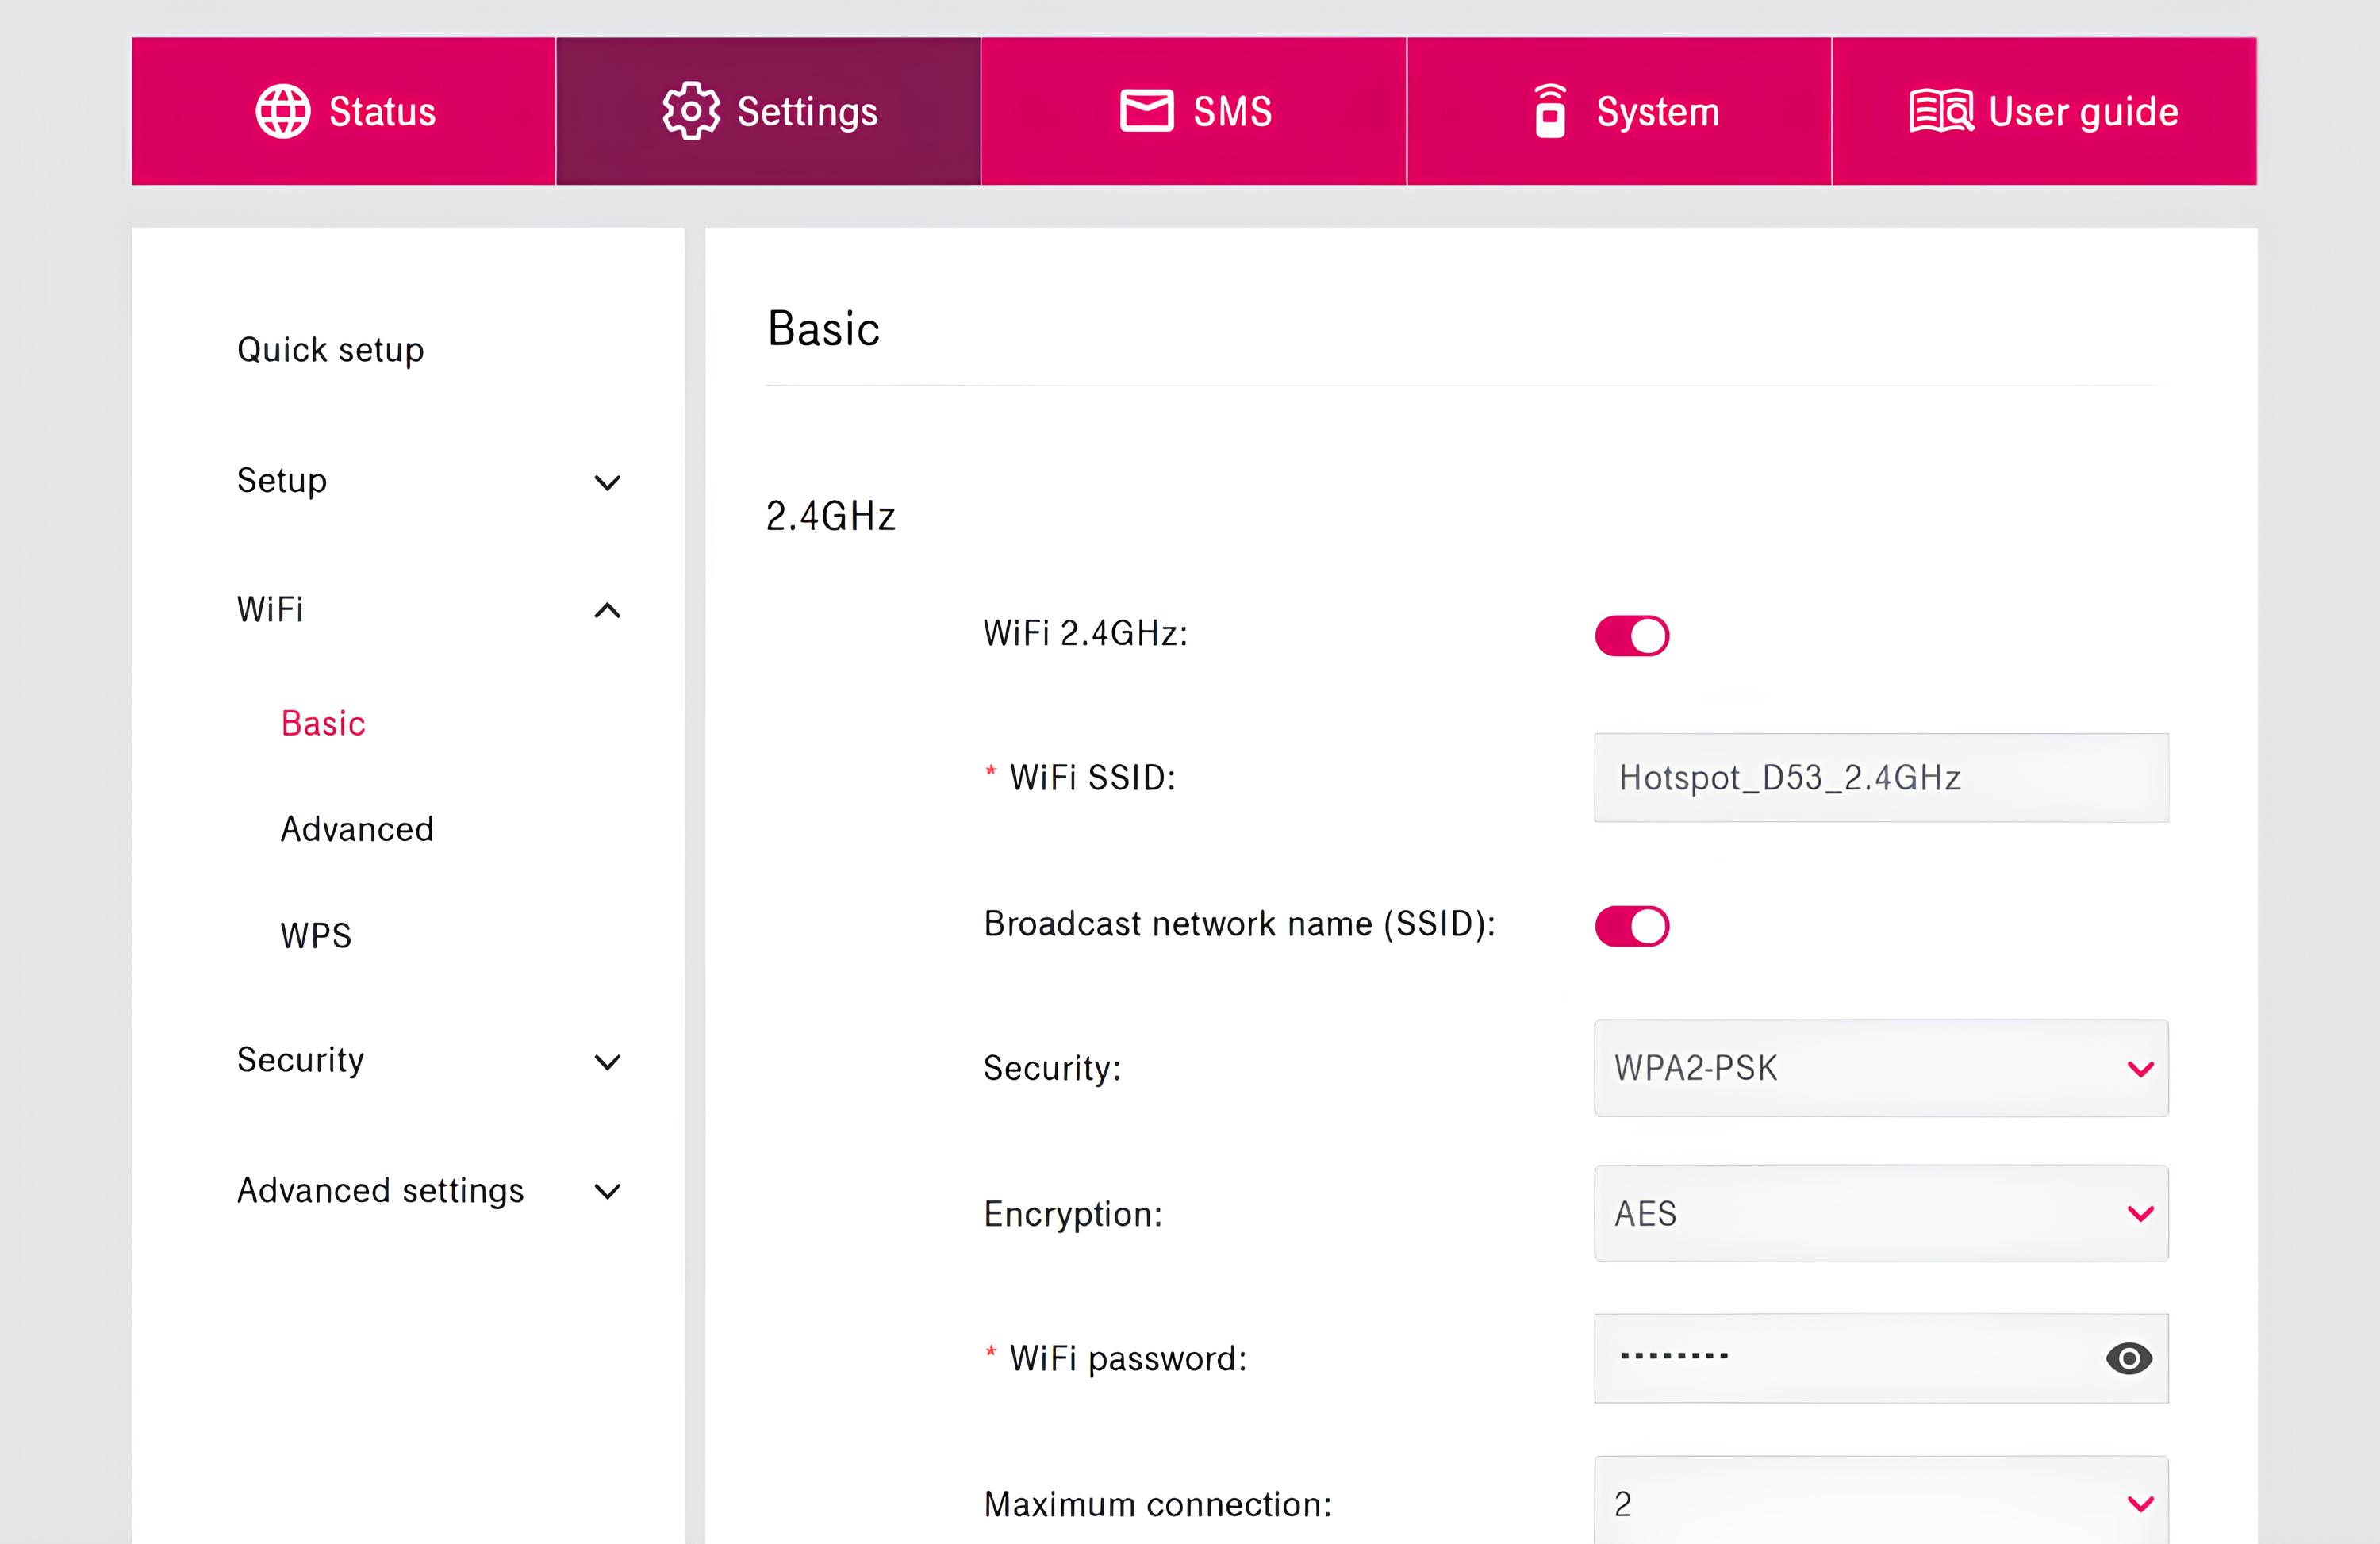
Once logged in, you are now positioned to explore the diverse functionalities offered by the WebUI. This includes customizing wireless network settings, managing connected devices, configuring security parameters, and monitoring network performance. The WebUI serves as a centralized platform for overseeing and optimizing the hotspot's capabilities, allowing you to tailor the network environment to your specific requirements.
By successfully logging in to the WebUI, you have unlocked the potential to harness the full capabilities of your hotspot device. This pivotal step provides you with the tools to proactively manage and enhance your network, ensuring seamless connectivity, robust security, and optimized performance.
In summary, the process of logging in to the WebUI is a crucial gateway to leveraging the full potential of your hotspot device. It empowers you to take charge of network customization and management, ultimately enhancing your network experience and ensuring a reliable and secure connectivity environment.
Conclusion
In conclusion, accessing the Web User Interface (WebUI) on your hotspot device is a pivotal step towards taking control of your network's configuration and management. By following the simple yet crucial steps outlined in this tutorial, you have gained the knowledge and capability to seamlessly access the WebUI, customize network settings, monitor performance, and implement security measures.
The process commences with connecting your device to the hotspot's network, ensuring a stable and reliable connection that forms the foundation for accessing the WebUI. Once connected, opening a web browser and entering the hotspot's unique IP address into the address bar sets the stage for establishing a secure link to the WebUI. This enables you to delve into the hotspot's configuration dashboard and unlock its full potential.
Entering the hotspot's IP address accurately is a key step, paving the way for seamless access to the WebUI. It serves as the gateway to a comprehensive set of configuration options, empowering you to customize network parameters, manage connected devices, and optimize security settings to create an efficient and secure network environment.
Finally, logging in to the WebUI provides you with direct access to the full spectrum of configuration and management features offered by the hotspot device. This pivotal step grants you the ability to tailor the network environment to your specific requirements, ensuring seamless connectivity, robust security, and optimized performance.
In essence, accessing the WebUI on your hotspot device equips you with the tools to proactively manage and enhance your network. Whether you're a novice user or a seasoned tech enthusiast, the ability to access and navigate the WebUI empowers you to take charge of network customization and management, ultimately enhancing your network experience and ensuring a reliable and secure connectivity environment.
By seamlessly navigating the WebUI, you have unlocked the potential to harness the full capabilities of your hotspot device, setting the stage for a streamlined and optimized network experience.


