Introduction
So, you’ve got your hands on a Gen Game controller, and you’re eager to dive into the world of gaming. Whether you’re a seasoned gamer or just starting out, setting up a new controller can be a bit daunting. But fear not! This guide will walk you through the process step by step, making it a breeze for you to get your Gen Game controller up and running in no time.
The Gen Game controller is a versatile gaming accessory that is compatible with a wide range of devices, including smartphones, tablets, and PCs. Its ergonomic design and intuitive button layout make it a popular choice for gamers looking for a reliable and responsive controller.
In this guide, we’ll cover everything you need to know to set up your Gen Game controller, from unboxing it to configuring the settings for your specific gaming needs. By the end of this tutorial, you’ll be ready to unleash your gaming prowess with the help of your newly set up Gen Game controller.
So, grab your controller, buckle up, and let’s embark on this exciting journey to set up your Gen Game controller!
Step 1: Unboxing the Gen Game Controller
Unboxing your Gen Game controller is the first step towards immersing yourself in the world of gaming. The packaging is designed to keep the controller safe and secure during transit, and unboxing it is an exciting moment that marks the beginning of your gaming adventure.
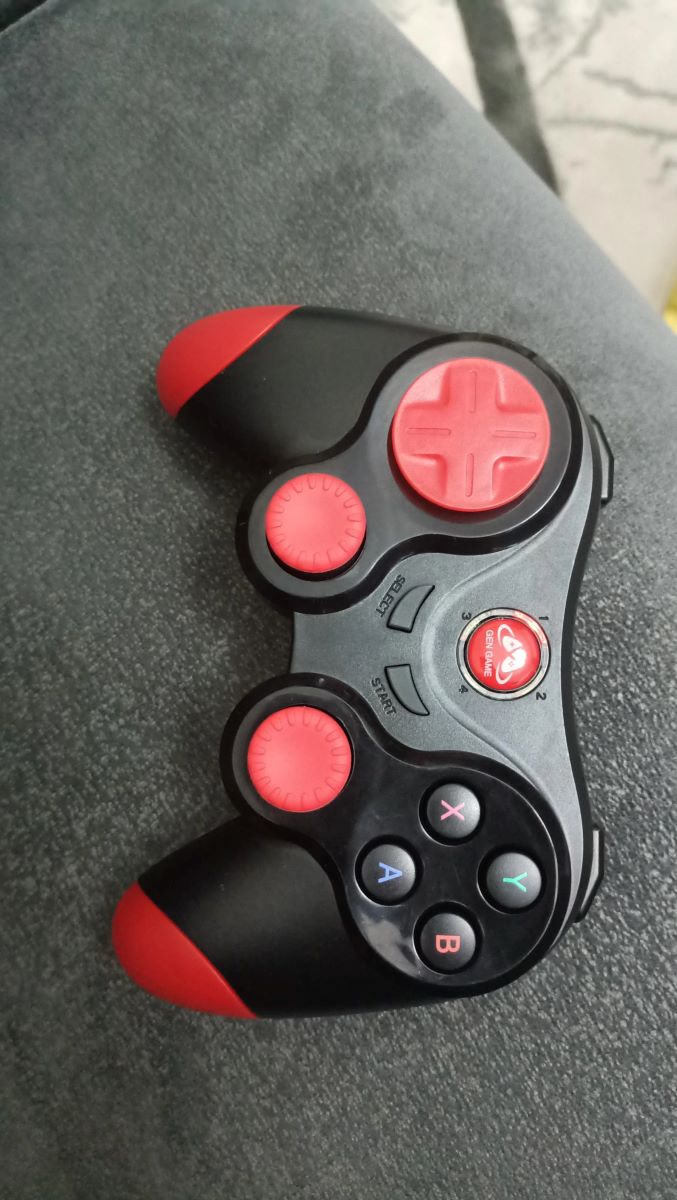
When you first open the box, you’ll find the Gen Game controller nestled snugly within protective packaging. Take a moment to appreciate the sleek design and ergonomic contours of the controller. The tactile feel of the buttons and the sturdy construction are a testament to the quality of the device.
As you lift the controller out of the box, you’ll notice the attention to detail in its design. The textured grips provide a comfortable and secure hold, while the responsive buttons and analog sticks are poised to deliver precise control during gameplay.
Alongside the controller, you may find additional accessories such as a USB cable for charging and a user manual that provides valuable information on the controller’s features and functionality. Familiarize yourself with the contents of the box, ensuring that you have everything you need to proceed to the next step.
Unboxing the Gen Game controller is an exciting prelude to the setup process. It sets the stage for the gaming experiences that lie ahead, and as you hold the controller in your hands, you can feel the potential for countless hours of immersive gameplay awaiting you.
Step 2: Charging the Controller
Before you can start using your Gen Game controller, it’s essential to ensure that it is adequately charged. The initial charging process is straightforward and sets the foundation for uninterrupted gaming sessions without the worry of a drained battery.
Begin by locating the USB cable included in the packaging. This cable is used for charging the controller and can be connected to a variety of power sources, such as a USB port on your computer, a wall adapter, or a portable power bank. The versatility of the charging options allows you to power up your controller conveniently, even when you’re on the move.
Next, connect one end of the USB cable to the charging port on the Gen Game controller. The port is typically located at the top or bottom of the controller, and the cable securely plugs into place with a satisfying click. Once connected, the other end of the cable can be inserted into the power source of your choice.
As the controller charges, you may notice a subtle indicator light that illuminates to signify the charging process. This visual cue provides assurance that the controller is receiving power and allows you to monitor the charging progress at a glance.
Depending on the initial charge level of the controller, the charging process may take a couple of hours to reach full capacity. It’s advisable to allow the controller to charge completely before disconnecting it for first-time use, ensuring that you have ample battery life for extended gaming sessions.
Charging the Gen Game controller is a crucial step that paves the way for uninterrupted gaming enjoyment. Once the controller is fully charged, you’ll be ready to move on to the next phase of the setup process and begin exploring the myriad gaming possibilities at your fingertips.
Step 3: Connecting the Controller to Your Device
With your Gen Game controller charged and ready, it’s time to establish the vital connection between the controller and your gaming device. Whether you’re using a smartphone, tablet, or PC, the process of pairing the controller is designed to be seamless, allowing you to delve into your favorite games with ease.
Begin by powering on your Gen Game controller. The power button is typically located on the face of the controller, and pressing it initiates the controller’s startup sequence. As the controller powers up, you may notice a brief indicator light display, signaling that the controller is ready to pair with a compatible device.
Now, navigate to the Bluetooth settings on your gaming device. For smartphones and tablets, this can usually be found in the device’s settings menu, while PCs may require you to access the Bluetooth settings through the system preferences or control panel.
Within the Bluetooth settings, initiate a search for nearby devices. Your Gen Game controller should appear in the list of available devices, and selecting it will prompt the pairing process. Once the controller is successfully paired with your device, a confirmation message or indicator light will signify the successful connection.
It’s important to note that some devices may require a PIN or passkey for the initial pairing process. If prompted, refer to the user manual or on-screen instructions to enter the necessary code and complete the pairing procedure.
Once the controller is successfully paired with your device, you’re all set to embark on your gaming journey. The seamless connection between the Gen Game controller and your device ensures that you can enjoy responsive and immersive gameplay, with the controller serving as your trusted companion in the virtual realms of your favorite games.
Step 4: Configuring the Controller Settings
Now that your Gen Game controller is successfully connected to your gaming device, it’s time to fine-tune the controller settings to suit your gaming preferences. Customizing the controller settings allows you to optimize its performance and tailor the controls to align with your gaming style, ensuring a personalized and immersive gaming experience.
Begin by accessing the settings menu of your gaming device or the specific game you intend to play. Look for the input or controller settings section, where you can adjust various parameters related to the Gen Game controller.
One of the key settings to configure is the button mapping. This feature enables you to assign specific functions to different buttons on the controller, providing flexibility in how you interact with the game. Whether you prefer a particular button layout for ease of use or wish to remap controls for enhanced convenience, the button mapping feature empowers you to customize the controller to your liking.
Additionally, explore any sensitivity or dead zone settings that may be available. These settings allow you to fine-tune the responsiveness of the controller’s analog sticks and triggers, ensuring that the input from the controller aligns precisely with your actions in the game.
Depending on the game or gaming platform, you may also have the option to adjust vibration settings, motion controls, or other advanced features of the Gen Game controller. Take the time to explore these settings and experiment with different configurations to discover the setup that best complements your gaming experience.
By configuring the controller settings to your preferences, you can optimize the Gen Game controller to deliver a seamless and intuitive gaming experience. The ability to tailor the controller settings empowers you to adapt the device to various gaming scenarios, enhancing your control and immersion in the virtual worlds you explore.
Step 5: Testing the Controller
With the Gen Game controller set up and configured to your preferences, it’s time to put it to the test and experience its performance firsthand. Testing the controller allows you to ensure that all settings are optimized, buttons are responsive, and the overall gaming experience meets your expectations.
Launch a game or gaming application that supports external controllers on your device. This can be a popular mobile game, a PC game with controller support, or any other gaming software that allows for controller input.
As the game loads, take a moment to familiarize yourself with the controller’s layout and button assignments. The ergonomic design of the Gen Game controller ensures that the buttons, triggers, and analog sticks are intuitively positioned for comfortable and precise gameplay.
Once you’re in the game, test the responsiveness of the controller by navigating through menus, executing in-game commands, and engaging in gameplay activities that require varied input from the controller. Pay attention to the tactile feedback provided by the buttons and triggers, ensuring that each press and action registers accurately within the game.
Experiment with different game genres and scenarios to gauge the versatility of the controller. Whether you’re engaging in fast-paced action sequences, exploring open-world environments, or strategizing in a multiplayer setting, the Gen Game controller should seamlessly adapt to the demands of the game, providing a fluid and immersive gaming experience.
During the testing phase, take note of any specific features or functionalities of the controller that enhance your gaming experience. Whether it’s the precision of the analog sticks, the comfort of the grips during extended gameplay, or the convenience of the button layout, identifying these positive attributes reinforces the value of the Gen Game controller as an integral part of your gaming setup.
By thoroughly testing the Gen Game controller in various gaming scenarios, you can confidently affirm its performance and suitability for your gaming endeavors. The controller’s seamless integration with your gaming device and its responsiveness to your commands solidify its role as a reliable and immersive tool for unlocking gaming adventures.
Conclusion
Congratulations! You’ve successfully navigated through the process of setting up your Gen Game controller, from unboxing it to customizing its settings and putting it to the test in the gaming arena. The journey to establish a seamless connection between the controller and your gaming device has equipped you with the tools to embark on thrilling gaming adventures with confidence and precision.
As you reflect on the setup process, you’ve not only gained familiarity with the physical aspects of the controller but also delved into the intricacies of configuring its settings to align with your gaming preferences. The tactile feel of the buttons, the responsiveness of the analog sticks, and the ergonomic design of the controller have seamlessly integrated into your gaming environment, enhancing your control and immersion in the virtual realms you explore.
With the Gen Game controller at your disposal, you’re poised to unlock the full potential of your favorite games, whether you’re engaging in intense combat, embarking on epic quests, or competing in multiplayer showdowns. The controller’s versatility and intuitive functionality empower you to navigate diverse gaming landscapes with finesse and precision, ensuring that every gaming session is a captivating and immersive experience.
By embracing the process of setting up your Gen Game controller, you’ve not only gained a reliable gaming accessory but also elevated your gaming prowess to new heights. The controller stands as a steadfast companion in your gaming endeavors, ready to respond to your commands and immerse you in the captivating worlds of interactive entertainment.
As you venture forth into the realms of gaming, armed with your newly set up Gen Game controller, may your gaming experiences be filled with excitement, skillful maneuvers, and triumphant victories. The controller, now seamlessly integrated into your gaming arsenal, is poised to accompany you on countless adventures, bringing your gaming aspirations to life with each press of a button and every deft maneuver.