Introduction
Welcome to the world of videography with your Panasonic camcorder! As you embark on your creative journey, you’ll inevitably encounter the need to import MTS files from your camcorder to your computer for editing, storage, or sharing. MTS files, also known as AVCHD (Advanced Video Coding High Definition) files, are commonly used by Panasonic camcorders to maintain high-quality video recordings. In this guide, we’ll walk you through the step-by-step process of importing MTS files from your Panasonic camcorder to your computer, so you can unleash your creativity and bring your video projects to life.
Whether you’re a seasoned videographer or an enthusiastic amateur, mastering the art of importing MTS files is a fundamental skill that will empower you to harness the full potential of your Panasonic camcorder. By following the instructions provided in this guide, you’ll gain the knowledge and confidence to seamlessly transfer your MTS files, opening the door to a world of editing possibilities and the ability to preserve your precious memories in digital form.
Step 1: Connect your Panasonic Camcorder to your computer
Before you can begin importing MTS files from your Panasonic camcorder, the first step is to establish a physical connection between your camcorder and your computer. This typically involves using a USB cable to establish a direct link, allowing you to access the files stored on your camcorder’s memory.
Start by locating the USB port on your Panasonic camcorder. This port is usually situated on the side or back of the device, and it may be concealed by a protective cover. Once you’ve located the USB port, carefully insert one end of the USB cable into the port, ensuring that it is securely connected. The other end of the USB cable should be inserted into an available USB port on your computer.
Upon establishing the physical connection, your computer should detect the presence of the Panasonic camcorder and initiate the necessary drivers and software to enable communication between the two devices. Depending on your computer’s operating system, you may receive a notification indicating that a new device has been connected. Allow your computer a few moments to recognize the camcorder and prepare it for file transfer.
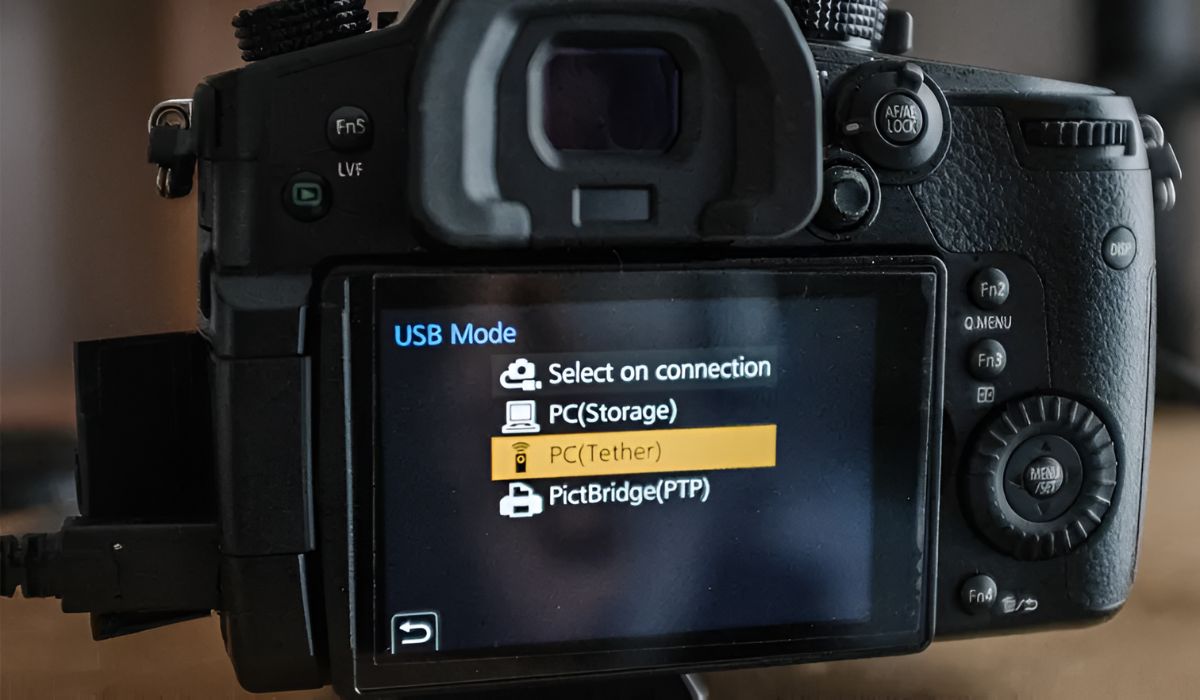
It’s important to ensure that your Panasonic camcorder is powered on during this process, as the connection may not be established if the device is powered off. Additionally, some camcorders may require you to select a specific mode, such as “PC Connect” or “USB Mode,” to enable file transfer functionality. Refer to your camcorder’s user manual for instructions on how to activate the appropriate mode for file transfer.
Once the connection is established and your computer recognizes the camcorder, you’re ready to proceed to the next step in the process of importing MTS files from your Panasonic camcorder.
Step 2: Locate the MTS files on your camcorder
After successfully connecting your Panasonic camcorder to your computer, the next step is to locate the MTS files stored on the camcorder’s memory. MTS files are the native file format used by many Panasonic camcorders to record high-definition video, and they are typically stored within the camcorder’s internal memory or on a removable memory card.
Begin by accessing the file navigation interface on your Panasonic camcorder. Depending on the model of your camcorder, this process may involve navigating through a menu system using the camcorder’s built-in display screen and control buttons. Look for options such as “Media” or “File Management” to access the stored video files.
If your camcorder uses a removable memory card, such as an SD card, to store recorded videos, you may need to remove the memory card from the camcorder and insert it into a compatible card reader on your computer. This will allow you to access the MTS files directly from the memory card without relying on the camcorder’s internal memory.
Once you’ve accessed the file navigation interface on your camcorder or inserted the memory card into your computer, navigate to the location where the MTS files are stored. These files are typically organized by date or recording session, making it easier to locate specific videos based on when they were recorded.
When browsing through the MTS files, take note of the file names and any additional information provided by the camcorder, such as recording date, time, and file size. This information can be helpful when identifying the specific videos you wish to import to your computer.
It’s important to exercise caution when handling the MTS files on your camcorder, especially if you’re using the camcorder’s built-in file management system to navigate through the recorded videos. Avoid deleting or modifying any files unless you are certain of their contents, as accidental deletion or alteration of MTS files can result in the loss of valuable video footage.
With the MTS files successfully located on your Panasonic camcorder, you’re now prepared to proceed to the next step in the process of importing these files to your computer for further editing and archival.
Step 3: Transfer the MTS files to your computer
With the MTS files located on your Panasonic camcorder, it’s time to initiate the transfer process to bring these high-definition video recordings to your computer. The transfer process enables you to create a digital copy of the MTS files on your computer’s storage, providing you with the flexibility to edit, organize, and share the videos as desired.
When transferring MTS files from your camcorder to your computer, there are several methods you can employ, depending on the available connectivity options and software compatibility. One common approach is to use the file transfer functionality provided by your computer’s operating system, which allows you to copy the MTS files directly from the camcorder’s memory to a designated location on your computer’s hard drive or external storage device.
Another method involves utilizing specialized video editing or media management software that supports the import of MTS files. Many video editing applications offer built-in tools for importing video footage from camcorders and other recording devices, streamlining the transfer process and providing additional features for organizing and editing the imported videos.
Before initiating the transfer, ensure that your computer has sufficient available storage space to accommodate the MTS files. High-definition video recordings can consume significant storage capacity, so it’s important to verify that your computer’s storage resources are adequate to accommodate the transferred files without encountering storage limitations.
When transferring the MTS files, consider organizing them into a dedicated folder or directory on your computer to maintain a structured and easily accessible library of video recordings. By categorizing the files based on recording date, event, or other relevant criteria, you can streamline the process of locating and managing the imported videos within your computer’s file system.
Throughout the transfer process, monitor the progress to ensure that all MTS files are successfully copied to your computer without any errors or interruptions. Once the transfer is complete, verify that the imported MTS files are accessible and playable using a compatible video player or video editing software on your computer.
By successfully transferring the MTS files to your computer, you’ve taken a crucial step in harnessing the creative potential of your video recordings, setting the stage for the next phase of editing and refining your high-definition footage.
Step 4: Use video editing software to import and edit the MTS files
Now that you have transferred the MTS files from your Panasonic camcorder to your computer, it’s time to leverage the power of video editing software to import and refine your high-definition video recordings. Video editing software provides a versatile platform for organizing, enhancing, and transforming your MTS files into polished, professional-quality videos that captivate and engage your audience.
Begin by launching your preferred video editing software on your computer. If you don’t already have a specific video editing application installed, consider exploring popular options such as Adobe Premiere Pro, Final Cut Pro, or Sony Vegas Pro, each of which offers comprehensive tools for importing and editing MTS files with precision and creativity.
Once the video editing software is running, navigate to the import or media management section of the application to initiate the process of importing the MTS files. Depending on the software you’re using, you may encounter options to import individual MTS files or entire directories containing multiple video recordings. Select the desired MTS files for import, and proceed to add them to your project timeline or media library within the editing software.
Upon importing the MTS files, take advantage of the editing software’s array of tools and features to refine and enhance your video footage. These tools may include options for trimming and cutting video segments, applying visual effects and transitions, adjusting color and exposure settings, and integrating audio elements to complement your video content.
As you delve into the editing process, consider experimenting with different editing techniques and styles to bring your creative vision to life. Whether you’re crafting a cinematic masterpiece, a documentary, or a personal vlog, the editing software serves as your canvas for weaving together the MTS files into a compelling visual narrative.
Throughout the editing process, take advantage of the software’s preview and playback features to review your edits and ensure that the MTS files are seamlessly integrated into your project. Fine-tune the timing, visual effects, and audio elements to achieve the desired impact, and explore the software’s capabilities for adding titles, captions, and other graphical overlays to enhance the storytelling aspect of your videos.
Upon completing the editing process, preview the final video composition to verify that the MTS files have been transformed into a cohesive and engaging visual presentation. Once you’re satisfied with the edits, proceed to export the edited video in your desired format, ready to share with your audience or further refine through additional post-production processes.
By leveraging video editing software to import and edit the MTS files from your Panasonic camcorder, you’ve harnessed the full potential of your high-definition video recordings, transforming them into captivating visual creations that reflect your unique creative vision and storytelling prowess.
Conclusion
Congratulations on successfully navigating the process of importing MTS files from your Panasonic camcorder to your computer and harnessing the power of video editing software to refine and elevate your high-definition video recordings. By following the step-by-step guide outlined in this article, you’ve gained valuable insights into the seamless transfer of MTS files, empowering you to unleash your creativity and bring your video projects to life with confidence and proficiency.
As you continue to explore the realm of videography and storytelling through video content, remember that the process of importing and editing MTS files is just the beginning of your journey. With each video project, you have the opportunity to refine your skills, experiment with new editing techniques, and captivate your audience with compelling visual narratives that resonate and inspire.
By mastering the art of importing MTS files and leveraging the capabilities of video editing software, you’ve unlocked a world of creative possibilities, enabling you to craft immersive and impactful video content that leaves a lasting impression on your viewers. Whether you’re documenting cherished moments, creating educational videos, or producing professional-quality visual content, the knowledge and skills you’ve acquired in this process serve as the foundation for your continued growth and success in the realm of video production.
Embrace each video project as an opportunity to express your creativity, refine your storytelling prowess, and connect with your audience on a deeper level. As you apply the techniques and principles outlined in this guide, remember to infuse your videos with authenticity, emotion, and a touch of your unique creative flair, allowing your visual creations to resonate and leave a lasting impact on those who experience them.
With the ability to import, edit, and refine MTS files from your Panasonic camcorder, you’re equipped to embark on a journey of visual storytelling that transcends boundaries and captivates audiences. Embrace the creative process, explore new horizons, and let your passion for videography shine through in every frame of your meticulously crafted videos.


