Introduction
Inserting a SIM card into your iPhone XR is a fundamental step in setting up your device for mobile connectivity. Whether you're upgrading to a new iPhone or simply need to replace your SIM card, this guide will walk you through the process with ease. By following the simple steps outlined in this tutorial, you'll be able to successfully insert a SIM card into your iPhone XR and enjoy seamless access to cellular networks.
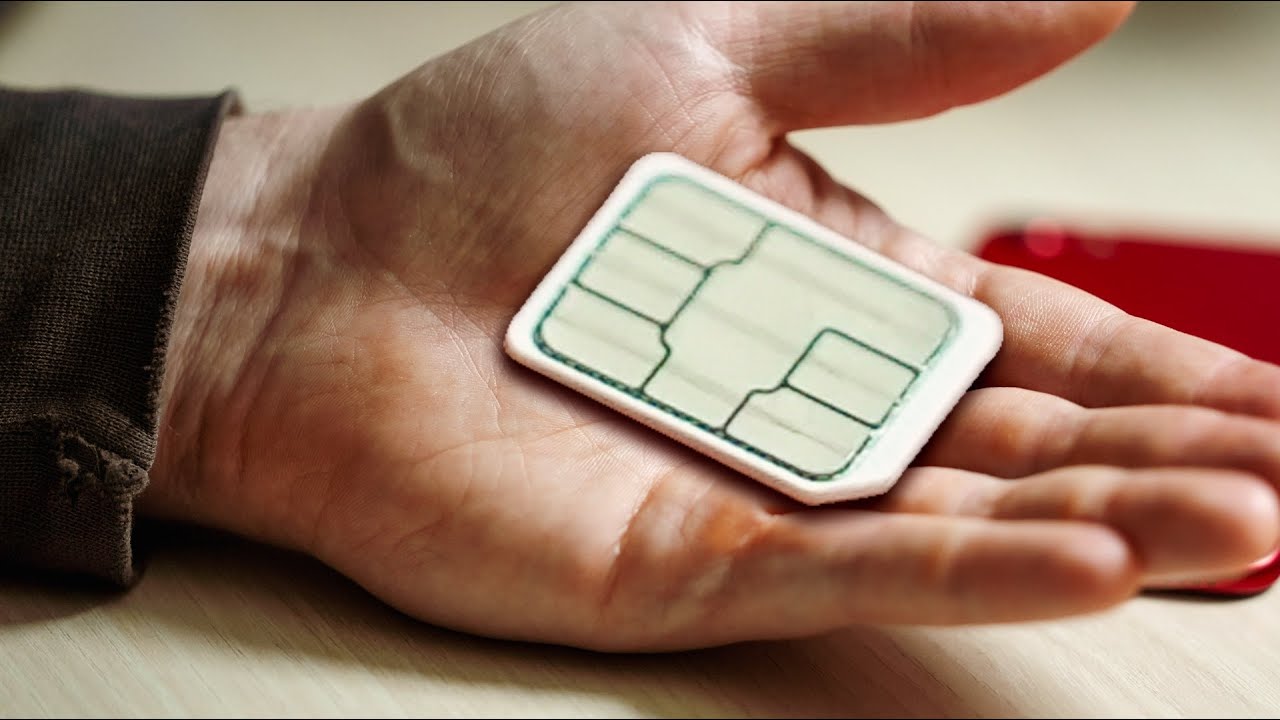
The SIM card, or Subscriber Identity Module, plays a pivotal role in enabling your iPhone XR to connect to a cellular network and make calls, send text messages, and access mobile data. It uniquely identifies your device to the network and allows you to personalize your mobile service by storing essential information such as your phone number, contacts, and text messages. Therefore, ensuring that the SIM card is properly inserted is crucial for the optimal functionality of your device.
In the following sections, we will delve into a step-by-step tutorial that will guide you through the process of locating the SIM card tray, ejecting the tray, inserting the SIM card, and reinserting the tray into your iPhone XR. Whether you're a seasoned iPhone user or a newcomer to the Apple ecosystem, this comprehensive guide will equip you with the knowledge and confidence to handle the SIM card insertion process effortlessly.
With this tutorial at your disposal, you'll be able to take full advantage of the impressive capabilities of your iPhone XR, staying connected with friends, family, and the digital world at large. Let's embark on this journey to seamlessly integrate your SIM card into your iPhone XR, unlocking the full potential of your mobile device.
Step 1: Locate the SIM Card Tray
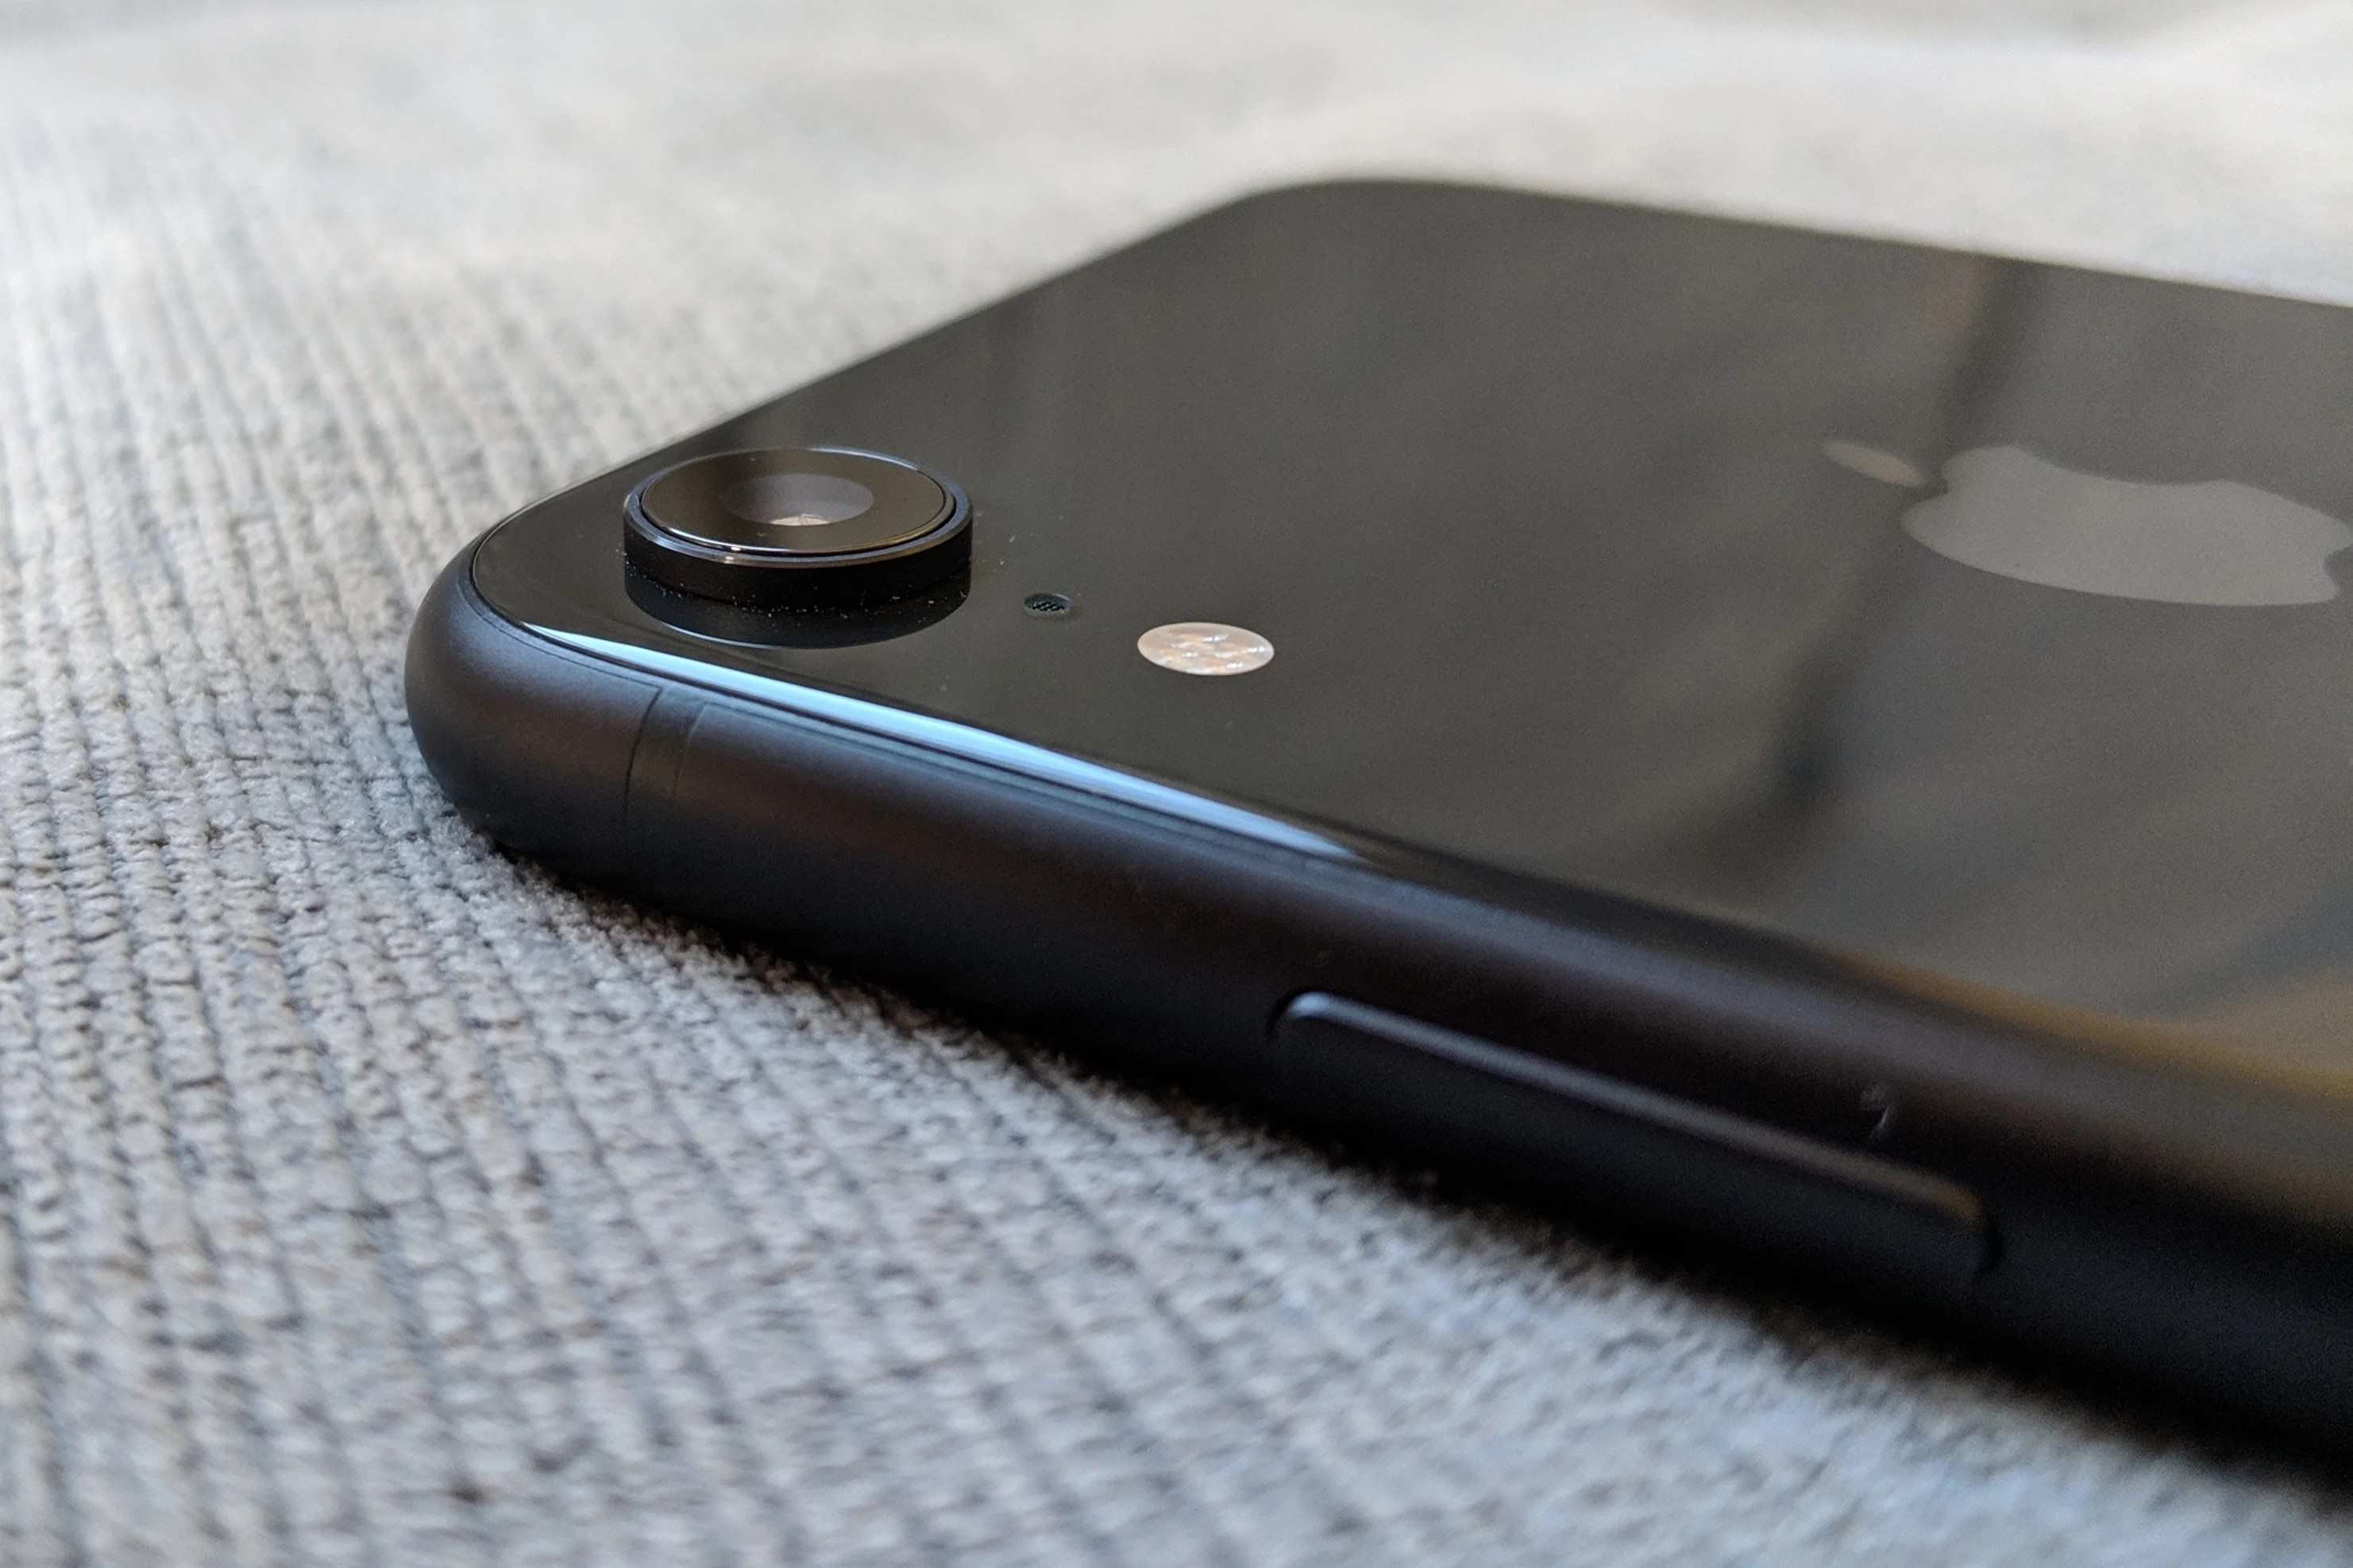
The first step in inserting a SIM card into your iPhone XR is to locate the SIM card tray. This small but crucial component is responsible for housing the SIM card securely within your device. To begin the process, you'll need to identify the precise location of the SIM card tray on your iPhone XR.
The SIM card tray on the iPhone XR is typically situated on the right-hand side of the device. It is important to note that the exact placement may vary slightly depending on the specific model and design of your iPhone XR. However, a general rule of thumb is to look for a small, recessed slot along the right edge of the device.
Upon locating the SIM card tray, you will notice a small pinhole adjacent to it. This pinhole serves as the entry point for the SIM card ejection tool, which is essential for safely removing and inserting the SIM card. The presence of this pinhole is a key indicator of the SIM card tray's location and facilitates the subsequent steps in the insertion process.
By familiarizing yourself with the physical layout of your iPhone XR and identifying the SIM card tray and ejection pinhole, you are poised to proceed with confidence to the next step in the tutorial. This initial step sets the stage for a smooth and successful SIM card insertion process, ensuring that you are well-prepared to seamlessly integrate the SIM card into your iPhone XR.
With the SIM card tray now located, you are ready to delve into the subsequent steps, which will guide you through the process of ejecting the tray, inserting the SIM card, and reinserting the tray into your iPhone XR. As you embark on this journey, rest assured that you are equipped with the foundational knowledge to navigate the SIM card insertion process with ease and precision.
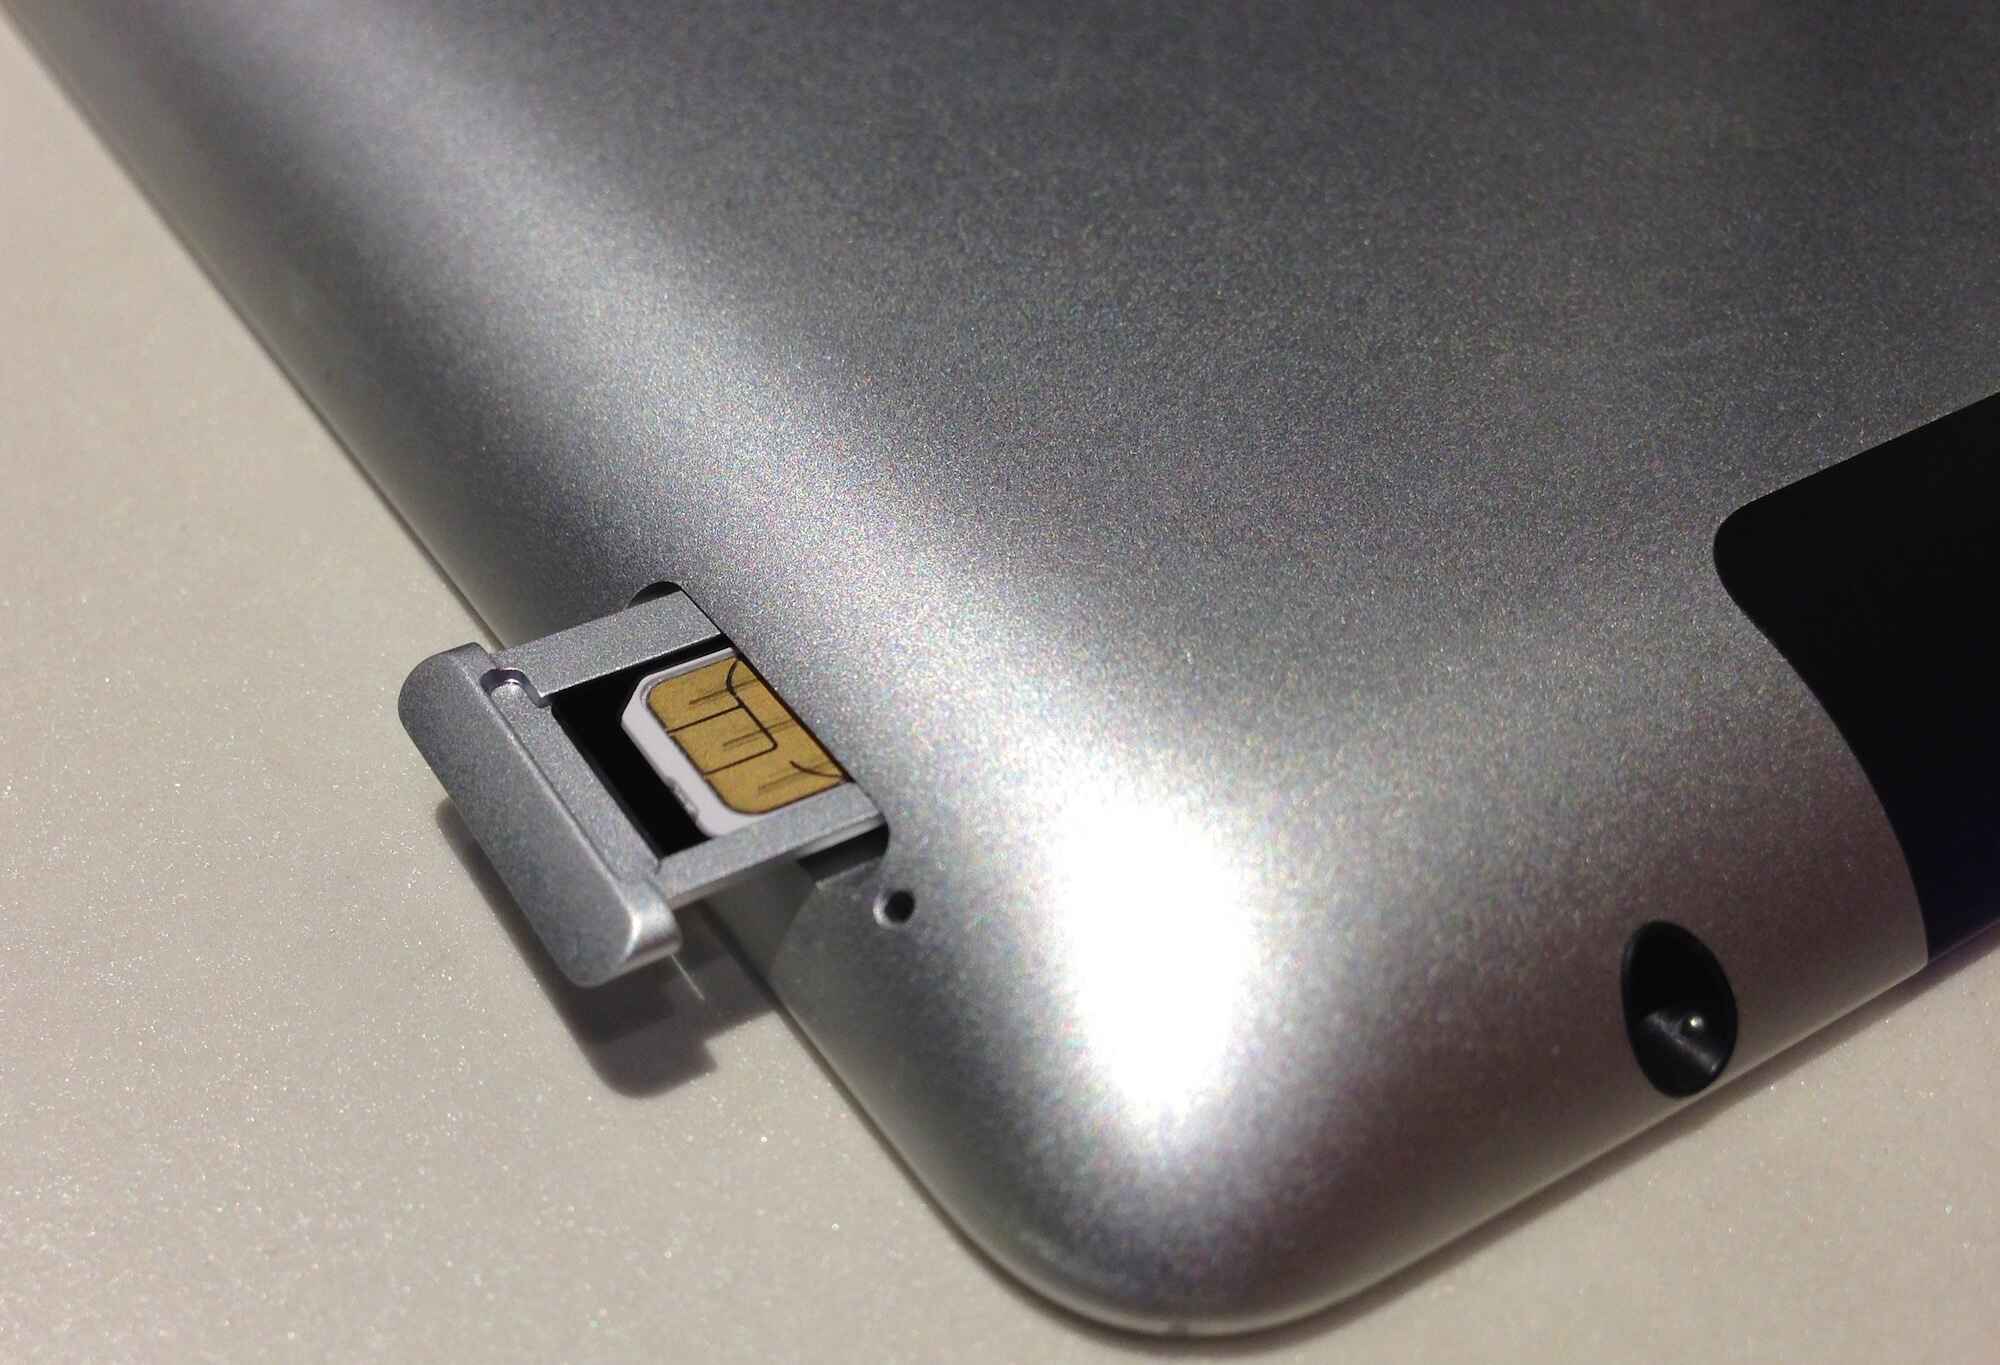
Step 2: Eject the SIM Card Tray
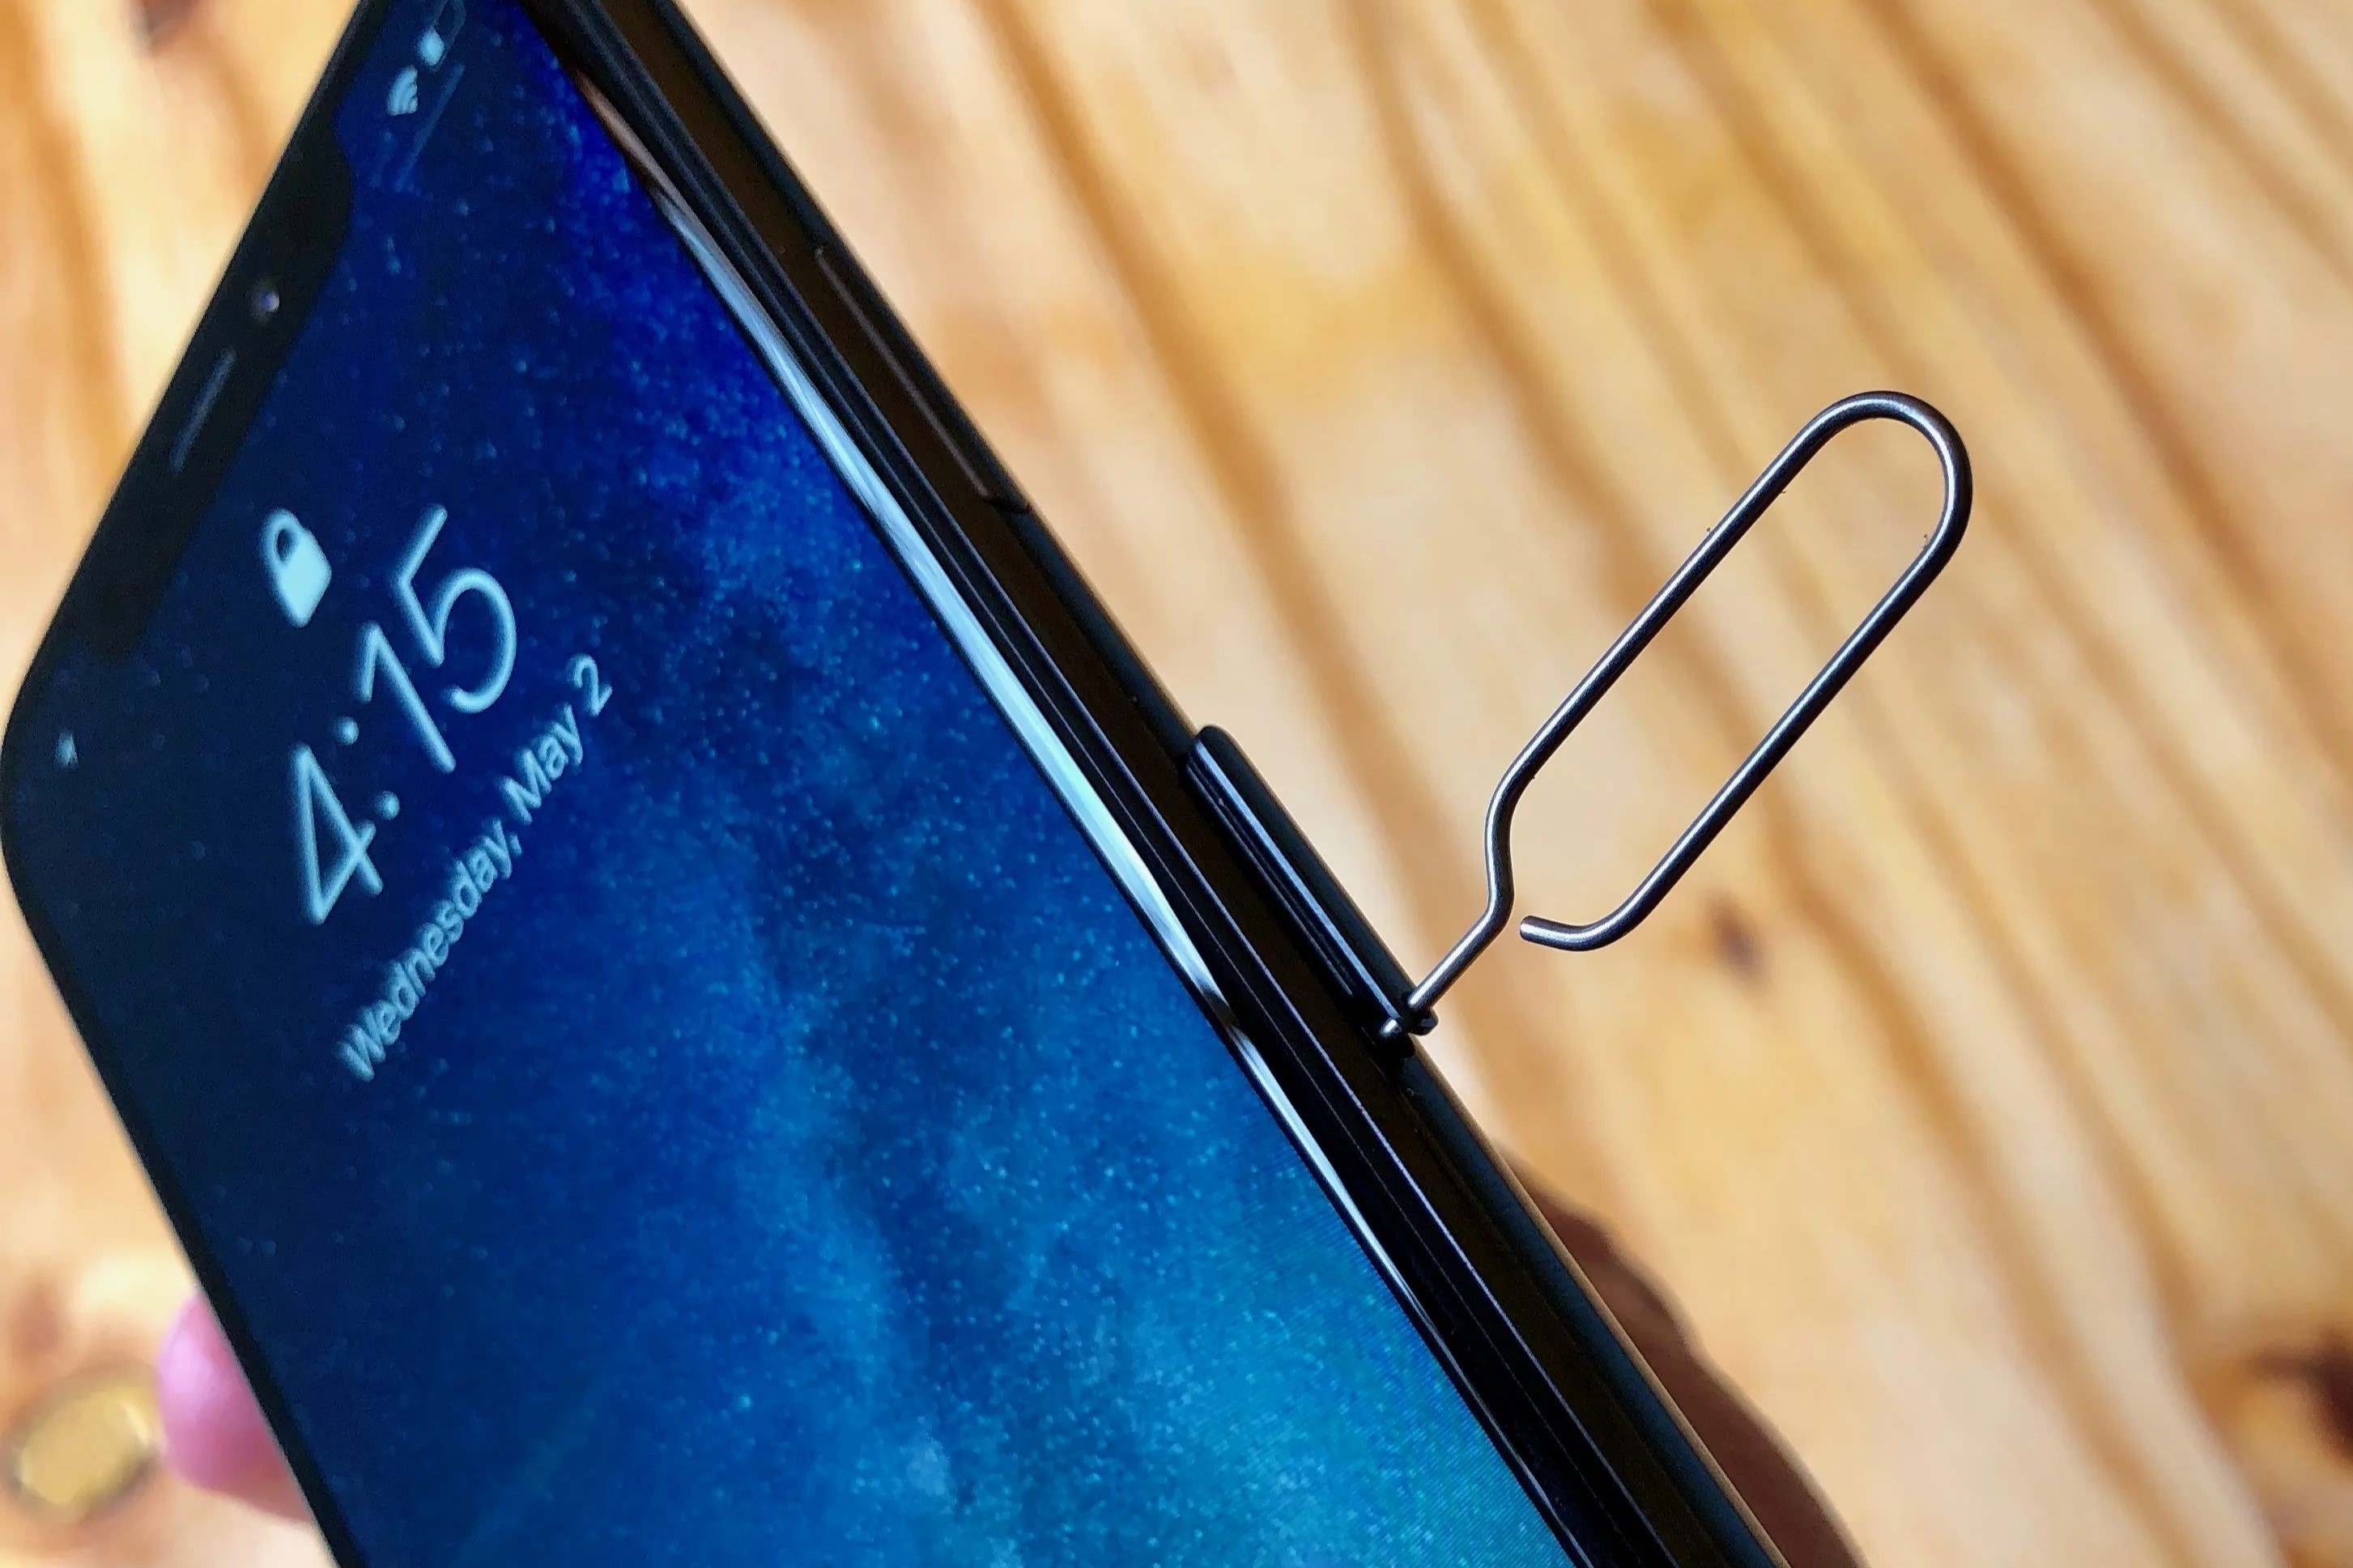
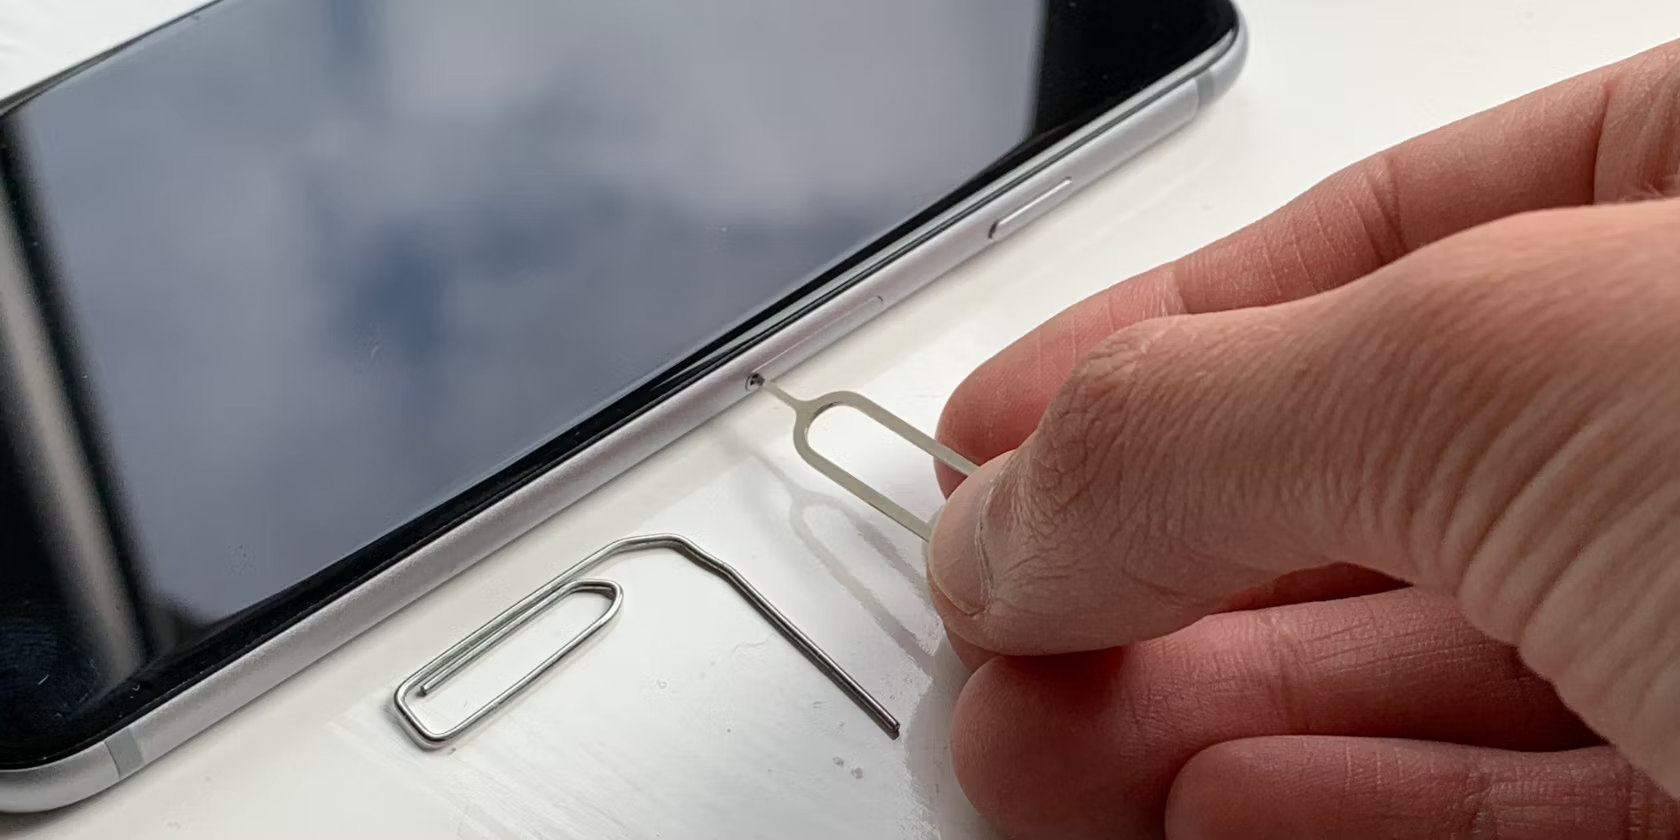
Ejecting the SIM card tray is a critical step in the process of inserting a SIM card into your iPhone XR. This step ensures that the SIM card tray is safely removed from the device, allowing for the seamless insertion of the SIM card. To accomplish this, you will need to utilize the SIM card ejection tool, which is typically provided by Apple alongside the iPhone XR.
To begin, locate the SIM card ejection tool that came with your iPhone XR. This tool is a small, metallic pin with a narrow, pointed end, specifically designed for ejecting the SIM card tray. If the original ejection tool is unavailable, a suitable alternative such as a paperclip can be used, ensuring that it is straightened to facilitate the ejection process.
Next, firmly grasp the iPhone XR in one hand, ensuring a secure grip to prevent accidental slippage. With the device held securely, take the SIM card ejection tool and insert the pointed end into the pinhole adjacent to the SIM card tray. Apply gentle pressure to engage the internal mechanism, causing the SIM card tray to protrude slightly from the device.
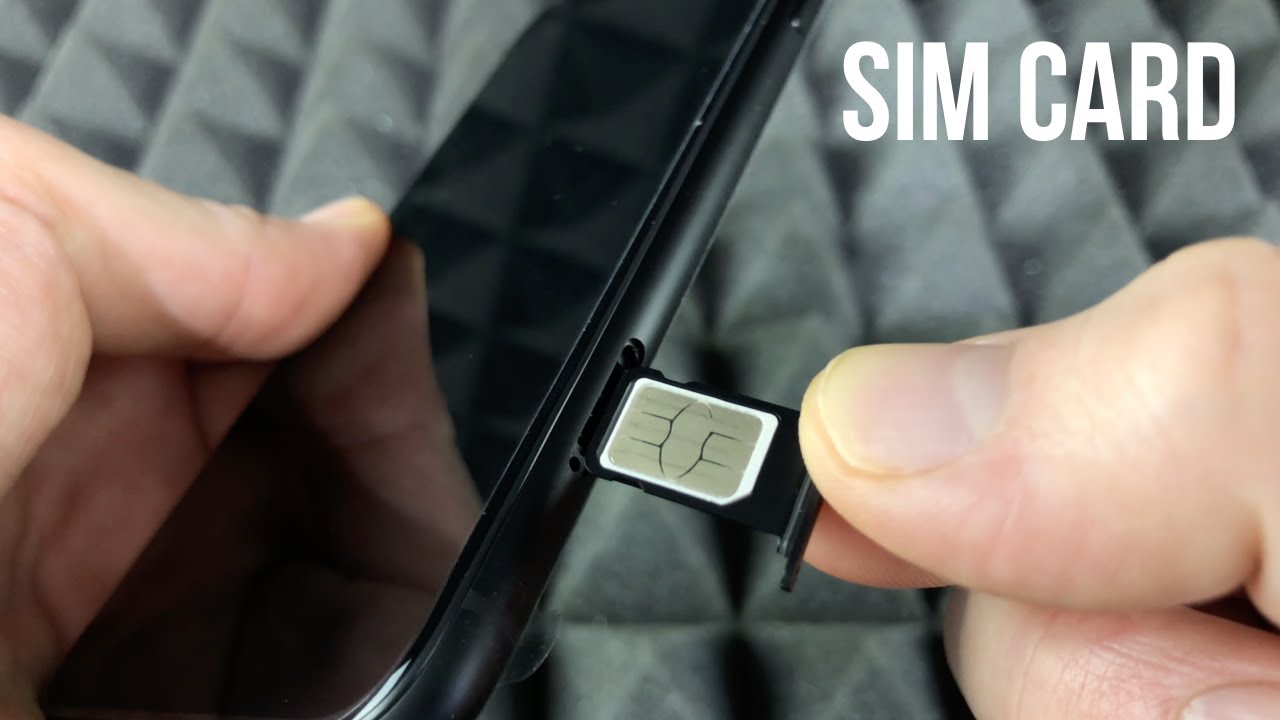
As the SIM card tray emerges, carefully pull it out of the iPhone XR, ensuring a steady and controlled motion to prevent any damage to the tray or the device. Once the tray is fully ejected, set it aside in a safe location, ensuring that it is easily accessible for the subsequent step of inserting the SIM card.
With the SIM card tray successfully removed from your iPhone XR, you have completed the pivotal task of ejecting the tray in preparation for the next phase of the SIM card insertion process. This seamless maneuver sets the stage for the subsequent step of inserting the SIM card into the tray, a process that will be covered in detail in the following section.
As you proceed with confidence to the next step, you can take pride in successfully navigating the ejection process, positioning yourself for a smooth and efficient SIM card insertion into your iPhone XR. With the SIM card tray in hand and the device primed for the next phase, you are well on your way to completing the SIM card insertion process and enjoying uninterrupted mobile connectivity on your iPhone XR.
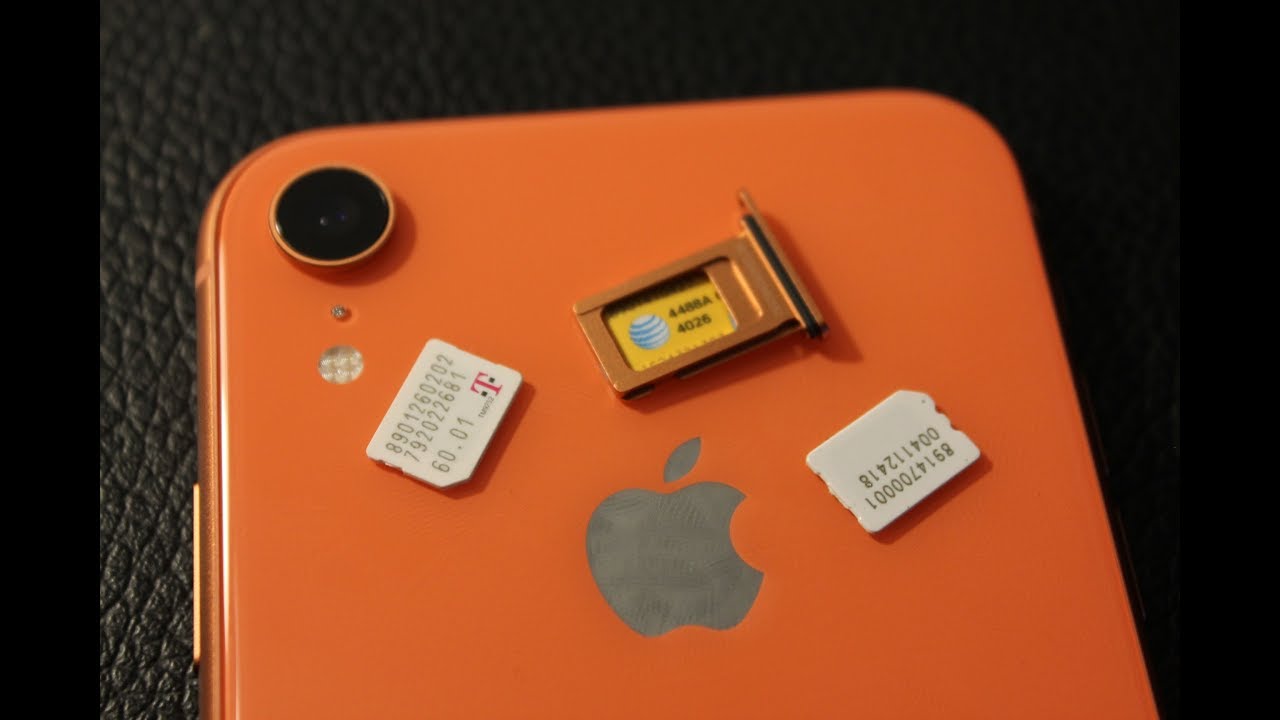
Step 3: Insert the SIM Card
With the SIM card tray successfully ejected from your iPhone XR, you are now poised to embark on the pivotal step of inserting the SIM card into the tray. This step is integral to establishing the essential connection between your device and the cellular network, enabling seamless communication and data access. By following the detailed instructions outlined below, you will navigate the process with confidence and precision, ensuring that the SIM card is securely integrated into your iPhone XR.
Begin by carefully examining the SIM card tray that you have removed from your device. Take note of the orientation and shape of the tray, as well as the position of the SIM card slot within it. The SIM card slot is designed to accommodate the SIM card in a specific configuration, ensuring a snug and secure fit within the tray.
Next, retrieve your SIM card from its protective casing or the previous device in which it was installed. Take a moment to inspect the SIM card, noting the shape and size to ensure that it aligns with the slot in the tray. It is essential to position the SIM card correctly to avoid any potential damage to the card or the tray during the insertion process.
With the SIM card oriented in the correct position, gently place it into the designated slot within the SIM card tray. Ensure that the SIM card rests flat and flush within the slot, aligning with the contours of the tray to maintain a secure and stable position. Exercise caution to prevent any bending or misalignment of the SIM card, as this could impede its functionality within the device.
As the SIM card is delicately nestled within the tray, take a moment to verify that it is firmly seated and aligned according to the designated configuration. This visual inspection ensures that the SIM card is properly positioned for optimal performance and connectivity within your iPhone XR.
Once the SIM card is securely inserted into the tray, carefully position the tray with the SIM card back into the corresponding slot on your iPhone XR. Ensure that the tray slides smoothly and seamlessly into the device, aligning with the surrounding contours to maintain a seamless exterior profile.
As the SIM card tray is reinserted, you have successfully completed the crucial step of inserting the SIM card into your iPhone XR. This milestone signifies the seamless integration of the SIM card into your device, setting the stage for uninterrupted mobile connectivity and access to essential communication services.
With the SIM card securely in place, you are now prepared to proceed to the final step of reinserting the SIM card tray into your iPhone XR. This concluding step will ensure that the SIM card is housed securely within the device, allowing you to harness the full potential of your iPhone XR for communication, data access, and connectivity with the digital world.
As you transition to the next phase of the tutorial, take pride in successfully navigating the intricate process of inserting the SIM card into your iPhone XR. With the SIM card firmly integrated into your device, you are poised to embark on a seamless and enriching mobile experience, empowered by the robust capabilities of your iPhone XR.
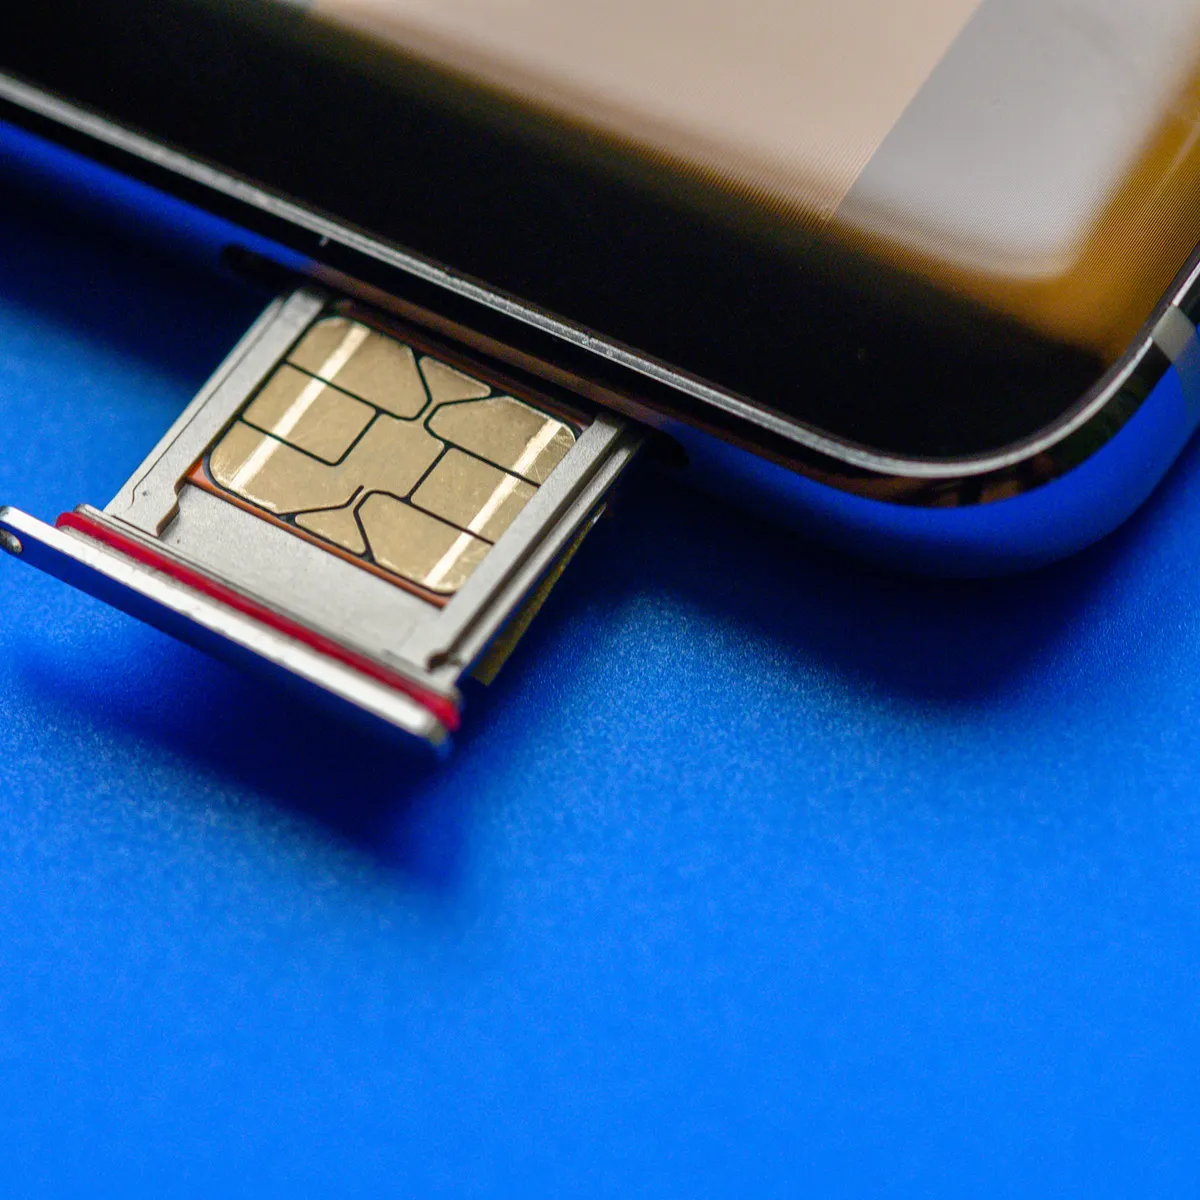
Step 4: Reinsert the SIM Card Tray
With the SIM card securely inserted into your iPhone XR, the final step in the SIM card insertion process involves reinserting the SIM card tray back into the device. This critical maneuver ensures that the SIM card is housed securely within the iPhone XR, allowing for seamless connectivity and optimal performance. By following the detailed instructions outlined below, you will successfully complete the SIM card insertion process, positioning your device for uninterrupted access to cellular networks and essential communication services.
Begin by carefully aligning the SIM card tray with the corresponding slot on the right-hand side of your iPhone XR. Take note of the orientation of the tray, ensuring that it aligns seamlessly with the surrounding contours of the device. This alignment is crucial for a smooth and secure reinsertion of the tray, maintaining the sleek and streamlined profile of your iPhone XR.
Once the SIM card tray is positioned correctly, gently slide it back into the device, applying steady and controlled pressure to facilitate a seamless reintegration. Ensure that the tray glides effortlessly into the designated slot, maintaining a flush and uniform alignment with the device's exterior. This smooth reinsertion process is essential for preserving the structural integrity of the iPhone XR while securely housing the SIM card within the device.
As the SIM card tray is fully reinserted into your iPhone XR, take a moment to verify that it sits snugly and securely within the device. Perform a visual inspection to confirm that the tray is flush with the surrounding edges, seamlessly blending into the sleek design of the iPhone XR. This verification ensures that the SIM card is housed in a stable and protected environment, ready to facilitate seamless communication and connectivity.
With the SIM card tray successfully reinserted, you have completed the final step of the SIM card insertion process for your iPhone XR. This milestone signifies the meticulous integration of the SIM card into your device, setting the stage for uninterrupted mobile connectivity and access to essential communication services.
As you conclude the SIM card insertion process, take pride in successfully navigating each step with precision and confidence. With the SIM card securely housed within your iPhone XR, you are poised to embark on a seamless and enriching mobile experience, empowered by the robust capabilities of your device.
Conclusion
In conclusion, the process of inserting a SIM card into your iPhone XR is a fundamental yet straightforward endeavor that empowers you to seamlessly integrate your device with cellular networks, enabling essential communication and data access. By following the comprehensive tutorial outlined in this guide, you have gained the knowledge and confidence to navigate each step of the SIM card insertion process with precision and ease.
From locating the SIM card tray to delicately inserting the SIM card and reinserting the tray into your iPhone XR, each step has been meticulously detailed to ensure a seamless and successful experience. As a result, you have positioned your device for uninterrupted mobile connectivity, allowing you to harness the full potential of your iPhone XR for communication, data access, and connectivity with the digital world.
By familiarizing yourself with the physical layout of your iPhone XR and identifying the SIM card tray and ejection pinhole, you have established a solid foundation for the insertion process. The pivotal step of ejecting the SIM card tray was executed with finesse, setting the stage for the delicate task of inserting the SIM card into the tray. With careful attention to detail, you ensured that the SIM card was securely positioned within the tray, ready to facilitate seamless communication and connectivity.
Finally, the process culminated in the reinsertion of the SIM card tray into your iPhone XR, completing the seamless integration of the SIM card into your device. This final step signifies the meticulous care and precision with which you have approached the SIM card insertion process, ensuring that your iPhone XR is primed for optimal performance and connectivity.
As you embark on your journey with the SIM card securely integrated into your iPhone XR, take pride in the knowledge that you have successfully navigated this essential process with confidence and expertise. With the SIM card firmly in place, your iPhone XR is now poised to deliver a seamless and enriching mobile experience, empowering you to stay connected with friends, family, and the digital world at large.
In essence, this tutorial has equipped you with the essential skills to handle the SIM card insertion process effortlessly, allowing you to make the most of your iPhone XR's impressive capabilities. With the SIM card seamlessly integrated into your device, you are well-prepared to embark on a seamless and enriching mobile experience, empowered by the robust connectivity and communication features of your iPhone XR.