Introduction
Welcome to our guide on how to link your PayPal and Venmo accounts. Many people today rely on these popular payment platforms for their online transactions, whether it’s sending money to friends, making purchases, or even receiving payments. By linking your PayPal and Venmo accounts, you can seamlessly transfer funds between the two platforms and enjoy a more convenient and streamlined payment experience.
PayPal is a well-established and trusted online payment platform that allows users to securely send and receive money, make online purchases, and even set up recurring payments. Venmo, on the other hand, is a peer-to-peer payment app that enables users to send money to friends and family, split bills, and even make purchases at select merchants.
Linking your PayPal and Venmo accounts not only allows for easy fund transfers, but it also opens up new possibilities for using your funds in various ways. For example, you can use your PayPal balance to make payments within the Venmo app, making it more convenient than ever to settle bills with friends or make purchases at Venmo-enabled merchants. Additionally, linking the two accounts provides a central hub for managing your finances, giving you greater visibility and control over your funds.
In this step-by-step guide, we will walk you through the process of linking your PayPal and Venmo accounts, as well as provide some troubleshooting tips for common issues that may arise. Whether you’re a long-time user of both platforms or just starting out, this guide will help you make the most of your PayPal and Venmo accounts and simplify your online payments.
Step 1: Create a PayPal Account
Before you can link your PayPal and Venmo accounts, you’ll need to have a PayPal account. If you already have one, you can skip this step and move on to Step 2.
To create a PayPal account, follow these simple steps:
- Go to the PayPal website (www.paypal.com) and click on the “Sign Up” button.
- Choose the type of account you want to create – Personal or Business – and click “Get Started”. For most individuals, a Personal account is sufficient.
- Provide your email address and create a password for your PayPal account. Make sure to choose a strong password that is unique and not easily guessable.
- Next, you’ll be asked to provide your personal information, including your full name, address, and phone number. This information is necessary for PayPal to verify your identity and ensure the security of your account.
- Once you’ve entered your personal information, review the terms and conditions, and click “Agree and Create Account” to proceed.
- At this point, you may be asked to link a debit or credit card to your PayPal account. This step is optional and can be skipped if you prefer to link a bank account later.
- Finally, you’ll be prompted to confirm your email address. PayPal will send a confirmation email to the email address you provided during the sign-up process. Simply click on the link in the email to verify your account.
Once you’ve successfully created your PayPal account and verified your email address, you’re ready to move on to the next step: creating a Venmo account. If you already have a Venmo account, you can skip to Step 3.
It’s crucial to keep your PayPal account information secure and regularly monitor your account for any unauthorized activity. Set up strong passwords, enable two-factor authentication, and be cautious of phishing attempts.
Step 2: Create a Venmo Account
In order to link your PayPal and Venmo accounts, you’ll need to have a Venmo account. If you already have one, you can skip this step and proceed to Step 3.
Follow these steps to create a Venmo account:
- Download the Venmo mobile app from the App Store (for iOS) or Google Play Store (for Android).
- Once the app is installed, open it and tap on “Sign Up” to start creating your account.
- Enter your phone number or email address, and create a secure password for your Venmo account.
- Next, you’ll be asked to verify your phone number or email address. Follow the instructions provided to complete the verification process.
- Once your account is verified, you can customize your Venmo profile by adding a profile photo and a username. This will help your friends find you on the platform.
- Review the Venmo User Agreement and Privacy Policy, then click “Accept & Continue” to proceed.
- Set up your Venmo security PIN. This PIN will be required whenever you want to send money or make changes to your Venmo settings.
- Optionally, you can choose to link a debit card or bank account to your Venmo account. This will enable you to transfer funds to and from your Venmo balance.
Congratulations! You have now successfully created your Venmo account. Make sure to keep your account secure by using a strong password and enabling additional security features such as fingerprint or Face ID authentication if available on your device.
Now that you have both your PayPal and Venmo accounts set up, it’s time to proceed to the next step and link them together for seamless fund transfers and payment options.
Step 3: Linking PayPal and Venmo
Now that you have both a PayPal account and a Venmo account, you can proceed to link them together for easy fund transfers and payment options. Follow these steps to link your PayPal and Venmo accounts:
- Open the Venmo app on your mobile device and log in to your Venmo account.
- Tap on the profile icon at the top left corner of the screen to access your settings.
- Scroll down and select “Settings” from the list of options.
- Under “Settings,” tap on “Payment Methods.”
- Next, tap on “Link PayPal” to start the linking process.
- You’ll be redirected to the PayPal login page. Enter your PayPal email address and password to sign in.
- After signing in to your PayPal account, you’ll be asked to grant permission for Venmo to access your PayPal account.
- Review the information and permissions requested, then click “Agree & Connect” to link your PayPal and Venmo accounts.
Once the linking process is complete, you’ll receive a confirmation message indicating that your PayPal account is now linked to Venmo. You can now easily transfer funds between the two platforms and enjoy the convenience of using your PayPal balance within the Venmo app.
If at any point you want to unlink your PayPal and Venmo accounts, you can do so by following these steps:
- Open the Venmo app and log in to your Venmo account.
- Tap on the profile icon and go to “Settings.”
- Select “Payment Methods.”
- Tap on “Unlink PayPal.”
- Confirm your decision to unlink the accounts.
Keep in mind that once you unlink your PayPal and Venmo accounts, you will no longer be able to transfer funds between the two platforms and use your PayPal balance for payments within Venmo.
Now that your PayPal and Venmo accounts are linked, you can easily manage your finances and make seamless transactions between the two platforms.
Step 4: Verifying Your Venmo Account
In order to fully utilize your Venmo account and access all its features, it’s important to verify your account. Verifying your Venmo account adds an extra layer of security and allows you to increase your transaction limits. Here’s how you can verify your Venmo account:
- Open the Venmo app on your mobile device and log in to your account.
- Tap on the profile icon at the top left corner of the screen to access your settings.
- Select “Settings” from the list of options.
- Under “Settings,” tap on “Identity Verification.”
- Follow the on-screen instructions to provide the necessary information.
- You may be asked to provide personal details such as your full name, date of birth, social security number, or a photo of a government-issued ID.
- Once you’ve provided the required information, review and submit it for verification.
- Wait for Venmo to review and approve your verification request. This process can take a few hours to a few days.
- You’ll receive a confirmation once your Venmo account has been successfully verified.
Verifying your Venmo account is an important step to ensure the security of your transactions and allow for higher transaction limits. It also helps prevent fraudulent activities and protects both you and other Venmo users.
Keep in mind that your personal information provided for verification purposes is handled securely and in accordance with Venmo’s privacy policy. Rest assured that your information is protected.
Once your Venmo account is verified, you can enjoy the full range of features and benefits that Venmo has to offer, such as higher transaction limits, faster fund transfers, and additional security for your account.
Step 5: Transferring Funds between PayPal and Venmo
Now that your PayPal and Venmo accounts are linked, you can easily transfer funds between the two platforms. Whether you want to send money from PayPal to Venmo or vice versa, follow these steps to transfer funds:
Transferring Funds from PayPal to Venmo:
- Open the Venmo app on your mobile device and log in to your Venmo account.
- Tap on the “Pay or Request” icon at the bottom of the screen.
- Enter the recipient’s Venmo username, email address, or phone number.
- Specify the amount you want to transfer from PayPal to Venmo.
- Add a note or description if desired.
- Tap on the “Pay” button to initiate the transfer.
The funds should now be transferred from your PayPal account to your Venmo balance. Keep in mind that it may take a few minutes for the transfer to be completed.
Transferring Funds from Venmo to PayPal:
- Open the Venmo app on your mobile device and log in to your Venmo account.
- Tap on the “☰” icon at the top left corner of the screen to open the menu.
- Select “Transfer to Bank” from the options.
- Enter the amount you want to transfer from Venmo to PayPal.
- Choose the bank account connected to your PayPal account.
- Tap on “Transfer” to initiate the transfer.
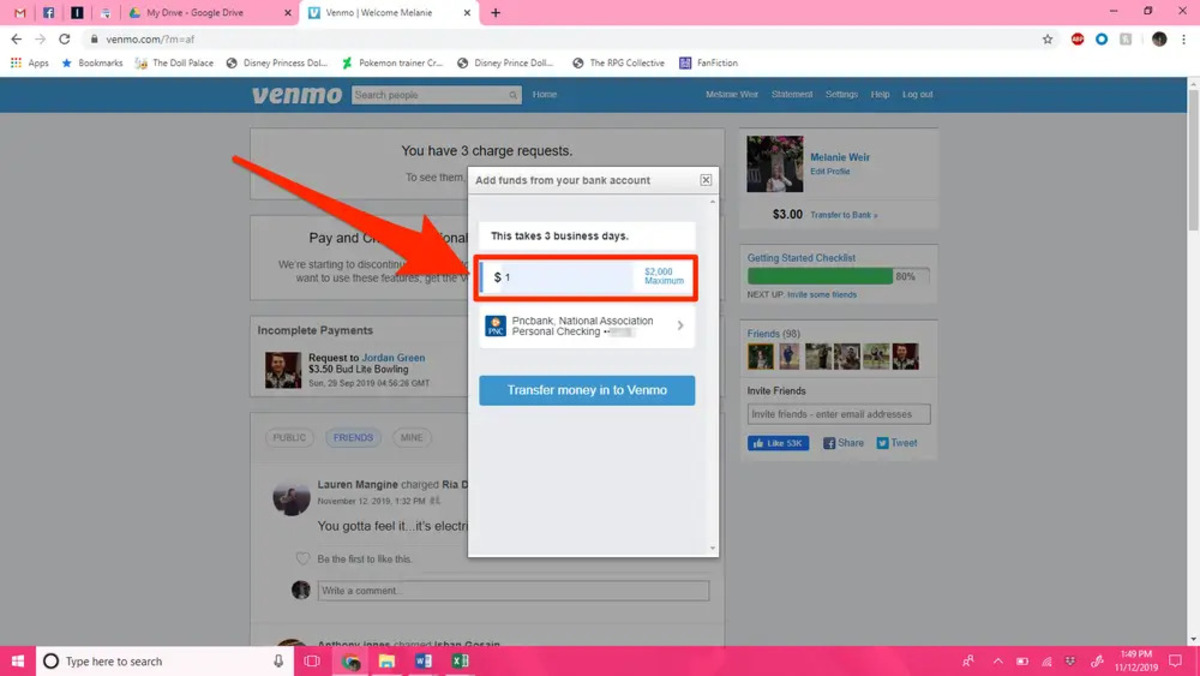
The funds should now be transferred from your Venmo balance to your linked bank account, which is connected to your PayPal account. It may take a few business days for the transfer to reflect in your PayPal account balance.
It’s important to note that transferring funds between PayPal and Venmo may be subject to certain fees or transaction limits imposed by the platforms. Make sure to familiarize yourself with these fees and limits to avoid any surprises.
By having the ability to transfer funds between PayPal and Venmo, you can easily manage your finances across both platforms and use your funds in a way that suits your needs.
Step 6: Using PayPal to Pay in Venmo
One of the great benefits of linking your PayPal and Venmo accounts is the ability to use your PayPal balance to make payments within the Venmo app. This provides a convenient way to pay friends, split bills, or make purchases at merchants that accept Venmo. Here’s how you can use PayPal to pay in Venmo:
- Open the Venmo app on your mobile device and log in to your Venmo account.
- Tap on the “Pay or Request” icon at the bottom of the screen.
- Enter the recipient’s Venmo username, email address, or phone number.
- Specify the amount you want to pay.
- Below the payment amount, you’ll see your available payment methods. Tap on “Pay with” and select PayPal from the options.
- Review the payment details and add a note or description if desired.
- Tap on the “Pay” button to complete the payment using your PayPal balance.
The payment will be deducted from your PayPal balance and sent to the recipient’s Venmo account. You’ll receive a confirmation of the payment within the Venmo app.
Using PayPal to pay in Venmo is a convenient option, especially if you prefer to utilize your PayPal balance for transactions. It allows you to seamlessly transfer funds between the two platforms and make payments without the need to manually transfer funds each time.
Keep in mind that certain fees may apply when using PayPal to pay in Venmo, such as currency conversion fees or transaction fees for specific types of transactions. Make sure to review the terms and conditions of both platforms to understand any applicable fees before making payments.
With the ability to use your PayPal balance within Venmo, you have greater flexibility and convenience in managing your funds and making payments to friends or businesses.
Step 7: Troubleshooting Common Issues
While linking your PayPal and Venmo accounts is generally a straightforward process, you may encounter some common issues along the way. Here are a few troubleshooting tips to help you resolve these issues:
1. Incorrect login credentials: If you’re having trouble logging in to either your PayPal or Venmo account, double-check your login credentials. Ensure that you’re entering the correct email address or phone number and the associated password. If you’ve forgotten your password, follow the respective platforms’ password reset process.
2. Verification problems: If you’re experiencing difficulties with verifying your PayPal or Venmo account, make sure you’ve provided accurate information during the verification process. If you’re still facing issues, contact the customer support of the respective platform for further assistance.
3. Payment transfer delays: If you’ve initiated a fund transfer between your PayPal and Venmo accounts and it’s taking longer than expected, be patient. Transfers can sometimes take a few minutes or even a few business days, depending on various factors such as the type of transfer and the platform’s processing times. If the transfer is significantly delayed, contact customer support for assistance.
4. Invalid payment methods: Ensure that the payment methods linked to your PayPal and Venmo accounts are valid and up to date. If your chosen payment method is not working or is showing as invalid, double-check the information you entered, including card details or bank account information. Update the payment method if necessary.
5. Unauthorized transactions: If you notice any unauthorized transactions or suspicious activities on your PayPal or Venmo account, immediately contact customer support to report the issue and take appropriate actions to secure your accounts. It’s important to regularly monitor your accounts and review transaction history for any discrepancies.
If you encounter any other issues or have specific questions related to linking your PayPal and Venmo accounts, consider reaching out to the customer support of both platforms. They can provide personalized assistance and guide you through any challenges you may face.
By troubleshooting common issues that may arise during the linking process, you can ensure a smooth experience and fully utilize the features of your linked PayPal and Venmo accounts.
Conclusion
Congratulations! You have successfully learned how to link your PayPal and Venmo accounts. By following the steps outlined in this guide, you now have the ability to seamlessly transfer funds between PayPal and Venmo, use your PayPal balance to pay within the Venmo app, and enjoy the convenience of managing your finances across both platforms.
Linking your PayPal and Venmo accounts provides numerous benefits, including increased flexibility in using your funds, simplified transactions with friends and family, and the ability to make purchases at participating merchants. It streamlines your payment process and enhances your overall payment experience.
Remember to always keep your PayPal and Venmo accounts secure. Follow best practices such as using strong and unique passwords, enabling two-factor authentication, regularly monitoring your accounts for any unauthorized activity, and staying vigilant against phishing attempts.
If you encounter any difficulties or have specific questions, don’t hesitate to reach out to the customer support teams of PayPal and Venmo. They are there to assist you and provide further guidance.
Now that you’ve completed the linking process, explore the various features and functionalities available to you. Take advantage of the ease and convenience of managing your funds and making payments between PayPal and Venmo.
Thank you for following this guide on how to link your PayPal and Venmo accounts. We hope this information has been helpful and that you enjoy the benefits of seamless fund transfers and convenient payment options!


