Introduction
When it comes to the world of cryptocurrencies, Ethereum has emerged as one of the most prominent and innovative platforms. With its smart contract functionality and decentralized applications, Ethereum has revolutionized the way we think about blockchain technology. However, what if you want to modify or customize Ethereum to meet your specific needs? This is where forking Ethereum comes into play.
Forking Ethereum allows developers and blockchain enthusiasts to create their own unique version of the Ethereum blockchain. By making modifications to the existing codebase, you can introduce new features, tweak parameters, or even create an entirely separate chain that operates independently of the original Ethereum network.
In this article, we will delve into the world of Ethereum forking, exploring its definition, the different types of forks, and the step-by-step process of creating your own forked Ethereum blockchain. Whether you are a developer looking to experiment with Ethereum’s underlying technology or a blockchain enthusiast with a desire to understand the inner workings of this groundbreaking platform, this guide will provide you with the necessary insights.
Before we dive deeper into the technical aspects of forking Ethereum, let’s start by understanding what Ethereum is and its significance in the world of blockchain technology.
What is Ethereum?
Ethereum is a decentralized, open-source blockchain platform that enables the development and execution of smart contracts. It was proposed by Vitalik Buterin in 2013 and subsequently launched in 2015. Unlike Bitcoin, which primarily serves as a digital currency, Ethereum provides a more versatile platform for building decentralized applications (dApps) using smart contracts.
Smart contracts are self-executing contracts with the terms of the agreement directly written into code. These contracts automatically enforce the predetermined rules and conditions agreed upon by the involved parties, eliminating the need for intermediaries and potentially costly legal processes. Ethereum’s smart contract functionality opens up a world of possibilities, allowing developers to create a wide range of applications, from decentralized finance (DeFi) to digital identity systems and decentralized social networks.
At the core of Ethereum is its native cryptocurrency called Ether (ETH), which serves as a means of value transfer within the network. ETH is not only used for transaction fees but also as an incentive for participants to validate and secure the network through a consensus mechanism called Proof of Stake (PoS). This consensus mechanism, which Ethereum is in the process of transitioning to, ensures that the network remains secure and robust.
One of the key features that sets Ethereum apart is its ability to execute Turing-complete code, meaning that any computation that can be described by an algorithm can be run on the Ethereum Virtual Machine (EVM). This makes Ethereum a powerful platform for building complex applications that require advanced logic and computations.
Ethereum has gained significant traction within the blockchain community and has become the platform of choice for many developers and businesses. Its ecosystem is thriving, with a vibrant community, a wide range of developer tools and frameworks, and a growing number of dApps and projects built on top of it. Moreover, Ethereum’s commitment to openness, transparency, and decentralization has attracted the attention of traditional industries, potentially revolutionizing sectors such as finance, supply chain management, and governance.
Now that we have a basic understanding of what Ethereum is, let’s explore the concept of forking and how it applies to Ethereum’s blockchain in the next section.
What is a Fork?
In the context of blockchain technology, a fork refers to a divergence in the blockchain’s protocol, resulting in the creation of a separate and distinct chain from the original one. Essentially, a fork is a split in the blockchain’s history, where both chains share a common past until the point of divergence.
Forks can occur for various reasons and can have different implications depending on their nature. They are typically driven by the need to make fundamental changes to the existing protocol, address security vulnerabilities, or introduce new features to the blockchain. Forks can be categorized into two main types: hard forks and soft forks.
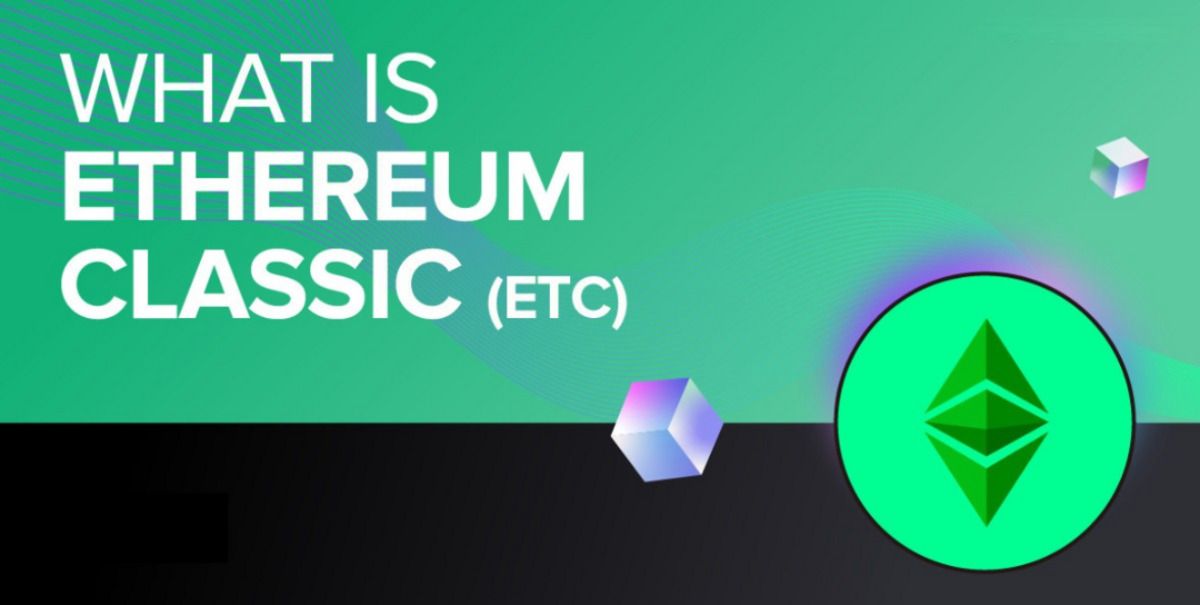
A hard fork is a type of fork that involves a radical change to the blockchain’s protocol, making it incompatible with previous versions. It requires all participants in the network to upgrade to the new version in order to continue validating and participating in the network. Hard forks often result in the creation of a new cryptocurrency, separate from the original one. Examples of notable hard forks include Bitcoin Cash, which was created as a result of a hard fork from the Bitcoin blockchain, and Ethereum Classic, which emerged after the infamous DAO hack and subsequent hard fork of the Ethereum network.
On the other hand, a soft fork is a less disruptive type of fork that maintains backward compatibility with the previous protocol. In a soft fork, the changes made to the blockchain’s protocol are designed to be compatible with older versions of the software. This means that participants who have not upgraded to the new version can still validate transactions and interact with the network. Soft forks usually aim to enhance the existing protocol without creating a separate chain. An example of a soft fork is the Segregated Witness (SegWit) upgrade in the Bitcoin network, which introduced changes to the transaction format and scalability without necessitating a split in the blockchain.
Forks play a crucial role in the evolution of blockchain networks as they allow for innovation and experimentation. They provide a mechanism for communities to express their consensus on proposed changes and enable the blockchain to adapt and address emerging challenges or opportunities. Forking is not unique to Ethereum; it is a common occurrence in the blockchain space and is driven by the decentralized nature of these networks.
Now that we have a solid understanding of what a fork is, let’s explore why forking Ethereum might be beneficial and why individuals or organizations may choose to embark on this process.
Understanding Hard Forks and Soft Forks
When it comes to forking a blockchain like Ethereum, it is essential to understand the distinction between hard forks and soft forks. Both types of forks involve making changes to the existing protocol, but they differ in terms of compatibility and the level of disruption to the network.
A hard fork is a type of fork that involves significant changes to the protocol, rendering it incompatible with previous versions. In a hard fork, the blockchain splits into two separate chains, with each chain following its own set of rules. This means that all participants in the network must upgrade to the new version of the software in order to continue validating and participating in the network. Failure to upgrade would result in the participant being left on the old chain, which may become obsolete over time. Hard forks often lead to the creation of a new cryptocurrency, with the original chain and the forked chain each having their own distinct tokens. Examples of notable hard forks include Bitcoin Cash and Ethereum Classic.
On the other hand, a soft fork is a less disruptive type of fork that maintains backward compatibility with previous versions of the protocol. In a soft fork, the changes made to the protocol are designed to be compatible with older versions of the software. This means that participants who have not upgraded to the new version can still validate transactions and interact with the network. Soft forks typically introduce new rules or restrictions to the existing protocol without creating a separate chain. They are often used to enhance the existing functionality or address specific issues within the network. An example of a soft fork is the Segregated Witness (SegWit) upgrade in the Bitcoin network.
One important aspect to consider when understanding hard forks and soft forks is network consensus. Consensus is the mechanism by which participants in a blockchain network agree on the validity of transactions and the state of the ledger. In a hard fork, all participants must agree to the changes in the protocol and upgrade their software to remain compatible with the new chain. This requires a high level of coordination and consensus among the network participants. Soft forks, on the other hand, require a majority of the network’s hash power to support and enforce the new rules, but participants who have not upgraded can still continue to validate transactions and participate in the network.
In summary, hard forks and soft forks are two different approaches to making changes to a blockchain’s protocol. Hard forks are more disruptive, creating a split in the blockchain and often resulting in the creation of a new cryptocurrency. Soft forks, on the other hand, are less disruptive, maintaining backward compatibility and introducing new rules or restrictions to the existing protocol. Understanding the differences between hard forks and soft forks is crucial for anyone considering forking Ethereum or participating in a forked blockchain. It is important to carefully consider the implications and potential benefits of each type of fork before making any decisions.
Why Fork Ethereum?
Forking Ethereum offers several compelling reasons for developers and blockchain enthusiasts to consider. Let’s explore some of the key motivations behind forking Ethereum and why individuals or organizations may choose to embark on this process.
1. Customization and Experimentation: Forking Ethereum allows developers to customize and experiment with the existing Ethereum protocol. By making modifications to the codebase, developers can introduce new features, enhance functionalities, or even create entirely new applications that cater to specific use cases. This flexibility is attractive to those who seek to push the boundaries of blockchain technology and explore innovative solutions.
2. Addressing Limitations: Ethereum, like any other technology, has its limitations. By forking Ethereum, developers have the opportunity to address these limitations and improve upon the existing protocol. For example, they can enhance scalability, reduce transaction costs, or introduce new consensus mechanisms that may be more energy-efficient or secure.
3. Community Consensus: Forking Ethereum provides a platform for communities to express their consensus on proposed changes or controversial issues. If there is disagreement within the Ethereum community regarding the direction of the protocol, forking allows dissenting groups to create their own version of Ethereum with the changes they believe are necessary. This promotes decentralization and inclusivity by allowing different perspectives to thrive.
4. Financial Incentives: Forking Ethereum can also present financial opportunities. When a forked blockchain gains traction and community support, its native tokens can potentially increase in value, providing financial gains to early participants. Additionally, by launching a forked blockchain, developers have the opportunity to create new revenue streams by offering unique services, applications, or token ecosystems that differentiate their chain from the original Ethereum network.
5. Education and Learning: Forking Ethereum can be a valuable educational experience for developers and blockchain enthusiasts. It provides a hands-on opportunity to delve deep into the inner workings of Ethereum’s codebase, understand blockchain architecture, and gain practical knowledge about consensus mechanisms, smart contracts, and decentralized applications. This knowledge can be applied to future projects or contribute to the development of the blockchain ecosystem as a whole.
It is important to note that forking Ethereum is not a decision to be taken lightly. It requires technical expertise and a thorough understanding of the implications, risks, and responsibilities involved. Additionally, forking a blockchain also entails building and fostering a community around the forked chain, as the success of the project relies on gaining support and usage from participants.
Now that we understand the motivations behind forking Ethereum, let’s delve into the different types of forks that can occur within the Ethereum ecosystem.
Types of Ethereum Forks
When it comes to forking Ethereum, there are different types of forks that can occur. These forks vary in their purpose, scope, and impact on the existing Ethereum network. Let’s explore the three main types of Ethereum forks:
1. Network Upgrade Forks: Network upgrade forks, also known as planned or protocol upgrade forks, are designed to introduce new features, enhancements, or improvements to the Ethereum network. These forks are carefully planned and executed by the Ethereum core development team in collaboration with the community. Network upgrade forks typically include changes to the underlying protocol, consensus mechanism, or smart contract functionality. Examples of network upgrade forks in Ethereum include the Byzantium, Constantinople, and Istanbul upgrades. These forks aim to improve the scalability, security, and efficiency of the network, and all participants are encouraged to upgrade their software to the latest version to benefit from the new features.
2. Contentious Forks: Contentious forks occur when there is a significant difference of opinion within the Ethereum community regarding proposed changes to the protocol or controversial issues. In these forks, opposing groups within the community pursue separate paths by creating their own versions of Ethereum. These forks can be driven by philosophical or ideological differences, governance disputes, or disagreements on specific protocol changes. A notable example of a contentious fork in Ethereum is the creation of Ethereum Classic (ETC) as a result of the DAO hack and subsequent hard fork. Contentious forks can result in a fragmented community and the emergence of two separate blockchains, each with its own set of participants and rules.
3. Testnet Forks: Testnet forks are forks of the Ethereum network that are created for testing and development purposes. These forks are typically used by developers, researchers, and individuals who want to experiment with Ethereum’s features without affecting the mainnet or the existing ecosystem. Testnet forks allow developers to test their applications, smart contracts, or new protocol changes in a controlled environment. These forks are not intended for production use but provide a safe space for innovation, debugging, and gathering feedback.
It is worth noting that not all forks result in the creation of a separate and independent blockchain. Some forks, such as network upgrades, are designed to enhance the existing Ethereum network and maintain compatibility with the mainnet. Other forks, like contentious forks, can lead to the creation of separate chains with their own distinct tokens and communities.
Understanding the different types of Ethereum forks is crucial for anyone considering forking Ethereum or participating in a forked blockchain. Each type of fork has its own unique characteristics, implications, and considerations. It is essential to thoroughly research and understand the goals and potential outcomes of a fork before getting involved, whether as a developer or as a participant in the network.
Now that we have explored the various types of Ethereum forks, let’s dive into the step-by-step process of forking Ethereum, from setting up the development environment to launching the forked Ethereum client.
Step-by-Step Guide to Forking Ethereum
If you’re interested in forking Ethereum and creating your own unique version of the blockchain, follow this step-by-step guide. It will walk you through the process, from setting up the development environment to launching the forked Ethereum client.
Step 1: Set up the Development Environment: Begin by setting up a development environment on your local machine. This typically involves installing the necessary software tools, such as the Ethereum client and a code editor. You can choose to use existing Ethereum clients like Geth or Parity, or you can develop your own client from scratch using programming languages like Python or Go.
Step 2: Create the Forked Blockchain: Once your development environment is set up, you will need to create a new blockchain that is based on the existing Ethereum network. This involves configuring the genesis block, which is the first block of the chain that sets the initial parameters and allocates the initial ether supply. You may also choose to pre-allocate certain addresses with specific balances for testing purposes or to simulate specific scenarios.
Step 3: Modify the Genesis Block: In this step, you can make modifications to the genesis block to customize your forked blockchain. You can adjust parameters such as block time, gas limits, difficulty, or any other consensus rules that align with your desired specifications. This is where you have the opportunity to shape the rules and behavior of your forked blockchain.
Step 4: Adjust Parameters and Consensus Rules: Beyond the genesis block, you can further tweak parameters and consensus rules to align with your specific objectives. For example, you can modify the block reward structure, adjust gas fees, or change the consensus mechanism if desired. These adjustments allow you to tailor the forked blockchain to meet your unique requirements or experimental goals.
Step 5: Deploy the Forked Chain: Once you have made the necessary modifications, it’s time to deploy your forked blockchain. This involves syncing the new chain with the existing Ethereum network and transferring the necessary data and state to your local environment. By deploying the forked chain, you’ll be able to interact with it and test its features and functionalities.
Step 6: Launch the Forked Ethereum Client: With the forked chain deployed, you will need to launch your customized Ethereum client. This entails running the modified client software that you have developed or configuring an existing client to connect to your forked network. This client will serve as the interface for interacting with the forked blockchain, allowing you to create and deploy smart contracts, execute transactions, and participate in network activities.
Step 7: Sync the Forked Chain: After launching the forked Ethereum client, you will need to sync your client with the forked blockchain. This process involves downloading and verifying the entire forked blockchain’s history, including all blocks, transactions, and smart contract data. Syncing ensures that your client has the most up-to-date information and can participate in the forked network effectively.
Step 8: Test and Validate the Forked Chain: Once your client is synced with the forked blockchain, it’s time to test and validate the performance and behavior of the forked chain. Execute transactions, interact with smart contracts, and simulate various scenarios to ensure that the forked chain operates correctly and aligns with your intended objectives. This testing phase allows you to identify any issues or bugs and make necessary adjustments before proceeding further.
Following these steps will allow you to successfully fork Ethereum and create your own tailored version of the blockchain. Remember to thoroughly research and understand the technical aspects of forking before proceeding, as well as the potential impact on the community and any potential legal or regulatory considerations. Forking Ethereum offers the opportunity for customization, experimentation, and innovation, but it also requires responsibility and adherence to best practices.
Now that you have understood the step-by-step process of forking Ethereum, it’s important to consider post-fork considerations and the implications of maintaining and further developing your forked blockchain. We will explore these aspects in the next section.
Setting up the Development Environment
Before you can start forking Ethereum and creating your own customized blockchain, you’ll need to set up a development environment on your local machine. This environment will provide you with the necessary tools and software to build, deploy, and test your forked version of Ethereum. Follow these steps to set up your development environment:
Step 1: Select an Ethereum Client: Choose an Ethereum client that suits your needs. Popular choices include Geth, which is written in Go, and Parity, which is written in Rust. You can also consider other clients or even develop your own client if you have the expertise. Make sure to download and install the client on your machine.
Step 2: Install Dependencies: Depending on the Ethereum client you choose, you may need to install additional dependencies. These could include programming languages, build tools, and other required software. Refer to the installation instructions provided with the client to ensure that you have all the necessary dependencies installed on your machine.
Step 3: Set Up a Code Editor: Choose a code editor that you’re comfortable with for writing and modifying the Ethereum client’s codebase. Popular options include Visual Studio Code, Sublime Text, or Atom. Install the code editor of your choice and configure any plugins or extensions that may enhance your development experience.
Step 4: Familiarize Yourself with the Ethereum Documentation: Take some time to familiarize yourself with the Ethereum documentation. This documentation provides valuable information about Ethereum’s architecture, protocols, smart contract development, and more. This knowledge will help you understand how Ethereum works and how to make the necessary modifications for your forked version.
Step 5: Join the Ethereum Community: Join online forums, developer communities, or social media groups focused on Ethereum development. Engaging with the community will allow you to access valuable resources, seek guidance, and learn from experienced developers. Interacting with the community can also provide opportunities for collaboration and feedback on your forked project.
Step 6: Set Up a Testing Environment: Consider setting up a testing environment to simulate and validate the functionalities of your forked Ethereum blockchain. This environment can include a local network with multiple nodes, virtual machines, or even the public Ethereum testnet. Testing your forked blockchain thoroughly will help identify and fix any issues before deploying it to a wider audience.
Remember to regularly update your development environment and stay informed about the latest advances and updates in the Ethereum ecosystem. This will ensure that you’re working with the most up-to-date tools and technologies.
With your development environment set up, you’re now ready to move on to the next steps in forking Ethereum, including creating the forked blockchain, modifying parameters, deploying the forked chain, and launching your forked Ethereum client. These steps will be discussed in detail in the upcoming sections of this guide.
Creating the Forked Blockchain
Once you have set up your development environment, the next step in forking Ethereum is creating the forked blockchain. This process involves configuring and initializing a new blockchain that is based on the existing Ethereum network. Follow these steps to create your forked blockchain:
Step 1: Define the Purpose: Determine the purpose and objectives of your forked blockchain. Consider the specific modifications you want to make, new features you want to introduce, or any improvements you want to implement. Having a clear vision for your forked blockchain will guide your decision-making throughout the process.
Step 2: Choose a Name: Select a name for your forked blockchain that distinguishes it from the original Ethereum network. Choose a name that reflects the purpose and values of your project, as it will help in establishing an identity for your forked blockchain.
Step 3: Configure the Genesis Block: The genesis block is the first block in the blockchain and sets the initial parameters for the network. Configure the genesis block by specifying important details, including the timestamp, initial difficulty, gas limits, and allocation of initial ether supply. You can also choose to pre-allocate certain addresses with specific balances for testing or development purposes.
Step 4: Set Up the Network ID: Assign a unique network ID to your forked blockchain. This ID ensures that your network is distinct and separate from the main Ethereum network. It helps in preventing accidental connections to the wrong network and maintaining the integrity of your forked chain.
Step 5: Initialize the Blockchain: Use the Ethereum client and the command-line interface to initialize your forked blockchain. This process involves executing specific commands to create the initial blocks and initialize the network state. Make sure to follow the client-specific instructions for initiating the blockchain, as it may vary depending on the client you are using.
Step 6: Verify Initialization: After initializing the forked blockchain, verify that the process was successful. Connect to your forked chain using the Ethereum client and ensure that the blockchain is syncing correctly. This will ensure that your forked blockchain is operational and ready for further modifications and testing.
Creating the forked blockchain is an important step in forking Ethereum. It establishes the foundation for your customized version of Ethereum and allows you to start making the necessary modifications to align with your project’s objectives. With the forked blockchain created, you can proceed to the next steps, such as modifying the genesis block, adjusting parameters and consensus rules, and deploying the forked chain.
In the upcoming sections, we will discuss these steps in detail, providing you with a comprehensive guide to forking Ethereum successfully.
Modifying the Genesis Block
After creating the forked blockchain, the next step in forking Ethereum is modifying the genesis block. The genesis block serves as the initial block of the blockchain and sets the foundation for the entire network. By making modifications to the genesis block, you can customize your forked version of Ethereum to meet your specific requirements or experimental goals. Follow these steps to modify the genesis block:
Step 1: Identify the Genesis Block Configuration: Locate the configuration file that contains the parameters and settings for the genesis block. The location and file name may vary depending on the Ethereum client you are using. Consult the documentation or resources specific to your chosen Ethereum client for the precise details.
Step 2: Define the Initial Allocation: Decide how the initial ether supply will be allocated in your forked blockchain. Determine the addresses that will receive the initial ether balances and specify the amounts for each address. You can allocate ether to specific accounts, including your own for testing or development purposes, or distribute the ether in a way that reflects the goals of your project.
Step 3: Set the Difficulty and Gas Limits: Adjust the difficulty and gas limits in the genesis block to configure the behavior of the network. The difficulty setting determines the amount of computing power required to mine new blocks, while the gas limits set the maximum amount of computational work allowed in each block. Customizing these settings allows you to influence the structure and functionality of your forked blockchain.
Step 4: Establish Timestamp and Chain ID: Specify a timestamp for the genesis block that marks the commencement of your forked blockchain. This timestamp determines the creation time of the first block and helps to differentiate your forked chain from the main Ethereum network. Additionally, set a unique Chain ID for your forked blockchain to help distinguish it from other Ethereum networks and prevent accidental connections to the wrong chain.
Step 5: Validate and Test: After making the necessary modifications to the genesis block, validate the changes by ensuring that the configuration file is correctly updated. Double-check the allocations, difficulty, gas limits, timestamp, and Chain ID to ensure accuracy. Once validated, run tests on your forked blockchain to ensure that the modifications function as expected and align with the objectives of your project.
Modifying the genesis block is an essential step in creating a customized version of Ethereum. By making these modifications, you can customize the initial parameters and behaviors of your forked blockchain, allowing it to serve your specific needs or experimental purposes. With the genesis block modified, you can proceed to adjust additional parameters, consensus rules, and further customize the behavior of your forked Ethereum blockchain.
In the next sections, we will explore the process of adjusting parameters and consensus rules, the deployment of the forked chain, and launching the forked Ethereum client.
Adjusting Parameters and Consensus Rules
Once you have modified the genesis block, the next step in forking Ethereum is adjusting parameters and consensus rules. This step involves fine-tuning various aspects of the forked blockchain to align with your specific objectives or experimental requirements. By adjusting parameters and consensus rules, you have the opportunity to customize the behavior and functionality of your forked Ethereum blockchain. Follow these steps to adjust parameters and consensus rules:
Step 1: Identify Parameters and Consensus Rules: Identify the specific parameters and consensus rules that you want to adjust in your forked blockchain. Consider factors like block time, gas limit, block reward, minimum stake size, consensus mechanism, or any other rules that you want to modify. Each Ethereum client may have different configuration files or settings dedicated to these parameters and consensus rules.
Step 2: Locate Configuration Files: Use the documentation or resources specific to your chosen Ethereum client to locate the configuration files that contain the parameters and consensus rules. These files may be separate or part of the Ethereum client’s codebase. Make sure to access and modify the correct files to ensure the desired changes take effect in your forked blockchain.
Step 3: Adjust Parameters: Make the necessary adjustments to the identified parameters. For example, you can modify the block time to change the rate at which new blocks are created, adjust the gas limit to restrict the computational work in each block, or tailor the block reward to incentivize validators or miners in your forked blockchain. Ensure that the adjusted parameters are in accordance with your project’s goals and align with the intended behavior of your forked Ethereum blockchain.
Step 4: Modify Consensus Rules: Customize the consensus rules of your forked blockchain to reflect the desired behavior. This could involve changing the consensus mechanism itself or tweaking the existing mechanism to suit your requirements. Consider the consensus rules related to block validation, voting mechanisms, or any other aspects that influence the governance and agreement on the state of the blockchain. Adjust these rules carefully, as they are crucial in ensuring the security and integrity of your forked Ethereum blockchain.
Step 5: Test and Validate: After adjusting the parameters and consensus rules, run thorough tests to validate the changes. Test the modified blockchain to ensure that the adjusted parameters and consensus rules function as expected. Simulate different scenarios and evaluate the behavior of the forked blockchain to ensure that it aligns with your intentions and objectives. Fix any issues or bugs that arise during testing before proceeding to the next steps.
By adjusting parameters and consensus rules, you have the power to shape the behavior and functionality of your forked Ethereum blockchain. This customization allows you to explore specific use cases, experiment with new features, or address limitations found in the original Ethereum network. With the parameters and consensus rules adjusted, you can move forward to deploy the forked chain and launch the forked Ethereum client.
In the following sections, we will discuss the process of deploying the forked chain, syncing the network, and testing and validating the forked chain’s performance and functionalities.
Deploying the Forked Chain
After adjusting the parameters and consensus rules of your forked Ethereum blockchain, the next step is to deploy the forked chain. Deploying the forked chain involves making it operational and accessible for testing, development, or even production use. Follow these steps to deploy the forked chain successfully:
Step 1: Configure Network Connectivity: Determine how your forked chain will connect to the Ethereum network. You can choose to connect your forked chain to the main Ethereum network, or you can create a private network specifically for your forked chain. Set up the necessary network connectivity configuration, including specifying the network ID, bootnodes, and peers.
Step 2: Establish Network Nodes: Set up nodes for your forked chain. Nodes are the individual computers that participate in the network, validating transactions and maintaining the blockchain’s state. Ensure that you have a sufficient number of nodes to achieve the desired level of decentralization and ensure network stability.
Step 3: Initialize and Sync the Forked Chain: To make the forked chain accessible, you need to initialize and synchronize it. Initialize the chain by running the Ethereum client with the appropriate options and flags to activate the forked chain. Additionally, synchronize the chain by allowing your nodes to download and validate all the blocks, transactions, and smart contract data from the genesis block to the latest state.
Step 4: Deploy Smart Contracts: Deploy any necessary smart contracts or applications onto your forked chain. This involves compiling and deploying your smart contracts using the development tools and software libraries supported by your Ethereum client. Deploying smart contracts allows you to test and showcase the unique features and capabilities of your forked chain.
Step 5: Monitor and Maintain: Once deployed, continuously monitor and maintain the forked chain. Monitor the network activity, node health, and the performance of your forked chain to ensure stability and security. Keep track of any updates or bug fixes released by the Ethereum client developers and apply them as needed to maintain the compatibility and integrity of your forked chain.
Deploying the forked chain is a critical step in the forking process, as it transforms your customized version of Ethereum into an operational blockchain. It allows you to test the modified parameters and consensus rules, execute transactions on the network, and engage with the smart contracts deployed on your forked chain.
In the next sections, we will explore how to launch the forked Ethereum client, sync the forked chain, and thoroughly test and validate its performance and functionality. These steps are crucial in ensuring the stability and success of your forked Ethereum blockchain.
Launching the Forked Ethereum Client
Once you have deployed the forked chain, the next step in forking Ethereum is to launch the forked Ethereum client. Launching the client allows you to interact with the forked blockchain, execute transactions, deploy smart contracts, and test the functionality of your customized version of Ethereum. Follow these steps to successfully launch the forked Ethereum client:
Step 1: Prepare Client Configuration: Configure the Ethereum client to connect to your forked chain. Modify the client’s configuration files to specify the network ID, bootnodes, and other network connectivity details. Ensure that the client is set up to connect to the correct chain and that it points to the appropriate data directories and resources.
Step 2: Launch the Ethereum Client: Use the command-line interface provided by the Ethereum client to start the client application. Run the appropriate command, ensuring that it includes the necessary flags and options to connect to your forked chain. The client will establish connections with other nodes in the network and synchronize with the forked blockchain.
Step 3: Monitor Client Output: Monitor the output of the Ethereum client for any error messages or warnings. This will help you identify and resolve any issues that may arise during the client launch process. Pay attention to the client’s connectivity status, as it must successfully connect to the forked chain’s network for proper functioning.
Step 4: Interact with the Forked Chain: With the Ethereum client successfully launched, you can now interact with the forked chain. Use the client’s provided command-line tools, APIs, or user interfaces to send transactions, deploy smart contracts, and interact with the state of the forked blockchain. This is an opportunity to test the custom features and modifications you have implemented in your forked version of Ethereum.
Step 5: Collaborate and Gather Feedback: Engage with the Ethereum community and potential users or developers of your forked chain. Share the details of your forked Ethereum client, encourage users to test it, and gather feedback on its functionality and usability. Collaborating with the community will help you identify areas for improvement and drive the future development and adoption of your forked Ethereum client.
Launching the forked Ethereum client marks a significant milestone in the forking process. It provides access to the functionalities of your customized version of Ethereum, empowering you to test and showcase the modifications and improvements made during the forking process.
In the upcoming sections, we will explore how to sync the forked chain, conduct thorough testing, and validate the performance and functionality of your forked Ethereum blockchain.
Syncing the Forked Chain
Once you have launched the forked Ethereum client, the next step in forking Ethereum is syncing the forked chain. Syncing allows your client to download and verify all the blocks, transactions, and smart contract data from the genesis block to the latest state of your forked blockchain. Follow these steps to successfully sync the forked chain:
Step 1: Connect to Peers: Ensure that your forked Ethereum client is connected to an adequate number of network peers. Peers are other nodes in the network that share block data with each other. Connecting to peers is crucial for syncing the forked chain, as it allows your client to receive and verify the network’s blockchain data incrementally.
Step 2: Download Block Data: The syncing process begins with your client downloading the block data from the peers it is connected to. The client will request and download blocks, ensuring data integrity and validating them against the forked chain’s consensus rules. This process iterates until all the blocks from the genesis block to the latest state are downloaded.
Step 3: Verify Block Data: Once the blocks are downloaded, your client will verify each block’s data against the forked chain’s rules. This verification process ensures that the blocks have valid transactions, correct timestamps, and adhere to the consensus mechanism you have implemented or modified.
Step 4: Validate Smart Contracts and State: Apart from block data, syncing also involves validating the smart contracts and their associated states. Your client will verify the deployed smart contracts, ensuring their code integrity and consistency with the forked chain’s rules. It will also validate the state of the forked chain, confirming that it accurately represents the current state of the blockchain.
Step 5: Monitor Syncing Progress: Monitor your client’s syncing progress to track the synchronization status. Most Ethereum clients provide logs or progress indicators that show the current block number being synced, the number of remaining blocks, and any potential errors or warnings that may arise during the syncing process. Continuously monitoring the progress will help ensure that your forked chain syncs successfully.
Complete and successful syncing of the forked chain means that your client is up to date with the latest state of the blockchain. It enables you to accurately interact with the forked chain, execute transactions, and test the functionalities you have implemented or modified.
In the following sections, we will explore how to test and validate the forked chain, ensuring its performance, security, and compliance with the objectives of your customized Ethereum blockchain.
Testing and Validating the Forked Chain
Once the forked chain is synced and your client is up to date, the next crucial step in forking Ethereum is testing and validating the forked chain. This process ensures that your customized version of Ethereum performs reliably, meets the defined objectives, and operates securely. Follow these steps to effectively test and validate the forked chain:
Step 1: Develop a Test Plan: Begin by developing a comprehensive test plan that outlines the various scenarios and use cases you want to evaluate. Consider performing functional testing to ensure that smart contracts, transactions, and other blockchain operations behave as expected. You may also conduct performance testing to assess the scalability and responsiveness of the forked chain under different loads or stress-testing conditions.
Step 2: Execute Test Cases: Implement the test plan by executing the defined test cases on the forked chain. Execute a wide range of tests, including positive and negative test scenarios, to evaluate the resilience and accuracy of the forked chain. Pay attention to critical areas such as consensus mechanisms, smart contract interactions, and data handling to identify any vulnerabilities or inconsistencies.
Step 3: Monitor Performance and Analyze Results: Monitor the performance of the forked chain during testing. Analyze crucial metrics such as transaction throughput, block propagation time, and gas consumption to assess the overall efficiency and performance of the forked chain. Identify any anomalies, bottlenecks, or areas for improvement that need to be addressed.
Step 4: Conduct Security Audits: It is essential to conduct rigorous security audits to identify and address any potential vulnerabilities in the forked chain. Test for common security flaws such as reentrancy attacks, input validation issues, or any smart contract vulnerabilities that might impact the security of the forked chain. Collaborate with security experts or engage in bug bounty programs to gain external insights and feedback.
Step 5: Engage the Community: Engage with the Ethereum community, potential users, or developers of your forked chain to gather feedback and insights. Encourage testing and provide avenues for reporting bugs or suggesting improvements. Community involvement can help identify edge cases, enhance user experiences, and foster collaboration, driving the continued growth and development of your forked chain.
Thoroughly testing and validating the forked chain ensures its stability, functionality, and security. It helps to instill confidence in the forked chain’s performance, making it suitable for use in various scenarios, including development, testing, or even production environments.
In the upcoming sections, we will explore important post-fork considerations and conclude our guide to forking Ethereum. These considerations will provide insights into the future management and development of your forked Ethereum blockchain.
Post-Fork Considerations
After successfully forking Ethereum and creating your customized blockchain, there are some important post-fork considerations to keep in mind. These considerations will help you manage and develop your forked Ethereum blockchain effectively. Consider the following post-fork aspects:
1. Community Support: Building and fostering a strong community around your forked Ethereum blockchain is crucial for its success. Engage with users, developers, and stakeholders of your forked chain through forums, social media, or dedicated communication channels. Encourage collaboration, address concerns, and seek feedback to ensure ongoing support and participation.
2. Documentation and Resources: Provide comprehensive and up-to-date documentation, tutorials, and resources to assist developers and users in understanding and utilizing your forked blockchain. Clear and detailed documentation will facilitate adoption and development on your platform, attracting more users and contributors to the ecosystem.
3. Bug Fixes and Upgrades: Regularly address and fix any bugs or vulnerabilities that arise in the forked Ethereum blockchain. Release timely upgrades or patches to improve security, enhance functionality, and implement new features based on community feedback. Continually monitoring and maintaining the chain will ensure its stability and long-term sustainability.
4. Governance and Consensus: Establish a governance mechanism to ensure consensus among stakeholders and facilitate decision-making processes for protocol upgrades or changes. Engage the community in shaping the direction of the forked chain through voting or consensus mechanisms. Transparent and inclusive governance practices will encourage community trust and drive adoption.
5. Ecosystem Integration: Foster integration and interoperability with existing Ethereum-based applications, tools, and services. Collaborate with other projects to expand the ecosystem and increase the potential use cases for your forked Ethereum blockchain. Compatibility with existing Ethereum infrastructure can attract more users and developers to your platform.
6. Security Audits: Regularly conduct security audits to ensure the robustness and integrity of the forked chain. Engage professional auditing firms or invite the community to participate in security assessments through bug bounty programs. Proactive security measures will protect users’ funds and data and enhance the credibility of your forked Ethereum blockchain.
7. Long-Term Development: Plan and execute a roadmap for the long-term development of your forked Ethereum blockchain. Continuously evaluate the performance and effectiveness of the chain, and incorporate user feedback and industry trends to shape the future direction. Regular updates, feature enhancements, and staying up to date with the latest Ethereum improvements will ensure the continued growth and relevance of your forked chain.
By considering these post-fork aspects, you can effectively manage and develop your forked Ethereum blockchain, ensuring ongoing support, security, and growth. Emphasizing community engagement, documentation, governance, and security will contribute to the long-term success and adoption of your customized blockchain solution.
With your forked Ethereum blockchain up and running, it’s time to embark on an exciting journey of innovation, exploration, and collaboration within the blockchain community. Good luck with your forked Ethereum project and the possibilities it holds!
Conclusion
Forking Ethereum opens up a world of possibilities for developers and blockchain enthusiasts alike. It allows for customization, experimentation, and innovation within the Ethereum ecosystem. By modifying the existing codebase, adjusting parameters, and introducing new features, you can create a unique version of Ethereum that caters to specific use cases or addresses limitations of the original network.
Throughout this guide, we have explored the process of forking Ethereum, step by step. We began by understanding what Ethereum is and the significance it holds in the blockchain world. We then delved into the different types of forks, including hard forks, soft forks, and testnet forks.
We covered the critical steps involved in forking Ethereum, from setting up the development environment to creating the forked blockchain, modifying the genesis block, adjusting parameters and consensus rules, and deploying the forked chain. We also emphasized the importance of syncing the forked chain and launching the forked Ethereum client to interact with the customized blockchain.
Furthermore, we discussed the significance of testing and validating the forked chain, focusing on functional testing, performance testing, and security audits. These processes help ensure the stability, reliability, and security of the forked Ethereum blockchain.
Lastly, we addressed several post-fork considerations, including community support, documentation, bug fixes, governance, ecosystem integration, security audits, and long-term development. These aspects will contribute to the success and ongoing development of your customized blockchain solution.
Forking Ethereum offers immense potential for innovation and exploration within the blockchain space. As you embark on your forking journey, remember to engage with the Ethereum community, gather feedback, and remain adaptable to the evolving needs and trends of the blockchain ecosystem. Through continuous development, collaboration, and adherence to best practices, your forked Ethereum project has the potential to make a significant impact in the crypto world.
Wishing you all the best in your forking endeavors and the opportunities that lie ahead!