Introduction
Are you interested in becoming a validator on Ethereum? If you are, you’ve come to the right place! Ethereum is a decentralized blockchain platform that enables the creation and execution of smart contracts. Validators play a crucial role in securing the Ethereum network and validating transactions. In return for their efforts, validators receive rewards in the form of ETH.
Becoming a validator on Ethereum offers numerous benefits, including the opportunity to earn passive income and actively contribute to the network’s security and consensus mechanism. However, the process of becoming a validator can seem daunting at first. That’s why we’ve put together this comprehensive guide to walk you through the essential steps.
In this article, we will discuss the requirements for becoming a validator and provide step-by-step instructions on setting up your node, running a validator client, joining a beacon chain, and maintaining validator performance. By the end of this guide, you will have a solid understanding of the process and be well on your way to becoming a validator on Ethereum.
Before we dive into the details, it’s important to note that being a validator on Ethereum requires a significant commitment of time, resources, and technical knowledge. It’s not a task to be taken lightly, but with dedication and the right approach, it can be a rewarding endeavor.
What is a Validator on Ethereum?
In the Ethereum network, validators are responsible for validating and confirming transactions on the blockchain. They play a crucial role in maintaining network security, consensus, and ensuring the integrity of the Ethereum ecosystem.
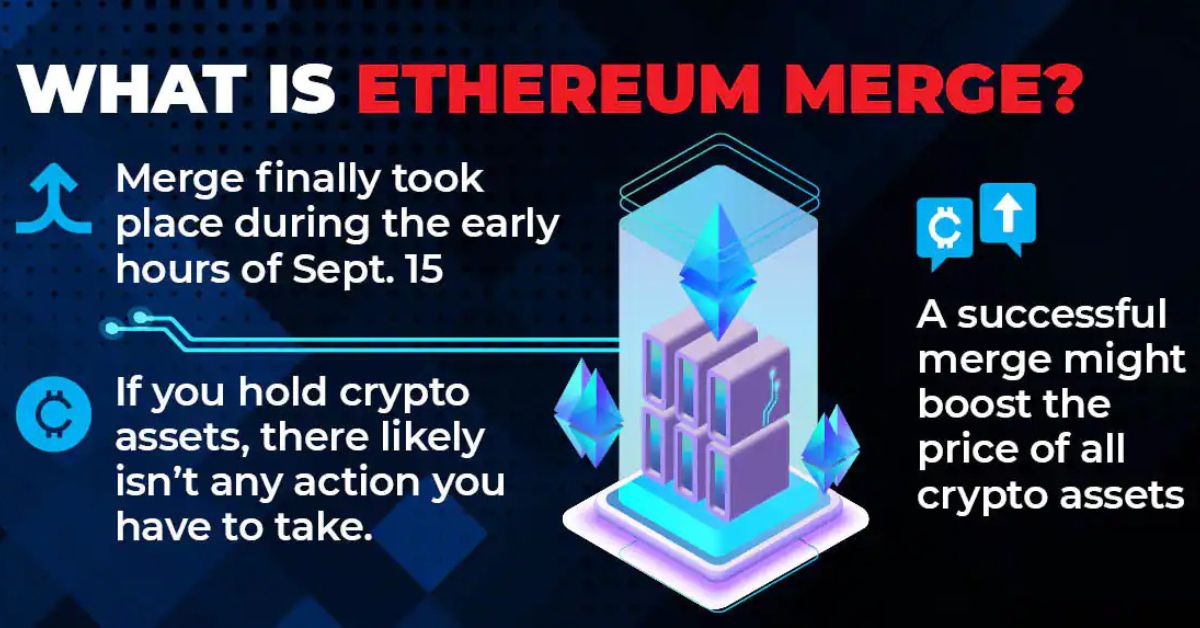
Validators are part of the proof-of-stake (PoS) consensus mechanism, which Ethereum plans to transition to with the upcoming Ethereum 2.0 upgrade. Unlike proof-of-work (PoW) systems that rely on miners to solve complex mathematical puzzles, PoS systems determine validators based on the number of coins they hold and are willing to “stake” as collateral.
Validators are randomly selected to propose blocks and validate transactions by locking up a specified amount of Ether (ETH) as a security deposit. Once selected, validators add new blocks to the blockchain and validate transactions by ensuring they meet the network’s rules and consensus algorithms.
Validators play a critical role in maintaining the integrity and security of the Ethereum network. By running the required software and maintaining a stable connection to the network, validators contribute to achieving consensus and preventing malicious or fraudulent activities. Validators are rewarded with incentives for their work, including transaction fees and newly created Ether.
Validators in Ethereum are also responsible for participating in the governance of the network. They have the power to vote on proposed upgrades and changes, thus influencing the direction and development of the Ethereum ecosystem.
To become a validator on Ethereum, you need to meet certain requirements and follow a set of steps to set up your node, run a validator client, and join the beacon chain. These requirements and steps will be discussed in detail in the following sections.
Why Become a Validator on Ethereum?
Becoming a validator on Ethereum offers a range of enticing benefits that make it an attractive opportunity for individuals looking to actively contribute to the Ethereum network and achieve financial gains.
One of the primary motivations for becoming a validator is the potential to earn passive income. Validators receive rewards in the form of newly minted Ether (ETH) and transaction fees for their participation in securing the Ethereum network. By staking and validating transactions, validators have the opportunity to generate consistent returns on their investment.
Beyond the financial aspect, becoming a validator allows individuals to play a crucial role in maintaining the security and integrity of the Ethereum ecosystem. Validators verify and validate transactions, ensuring that they adhere to the network’s rules and consensus mechanisms. By actively participating in network governance, validators have a say in the decision-making processes that shape the future of Ethereum.
Furthermore, being a validator provides an opportunity to actively engage with the Ethereum community and connect with other like-minded individuals. Validators often collaborate and exchange knowledge with peers, contributing to the further development and improvement of the Ethereum network. The sense of camaraderie and shared purpose within the validator community can be highly rewarding.
Becoming a validator on Ethereum also offers diversification potential for crypto enthusiasts. In addition to holding Ether as an investment, validators can use their ETH holdings to actively participate in securing the network. This diversification strategy allows individuals to mitigate risk and potentially increase their overall returns in the cryptocurrency space.
Lastly, becoming a validator on Ethereum is an opportunity to contribute to the broader decentralization movement. By actively participating in securing the network, validators help to ensure that Ethereum remains a decentralized and resilient blockchain platform. This is crucial for building trust and facilitating the adoption of decentralized applications and smart contracts.
While there are numerous incentives for becoming a validator on Ethereum, it is worth noting that the role requires a level of technical knowledge, ongoing maintenance, and commitment of resources. However, for those willing to undertake the responsibilities, being a validator can be a rewarding and impactful endeavor.
Requirements for Becoming a Validator
Becoming a validator on Ethereum requires meeting several requirements to ensure you have the necessary resources, technical capabilities, and commitment to fulfill the role effectively. These requirements are essential for maintaining the security and integrity of the Ethereum network.
First and foremost, you will need to own a sufficient amount of Ether (ETH) to participate as a validator. The specific amount required can vary, depending on the current network conditions and the minimum staking threshold. At the time of writing, the Ethereum 2.0 Beacon Chain requires a minimum stake of 32 ETH to become a validator.
Besides the required ETH holdings, you will need to have access to a reliable and stable internet connection. Validators are expected to maintain a 24/7 connection to the Ethereum network, as they play a critical role in validating transactions and securing the network. A stable internet connection is crucial to ensure uninterrupted communication with the network.
Additionally, you will need to set up and maintain a hardware infrastructure capable of running a validator node. This includes a personal computer or server with adequate computing power and storage capacity. The hardware should meet the necessary specifications to handle the computational demands of running a validator client and managing the associated tasks.
Furthermore, it is crucial to have a solid understanding of Ethereum and its underlying technology. Familiarize yourself with the concepts of blockchain, consensus mechanisms, and smart contracts. Understanding how the Ethereum network functions will help you make informed decisions and troubleshoot any issues that may arise while running your validator node.
Lastly, becoming a validator on Ethereum requires a commitment of time and effort. Validators must actively monitor and maintain their nodes, ensuring they remain connected to the network and perform their duties efficiently. Regular software updates, security measures, and ongoing maintenance are necessary to ensure optimal performance as a validator.
Meeting these requirements demonstrates your dedication to the role of a validator on Ethereum. It signifies your commitment to contribute to the network’s security, consensus, and overall development. By fulfilling these requirements, you will be well-prepared to take the necessary steps towards becoming a validator and actively participating in the Ethereum network.
Step 1: Owning Sufficient ETH
The first step towards becoming a validator on Ethereum is to ensure you have a sufficient amount of Ether (ETH) to meet the staking requirements. At present, the Ethereum 2.0 Beacon Chain requires a minimum stake of 32 ETH to become a validator.
Before proceeding, it is essential to evaluate your budget and risk tolerance. Investing in the required amount of ETH to become a validator carries its own set of considerations. Ensure that you only stake an amount you are willing to lock up for an extended period, as well as the potential risks associated with market volatility.
If you already hold the necessary amount of ETH, you are ready to move on to the subsequent steps. However, if you do not currently have the required stake, you have a few options:
- Acquire ETH on an Exchange: If you do not own the required amount of ETH, you can purchase it on various cryptocurrency exchanges. Ensure that you choose a reputable exchange with proper security measures in place, and follow the necessary steps to acquire the desired amount of ETH.
- Participate in Staking Pools: Another option is to participate in staking pools, also known as Ethereum staking services. Staking pools allow you to pool your funds with other participants to meet the minimum staking threshold. However, it is important to conduct thorough research and choose a reliable staking service provider.
- Participate in Staking Derivatives: Some platforms offer staking derivatives that allow you to participate in the staking process without directly owning the required amount of ETH. These derivatives provide exposure to the rewards and risks associated with staking. However, it is crucial to understand the terms and risks associated with participating in such platforms.
Once you have acquired the required amount of ETH, it is imperative to secure your holdings. As a validator, you will need to keep your ETH safe and secure. Consider using hardware wallets or other secure storage solutions to protect your funds from potential security breaches or unauthorized access.
Owning a sufficient amount of ETH is the first step towards becoming a validator on Ethereum. Take the time to evaluate your budget, assess the risks, and acquire the necessary stake. By ensuring you have the required ETH, you will be ready to proceed to the next steps in the validator setup process.
Step 2: Setting up a Node
Once you have obtained the required amount of Ether (ETH), the next step in becoming a validator on Ethereum is setting up a node. A node is an essential component that allows you to connect to the Ethereum network, synchronize with the blockchain, and participate in the validation process.
Setting up a node involves the following steps:
- Hardware Selection: Choose a suitable device to act as your validator node. This could be a personal computer, a dedicated server, or even a virtual private server (VPS). Ensure that the hardware has sufficient computing power, memory, and storage capacity to handle the demands of running a validator node.
- Operating System Installation: Install a reliable operating system on your chosen hardware. Common options include Linux distributions like Ubuntu or CentOS. Ensure that the operating system is up to date and properly configured for optimal performance.
- Network Configuration: Set up network configurations to enable your node to communicate with the Ethereum network. Ensure that your device has a stable internet connection and appropriate firewall settings that allow incoming and outgoing connections on the required ports.
- Software Installation: Install the necessary software for your Ethereum validator node. Popular choices for Ethereum 2.0 include Prysm, Lighthouse, and Teku. These software clients enable your node to interact with the Ethereum 2.0 Beacon Chain and perform validation tasks.
- Node Configuration: Configure your node by specifying details such as network connectivity, peer discovery, storage options, and other parameters. Consult the documentation provided by the Ethereum software client you have chosen for specific configuration instructions.
It is crucial to follow the installation and configuration instructions provided by the chosen Ethereum software client. These instructions will guide you through the process and ensure that your node is set up correctly and securely.
Setting up a node can be a technically challenging task, especially for those without experience in server administration. If you are not comfortable with the technical aspects, consider seeking assistance from online forums, technical communities, or consulting with knowledgeable individuals in the Ethereum validator community.
Once your node is set up and configured, you will be ready to move on to the next steps of running a validator client and joining a beacon chain. Properly setting up your node is crucial in ensuring a stable and reliable connection to the Ethereum network, enabling you to effectively participate as a validator.
Step 3: Running a Validator Client
After setting up your Ethereum node, the next step in becoming a validator is running a validator client. A validator client is software that allows your node to actively participate in the validation process on the Ethereum network.
Here are the key steps involved in running a validator client:
- Choose a Validator Client: Select a validator client that is compatible with the Ethereum network and the version of Ethereum you are participating in. Popular Ethereum 2.0 validator clients include Prysm, Lighthouse, and Teku. Each client has its own features, configuration options, and performance characteristics.
- Install the Validator Client: Download and install the chosen validator client on your node. Follow the installation instructions provided by the client’s documentation to ensure a proper setup. Verify the client’s integrity by checking its cryptographic checksums or signatures, if available.
- Configure the Validator Client: Configure the validator client by specifying the necessary parameters such as the location of your Ethereum node, network connectivity, keystore location, and other relevant settings. This configuration process may vary depending on the chosen validator client, so consult the client’s documentation for specific instructions.
- Create a Validator Key Pair: Generate a validator key pair that consists of a public key and a secret private key. The private key should be kept secure and accessible only to you, as it is necessary to sign and validate blocks. Ensure you follow best practices for key management, such as storing the private key offline in a secure hardware wallet.
- Import the Validator Key: Import the validator key into your validator client using the appropriate interface or command. This step allows your validator client to use the private key for signing blocks and participating in the consensus process.
- Start the Validator Client: Initiate the validator client and start the validator process. This step allows your validator to actively participate in block proposal, block validation, and consensus activities on the Ethereum network. Monitor the validator client’s logs and status to ensure it is running smoothly.
Running a validator client requires attention to detail and adherence to the instructions provided by the client’s documentation. It is important to keep your validator client up to date with the latest releases and security patches to ensure optimal performance and protection against potential vulnerabilities.
Additionally, regularly monitor the operation of your validator client and investigate any potential issues or error messages that may arise. Stay active in the Ethereum validator community, engage with other validators, and seek guidance if needed to troubleshoot and resolve any technical challenges that may occur.
By successfully running a validator client, you are actively participating in the Ethereum network’s consensus process and contributing to its security and decentralization.
Step 4: Joining a Beacon Chain
Once you have set up your Ethereum node and have a running validator client, the next step in becoming a validator is joining a beacon chain. The beacon chain is a key component of Ethereum’s proof-of-stake (PoS) consensus mechanism and acts as the central coordination point for validators.
Here are the steps involved in joining a beacon chain:
- Synchronize with the Beacon Chain: Connect your validator client to the Ethereum 2.0 Beacon Chain. The beacon chain serves as the central hub of the Ethereum PoS consensus protocol. Synchronization ensures that your client is up to date and aware of the latest state of the network.
- Generate a Deposit Data File: Generate a deposit data file that contains information about your validator account and its public key. This file is required for the deposit contract interaction in the Ethereum network. Ensure that the file is securely stored and accessible when needed for the deposit process.
- Submit a Validator Deposit: Initiate the validator deposit process by interacting with the Ethereum deposit contract. This contract is responsible for accepting the staking deposits and registering new validators on the beacon chain. Follow the instructions provided by the client’s documentation or the Ethereum network upgrade process to complete the deposit successfully.
- Wait for Activation: After submitting your validator deposit, you will need to wait for it to be processed and included in a beacon chain block. This process may take some time, as it depends on the network’s current congestion and the number of validators in the queue. Be patient and monitor the progress of your deposit.
- Monitor Validator Status: Once your validator deposit is activated, monitor the status of your validator on the beacon chain. Ensure that it is actively participating in block proposal and validation activities. Regularly check the logs and status of your validator client to identify any issues or anomalies that may need attention.
Joining a beacon chain is an important step that allows you to actively participate as a validator on the Ethereum network. It establishes your validator’s presence, enables it to propose and validate blocks, and contributes to the overall security and consensus process.
During this step, it is crucial to exercise patience, as network conditions and validator activation times can vary. Additionally, stay informed about any network upgrades or changes that may affect your validator’s operation, and follow the necessary steps provided by the Ethereum community to adapt to these changes.
By successfully joining a beacon chain, you have officially become an active validator on Ethereum, contributing to the network’s decentralized operation and consensus mechanisms.
Step 5: Initiating Validator Deposits
After setting up your validator client and joining the beacon chain, the next step in becoming a validator on Ethereum is initiating validator deposits. Validator deposits are essential for securing your position as a validator and participating in the proof-of-stake (PoS) consensus mechanism.
Here’s how to initiate validator deposits:
- Prepare the Required ETH: Ensure that you have the necessary amount of Ether (ETH) available to fulfill the validator deposit requirements. At the time of writing, the minimum stake required for Ethereum 2.0 validators is 32 ETH. Make sure you have this amount readily available in your wallet.
- Generate Deposit Data: Use your validator client to generate the deposit data that includes your validator’s public key and other required information. This data serves as the foundation for the validator deposit process.
- Interact with the Deposit Contract: Utilize the Ethereum deposit contract to initiate the deposit process. This contract is responsible for accepting validator deposits and registering validators on the Ethereum network. Follow the instructions provided by your validator client or refer to the official Ethereum documentation for the necessary steps to interact with the deposit contract.
- Submit the Deposit Transaction: Submit the deposit transaction, along with the required ETH, to the Ethereum network. Ensure that your transaction includes the deposit data and the correct amount of ETH to complete the process successfully.
- Monitor the Deposit Confirmation: Monitor the Ethereum network for confirmation of your deposit transaction. This confirmation process may take some time depending on the network congestion and the number of pending transactions. Continue to monitor the status of your transaction until it is successfully confirmed and included in a block.
- Verify Deposit Status: Once your deposit transaction is confirmed, verify the status of your deposit on the beacon chain. Ensure that your validator deposit has been processed and activated. You can check the status using the tools provided by your validator client or by querying the Ethereum blockchain directly.
Initiating validator deposits is a crucial step in the overall process of becoming a validator on Ethereum. It solidifies your stake in the network and enables you to actively participate in the consensus mechanism.
During the deposit process, it is important to double-check all the necessary steps, such as generating the correct deposit data and submitting the transaction with the appropriate amount of ETH. Taking the time to verify and monitor the deposit status will ensure a smooth transition into the role of a validator on the Ethereum network.
By successfully completing the validator deposit process, you have secured your position as a validator and are ready to contribute to the validation and consensus activities on Ethereum.
Step 6: Maintaining Validator Performance
Maintaining validator performance is a crucial aspect of being an effective and successful validator on the Ethereum network. It involves actively monitoring and optimizing the performance of your validator to ensure it operates optimally and fulfills its responsibilities.
Here are the key factors to consider when maintaining validator performance:
- Network Connectivity: Ensure that your validator node maintains a stable and reliable internet connection. A consistent connection is necessary for staying in sync with the Ethereum network and participating in block proposal and validation activities.
- Hardware and Software Updates: Regularly update your validator node’s hardware and software components. Stay updated with the latest releases and security patches provided by your validator client’s development team. Keeping your hardware and software up to date helps enhance performance and mitigate potential vulnerabilities.
- Maintain Sufficient ETH Balance: Ensure that your validator maintains a sufficient ETH balance to cover any penalties or slashes that may occur. Validators can be penalized for various reasons, such as offline periods, incorrect behavior, or double voting. Maintaining an adequate ETH balance helps protect against these penalties and ensures continued participation in the consensus process.
- Monitor Validator Health: Regularly monitor the health and status of your validator. Use the monitoring tools provided by your validator client or external monitoring services to track vital metrics such as uptime, efficiency, and performance. Detecting any issues early on allows for timely resolution and optimization.
- Secure Key Management: Safeguard your private validator key and ensure it is protected from unauthorized access or loss. Consider using hardware wallets or other secure storage solutions to keep your key offline and away from potential security threats. Regularly back up your key to prevent data loss.
- Active Engagement in the Community: Stay connected with the Ethereum validator community to exchange knowledge, discuss best practices, and address any challenges you may encounter. Active engagement can provide valuable insights and learning opportunities to help improve your performance and validator setup.
Maintaining optimal validator performance requires vigilance, proactive management, and a commitment to ongoing maintenance. Regularly assess and optimize your validator setup based on network conditions and technological advancements.
Furthermore, it is essential to stay informed about any Ethereum network upgrades or changes that may impact your validator’s operation. Stay connected with official Ethereum communication channels and participate in relevant discussions to understand and adapt to updates effectively.
By consistently monitoring, optimizing, and engaging in the upkeep of your validator, you contribute to the network’s stability and security while maximizing your potential rewards as a validator on the Ethereum network.
Conclusion
Becoming a validator on the Ethereum network requires dedication, technical knowledge, and a commitment to ongoing maintenance. By following the essential steps outlined in this guide, you can embark on the journey of becoming a validator and actively contribute to the security and consensus of the Ethereum ecosystem.
Throughout the process, it is important to keep in mind the requirements for becoming a validator, such as owning a sufficient amount of ETH, setting up a node, running a validator client, joining a beacon chain, initiating validator deposits, and maintaining performance.
Becoming a validator on Ethereum offers various benefits, including the opportunity to earn passive income, actively contribute to network security, and participate in the governance and development of the Ethereum ecosystem.
However, it is important to note that being a validator requires a significant commitment of time, resources, and technical expertise. Regular monitoring, software updates, and maintaining a secure key management system are crucial to sustaining optimal performance and protecting your investments.
Remember to actively engage with the Ethereum validator community to exchange knowledge, seek guidance, and stay informed about important network upgrades or changes. By staying connected and sharing experiences, you can enhance your understanding and skillset as a validator.
Becoming a validator on Ethereum is an exciting opportunity to actively participate in the growth and security of one of the leading blockchain platforms. Through your efforts, you contribute to the decentralization and trustworthiness of the Ethereum network, helping to shape the future of decentralized finance, applications, and smart contracts.
As you embark on this journey, always approach it with enthusiasm, a willingness to learn, and an understanding of the responsibility you have as a validator on the Ethereum network. Together, we can build a stronger and more resilient decentralized ecosystem.