Introduction
Welcome to the world of drones, where aerial photography, cinematography, and recreational flying have become increasingly popular. Drones offer a unique perspective and exciting opportunities for capturing stunning footage from above. However, one aspect that drone owners need to consider is protecting their investment from water damage. In this article, we will explore the importance of waterproofing drones and provide essential tips on how to effectively waterproof your drone to ensure its longevity and functionality even in wet conditions.
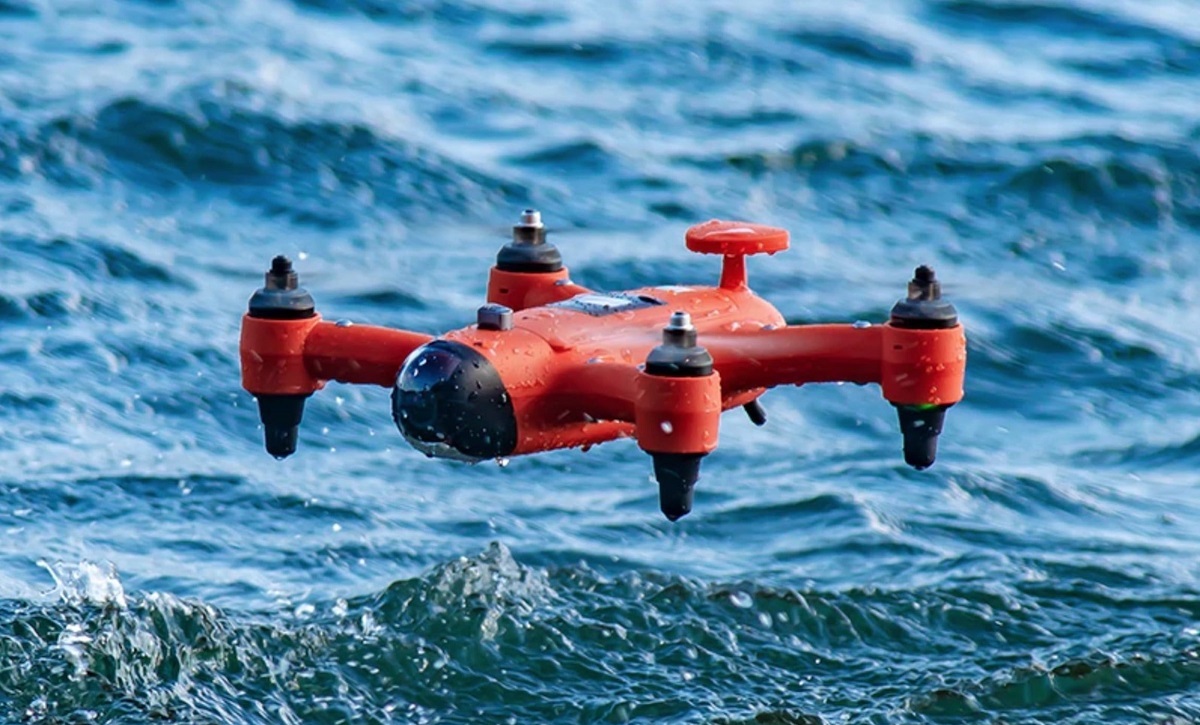
Waterproofing a drone involves taking proactive measures to shield its sensitive components from water intrusion. This is crucial, as drones are exposed to various weather conditions, accidents, and potential water-related hazards during flights. By optimizing your drone’s water resistance, you can confidently navigate through rain, mist, or even land on water for specific applications such as search and rescue missions or marine surveying.
There are different approaches to waterproofing a drone, depending on its make, model, and intended use. It’s essential to understand both the risks associated with water damage and the options available for protecting your drone before you embark on any waterproofing modifications.
In the following sections, we will delve into the various aspects of waterproofing a drone, including assessing water resistance ratings, preparing the drone for waterproofing, choosing the right methods, waterproofing the electronics, motors, frame, and internal connections, as well as protecting the battery. We will also provide tips for testing the waterproofed drone and essential considerations while flying a waterproofed drone.
Before we dive into the details, it’s important to note that waterproofing a drone will require some technical knowledge and skills. If you’re unsure or uncomfortable with it, it’s always a good idea to seek professional assistance or consult with experienced drone enthusiasts. Now, let’s explore the world of drones and their need for waterproofing with the aim to enhance their capabilities and longevity.
Why is Waterproofing Important for Drones?
Waterproofing your drone may seem like an extra step that requires time and effort, but it is a crucial measure to ensure the longevity and functionality of your equipment. Here are a few reasons why waterproofing is important for drones:
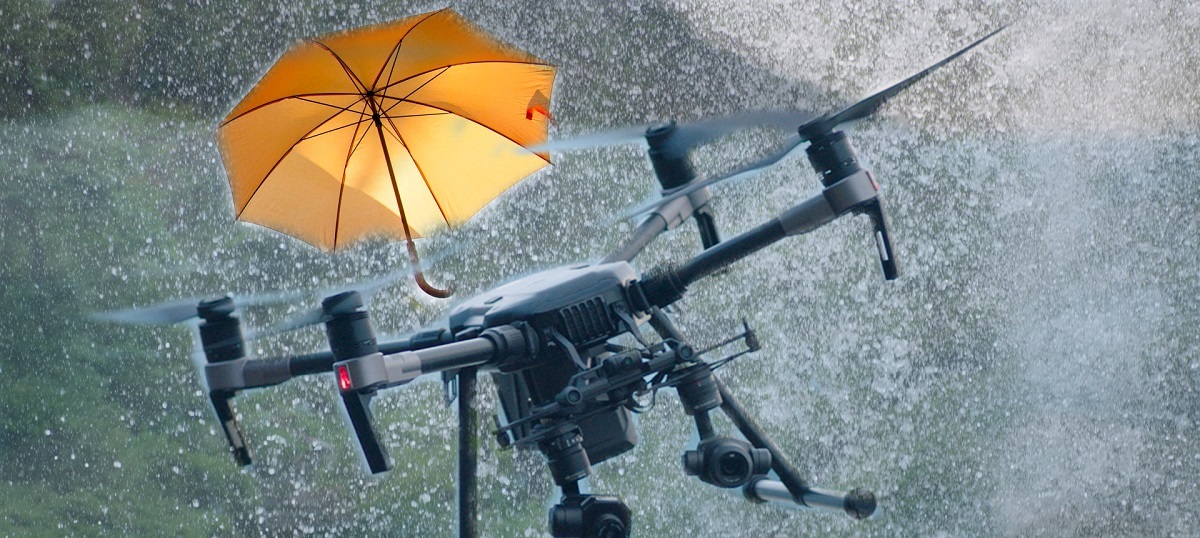
Protection against Water Damage: Drones are often exposed to unpredictable weather conditions, including rain, mist, or even accidental water splashes. Water can easily seep into the sensitive electronic components of the drone, damaging the circuitry and causing malfunctions. By waterproofing your drone, you create a barrier that protects these vulnerable parts from water intrusion.
Ensuring Maximum Performance: When drones operate in wet conditions without proper waterproofing, the moisture can interfere with the electrical connections and sensors, leading to potential performance issues. Waterproofing your drone allows you to maintain optimal performance even in challenging weather conditions, ensuring stable flight controls and reliable operation.
Extended Lifespan: By safeguarding your drone against water damage, you significantly extend its lifespan. Water-related issues can permanently damage key components, leading to expensive repairs or even rendering the drone unusable. Waterproofing not only protects your investment but also allows you to enjoy your drone for a more extended period.
Versatility and Flexibility: With a waterproofed drone, you can expand your creative possibilities and explore new environments. Whether you want to capture aerial footage on a rainy day or venture into aquatic settings, a waterproofed drone gives you the freedom to operate in water-rich areas with confidence.
Specialized Applications: Waterproofing opens up opportunities for specialized drone applications. For example, search and rescue teams can utilize waterproofed drones to locate and retrieve objects from bodies of water, while marine researchers can conduct surveys or monitor marine life without the risk of water damage.
Peace of Mind: Knowing that your drone is waterproofed provides peace of mind while flying in areas prone to rain, near bodies of water, or in humid environments. You can focus on capturing captivating shots or completing missions without worrying about water-related mishaps.
Waterproofing your drone is an investment that pays off in the long run. It ensures the durability and reliability of your equipment, expands your possibilities as a drone pilot, and protects your investment from water-related damage. In the next sections, we will dive into the practical steps of waterproofing your drone, from assessing water resistance ratings to implementing the right waterproofing methods for different drone components.
Assessing Water Resistance Rating
Before you start waterproofing your drone, it’s essential to assess its existing water resistance capabilities. Different drone models come with varying levels of water resistance, and understanding your drone’s water resistance rating will help you determine the extent of waterproofing needed. Here are a few factors to consider when assessing the water resistance rating of your drone:
Manufacturer Specifications: Start by referring to the manufacturer’s specifications or user manual to check if your drone has any specific water resistance rating. Some drones may already have an IP (Ingress Protection) rating or other water resistance certifications, indicating their ability to withstand exposure to water or dust.
Sealing and Casing: Examine the drone’s body and casing to identify any existing sealing mechanisms or design features that provide protection against water. Look for gaskets or O-rings around access ports, battery compartments, and other vulnerable areas. Drones with well-sealed electronics and tight-fitting components will have a better chance of surviving in wet conditions.
Electronics and Connectors: Evaluate the quality of the drone’s electronic components and connectors. High-quality components are typically designed to resist water damage to some extent. Look for silicone coatings, conformal coatings, or other moisture-resistant materials on circuit boards and connectors.
Drone Type and Intended Use: Consider the type of drone you have and its intended use. Drones built for aerial photography or industrial applications may have better water resistance features compared to entry-level recreational drones. The level of water resistance required will also depend on the environments in which you plan to fly your drone.
Feedback from Other Drone Owners: Seek insights from other drone owners who have experience with your specific drone model or a similar one. Online forums, social media groups, or drone communities can offer valuable information on the water resistance capabilities of various drone models and suggestions for effective waterproofing techniques.
Once you have assessed the water resistance rating of your drone, you can determine how much additional waterproofing is required. Even if your drone has some level of water resistance, it’s still advisable to take extra precautions, especially if you plan to fly in wet or harsh conditions. In the next sections, we will explore the steps involved in preparing your drone for waterproofing and selecting the right waterproofing methods based on its water resistance rating.
Preparing the Drone for Waterproofing
Before you begin the process of waterproofing your drone, it’s important to prepare it properly. Taking the time to complete these steps will ensure a smooth and effective waterproofing process. Here are the key steps involved in preparing your drone for waterproofing:
1. Cleaning: Start by thoroughly cleaning your drone. Remove any dust, dirt, or debris from the surface of the drone using a soft brush or compressed air. Clean the propellers, landing gear, and any other exposed areas. This step is crucial to ensure that no dust or particles interfere with the waterproofing process and compromise its effectiveness.
2. Disassembling: Depending on the level of waterproofing required, you may need to partially or completely disassemble your drone. Follow the manufacturer’s instructions or refer to online resources specific to your drone model to disassemble the necessary components. Make sure to document the disassembly process carefully, as this will help you reassemble the drone correctly after waterproofing.
3. Inspecting and Removing Electronics: Inspect the electronics and connectors inside your drone. Look for any signs of corrosion or damage. If you notice any compromised components, consider replacing them before proceeding with the waterproofing process. Carefully disconnect, remove, and label any electronic components or cables that may hinder the waterproofing process.
4. Reinforcing Weak Points: Identify any areas of the drone that are prone to water intrusion. These may include access ports, seams, or areas where cables enter the drone’s body. Reinforce these weak points by applying waterproof silicone or using specialized sealants. Ensure that the seals are tight and will effectively keep water out of the drone’s internal components.
5. Applying Protective Coatings: Consider applying protective coatings to the internal components of the drone. Coatings like conformal coating or liquid electrical tape can help make the electronics and connectors more resistant to water damage. Make sure to follow the manufacturer’s instructions for proper application and curing time.
6. Waterproofing Accessories: Don’t forget to waterproof any accessories or attachments, such as camera gimbals, FPV systems, or other peripherals. Follow the manufacturer’s instructions or seek guidance from experts to ensure proper waterproofing of these accessories without compromising their functionality.
7. Document and Reassemble: Take photos or make notes of the disassembly process to guide you during reassembly. Make sure to keep track of any removed components so that you can reinstall them correctly after the waterproofing process is complete. Follow the reverse order of disassembly to reassemble the drone, making sure all connections are secure and components are in their proper places.
By properly preparing your drone for waterproofing, you set the foundation for a successful waterproofing job. These steps help ensure that the waterproofing process is carried out effectively without compromising the integrity of your drone’s components. In the next sections, we will explore the different methods available for waterproofing the various parts of your drone.
Choosing the Right Waterproofing Method
When it comes to waterproofing your drone, there are several methods and products available. Choosing the right waterproofing method depends on factors such as the drone’s water resistance rating, the level of protection needed, and personal preferences. Here are some popular waterproofing methods to consider:
1. Waterproof Sprays and Coatings: Waterproof sprays and coatings are commonly used to add a protective layer to the external components of the drone. These sprays create a hydrophobic barrier that repels water, preventing it from entering and damaging the drone’s sensitive parts. Be sure to select a spray or coating that is safe for use on electronics and follow the manufacturer’s instructions for proper application.
2. Silicone Sealants and Adhesives: Silicone sealants and adhesives are ideal for reinforcing weak points and sealing gaps in the drone’s body. These products provide a watertight seal and can be applied around access ports, seams, and cable entry points. Choose a high-quality, flexible silicone sealant that adheres well to different surfaces and is resistant to water and temperature changes.
3. Conformal Coatings: Conformal coatings are specially formulated coatings designed to protect electronic components from moisture. These coatings are applied to the circuit boards and connectors, creating a protective layer that prevents water damage. Conformal coatings provide excellent insulation and can be sprayed or brushed onto the components. Follow the manufacturer’s instructions for proper application and ensure that all exposed areas are adequately coated.
4. Waterproof Enclosures or Cases: For drones that require maximum protection, waterproof enclosures or cases can be used. These cases provide a complete seal around the drone, protecting it from water, dust, and impacts. They are designed with rubber gaskets or O-rings to ensure a watertight seal. Choose a case that is compatible with your drone’s dimensions and offers easy access to the drone’s controls and features.
5. Internal Cable Management: Proper cable management within the drone can also contribute to its overall water resistance. Secure and organize cables within the drone’s body, ensuring they are away from areas where water can accumulate. Use cable ties or clips to keep the cables in place and prevent them from interfering with the drone’s moving parts or components. Additionally, consider using spiral cable wraps or waterproof cable connectors for added protection.
6. Component Replacement: In some cases, replacing certain vulnerable components with waterproof alternatives may be necessary. For example, waterproof ESCs (Electronic Speed Controllers) or motors can be installed to improve the drone’s water resistance. Research and consult with experts to find compatible waterproof components that will enhance your drone’s protection against water damage.
Remember, the right waterproofing method will depend on your specific drone and its water resistance rating. Consider the level of protection required, the environments you plan to fly in, and the additional features you may need. It’s also important to carefully follow the manufacturer’s instructions and seek professional assistance if needed to ensure a successful waterproofing job.
In the next sections, we will guide you through the process of waterproofing the different components of your drone, including the electronics, motors, frame, internal cables, and battery.
Waterproofing the Electronics
The electronics of your drone are the most critical components that need protection from water damage. Waterproofing the electronics involves creating a barrier that prevents water from reaching the sensitive circuitry and connectors. Here’s a step-by-step guide on how to effectively waterproof the electronics of your drone:
1. Disassemble the Drone: Begin by disassembling your drone following the manufacturer’s instructions or online resources specific to your drone model. This will give you access to the internal electronics and make the waterproofing process easier.
2. Clean and Dry: Ensure that the electronics are free from any dirt or moisture. Use a soft brush or compressed air to remove dust and a clean, lint-free cloth to wipe the components gently. Make sure all parts are completely dry before proceeding.
3. Apply Conformal Coating: Conformal coatings are an effective way to protect the sensitive electronics from water damage. Choose a conformal coating specifically designed for electronics and use a brush or spray to apply it evenly to the circuit boards, connectors, and any exposed components. Be thorough, ensuring that all the surfaces are adequately covered with the coating. Follow the manufacturer’s instructions on drying time and the number of coating layers to apply.
4. Insulate and Seal: In addition to conformal coating, you can further enhance protection by insulating and sealing the electronic components. Use liquid electrical tape or heat shrink tubing to insulate exposed solder joints, connections, and wires. This will provide an extra layer of water resistance and prevent potential short circuits due to water exposure. Ensure that all exposed areas are adequately sealed to prevent water from entering.
5. Waterproof Connectors: Pay special attention to the connectors, as they are vulnerable points for water ingress. Apply a small amount of dielectric grease or silicone sealant to the connectors, helping to create a protective barrier. Ensure that the connectors are properly inserted and secured to maintain the water resistance integrity.
6. Reassemble the Drone: Once the electronics have been waterproofed, carefully reassemble your drone, ensuring that all connections are secure and components are in their proper places. Follow the documentation or notes you made during disassembly to ensure a successful reassembly.
7. Perform Testing: Before taking your drone out for a flight, it is essential to perform a thorough testing procedure. Check all the electronic functions, including the sensors, motors, and remote control responsiveness. Look for any abnormalities or signs of water intrusion. If everything functions properly, proceed to the next steps of waterproofing the motors, frame, internal cables, and battery, which we will discuss in the following sections.
Waterproofing the electronics of your drone is critical to protect them from water damage and ensure their longevity. By following these steps and taking the necessary precautions, you can significantly enhance the water resistance of your drone’s electronics and feel confident flying in wet conditions.
Waterproofing the Motors and Frame
When it comes to waterproofing your drone, it’s essential to address not only the electronics but also the motors and frame. These components are also susceptible to water damage and require adequate protection. Here’s a step-by-step guide on how to effectively waterproof the motors and frame of your drone:
1. Preparation: Disassemble your drone, following the manufacturer’s instructions or online resources specific to your drone model. This will give you access to the motors and frame, allowing for proper waterproofing.
2. Clean and Dry: Thoroughly clean the motors and frame to remove any dirt, debris, or moisture. Use a soft brush or compressed air to remove dust and a clean, lint-free cloth to wipe the components gently. Ensure that all parts are completely dry before proceeding.
3. Waterproofing Treatment: Apply a waterproofing treatment to the motors and frame to enhance their water resistance. There are several options available, including waterproof sprays, specialized motor coatings, or corrosion-resistant paints. Apply the treatment according to the manufacturer’s instructions and ensure that all surfaces are adequately covered.
4. Motor Seal: Take extra measures to seal the motors to prevent water from entering. Use silicone sealant or heat shrink tubing to seal any gaps or openings around the motor casing. Ensure that the seal is tight and that no water can penetrate into the internal components of the motors.
5. Frame Waterproofing: Waterproof the frame of your drone by applying a protective coating or using waterproof tapes. Apply the coating or tape to all frame joints and areas that are susceptible to water intrusion. Pay particular attention to entry points for cables, screws, and other openings.
6. Reassemble the Drone: Once the motors and frame are properly waterproofed, carefully reassemble your drone, ensuring that all connections are secure and components are in their proper places. Follow the documentation or notes you made during disassembly to ensure a successful reassembly.
7. Perform Testing: After reassembling the drone, perform thorough testing to ensure the waterproofing is successful. Check the functionality of the motors and verify that they operate smoothly without any signs of water damage. Inspect the frame for any water seepage or abnormalities. If everything checks out, you can proceed to waterproofing the internal cables and connections.
Waterproofing the motors and frame of your drone is crucial to protect them from water damage and ensure the overall integrity of your drone. By following these steps and using appropriate waterproofing treatments, you can enhance the water resistance of these components and fly your drone with confidence, even in wet conditions.
Waterproofing the Internal Cables and Connections
To ensure comprehensive water resistance for your drone, it’s important to pay attention to the internal cables and connections. These components are critical for the proper functioning of the drone, and water damage can lead to malfunctions or even complete failure. Here are the steps to effectively waterproof the internal cables and connections:
1. Disassemble the Drone: Begin by disassembling the drone, following the manufacturer’s instructions or online resources specific to your drone model. This will give you access to the internal cables and connections for proper waterproofing.
2. Evaluate the Existing Connections: Assess the existing connections within the drone. Look for areas where the cables and connectors are exposed or vulnerable to water intrusion. Pay close attention to points where cables enter the frame, as these are common entry points for water. Identify any weak spots or damaged connectors that may need replacement.
3. Insulate Exposed Cables: Insulate the exposed cable connectors by applying heat shrink tubing or using silicone sealant. Slide the heat shrink tubing over each connector and apply heat to shrink it securely around the connections. If using silicone sealant, carefully apply it around the cable connectors, ensuring a tight seal without obstructing the functionality of the connectors.
4. Waterproof Cable Entry Points: Focus on the areas where cables enter the drone’s frame or compartments. Seal these entry points using waterproof tape or silicone sealant. Create a watertight barrier around these areas, ensuring that no water can penetrate into the internal components through the cable entry points.
5. Organize and Secure Internal Cables: Proper cable management is important to prevent cable damage and ensure water resistance. Use zip ties, adhesive-backed cable clips, or spiral cable wraps to organize and secure the internal cables. Keep the cables away from moving parts and ensure they are well-routed within the drone’s frame to reduce the risk of water damage or interference with other components.
6. Reassemble the Drone: Once the internal cables and connections are properly waterproofed and secured, carefully reassemble the drone. Follow the manufacturer’s instructions or the documentation and notes you made during disassembly to ensure a successful reassembly.
7. Perform Testing: Test the drone thoroughly after reassembly to ensure the waterproofing on the internal cables and connections is effective. Power on the drone and check the functionality of all the internal components. Verify that there are no signs of water damage, such as short circuits or irregularities in operation.
Properly waterproofing the internal cables and connections of your drone is crucial to protect them from water damage and ensure the overall functionality of your drone. By following these steps and taking the necessary precautions, you can prevent water intrusion into these vital components and enjoy the peace of mind of flying your drone even in wet conditions.
Protecting the Battery
The battery is a critical component of your drone, and proper protection is essential to maintain its performance and longevity. Water infiltration can damage the battery, leading to reduced flight times, unstable power output, or even complete failure. Here are the steps to effectively protect the battery:
1. Remove the Battery: Begin by removing the battery from the drone. This will allow you to focus on protecting it without any interference.
2. Inspect the Battery: Thoroughly inspect the battery for any signs of damage or wear. Look for dents, punctures, or any abnormalities that could compromise its structural integrity. If you notice any issues, consider replacing the battery for optimal safety and performance.
3. Apply Waterproof Sealant: Apply a thin layer of waterproof sealant around the battery terminals. This will create a protective barrier, preventing water from reaching the terminals and potentially causing a short circuit. Allow the sealant to fully cure according to the manufacturer’s instructions before reinserting the battery.
4. Use a Waterproof Battery Bag or Case: Consider using a specialized waterproof battery bag or case to provide an extra layer of protection. These bags are designed to seal tightly, preventing any water from reaching the battery. Ensure that the bag or case is specifically designed for your battery model and that it offers a secure closure mechanism.
5. Store and Transport Properly: When not in use, store and transport the battery in a dry and cool environment. Avoid exposing it to extreme temperatures or moisture, as these can adversely affect its performance. Use a designated battery storage case or bag to protect it from any potential damage during transportation.
6. Perform Regular Battery Maintenance: Regularly inspect and maintain your drone battery to ensure its optimal performance and safety. Check for any signs of swelling, leakage, or damage. If you notice any issues, promptly replace the battery to avoid potential hazards. Additionally, follow proper charging and discharging procedures as outlined in the manufacturer’s instructions to prolong the battery’s lifespan.
7. Reinstall the Battery: Once you have taken the necessary steps to protect the battery, carefully reinstall it in the drone. Make sure the connections are secure and the battery is properly seated. Double-check that the waterproof sealant is in place and intact.
Protecting the battery is vital to maintain the overall performance and reliability of your drone. By following these steps and investing in proper protection measures, you can safeguard your battery against water damage and enjoy extended flight times and consistent power output.
Testing the Waterproofed Drone
Once you have completed the process of waterproofing your drone, it is crucial to conduct thorough testing to ensure that the waterproofing measures are effective. Testing the waterproofed drone will help verify its water resistance capabilities and ensure that it functions properly in wet conditions. Here are some steps to follow when testing your waterproofed drone:
1. Dry Testing: Before exposing your drone to water, conduct a dry test to ensure that all the components are functioning correctly after the waterproofing process. Power on the drone and check the functionality of the motors, sensors, remote control responsiveness, and any other critical features. Inspect the drone carefully for any signs of water intrusion, such as condensation or abnormal behavior.
2. Splash Testing: Start with a splash test to gradually introduce your drone to water. Fill a container or basin with water and gently lower your drone into it, ensuring that it remains level. Observe the drone’s behavior and monitor for any signs of water leakage or damage. Pay attention to critical areas, such as access ports, cable entry points, and connectors.
3. Rain Testing: If your drone is designed for outdoor flying, consider testing its waterproofing capabilities in light rain or misty conditions. Take the drone to an open area with minimal wind and expose it to light precipitation. Observe closely to see if any water penetrates the drone’s protective layers or if there are any adverse effects on its performance.
4. Wet Landing Test: If your drone is capable of landing on water, perform a wet landing test in a controlled environment. Ensure that the water body is calm and free from obstacles. Slowly land the drone on the water’s surface and observe its buoyancy, stability, and ability to take off again. Monitor closely for any water leakage or damage during the landing and takeoff process.
5. Post-Test Inspection: After each testing phase, thoroughly inspect the drone for any signs of water intrusion, such as water droplets inside the body or abnormal behavior of the electronic components. Dry the drone completely and visually inspect the waterproof seals, connections, and any vulnerable areas. Address any issues promptly to ensure the continued water resistance of your drone.
6. Repeat Testing (If Necessary): If you encounter any issues or suspect that the waterproofing measures may not be sufficient, repeat the testing process or perform additional tests. This will help identify any weak points or areas that need further waterproofing attention. Consider seeking expert advice or consulting with experienced drone enthusiasts if you encounter difficulties or need guidance during this process.
Testing the waterproofed drone is a crucial step to ensure its water resistance capabilities and overall functionality. By following these testing procedures and addressing any issues that arise, you can have confidence in your waterproofed drone’s ability to withstand water exposure and fly reliably in wet or damp conditions.
Tips for Flying a Waterproofed Drone
Now that you have successfully waterproofed your drone, it’s important to keep a few tips in mind while flying in wet conditions. These tips will help you maximize the performance, longevity, and safety of your waterproofed drone:
1. Check Weather Conditions: Before flying your waterproofed drone, check the weather forecast for rain, wind, and other adverse conditions. Avoid flying in heavy rain or strong winds, as they can pose challenges and potential risks for your drone’s stability and control.
2. Maintain Safe Distance: While flying a waterproofed drone in wet conditions, it’s crucial to maintain a safe distance between your drone and any potential water sources, including rivers, lakes, or the ocean. Even with waterproofing, direct contact with water can still pose risks to the drone’s electronics and flight stability.
3. Dry the Drone After Use: After flying in wet conditions or landing on water, be sure to thoroughly dry your drone. Use a clean, lint-free cloth to dry the exterior surfaces, and consider using a handheld air blower to remove any moisture from hard-to-reach areas. Ensure the drone is completely dry before storing it to prevent corrosion or other water-related damage.
4. Inspect Seals and Connections: Regularly inspect the seals, connectors, and cable entry points on your waterproofed drone. Look for any signs of wear and tear, loose connections, or damage to the waterproofing measures. Address any issues promptly to maintain the integrity of the waterproofing and prevent potential water infiltration.
5. Perform Routine Maintenance: Practice regular maintenance on your waterproofed drone to ensure optimal performance. Clean the drone regularly to remove dirt or debris that can compromise the waterproofing. Inspect the propellers, motors, and other components for any signs of damage or wear, and replace any worn-out parts as needed.
6. Keep Spare Parts Handy: It’s always a good idea to have spare parts, such as propellers and cables, readily available. Accidents can happen, especially in challenging weather conditions, and having spare parts on hand will minimize downtime and allow you to continue flying your waterproofed drone.
7. Fly Responsibly: Regardless of the weather or waterproofing measures, always fly your drone responsibly and abide by local laws and regulations. Respect privacy, avoid flying over restricted areas, and prioritize the safety of people and property. Being a responsible drone pilot contributes to the overall positive perception and acceptance of drone technology.
8. Stay Updated and Learn from Experience: Stay updated on the latest advancements in drone technology and waterproofing methods. Engage with online communities, attend workshops, and learn from experienced drone enthusiasts. By continually learning and adapting, you can enhance your skills and knowledge in maintaining and flying your waterproofed drone.
By following these tips, you can enjoy the benefits of flying a waterproofed drone with confidence, even in wet conditions. Remember to prioritize safety, maintain regular maintenance, and stay informed about the best practices for flying and maintaining your drone.
Conclusion
Waterproofing your drone is a worthwhile investment that protects your equipment and expands its capabilities. By taking the necessary steps to waterproof your drone, you can confidently fly in wet conditions, explore aquatic environments, and capture stunning footage without the fear of water damage. Here’s a recap of the key points and steps discussed in this article:
• Waterproofing is important for drones as it protects against water damage, ensures maximum performance, and extends the lifespan of the drone.
• Assessing the water resistance rating of your drone helps determine the extent of waterproofing needed.
• Preparing the drone involves cleaning, disassembling, and inspecting the components.
• Choosing the right waterproofing method depends on the drone’s water resistance rating, and options include sprays, sealants, coatings, enclosures, and component replacements.
• Waterproofing the electronics involves applying conformal coatings, insulating and sealing connectors, and organizing internal cables.
• Waterproofing the motors and frame includes applying protective treatments, sealing the motors, and treating the frame with coatings or tapes.
• Waterproofing the internal cables and connections involves insulating connectors and sealing cable entry points.
• Protecting the battery requires applying sealant, using waterproof bags or cases, and maintaining proper storage and transportation practices.
• Testing the waterproofed drone is important to verify its water resistance and functionality in wet conditions.
• Tips for flying a waterproofed drone include checking weather conditions, maintaining a safe distance from water sources, drying the drone after use, and performing routine maintenance.
Waterproofing your drone requires careful attention to detail, technical skills, and the use of appropriate products and methods. Always follow the manufacturer’s instructions and seek professional assistance if needed. By waterproofing your drone, you can confidently explore new opportunities, capture stunning footage, and have peace of mind knowing that your investment is protected from water damage. So, get ready to take your drone to new heights, even in wet conditions!


