Introduction
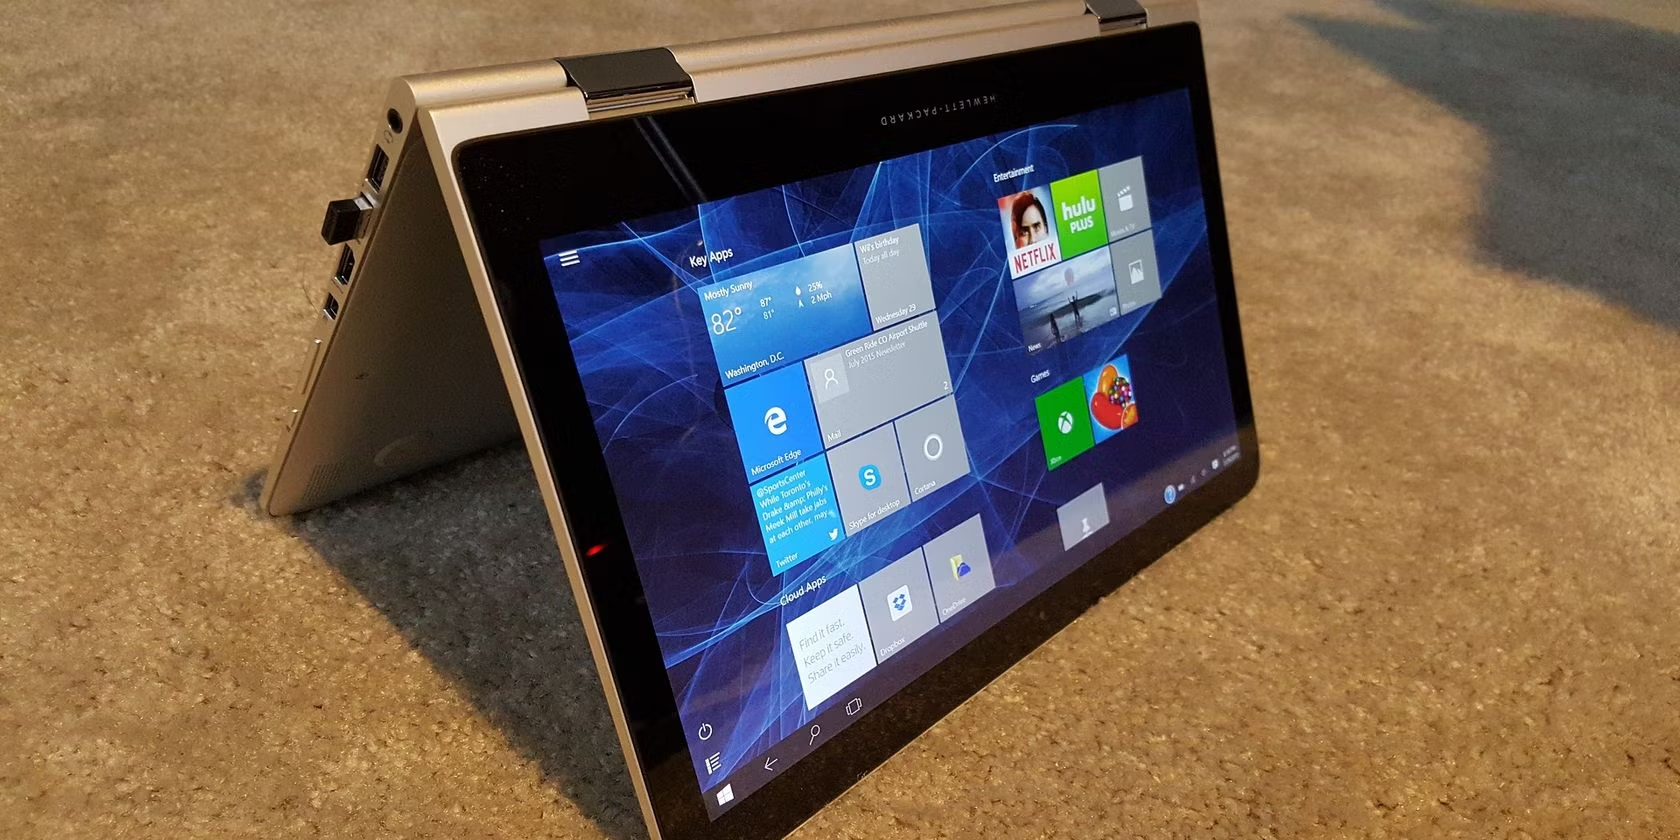
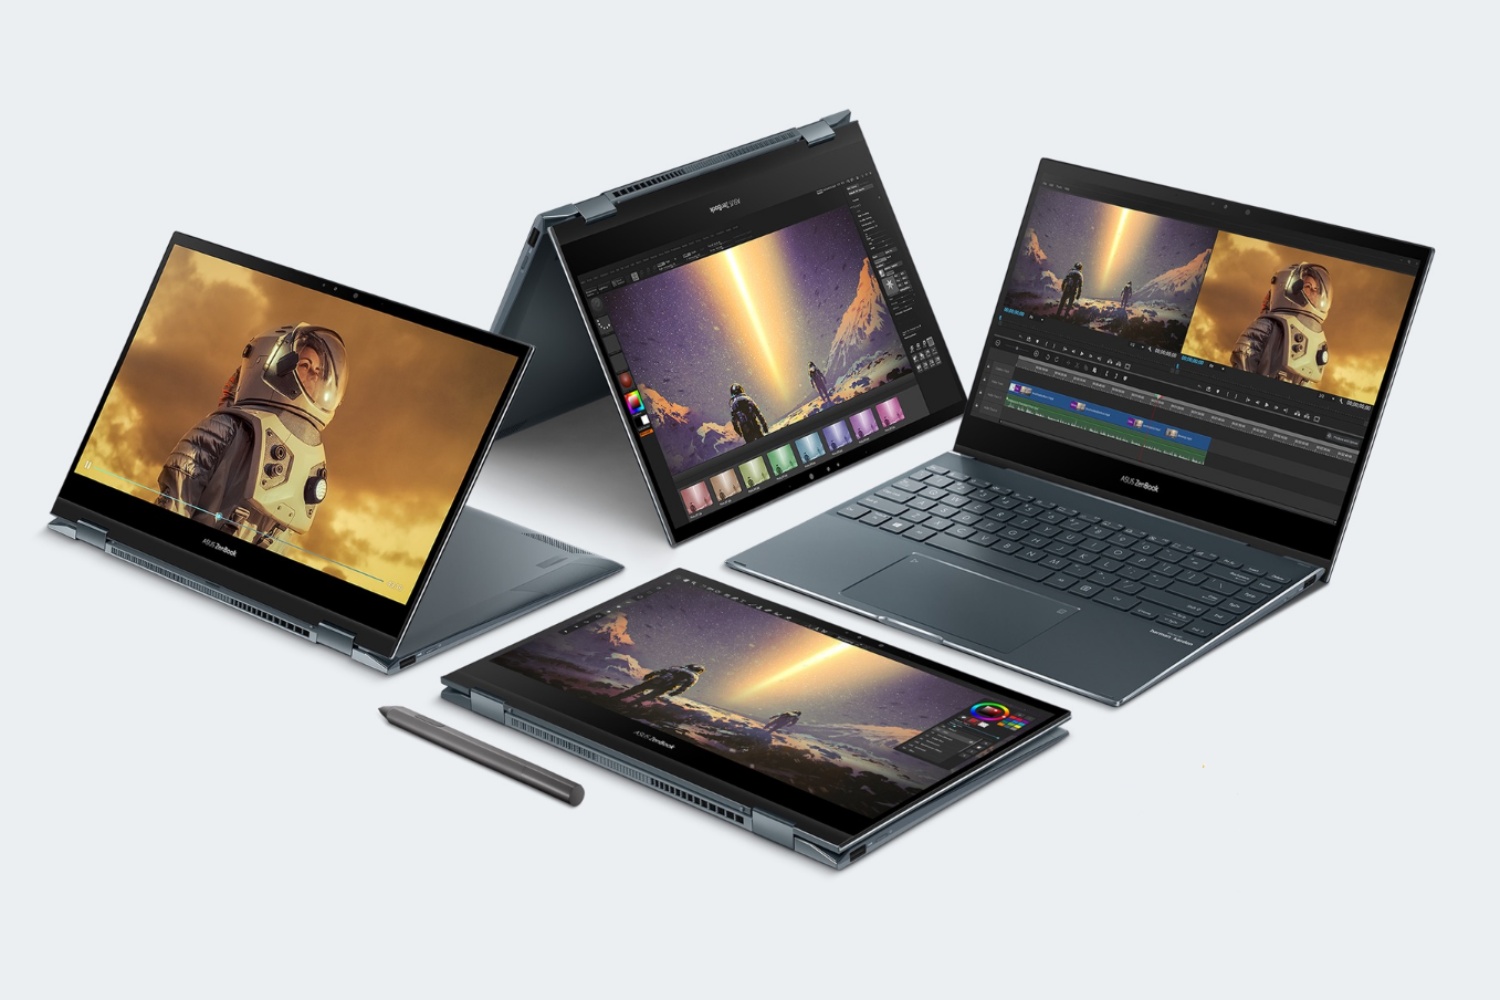
Switching from tablet mode to desktop mode on Windows 10 allows you to seamlessly transition between different device usage scenarios. Tablet mode provides a touch-friendly interface with larger icons and a fullscreen Start menu, making it ideal for tablet or hybrid devices. On the other hand, the desktop mode offers the traditional Windows interface with a taskbar, desktop icons, and windowed applications, perfect for a laptop or desktop setup.
In this article, we will guide you through the process of switching from tablet mode to desktop mode on Windows 10. Whether you’re using a tablet, 2-in-1 device, or simply want to switch back to the familiar desktop environment, these steps will help you make the transition effortlessly.
Before we dive into the step-by-step guide, it’s important to note that the process may vary slightly depending on your device and Windows 10 version. However, the overall concept and functionality remain the same across most devices.
So, let’s get started and learn how to switch from tablet mode to desktop mode on Windows 10!
Step 1: Opening Settings
The first step in switching from tablet mode to desktop mode on Windows 10 is to access the Settings app. This app is the central hub for customizing your device settings and preferences.
To open the Settings app, there are a few different ways you can do it:
- Click on the Start button in the bottom-left corner of the screen, then click on the gear icon to open the Settings app.
- Press the Windows key + I on your keyboard simultaneously to open the Settings app directly.
- Right-click on the Start button and select “Settings” from the context menu.
Choose whichever method suits you best, and the Settings app will open up, ready for you to make the necessary changes to switch from tablet mode to desktop mode.
Once you have the Settings app open, you are one step closer to optimizing your device’s user interface to match your preferences and needs.
Keep in mind that these instructions are specifically for Windows 10. If you are using a different version of Windows, the steps may vary slightly, but the general process should remain similar.
Step 2: Accessing Tablet Mode Settings
Now that we have the Settings app open, we need to navigate to the Tablet Mode settings to make the necessary adjustments.
To access the Tablet Mode settings, follow these simple steps:
- Within the Settings app, click on the “System” category.
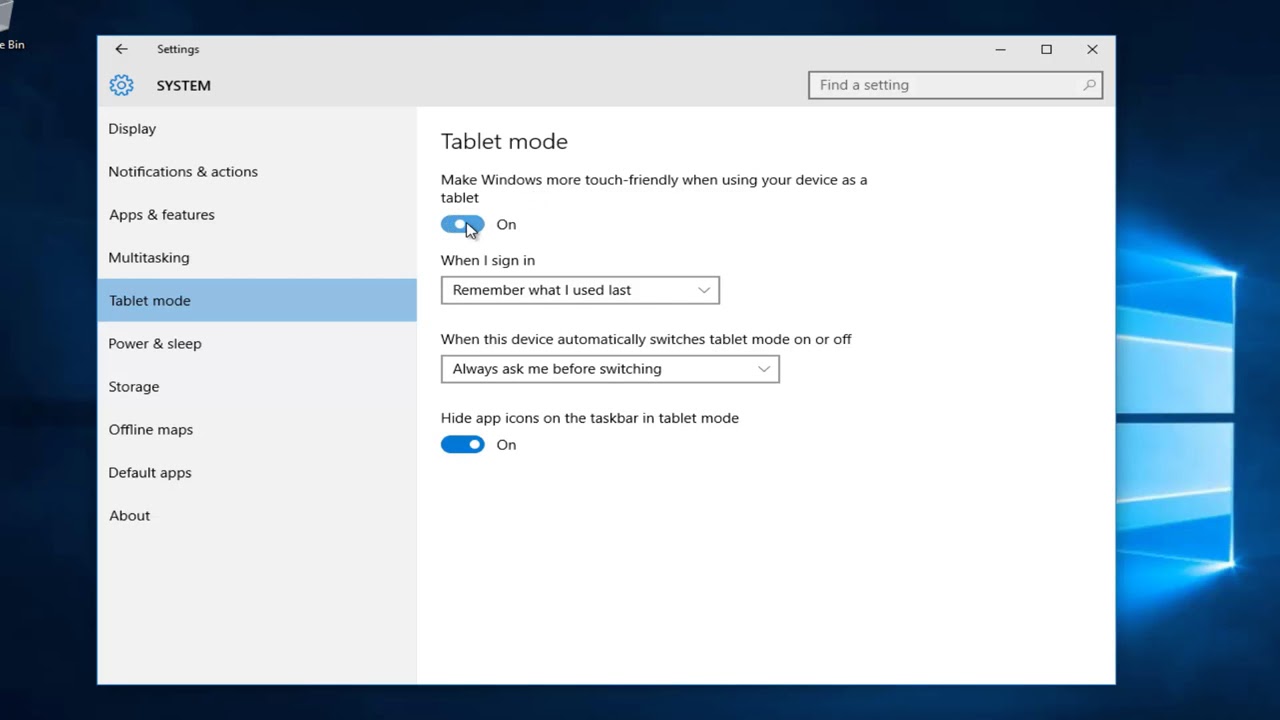
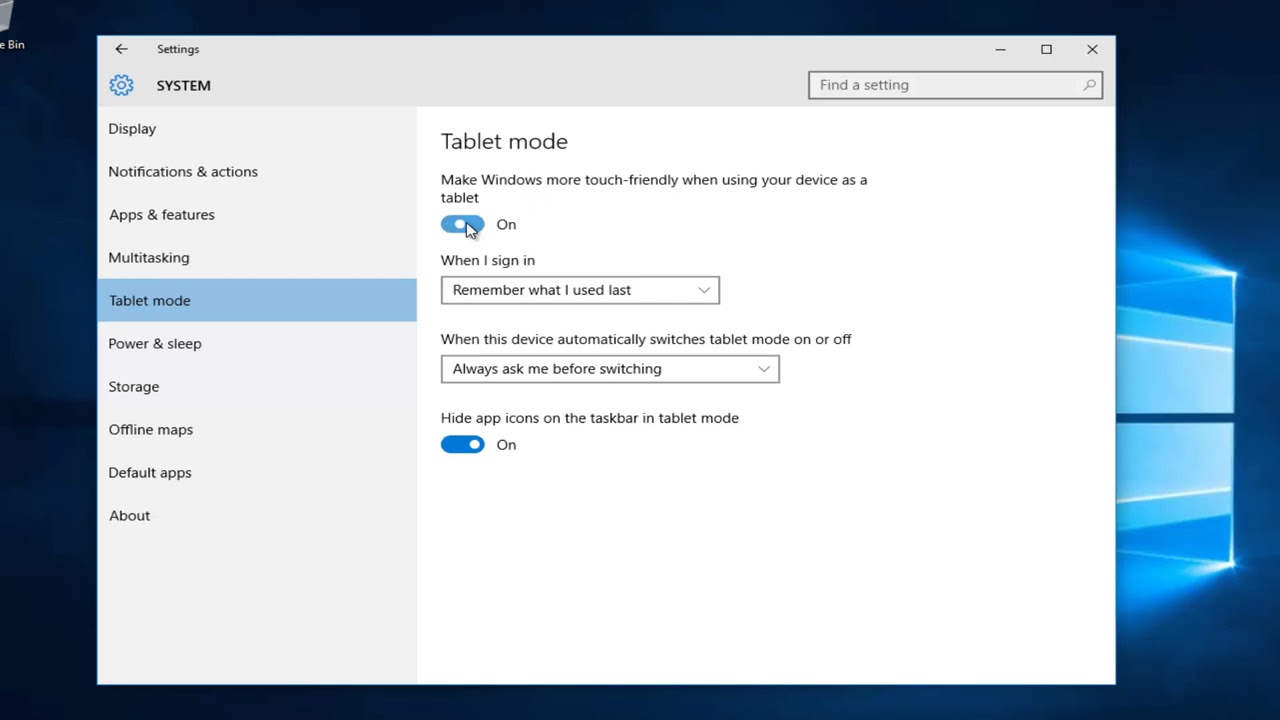
- In the left sidebar, click on the “Tablet mode” option.
By clicking on the “Tablet mode” option, you will be directed to the Tablet mode settings page where you can configure how your device behaves in tablet mode.
On this page, you will see various options related to tablet mode, including:
- “When I sign in” – here, you can choose whether your device should automatically switch to tablet mode when you sign in.
- “When this device automatically switches tablet mode on or off” – this option allows you to customize when your device automatically switches to tablet mode based on its orientation.
- “Set up assigned access” – this feature lets you restrict your device to a specific app or a custom user experience for streamlined tablet usage.
Feel free to explore these options and adjust them according to your preferences. Once you have configured your tablet mode settings, you can proceed to the next step to select your preferred mode.
Note that these settings are designed to optimize your device for tablet use, ensuring a seamless and user-friendly experience when operating in tablet mode.
Step 3: Choosing Your Preferred Mode
Now that you have accessed the Tablet Mode settings, you can choose your preferred mode of operation for your device. Windows 10 offers two main options: “Use tablet mode” and “Use desktop mode”.
Here’s how you can select your preferred mode:
- On the Tablet Mode settings page, under the “Tablet mode” section, you will find the option “Make Windows more touch-friendly when using your device as a tablet”.
- To enable tablet mode, toggle the switch to the ‘On’ position.
- If you prefer the traditional desktop mode, toggle the switch to the ‘Off’ position.
By default, Windows 10 will automatically switch to tablet mode if it detects that you’re using a tablet or a device with a touchscreen. However, you have the choice to manually override this setting.
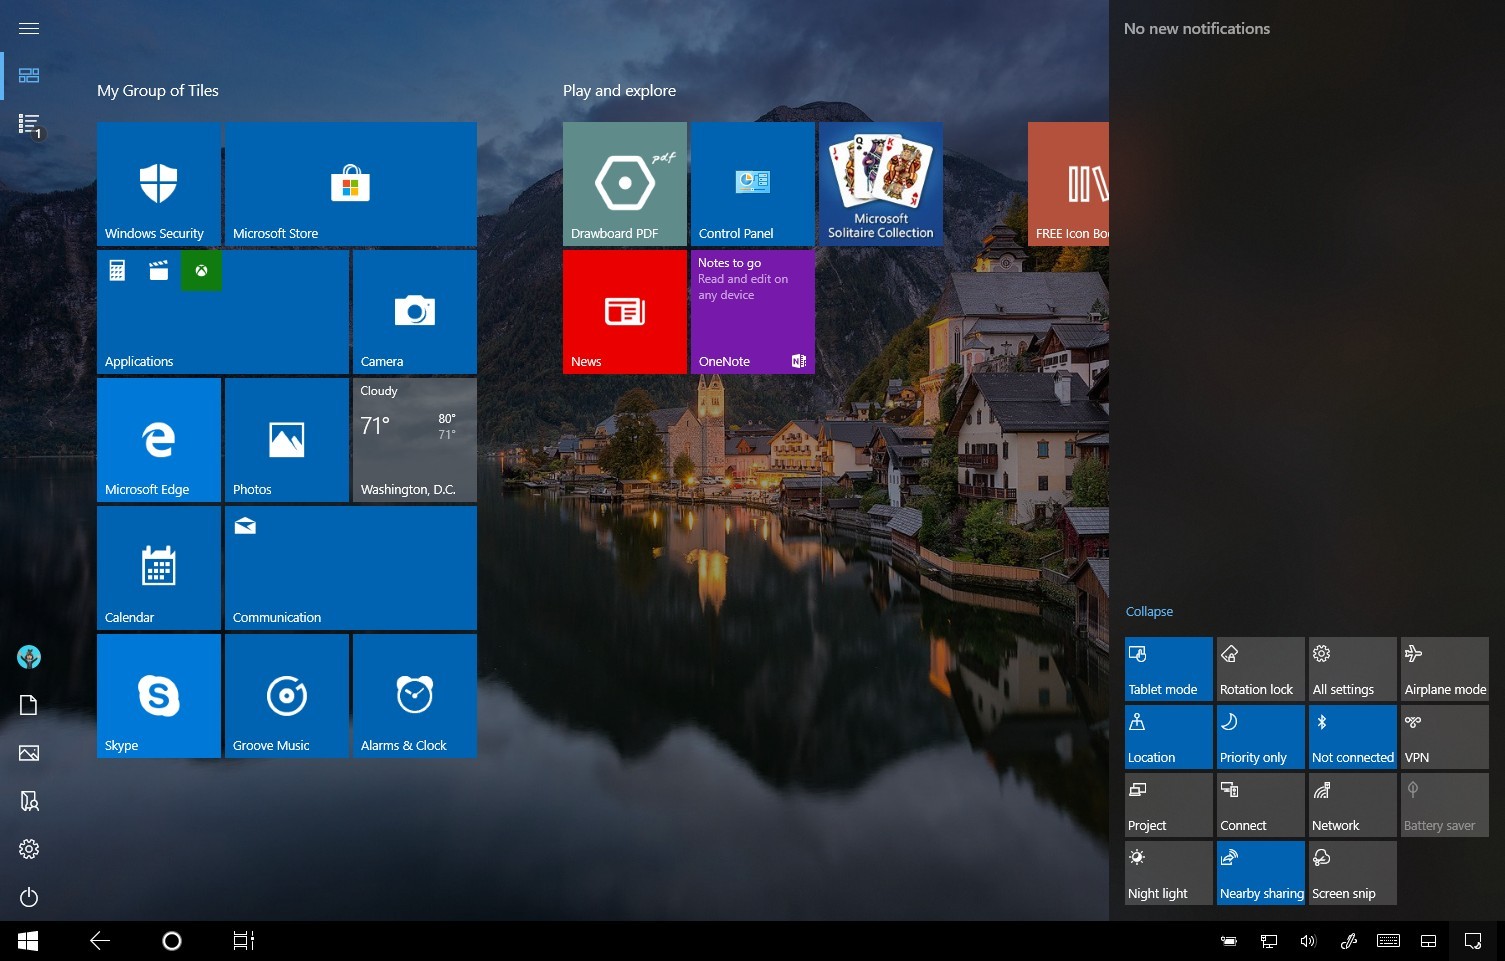
When you enable tablet mode, Windows will optimize the user interface for touch interaction. The Start menu will expand to fill the screen, app tabs will appear in full-screen mode, and icons will be larger and more touch-friendly.
On the other hand, disabling tablet mode will revert Windows to the familiar desktop mode where you can use your device with a mouse and keyboard as you would with a traditional laptop or desktop computer.
Remember, you can always switch between tablet mode and desktop mode depending on your needs and preferences. Flexibility is one of the key advantages of Windows 10.
Once you have made your selection, you are ready to move on to customizing your tablet mode settings further, if desired.
Step 4: Customizing Tablet Mode Settings
After selecting your preferred mode in the previous step, you can further customize the tablet mode settings to tailor the user experience to your liking.
To customize the tablet mode settings, follow these steps:
- On the Tablet Mode settings page, scroll down to the “When this device automatically switches tablet mode on or off” section.
- Here, you will find two options: “Don’t ask me and always switch” and “Always ask me before switching”.
- If you prefer Windows 10 to automatically switch between tablet and desktop mode based on the device’s orientation, choose the “Don’t ask me and always switch” option.
- If you want Windows 10 to prompt you for confirmation before switching modes, select the “Always ask me before switching” option.
Additionally, you can personalize other tablet mode features by checking or unchecking the following options:
- “Hide app icons on the taskbar in tablet mode” – when enabled, this option will remove the icons from the taskbar in tablet mode, providing a cleaner and more immersive experience.
- “Automatically hide the taskbar in tablet mode” – when enabled, this option will hide the taskbar when in tablet mode, maximizing the screen space for applications.
Feel free to explore and experiment with these settings to find the configuration that best suits your workflow and preferences. Remember that you can always change the settings later if needed.
Once you have customized the tablet mode settings to your liking, you’re almost done with the process. The next and final step is to learn how to switch back to desktop mode if and when needed.
Step 5: Switching Back to Desktop Mode
If you’ve been using your device in tablet mode and now wish to switch back to desktop mode, Windows 10 makes it simple to do so. Follow these steps:
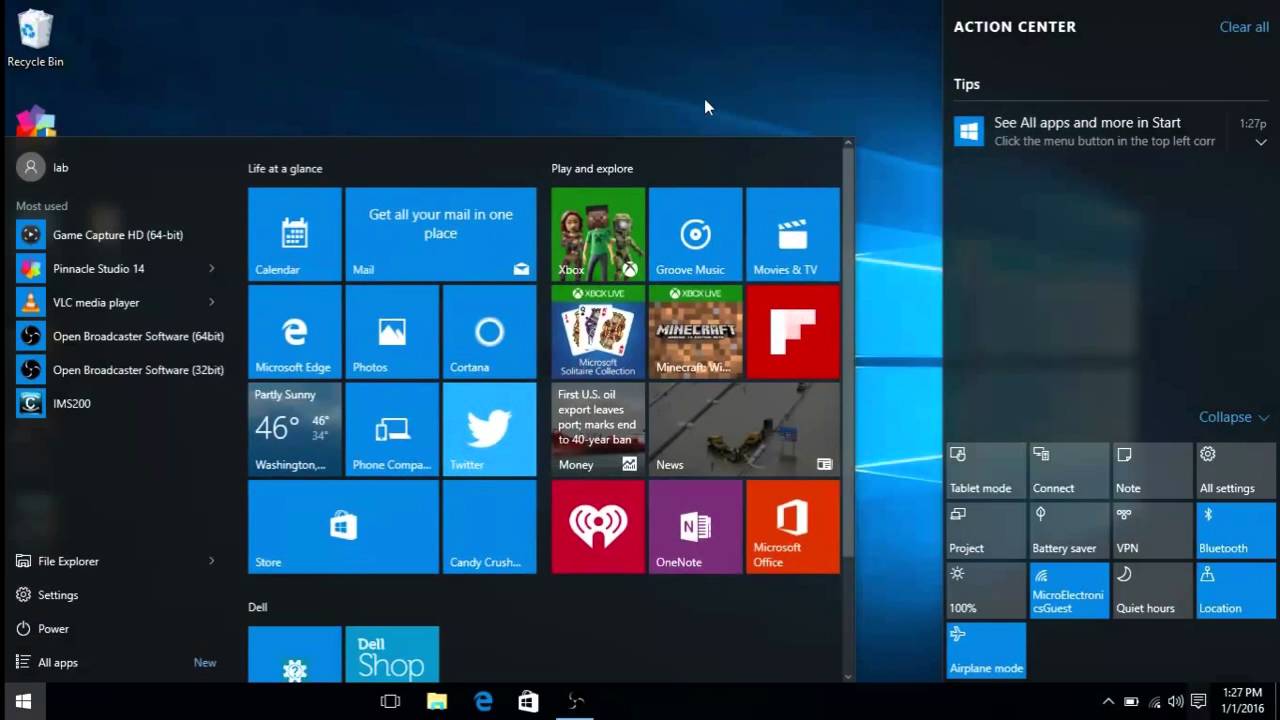
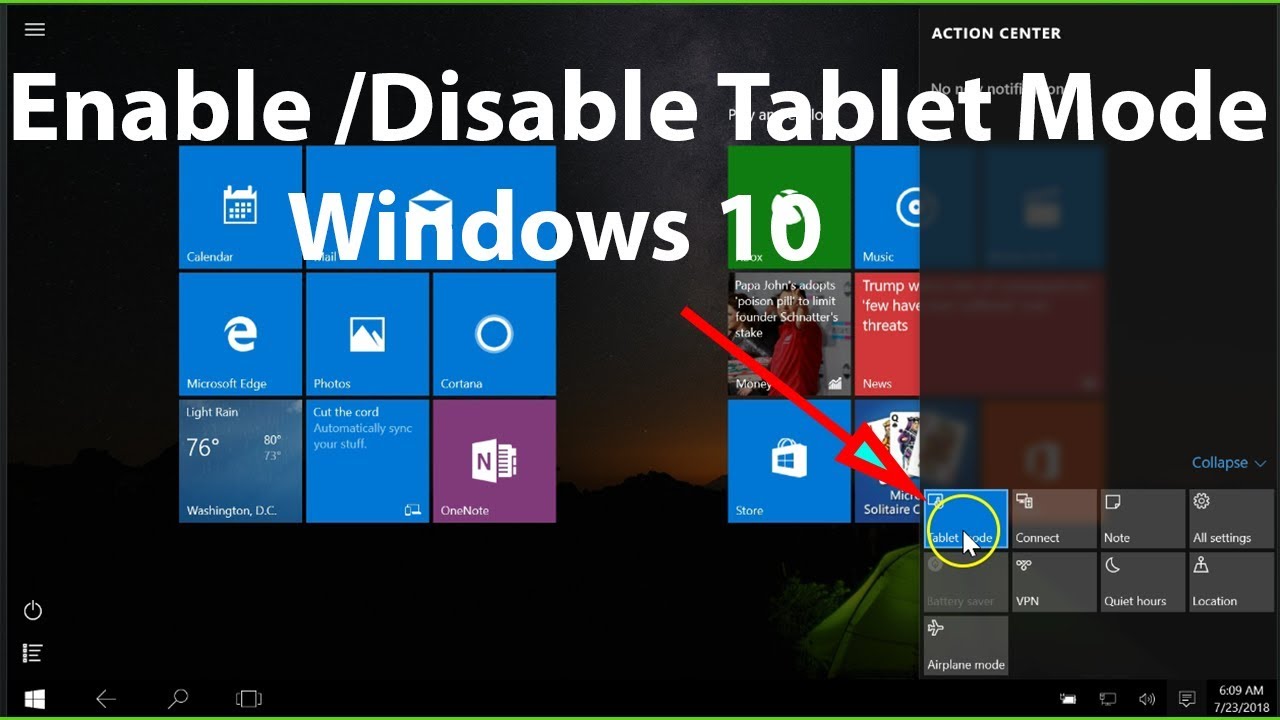
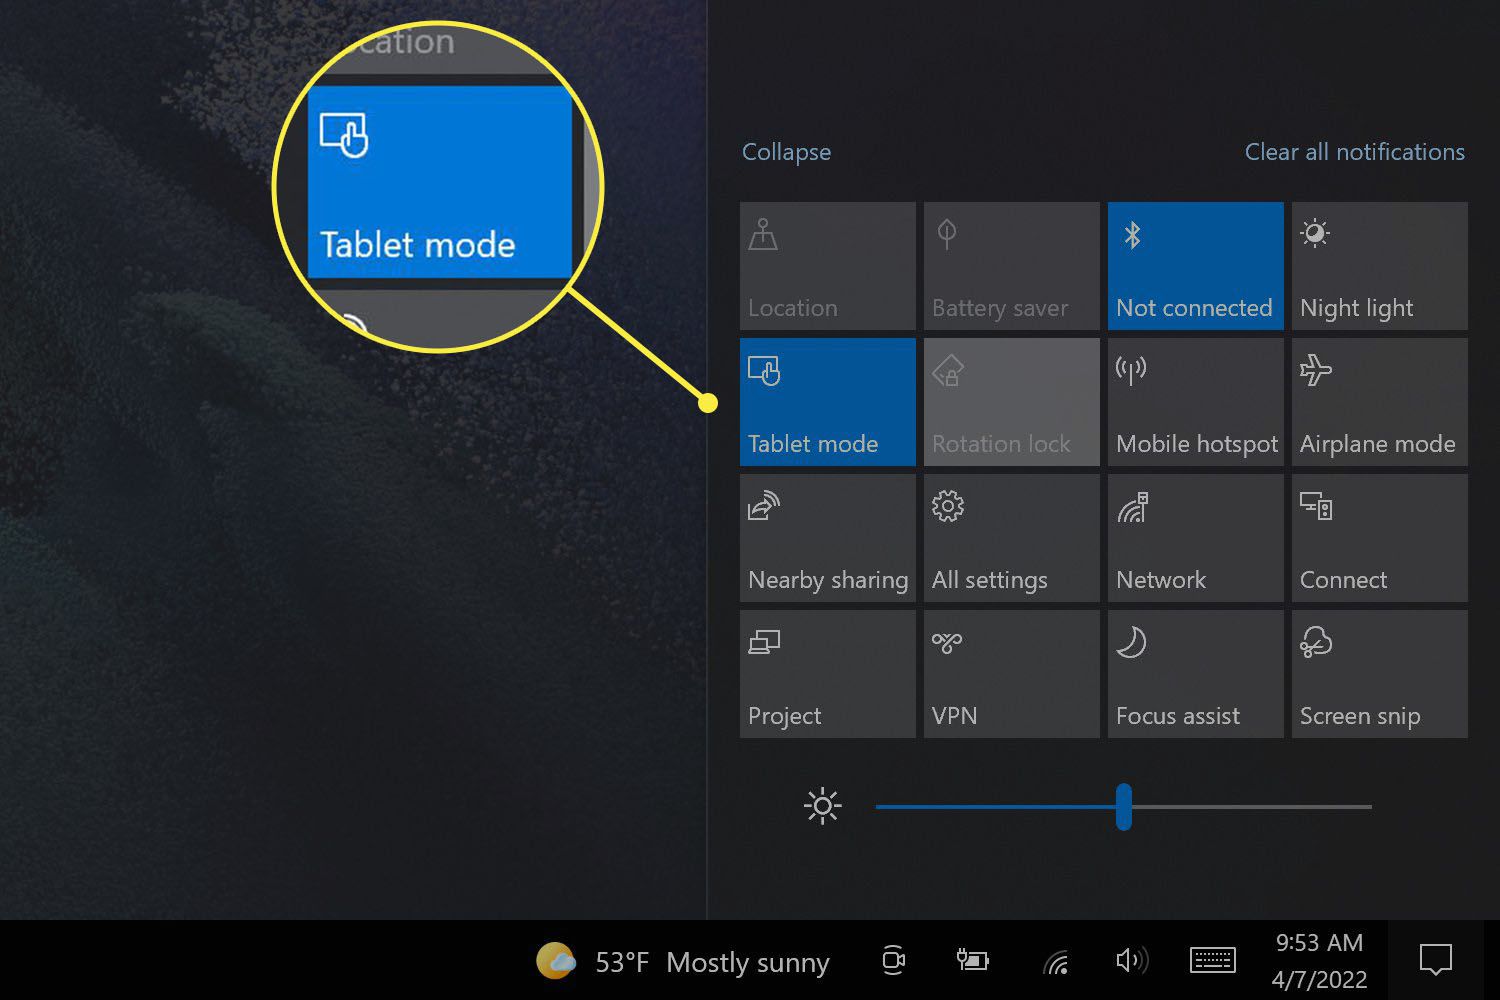
- If your device is currently in tablet mode, go to the bottom-right corner of the screen to access the Action Center. You can do this by swiping in from the right side of the screen or by clicking on the Notification Center icon in the taskbar.
- In the Action Center, you will see a tile labeled “Tablet mode”. Click on this tile to toggle tablet mode off.
- As an alternative method, you can also open the Action Center directly by pressing the Windows key + A on your keyboard.
Once you’ve turned off tablet mode, Windows 10 will switch back to the traditional desktop interface. You’ll see the taskbar, desktop icons, and open applications displayed as normal.
If you prefer a more automated approach, you can go back to the Tablet Mode settings we mentioned earlier in this guide and toggle the “Make Windows more touch-friendly” switch to the ‘Off’ position. This will disable tablet mode and keep your device in desktop mode permanently.
It’s important to note that switching back to desktop mode does not disable tablet mode entirely. You can still revert to tablet mode whenever you want by following the same steps outlined in Step 3 and 4.
With the ability to easily switch between tablet mode and desktop mode, Windows 10 offers a versatile and adaptable user experience, regardless of the type of device you’re using.
Congratulations! You’ve successfully learned how to switch from tablet mode to desktop mode on Windows 10. By understanding and utilizing this functionality, you can make the most out of your device and seamlessly transition between different usage scenarios.
Conclusion
Switching from tablet mode to desktop mode on Windows 10 allows you to effortlessly adapt your device’s user interface to suit your needs and preferences. Whether you’re using a tablet, 2-in-1 device, or a traditional laptop or desktop computer, Windows 10 offers a seamless transition between different modes of operation.
In this guide, we’ve walked you through the step-by-step process of switching from tablet mode to desktop mode. We started by opening the Settings app and accessing the Tablet Mode settings. From there, you learned how to choose your preferred mode and customize the tablet mode settings further. Finally, we explained how to switch back to desktop mode if you decide to return to the traditional interface.
Windows 10’s flexibility and versatility in handling different device types and usage scenarios make it a powerful operating system. By utilizing tablet mode and desktop mode, you can optimize your workflow and user experience, enhancing productivity and convenience.
Remember, you can always switch between tablet mode and desktop mode as needed. Feel free to experiment with the settings and find the configuration that suits you best.
With these tools at your disposal, you can enjoy the benefits of tablet mode on touch-enabled devices and seamlessly switch back to desktop mode when using a keyboard and mouse. This adaptability makes Windows 10 a versatile operating system that caters to a wide range of user preferences.
So, go ahead and make the most out of your Windows 10 experience by utilizing tablet mode and desktop mode to optimize your device’s user interface and tailor it to your needs!


