Introduction
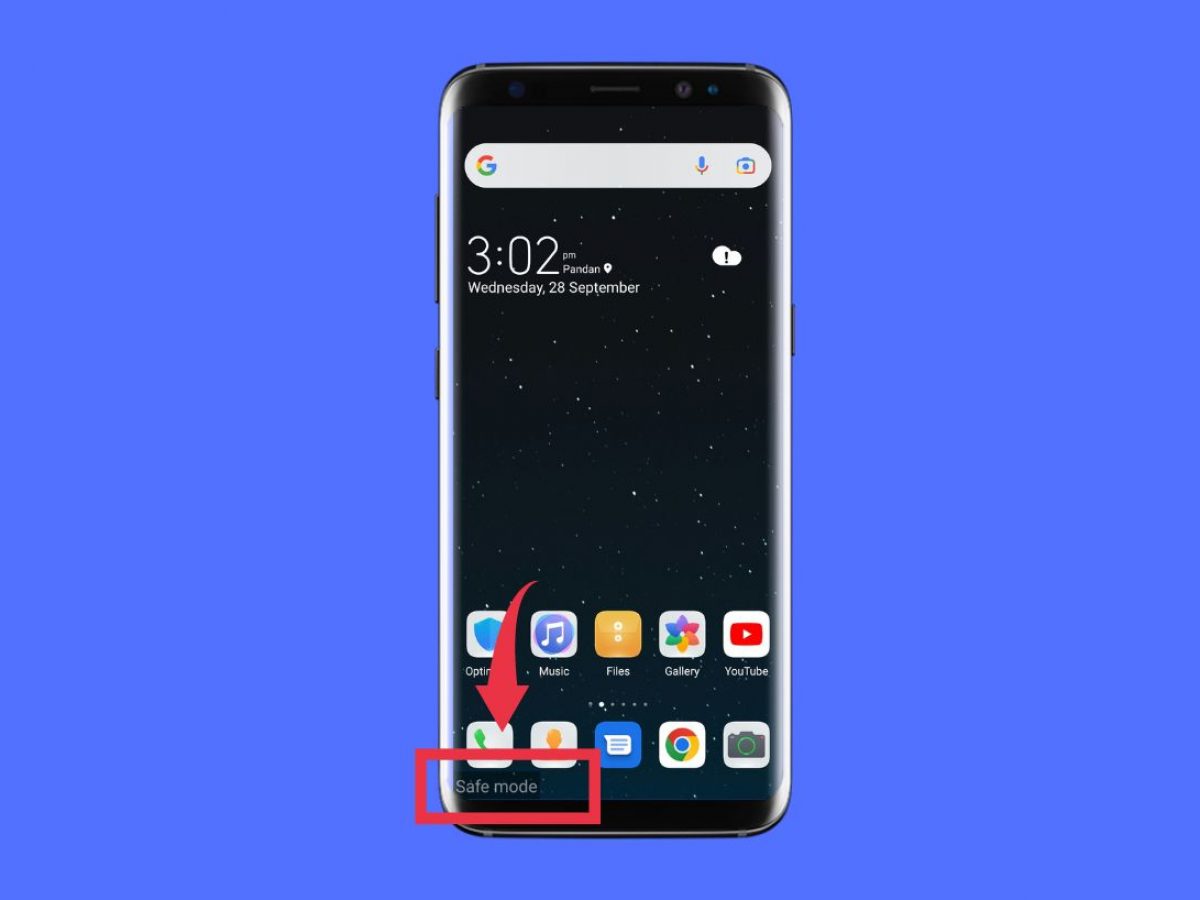
Welcome to this guide on how to get your Samsung Galaxy off Safe Mode. If you own a Samsung Galaxy smartphone and find yourself stuck in Safe Mode, don’t worry, you’re not alone. Safe Mode is a built-in feature that helps diagnose and troubleshoot issues on your device by disabling all third-party apps and only allowing essential system functionality.
While Safe Mode can be helpful in certain situations, such as when you’re experiencing software conflicts or app crashes, getting your device out of Safe Mode is often the top priority. When your Samsung Galaxy is stuck in Safe Mode, you may notice limited access to certain features, reduced performance, or the absence of some customizations you’ve made to your device.
In this article, we’ll explore the various reasons why your Samsung Galaxy might be stuck in Safe Mode and provide you with step-by-step instructions on how to exit this mode and regain full functionality on your device.
Whether you accidentally activated Safe Mode or your device entered it automatically due to an issue, we have you covered. We’ll walk you through different methods to help you exit Safe Mode and get your Samsung Galaxy back to its normal state.
Please note that the methods described in this guide are specific to Samsung Galaxy devices. While some methods may work on other Android devices, they may vary between manufacturers and models. It’s always a good idea to consult the user manual or the manufacturer’s support website for device-specific instructions.
So, if you’re ready to regain control of your Samsung Galaxy and say goodbye to Safe Mode, let’s dive into the various methods you can try to bring your device back to normal.
What is Safe Mode?
Safe Mode is a diagnostic mode that allows your Samsung Galaxy to run with only essential system functionality and disables all third-party apps. When your device boots up in Safe Mode, it prevents any non-essential software or applications from launching, which can help pinpoint and resolve any issues or conflicts that may be causing problems with your device.
In Safe Mode, your Samsung Galaxy will appear and function differently compared to its normal mode. You may notice a simplified user interface, limited access to certain features, and a lack of customization options. This is because Safe Mode only loads the basic system files and services necessary for your device to operate.
Using Safe Mode can be helpful when troubleshooting issues with your Samsung Galaxy. It allows you to determine if a problem you’re experiencing is caused by a specific app or software conflict. By disabling third-party apps, you can identify if one of them is causing system instability, crashes, or other problems.
Entering Safe Mode on your Samsung Galaxy can be done by following a specific key combination during the boot-up process. The exact method may vary depending on your device model, but a common way to enter Safe Mode is by pressing and holding the power button until the device menu appears. From there, you can choose “Safe Mode” to boot into this diagnostic mode.
It’s important to note that while Safe Mode is a useful tool to diagnose and fix issues, it’s not a permanent solution. Exiting Safe Mode is crucial to restore full functionality to your Samsung Galaxy and regain access to all your apps and settings.
In the following sections, we’ll explore the possible reasons why your Samsung Galaxy might be stuck in Safe Mode and provide you with step-by-step instructions on how to exit this mode. Let’s get started!
Reasons for Samsung Galaxy being stuck in Safe Mode
There are several reasons why your Samsung Galaxy may be stuck in Safe Mode, and understanding these reasons can help you troubleshoot and fix the issue. Here are some common causes:
- Accidental Activation: One of the most common reasons is accidentally activating Safe Mode yourself. This can happen if you mistakenly press and hold a key combination during the device’s boot-up process. It’s easy to unintentionally trigger Safe Mode if you’re not familiar with the specific key combination for your Samsung Galaxy model.
- Software Conflict: Sometimes, a software conflict can force your device into Safe Mode. This can occur if there’s an issue with a recently installed app or if two apps are incompatible and causing conflicts in the system. Safe Mode is activated as a protective measure to prevent further problems and allow you to resolve the conflict.
- Battery or Power Issues: A low battery or a power-related problem can trigger Safe Mode. When your device detects a power issue, it may automatically enter Safe Mode to conserve power and prevent further damage.
- System Updates: Occasionally, after a system update, some devices may get stuck in Safe Mode. This can happen if the update did not install correctly or if there’s a compatibility issue between the updated software and your device’s configuration.
- Hardware Problems: In rare cases, hardware issues can cause your Samsung Galaxy to get stuck in Safe Mode. This could be due to a faulty power button or a malfunction in the device’s hardware components.
Identifying the reason why your Samsung Galaxy is stuck in Safe Mode is the first step towards resolving the issue. Once you understand the cause, you can try the appropriate methods to exit Safe Mode and regain normal functionality on your device.
Now that we have explored the potential reasons behind being stuck in Safe Mode, let’s move on to the methods you can use to get your Samsung Galaxy out of Safe Mode. Follow the step-by-step instructions in the upcoming sections to resolve the issue and enjoy your device without restrictions.
How to Exit Safe Mode on Samsung Galaxy
If your Samsung Galaxy is stuck in Safe Mode, don’t worry – there are several methods you can try to exit this diagnostic mode and regain full functionality on your device. Here are the step-by-step instructions for each method:
Method 1: Restart the Device
The simplest method to exit Safe Mode is to restart your Samsung Galaxy. To do this, press and hold the power button until the device menu appears. From there, select the “Restart” option. Once your device reboots, it should start up in normal mode, bypassing Safe Mode.
Method 2: Remove the Battery
If you have a Samsung Galaxy device with a removable battery, you can try removing the battery while the device is powered off. Leave the battery out for a few seconds, then reinsert it and power on your device. It should boot up in normal mode.
Method 3: Uninstall Recently Installed Apps
If the issue is caused by a recently installed app, uninstalling it can help you exit Safe Mode. Head to the Settings menu of your Samsung Galaxy, then navigate to “Apps” or “Applications.” Find the app you want to uninstall, tap on it, and select the “Uninstall” option. Once the app is removed, restart your device to exit Safe Mode.
Method 4: Clear Cache Partition
Clearing the cache partition can also help in resolving the Safe Mode issue. Start by powering off your Samsung Galaxy. Then, press and hold the volume up button, the power button, and the home button simultaneously until the device vibrates and the Samsung logo appears. Release the buttons, and you should enter the recovery mode menu. Use the volume buttons to navigate to the “Wipe Cache Partition” option, and then use the power button to select it. Once the cache partition is cleared, restart your device.
Method 5: Disable Safe Mode Using Settings
If none of the above methods work, you can try disabling Safe Mode using the device settings. Open the Settings menu, then go to “System” or “System and Updates.” Look for the “Safe Mode” option and disable it. Restart your device, and it should boot up in normal mode.
Method 6: Factory Reset the Device
If all else fails, a last resort option is to perform a factory reset on your Samsung Galaxy. Keep in mind that this method will erase all data and settings on your device, so make sure to backup any important files beforehand. To factory reset your device, go to the Settings menu, select “Backup & reset” or “General Management,” and choose the “Factory Data Reset” option. Follow the on-screen instructions to initiate the reset process.
After completing any of these methods, your Samsung Galaxy should successfully exit Safe Mode and boot up in normal mode. If the issue persists, it may be helpful to seek assistance from Samsung customer support or visit an authorized service center for further troubleshooting.
Now that you are equipped with these methods, choose the one that suits your situation and get your Samsung Galaxy out of Safe Mode.
Method 1: Restart the Device
The first and simplest method to exit Safe Mode on your Samsung Galaxy is to restart the device. This method works in most cases and is easy to perform. Here’s how you can do it:
- Press and hold the power button on your Samsung Galaxy. You will see the device menu appear on the screen.
- In the device menu, select the “Restart” option. This will initiate the restart process.
- Wait for your Samsung Galaxy to power off and then power back on. The device will start up in normal mode, bypassing Safe Mode.
Once the restart is complete, you should have full access to all features and functionality on your Samsung Galaxy. If the device still boots up in Safe Mode after the restart, try another method from this guide to troubleshoot the issue.
Note that performing a restart may also help resolve any temporary software glitches or conflicts that may have triggered Safe Mode. It’s a good first step to try before moving on to more complex methods.
Remember, depending on your Samsung Galaxy model, the key sequence or method to perform a restart may vary slightly. If the above method doesn’t work for your device, refer to your user manual or consult the Samsung support website for specific instructions.
Now that you know how to restart your Samsung Galaxy to exit Safe Mode, let’s explore other methods that you can try if a simple restart doesn’t resolve the issue.
Method 2: Remove the Battery
If you own a Samsung Galaxy device with a removable battery, you can try removing the battery to exit Safe Mode. This method can be helpful if the device is not responding to a regular restart. Here’s how to remove the battery:
- Power off your Samsung Galaxy by pressing and holding the power button until the device menu appears, then selecting the “Power off” option.
- Locate the battery compartment on your device. This is usually located on the back of the phone and may require removing the device’s back cover or a specific panel.
- Carefully remove the battery from your Samsung Galaxy. You may need to use a fingernail or a small tool to gently pry the battery out.
- Leave the battery out for a few seconds to ensure that any residual power is drained from the device.
- Reinsert the battery into your Samsung Galaxy, ensuring it is properly aligned and secure in its compartment.
- Press and hold the power button to turn your device back on. You should see the Samsung logo and the device will boot up in normal mode, bypassing Safe Mode.
If the battery removal method is successful, your Samsung Galaxy will exit Safe Mode, and you will have full access to all features and functionality. Keep in mind that this method is only applicable to devices with removable batteries. For devices with non-removable batteries, try other methods mentioned in this guide.
If removing the battery does not resolve the issue and your device continues to boot up in Safe Mode, proceed to the next method for further troubleshooting.
Remember to handle the battery with care and follow the manufacturer’s guidelines for proper battery removal and reinsertion. If you are unsure about removing the battery yourself, it is recommended to seek assistance from a professional or visit an authorized service center.
Now that you know how to remove the battery to exit Safe Mode, let’s explore another method that you can try to resolve the issue.
Method 3: Uninstall Recently Installed Apps
If your Samsung Galaxy is stuck in Safe Mode, it’s possible that a recently installed app is causing the issue. Uninstalling the problematic app can help you exit Safe Mode and regain normal functionality. Follow these steps to remove recently installed apps:
- Open the Settings menu on your Samsung Galaxy. You can usually find it in the app drawer or by swiping down from the top of the screen and tapping the gear icon.
- Scroll down and select “Apps” or “Applications.” The name may vary depending on your device model and Android version.
- In the list of installed apps, look for the app you want to uninstall. You can either scroll through the list or use the search bar at the top to find the app faster.
- Tap on the app to open its details page.
- Select the “Uninstall” or “Remove” option. You may be prompted to confirm the action.
- Once the app is uninstalled, restart your Samsung Galaxy. This can be done by pressing and holding the power button until the device menu appears, then selecting the “Restart” option.
After the restart, your Samsung Galaxy should boot up in normal mode, bypassing the Safe Mode. If the issue was caused by the recently uninstalled app, you should now have full access to all features and functionality.
If you’re unsure which app might be causing the problem, you can uninstall multiple recently installed apps one by one to see if the issue resolves. Start with the most recently installed apps and work your way backward until you find the app causing the Safe Mode activation.
Remember that uninstalling apps will remove all associated data and settings, so make sure to back up any important information before proceeding with the uninstallation.
If uninstalling recently installed apps does not help you exit Safe Mode, proceed to the next method for further troubleshooting.
Now that you know how to uninstall recently installed apps to resolve the Safe Mode issue, let’s explore another method that you can try.
Method 4: Clear Cache Partition
If your Samsung Galaxy is stuck in Safe Mode, clearing the cache partition can help resolve the issue. By clearing the cache partition, you can remove temporary system files that might be causing conflicts and forcing your device into Safe Mode. Follow these steps to clear the cache partition:
- Power off your Samsung Galaxy by pressing and holding the power button until the device menu appears, then selecting the “Power off” option.
- Once your device is powered off, press and hold the volume up button, the power button, and the home button simultaneously. Keep holding these buttons until the Samsung logo appears on the screen.
- Release the buttons when you see the Samsung logo. This will bring you to the recovery mode menu.
- Use the volume buttons to navigate to the “Wipe Cache Partition” option. Use the power button to select it.
- A confirmation message will appear. Use the volume buttons to navigate to the “Yes” option and press the power button to confirm.
- Wait for the cache partition to be cleared. This may take a few seconds or minutes.
- Once the process is complete, the recovery mode menu will reappear. Use the volume buttons to navigate to the “Reboot System Now” option and select it using the power button.
After your Samsung Galaxy reboots, it should exit Safe Mode and boot up in normal mode. Clearing the cache partition can help resolve any temporary system issues that may have caused the Safe Mode activation.
Keep in mind that clearing the cache partition does not delete any personal data or settings on your device. It only removes temporary system files. Your apps, files, and personal data will remain intact.
If clearing the cache partition does not resolve the Safe Mode issue, proceed to the next method for further troubleshooting.
Now that you know how to clear the cache partition to exit Safe Mode on your Samsung Galaxy, let’s explore another method that you can try.
Method 5: Disable Safe Mode Using Settings
If your Samsung Galaxy is stuck in Safe Mode, you can try disabling Safe Mode using the device settings. Disabling Safe Mode in this way can help you exit Safe Mode and regain normal functionality on your device. Here’s how to do it:
- Open the Settings menu on your Samsung Galaxy. You can usually find it in the app drawer or by swiping down from the top of the screen and tapping the gear icon.
- Scroll down and select “System” or “System and Updates.” The name may vary depending on your device model and Android version.
- In the System settings, look for the “Safe Mode” option. It may be listed under “Advanced” or “Developer options.”
- Tap on the “Safe Mode” option to open its settings.
- You should see a toggle switch or an option to disable Safe Mode. Tap on it to turn off Safe Mode.
- Restart your Samsung Galaxy to apply the changes. This can be done by pressing and holding the power button until the device menu appears, then selecting the “Restart” option.
After the restart, your Samsung Galaxy should boot up in normal mode, bypassing Safe Mode. Disabling Safe Mode using the device settings can be an effective way to resolve the issue if it was enabled due to a software glitch or user error.
If the Safe Mode option is not available in your device settings or you cannot disable it using this method, proceed to the next method for further troubleshooting.
Remember to check your device’s user manual or consult the Samsung support website for device-specific instructions on disabling Safe Mode if you’re having trouble finding the option in the settings menu.
Now that you know how to disable Safe Mode using the device settings, let’s explore another method that you can try to fix the Safe Mode issue.
Method 6: Factory Reset the Device
If all other methods have failed to resolve the Safe Mode issue on your Samsung Galaxy, performing a factory reset can be your last resort. This method will restore your device to its original factory settings, erasing all data, apps, and settings. Make sure to backup any important files before proceeding. Here’s how to perform a factory reset:
- Open the Settings menu on your Samsung Galaxy. You can usually find it in the app drawer or by swiping down from the top of the screen and tapping the gear icon.
- Scroll down and select “General Management” or “System.” The name may vary depending on your device model and Android version.
- In the General Management or System settings, find and tap on “Reset” or “Reset options.”
- Choose the “Factory Data Reset” option. You may be prompted to enter your device’s PIN or password to proceed.
- Review the information presented and select the “Reset” or “Delete all” option to confirm the factory reset process.
- Your device will now begin the factory reset procedure. This may take a few minutes.
- Once the factory reset is complete, your Samsung Galaxy will reboot. Follow the on-screen instructions to set up your device as if it were brand new.
After the factory reset, your Samsung Galaxy will exit Safe Mode and boot up in normal mode. It’s important to note that a factory reset erases all data from your device, including apps, contacts, photos, and settings. Make sure to back up any important files before proceeding with the factory reset.
If the Safe Mode issue persists even after performing a factory reset, it is recommended to contact Samsung customer support or visit an authorized service center for further assistance.
Now that you know how to perform a factory reset on your Samsung Galaxy, let’s summarize the methods we’ve discussed in this guide.
Conclusion
Getting your Samsung Galaxy off Safe Mode is essential to regain access to all features and functionality on your device. In this guide, we explored various methods to help you resolve the Safe Mode issue. Here’s a quick recap of the methods discussed:
- Method 1: Restart the Device: Simply restarting your Samsung Galaxy can often be enough to exit Safe Mode.
- Method 2: Remove the Battery: If your device has a removable battery, removing and reinserting it can help in exiting Safe Mode.
- Method 3: Uninstall Recently Installed Apps: Uninstalling any recently installed apps that might be causing conflicts can resolve the issue.
- Method 4: Clear Cache Partition: Clearing the cache partition helps in removing temporary system files that might be triggering Safe Mode.
- Method 5: Disable Safe Mode Using Settings: Disabling Safe Mode through the device settings can be effective in resolving the issue.
- Method 6: Factory Reset the Device: Performing a factory reset is a last resort option that restores your device to its original factory settings.
Remember, it’s important to try these methods in the order listed and move on to the next method if the previous one doesn’t resolve the issue. Always back up your data before attempting a factory reset to avoid permanent data loss.
If your Samsung Galaxy continues to boot up in Safe Mode even after trying these methods, it may indicate a deeper underlying issue. In such cases, it’s recommended to seek assistance from Samsung customer support or visit an authorized service center for further troubleshooting.
We hope this guide helped you understand how to get your Samsung Galaxy off Safe Mode and get your device back to normal. By following the instructions provided, you can resolve the Safe Mode issue and enjoy the full functionality of your Samsung Galaxy once again.