Introduction
Welcome to this guide on how to charge a Logitech mouse! Logitech is a well-known brand that offers an extensive range of computer peripherals, including mice that are highly popular among users. While Logitech mice are known for their durability and long battery life, there may come a time when you need to recharge your mouse to ensure uninterrupted usage.
In this article, we will explain the various methods you can use to charge your Logitech mouse. Whether you have a wireless mouse that requires a rechargeable battery or a mouse with a built-in battery, we have you covered.
Before diving into the specifics of charging your Logitech mouse, it’s important to mention that the steps may vary slightly depending on the model you own. However, the general principles and methods remain the same.
Without further ado, let’s explore the different techniques you can employ to keep your Logitech mouse powered up and ready for use!
Checking the Battery Life
Before proceeding to charge your Logitech mouse, it’s important to determine the current battery level. This will help you gauge whether a charge is necessary or if you can continue using the mouse without interruption.
The process of checking the battery life may vary slightly depending on the model of your Logitech mouse. However, most Logitech mice have a built-in battery indicator that provides a visual representation of the battery level.
To check the battery life, follow these general steps:
- Locate the battery indicator on your Logitech mouse. This indicator can be in the form of an LED light or a battery level icon on the mouse itself.
- Take note of the color of the LED light or the battery level displayed. Generally, green indicates a full or high battery level, while red or flashing lights indicate a low battery.
- If your mouse has a battery level icon, check if it’s displaying a full bar, half bar, or low battery icon.
If the battery indicator shows a low battery level or if your mouse is not functioning properly due to a weak charge, it’s time to recharge your Logitech mouse. Move on to the next section to learn how to connect the charging cable.
Connecting the Charging Cable
Once you have determined that your Logitech mouse requires a recharge, the next step is to connect the charging cable. Logitech mice usually come with a USB charging cable that is specifically designed for that model.
Follow these steps to connect the charging cable:
- Locate the charging port on your Logitech mouse. It is typically found on the front or bottom of the mouse, labeled with a small charging icon.
- Take the USB charging cable and plug the smaller end into the charging port of the mouse.
- Connect the larger end of the USB cable into a USB port on your computer or a USB power adapter.
Ensure that the connection is secure and that the cable is properly inserted into both the mouse and the USB port. This will facilitate a stable charging process.
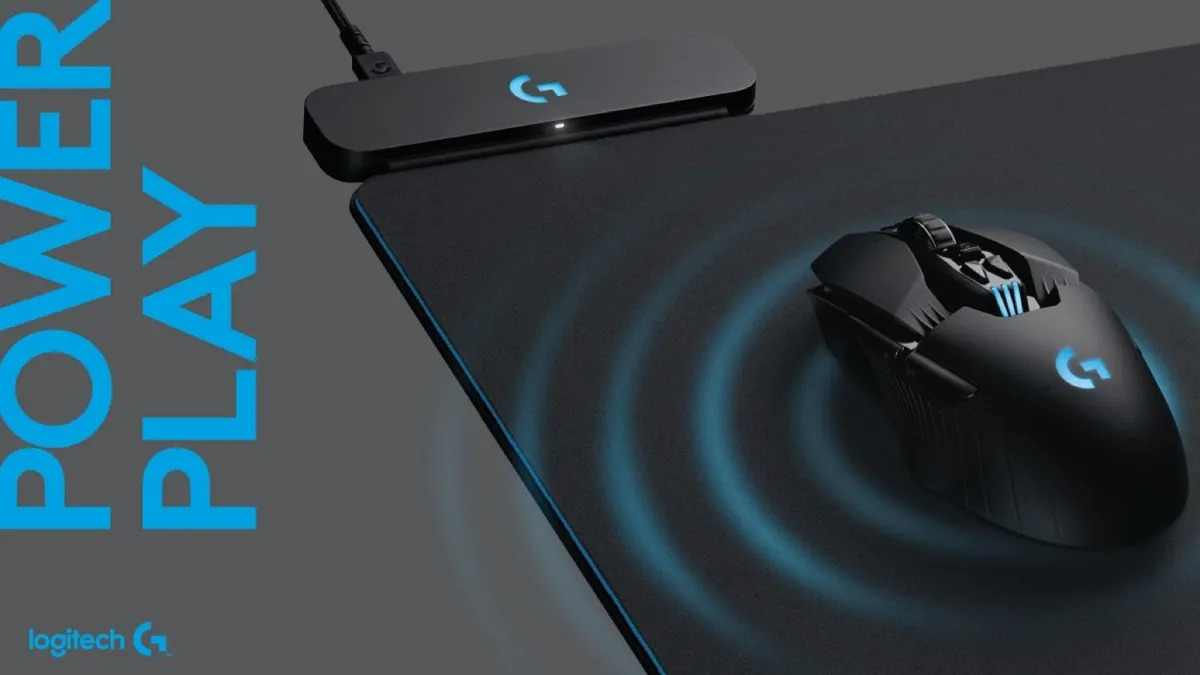
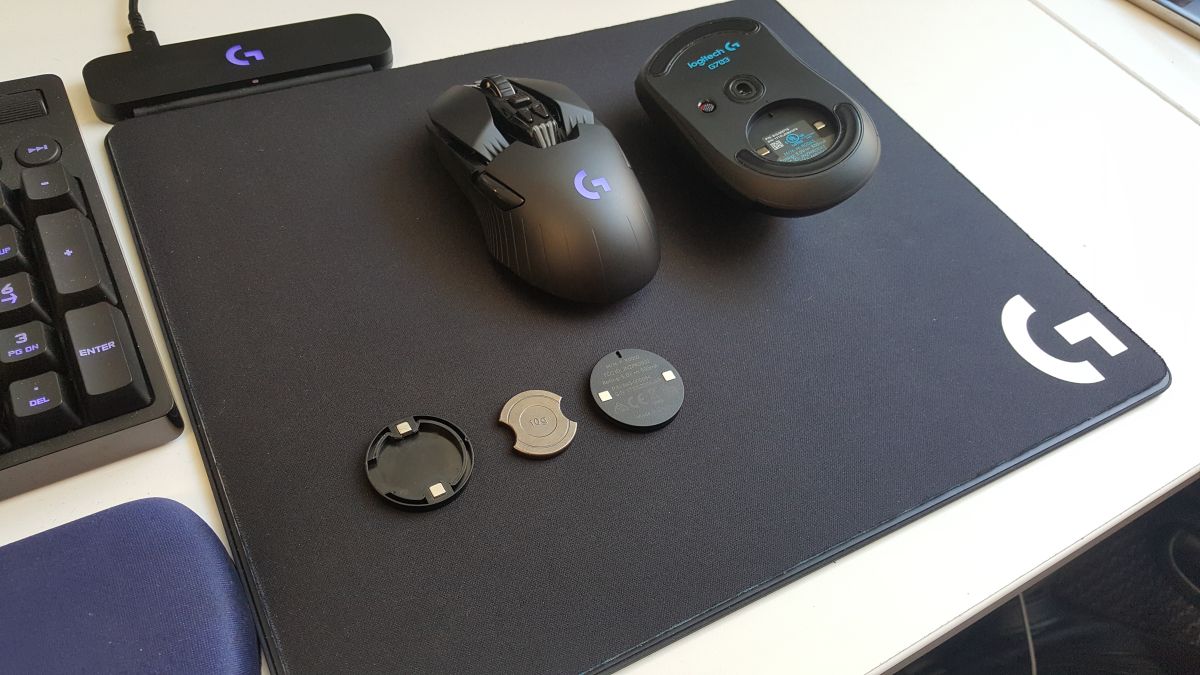
Note: Some Logitech mice may have a wireless charging feature that eliminates the need for a physical cable connection. In such cases, simply place the mouse on the accompanied charging pad or dock to initiate the charging process.
Now that you have successfully connected the charging cable, it’s time to move on and explore the different methods of charging your Logitech mouse. We will cover both the USB port charging method and charging via a power adapter in the upcoming sections.
Charging via USB Port
One of the most common and convenient ways to charge your Logitech mouse is through the USB port on your computer. This method allows you to charge your mouse while still using your computer, ensuring that you don’t have to interrupt your workflow.
Follow these steps to charge your Logitech mouse via a USB port:
- Ensure that your computer is turned on and running. This will provide the necessary power to charge your mouse.
- Connect the USB charging cable to the charging port on your Logitech mouse, as explained in the previous section.
- Insert the larger end of the USB cable into an available USB port on your computer.
- The charging process will begin automatically, and the battery indicator on your mouse may display a charging animation or a solid light to indicate that it is being charged.
- Allow your Logitech mouse to charge for the recommended duration or until the battery indicator shows a full charge.
It is important to keep in mind that charging times can vary depending on the specific Logitech mouse model and the remaining battery life. As a general guideline, it is advisable to charge your mouse for a few hours to ensure a complete charge.
Once your Logitech mouse is fully charged, you can disconnect the USB cable from both the mouse and your computer. Your mouse is now ready to be used wirelessly and should provide hours of uninterrupted functionality.
Next, let’s explore an alternative method for charging your Logitech mouse – using a power adapter.
Charging via Power Adapter
If you prefer not to charge your Logitech mouse through your computer’s USB port or if you want to charge your mouse even when your computer is turned off, using a power adapter is a convenient option.
Here’s how you can charge your Logitech mouse via a power adapter:
- Locate the USB charging cable that came with your Logitech mouse.
- Connect the smaller end of the USB cable to the charging port on your mouse.
- Insert the larger end of the USB cable into a USB power adapter.
- Plug the USB power adapter into a power outlet.
- The charging process will start automatically, and you may see a charging animation or a solid light on the battery indicator of your mouse.
- Allow your Logitech mouse to charge for the recommended duration or until the battery indicator shows a full charge.
It’s important to use a power adapter that provides the appropriate power output for your Logitech mouse. Using an incompatible adapter may lead to inefficient charging or potential damage to the mouse.
After the charging process is complete, disconnect the USB cable from both your Logitech mouse and the power adapter. Your mouse is now ready to be used wirelessly, providing you with seamless performance.
Keep in mind that while charging your mouse with a power adapter may be more convenient in terms of computer usage, it might not offer the flexibility of charging while working on the go. Nevertheless, it’s a great option to have when you want to charge your mouse independently from your computer.
Now that you know how to charge your Logitech mouse using both the USB port and a power adapter, let’s move on to the next section to learn how to check the charging status of your mouse.
Checking the Charging Status
When you have connected your Logitech mouse for charging, it’s essential to periodically check the charging status to ensure that your mouse is receiving the necessary power and that the charging process is progressing smoothly.
To check the charging status of your Logitech mouse, follow these steps:
- Observe the battery indicator on your mouse, whether it’s an LED light or a battery level icon.
- Pay attention to any changes in the color or the animation of the battery indicator.
- In most cases, a solid light or a slowly pulsating light indicates that the mouse is actively charging.
- If your mouse has a battery level icon, you may notice it gradually filling up as the charging progresses.
It’s important to note that the charging status and indicators may vary depending on the Logitech mouse model. Therefore, referring to the manufacturer’s user manual or documentation can provide specific details about the charging status indicators for your mouse.
While charging your Logitech mouse, it’s also a good practice to avoid using it or moving it excessively. This can prevent any disruption in the charging process and ensure that your mouse charges efficiently.
Once the battery indicator shows a full charge or if the charging animation has stopped, you can safely disconnect the charging cable from your Logitech mouse, as outlined in the previous sections. Your mouse is now ready to be used wirelessly, providing you with uncompromised functionality.
Now that you are aware of how to check the charging status of your Logitech mouse, let’s move on to the next section to explore some tips and best practices for maximizing the battery life of your mouse.
Disconnecting the Charging Cable
After your Logitech mouse has been charged to the desired level, it’s time to disconnect the charging cable to enjoy the freedom of wireless use. Properly disconnecting the cable ensures that your mouse remains in optimal condition and ready for use.
Follow these steps to safely disconnect the charging cable from your Logitech mouse:
- Ensure that your mouse is stationary and not being used while you disconnect the charging cable. This helps prevent any damage to the cable or the mouse itself.
- Gently pull the larger end of the USB cable out of the USB port on your computer or power adapter.
- Hold the smaller end of the USB cable firmly and gently pull it out of the charging port on your Logitech mouse.
It’s important to avoid applying excessive force or twisting the cable while disconnecting it from the mouse. This can help prevent any potential damage to the charging port or the cable itself.
Once the charging cable is safely disconnected, you can now enjoy the wireless functionality of your Logitech mouse. Remember to keep the USB cable in a safe place for future use if needed.
Before concluding, let’s explore some essential tips to maximize the battery life of your Logitech mouse.
Tips for Maximizing Battery Life
To ensure that your Logitech mouse provides long-lasting battery life and optimal performance, consider implementing the following tips and best practices:
- Adjust the mouse’s power settings: Many Logitech mice come with customizable power management settings. By adjusting these settings, you can optimize the battery usage based on your usage patterns. For example, you can set the mouse to enter sleep mode after a certain period of inactivity.
- Turn off the mouse when not in use: If you know that you won’t be using your Logitech mouse for an extended period, consider turning it off completely. This can significantly conserve battery power and extend its overall lifespan.
- Reduce the polling rate: The polling rate refers to the frequency at which the mouse sends information to the computer. Lowering the polling rate can help conserve battery life. However, keep in mind that this may slightly affect the mouse’s responsiveness.
- Opt for a wireless charging option: Some Logitech mouse models offer wireless charging compatibility. Using a wireless charging pad or dock eliminates the need to physically connect a cable for charging, providing convenience and ease of use.
- Keep the mouse and receiver clean: Dust and debris can interfere with the connection between the mouse and its receiver, leading to increased power consumption. Regularly clean both the mouse and the receiver to ensure optimal performance and battery life.
- Minimize mouse movement: Excessive mouse movement and cursor acceleration can drain the battery faster. Try to limit unnecessary movement and use smooth, controlled motions when using the mouse.
- Use power-saving features: Some Logitech mice come equipped with power-saving features, such as an automatic sleep mode or an on/off switch. Take advantage of these features to conserve battery life when the mouse is not in use.
By incorporating these tips into your routine, you can prolong the battery life of your Logitech mouse and enjoy extended periods of wireless usage without the need for frequent charging.
Now that you are equipped with the knowledge to maximize your Logitech mouse’s battery life, you can make the most out of its wireless functionality.
Conclusion
Charging your Logitech mouse is a straightforward process that ensures uninterrupted usage and optimal performance. Whether you choose to charge via the USB port on your computer or a power adapter, the steps involved are simple and efficient.
By checking the battery life, connecting the charging cable, and monitoring the charging status, you can easily keep your Logitech mouse powered up and ready for use. Remember to disconnect the charging cable properly once the battery is fully charged to enjoy the freedom of wireless functionality.
Additionally, implementing certain tips for maximizing battery life, such as adjusting power settings, turning off the mouse when not in use, and keeping the mouse and receiver clean, can significantly extend the battery life of your Logitech mouse.
As you continue to use and charge your Logitech mouse, it’s important to refer to the specific instructions and guidelines provided by the manufacturer for your particular mouse model. This will ensure that you follow the appropriate steps and recommendations for optimum charging and battery performance.
Now that you have learned how to charge and maintain your Logitech mouse’s battery, you can enjoy the convenience and freedom of wireless control without worrying about running out of power during important tasks or gaming sessions.
So go ahead, charge your Logitech mouse and enjoy endless hours of productivity or gaming with a fully powered device!