Steps to Change your Spotify Profile Picture
Spotify is not only a popular music streaming platform but also a social community where you can connect with friends and share your musical interests. One way to personalize your Spotify profile and make it stand out is by changing your profile picture. Follow these simple steps to change your Spotify profile picture:
- Open the Spotify app: Launch the Spotify app on your device. Make sure you have the latest version installed to access all the features and options.
- Go to the “Home” tab: Tap on the Home icon located at the bottom of the screen. This will take you to the main home screen of the Spotify app.
- Navigate to your profile: On the Home screen, tap on the profile icon at the top right corner or swipe right to access your profile.
- Tap on the profile icon: Once you are in your profile, you will see a round profile picture icon. Tap on it to proceed.
- Tap on “Edit Profile”: On the profile screen, you will find an option called “Edit Profile.” Tap on it to enter the profile editing mode.
- Click on the profile picture placeholder: In the profile editing mode, you will see a placeholder for your profile picture. Click on it to bring up the options to change your picture.
- Choose a photo from your device or take a new one: You will be presented with options to select a photo from your device’s gallery or even take a new picture using your device’s camera. Select the desired option and follow the prompts to choose or capture a photo.
- Adjust and crop the photo if needed: Once you have selected or taken a photo, Spotify will allow you to adjust and crop the photo to fit within the circular profile picture frame. Make any necessary adjustments and tap on “Save” or “Submit.”
- Save the changes: After cropping and adjusting the photo, tap on the “Save” or “Submit” button to save your changes.
- Refresh your Spotify account on all devices: Your profile picture will now be updated on the Spotify app. However, to see the changes reflected across all your devices, it is recommended to fully close and reopen the Spotify app or log out and log back in.
By following these steps, you can easily change your Spotify profile picture and add a personal touch to your profile. Show off your unique style and let your personality shine through your Spotify presence.
Step 1: Open the Spotify app
To change your Spotify profile picture, the first step is to open the Spotify app on your device. Whether you’re using a smartphone, tablet, or computer, accessing the Spotify app is the gateway to customizing your profile.
If you don’t have the Spotify app installed on your device yet, you can easily download it from the App Store or Play Store for mobile devices, or visit the Spotify website to download the desktop version for computers.
Once you have the Spotify app installed, locate the app icon on your device’s home screen or in your app drawer. Tap on the icon to launch the app.
It’s important to ensure that you have the latest version of the Spotify app installed to experience all the updated features and options. If you’re not sure if your app is up to date, you can check for updates in your device’s app store and install any available updates for the Spotify app.
After opening the Spotify app, you will be prompted to log in to your Spotify account. If you already have an account, enter your username and password to access your account and continue. If you don’t have an account yet, you can sign up for a free account or consider upgrading to a premium subscription for additional features.
Once you’re logged in, you’ll be greeted by the Spotify home screen, which features a variety of recommended playlists, personalized suggestions, and more. This is where you can explore new music, discover podcasts, and stay up to date with your favorite artists and friends.
The Spotify app provides a seamless and user-friendly interface, making it easy to navigate through the various sections and features. Take a moment to familiarize yourself with the layout and options available to make the most out of your Spotify experience.
With the Spotify app successfully opened, you’re now ready to proceed to the next step and start the process of changing your Spotify profile picture. Let’s move on to Step 2 to continue the journey of personalizing your Spotify profile!
Step 2: Go to the “Home” tab
After opening the Spotify app, the next step to change your Spotify profile picture is to navigate to the “Home” tab. The Home tab serves as the central hub where you can access a wide range of content, including your personalized recommendations, top charts, and recently played music.
To reach the Home tab, look for the home icon located at the bottom of the Spotify app’s interface. On most devices, this icon is represented by a house-shaped symbol. Tap on the home icon to proceed.
Once you tap on the Home button, you will be instantly redirected to the Home tab. Here, you will find a collection of playlists curated specifically for you based on your musical preferences, listening history, and saved songs. These personalized playlists can provide a great source of inspiration and discovery for finding new music.
The Home tab also features sections such as “Made For You,” “Discover,” and “Recently Played,” each offering a unique selection of songs and playlists tailored to your taste. You can navigate through these sections by swiping left or right on the screen, or by using the navigation buttons provided.
While exploring the Home tab, you’ll also come across recommended podcasts, new releases from your favorite artists, and playlists created by Spotify’s expert curators. This vibrant and dynamic section of the app ensures that you never run out of music options to enjoy.
Remember, the Home tab is not only a place for discovering new music but also serves as your starting point for managing your Spotify profile. From here, you can access your playlists, albums, and liked songs, view your followers, and of course, change your profile picture.
Now that you’ve successfully reached the Home tab, you’re one step closer to updating your Spotify profile picture. Next, we’ll delve into Step 3, where we’ll guide you through navigating to your profile. Let’s keep the momentum going!
Step 3: Navigate to your profile
Once you’ve reached the Home tab in the Spotify app, the next step in changing your profile picture is to navigate to your profile. Your profile is the central hub where you can view and edit your personal information, including your profile picture, bio, and playlists.
To access your profile, look for the profile icon, usually located in the top right corner of the Spotify app interface. The profile icon is typically represented by a silhouette of a person or your chosen profile picture if you have one set already. Tap on the profile icon to proceed.
After tapping on the profile icon, you will be directed to your profile page. Here, you can view your recently played music, liked songs, playlists, and other information related to your Spotify activity.
In addition to your recent activity, your profile page displays your follower count, allowing you to see how many users are following your musical journey. You can also discover other Spotify users and follow their profiles, further expanding your music network.
While on your profile page, you may also want to take a moment to customize your Spotify bio. Your bio is a great way to express yourself and share a glimpse of your musical tastes and interests with others. To edit your bio, simply tap on the “Edit Profile” button, which we’ll cover in more detail in the upcoming steps.
From your profile page, you can easily navigate through different sections, such as playlists, albums, and artists. This allows you to quickly find and manage your saved music and create playlists based on your preferences.
Now that you’ve successfully reached your profile, you’re one step closer to changing your Spotify profile picture. In the next step, we’ll guide you on how to tap on the profile icon to open the editing options. Let’s continue on this exciting journey!
Step 4: Tap on the profile icon
After navigating to your profile page in the Spotify app, the next step in changing your profile picture is to tap on the profile icon. The profile icon represents your Spotify identity and is located within your profile page.
To proceed, locate the profile icon, typically found in the top left corner of the screen. The icon is usually a small circular image that represents either your current profile picture or a silhouette of a person.
Once you’ve identified the profile icon, tap on it to access the editing options for your profile. By tapping on the profile icon, you’re indicating that you want to make changes to your profile information, including your profile picture.
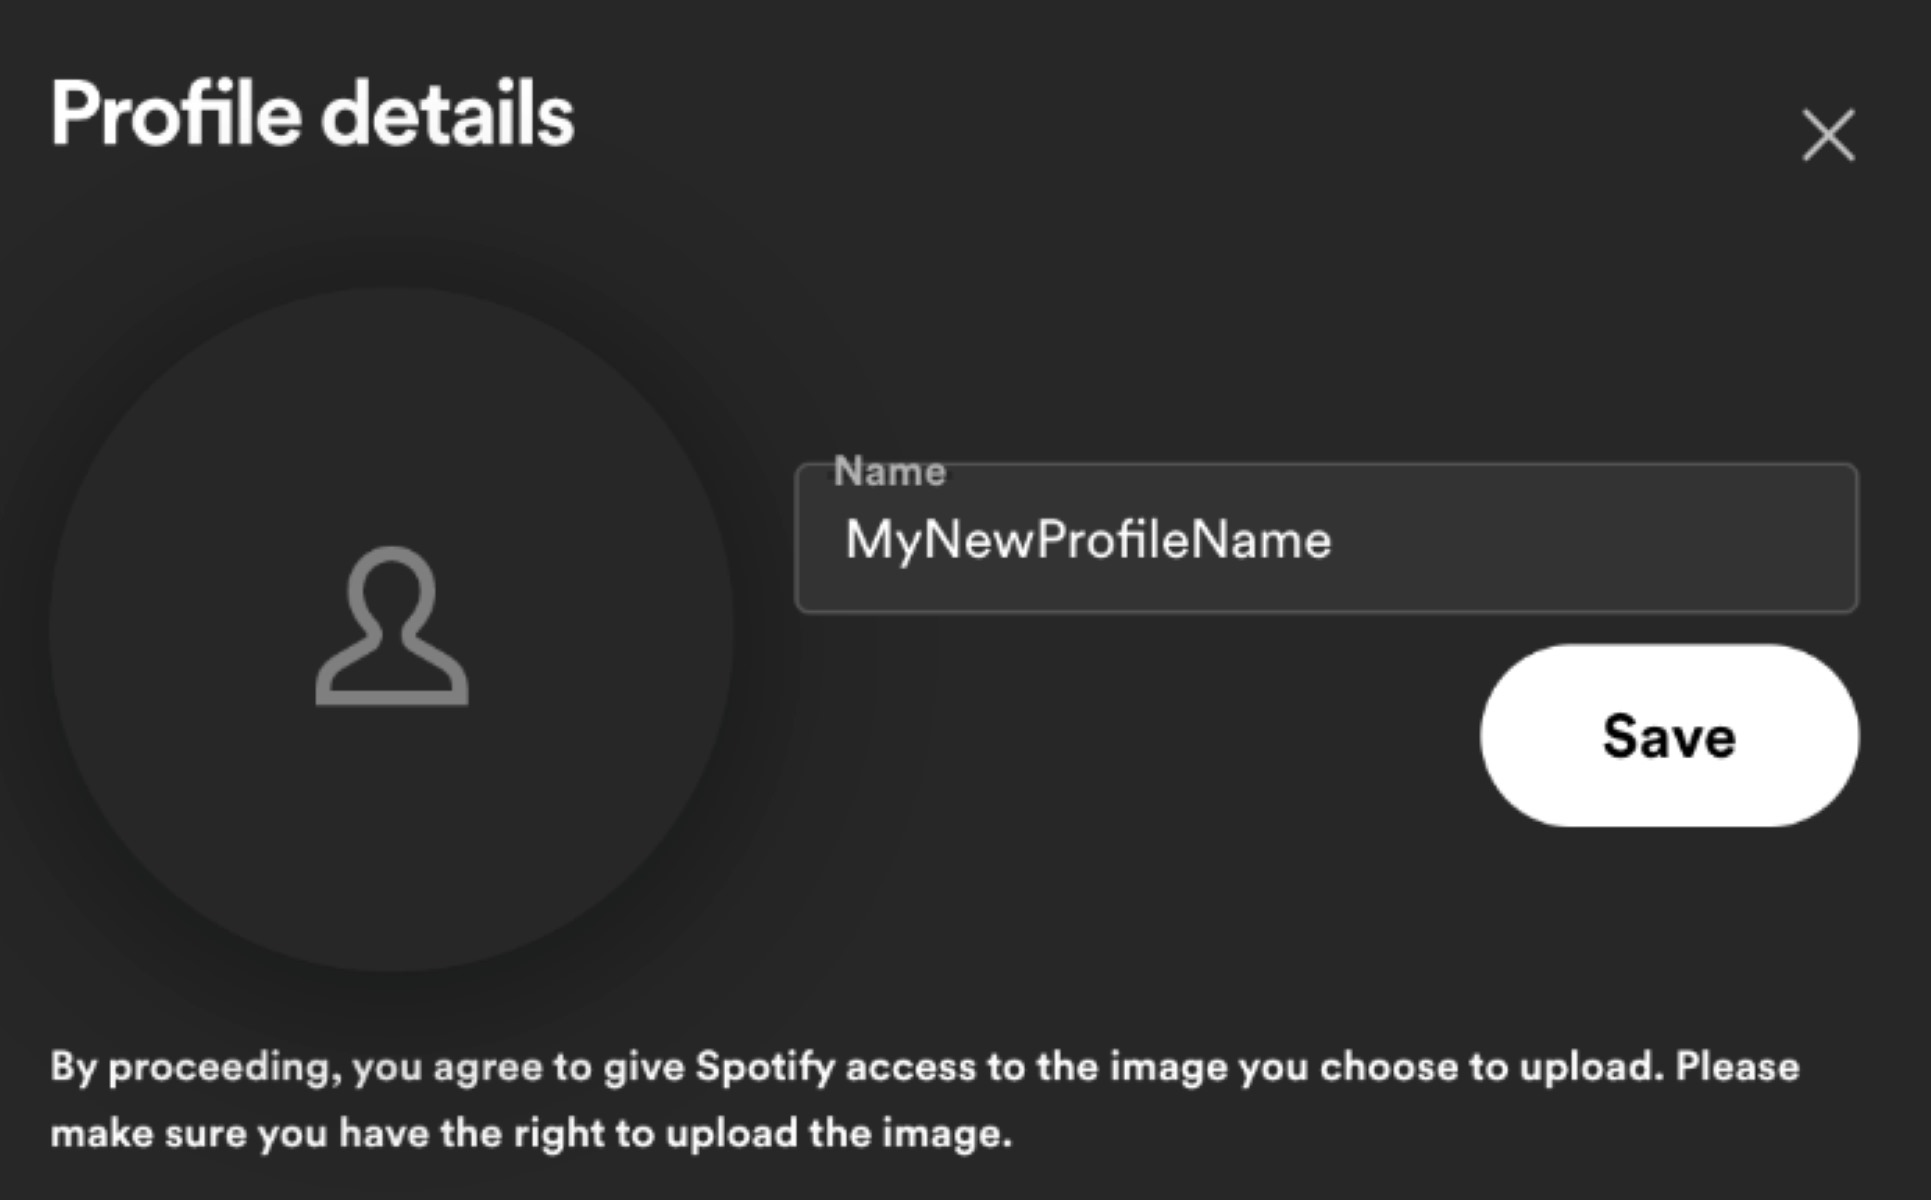
Upon tapping on the profile icon, you will be directed to the profile editing screen. This screen allows you to modify various aspects of your profile, including your profile picture, bio, and display name. It’s your chance to leave a personal touch on your Spotify profile.
On the profile editing screen, you’ll find different sections where you can update your information. This includes a placeholder for your current profile picture, a text field for your bio, and input fields for your display name and other optional details.
Changing your profile picture is a great way to express your individuality and make your profile stand out. Whether you want to upload a photo from your device’s gallery or take a new picture on the spot, the profile editing screen provides you with the tools to do so.
Now that you’ve successfully tapped on the profile icon, you’re one step closer to changing your Spotify profile picture. In Step 5, we’ll guide you through the process of tapping on the “Edit Profile” option to make further changes. Let’s keep the momentum going on this journey of personalization!
Step 5: Tap on “Edit Profile”
After tapping on the profile icon in the Spotify app, the next step in changing your profile picture is to tap on the “Edit Profile” option. This option allows you to access the editing tools and make changes to your profile information, including your profile picture.
To proceed, locate the “Edit Profile” button within the profile editing screen. This button is typically displayed beneath your current profile picture or in a prominent position on the screen. Tap on the “Edit Profile” button to continue.
By tapping on the “Edit Profile” button, you’re indicating that you want to make modifications to your Spotify profile. This action will grant you the ability to customize various aspects of your profile, adding a personal touch to your presence on the platform.
Upon tapping on the “Edit Profile” button, you will be taken to the profile editing interface. This interface allows you to edit different sections of your profile, such as your profile picture, bio, display name, and additional details.
Focus your attention on the profile picture section. This section will present you with options to change your profile picture. You can either select a photo from your device’s photo gallery or utilize the camera feature to take a new picture on the spot. Spotify provides a seamless and user-friendly experience for uploading and editing your profile picture.
Take this opportunity to select a profile picture that represents your personality, interests, or artistic preferences. Your profile picture is an essential element of your Spotify identity, and choosing a visually appealing and meaningful image can help you connect with others who share similar musical tastes.
Now that you’ve successfully tapped on the “Edit Profile” option, you’re one step closer to changing your Spotify profile picture. In Step 6, we’ll guide you through the process of clicking on the profile picture placeholder to proceed further. Let’s continue our journey of personalizing your Spotify profile!
Step 6: Click on the profile picture placeholder
After tapping on the “Edit Profile” button in the Spotify app, the next step in changing your profile picture is to click on the profile picture placeholder. This placeholder represents the current profile picture that is displayed on your Spotify profile and acts as a clickable area to access the options for changing your profile picture.
Locate the profile picture placeholder within the profile editing interface. The placeholder is typically a circular or square image that represents your current profile picture. It may also display the initials of your display name if you haven’t set a profile picture yet.
To proceed, click on the profile picture placeholder to bring up the options for changing your profile picture. Depending on the device and version of the Spotify app you’re using, there may be different ways to perform this action. You can typically click directly on the placeholder or use a context menu that appears when you long-press on the image.
Upon clicking on the profile picture placeholder, you will be presented with a menu of options for changing your profile picture. These options may include selecting a photo from your device’s gallery, taking a new photo using the camera, or even importing a picture from your preferred social media accounts.
Once you’ve selected your desired option, follow the prompts and instructions provided by the Spotify app to complete the process of changing your profile picture. You may be asked to grant permission for Spotify to access your device’s photo gallery or camera, depending on the option you’ve chosen.
Remember, your profile picture is a visual representation of your Spotify identity. Choose an image that reflects your personality, interests, or musical preferences. It’s an opportunity to showcase your uniqueness and connect with others who share similar tastes.
Now that you’ve successfully clicked on the profile picture placeholder, you’re one step closer to changing your Spotify profile picture. In Step 7, we’ll guide you through the process of choosing a photo from your device’s gallery or capturing a new one. Let’s continue our journey towards personalizing your Spotify profile!
Step 7: Choose a photo from your device or take a new one
After clicking on the profile picture placeholder in the Spotify app, the next step in changing your profile picture is to choose a photo from your device’s gallery or take a new one. This step allows you to select an image that best represents you and enhances your Spotify profile.
Within the menu of options for changing your profile picture, locate the selection for choosing a photo from your device’s gallery. This option typically appears as a button labeled “Choose from Gallery” or something similar. Tap on this option to proceed.
If you’d like to take a new photo specifically for your Spotify profile picture, you may also have the option to access your device’s camera directly from the Spotify app. Look for a button labeled “Take Photo” or a camera icon to initiate the camera interface.
When you choose the “Choose from Gallery” option, you will be redirected to your device’s photo gallery or albums. Navigate through your gallery to find the desired photo you want to set as your profile picture. Most devices allow you to browse through folders or albums or search for specific images using keywords.
Once you’ve found the photo you want to use, tap on it to select it as your new profile picture. Spotify will then display a preview of the photo, allowing you to review how it will appear as your profile picture.
If you opt to take a new photo using your device’s camera, the camera interface within the Spotify app will open. Align and frame your shot as desired, and use the camera controls to capture the perfect image. After capturing the photo, you will have the opportunity to review and confirm it before setting it as your profile picture.
Remember to choose a photo that best represents your personality, interests, or musical preferences. It could be a picture of yourself, your favorite band, a scenic view, or any other image that resonates with you. The goal is to reflect your individuality and make your Spotify profile uniquely yours.
Now that you’ve successfully chosen a photo from your device’s gallery or taken a new one, you’re one step closer to changing your Spotify profile picture. In Step 8, we’ll guide you through the process of adjusting and cropping the photo if needed. Let’s continue our journey of personalizing your Spotify profile!
Step 8: Adjust and crop the photo if needed
After selecting a photo from your device’s gallery or capturing a new one for your Spotify profile picture, the next step in changing your profile picture is to adjust and crop the photo if needed. This step allows you to fine-tune the appearance of the photo and ensure it fits perfectly within the circular profile picture frame.
Once you’ve chosen or taken a photo, Spotify will present you with an interface that allows you to adjust and crop the image. This interface provides you with tools to resize, rotate, and position the photo, ensuring the focal point is in the desired location and within the circular frame.
Using your fingers, you can pinch or expand on the screen to zoom in or out of the photo. This allows you to achieve the desired composition and ensure that the important elements of the image are clearly visible and well-centered.
If the photo needs rotation, you can use the available rotation buttons or gestures to rotate it clockwise or counterclockwise. This is particularly helpful if the photo was captured in landscape orientation or if you want to add a unique perspective to the image.
To crop the photo, Spotify provides a cropping tool that offers various aspect ratios or a freeform option. You can drag the corners or edges of the cropping frame to adjust the size and proportions of the photo. Make sure to position the photo within the circular frame to ensure it appears as intended on your Spotify profile.
Take your time to adjust and crop the photo until you’re satisfied with the result. It’s essential to find the right balance between capturing the essence of the image and making sure it fits aesthetically within the profile picture’s circular boundary.
If you’re unsure about the final appearance of the photo, you can always tap on the preview button to see how it will look as your profile picture before saving the changes. This allows you to make any necessary adjustments and ensure the photo reflects your desired aesthetic.
Now that you’ve successfully adjusted and cropped the photo, you’re one step closer to changing your Spotify profile picture. In Step 9, we’ll guide you through the process of saving the changes you’ve made. Let’s continue our journey of personalizing your Spotify profile!
Step 9: Save the changes
After adjusting and cropping your chosen photo for your Spotify profile picture, the next step is to save the changes you’ve made. Saving the changes ensures that your newly customized profile picture is updated and visible to others when they visit your Spotify profile.
Within the photo editing interface of the Spotify app, look for a button or option that allows you to save the changes you’ve made. This button is typically labeled as “Save,” “Apply,” or “Confirm.” Tap on this option to proceed with saving the changes.
By saving the changes, Spotify will update your profile picture to the newly selected or captured image. The photo you’ve chosen will now be displayed as your profile picture throughout the Spotify app and visible to your followers and other Spotify users.
If you’re not satisfied with the changes you’ve made and want to revert back to your previous profile picture, most photo editing interfaces on Spotify provide the option to cancel or discard the changes. This allows you to start the process again or keep your existing profile picture until you find a different photo that suits your preferences.
It’s important to take a moment to review the saved changes to ensure that the photo appears as desired and accurately represents your personality or interests. If necessary, you can always go back and edit your profile picture again to make further adjustments or select a different photo.
Keep in mind that it may take a few moments for the updated profile picture to propagate across all devices and for others to see the change. If you don’t immediately see the updated profile picture on all of your devices, try closing and reopening the Spotify app or logging out and logging back in to ensure the changes are fully reflected.
Now that you’ve successfully saved the changes to your profile picture, you’ve completed the process of changing your Spotify profile picture. Your newly customized profile picture will now be visible to others, adding a personal touch to your Spotify presence.
Congratulations on successfully personalizing your Spotify profile picture! In the final step, Step 10, we’ll guide you through the process of refreshing your Spotify account on all devices to ensure the changes are fully applied. Let’s wrap up this journey!
Step 10: Refresh your Spotify account on all devices
After saving the changes to your Spotify profile picture, the final step is to refresh your Spotify account on all devices. This ensures that the updated profile picture is synchronized and visible across all the devices you use to access Spotify.
Start by fully closing the Spotify app on all devices where you have logged into your Spotify account. This includes smartphones, tablets, computers, and any other devices that you use to access Spotify. On mobile devices, you can usually swipe up or press the home button to view and close running apps. On computers, you can close the Spotify app by clicking on the “X” button or using the task manager.
After closing the Spotify app, wait for a few seconds to ensure that the app fully terminates. Then, reopen the Spotify app on each device and log back into your Spotify account using your username and password. Make sure to enter the same account credentials you used when updating your profile picture.
By logging back into your Spotify account, the app will retrieve the latest profile information, including your updated profile picture. Allow a few moments for the app to sync and update the profile picture on each device.
If you have multiple devices that are actively logged into your Spotify account, it may take some time for the profile picture to appear consistent across all devices. This is normal and should resolve itself automatically as the synchronization process completes.
To confirm that the profile picture has been successfully updated, navigate to your Spotify profile on each device and check if the new profile picture is displayed. If the updated profile picture is not immediately visible, try refreshing the page or restarting the app on that particular device.
By refreshing your Spotify account on all devices, you ensure that your new profile picture is accurately reflected, providing a consistent and personalized experience across all platforms. Now you can enjoy your updated profile picture and connect with others who share your musical interests.
Congratulations! You have successfully refreshed your Spotify account on all devices, completing the process of changing your profile picture. With your personalized profile picture in place, you can now showcase your unique style and musical preferences within the Spotify community.
Thank you for following along with this step-by-step guide. We hope you found it helpful and informative. Enjoy exploring Spotify and sharing your musical journey with others!