Introduction
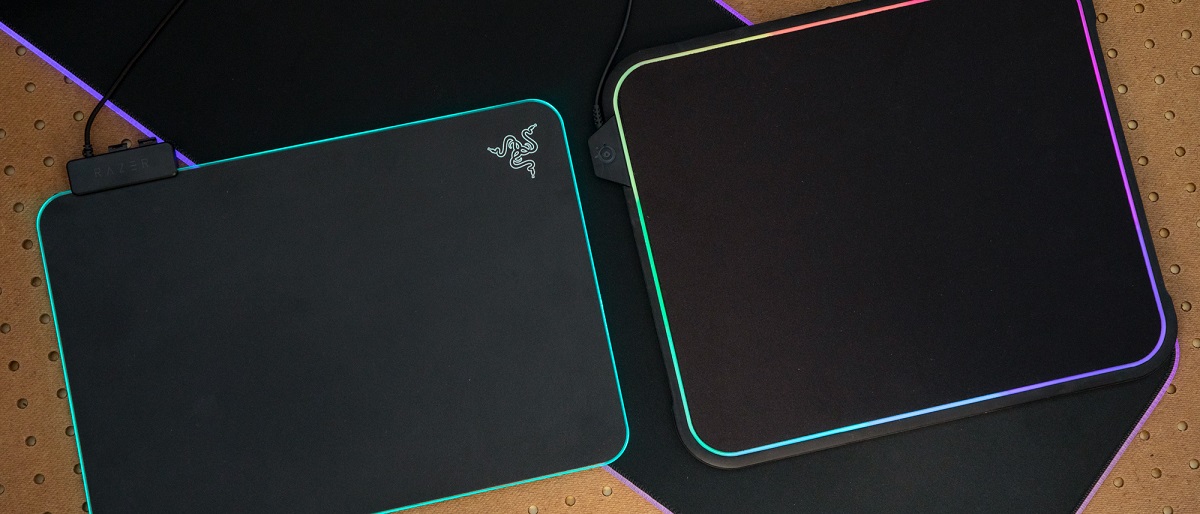
A mouse pad is an essential accessory for any computer user, providing a smooth and consistent surface for the mouse to glide on. RGB mouse pads, in particular, have gained popularity for their customizable lighting effects, adding a touch of style to any gaming setup or workstation. However, with regular use, these mouse pads can accumulate dust, dirt, and stains, which may affect their functionality and aesthetics. Therefore, it's crucial to know how to properly clean and maintain an RGB mouse pad to ensure its longevity and performance.
Cleaning an RGB mouse pad is a straightforward process that can be easily incorporated into your regular cleaning routine. By following a few simple steps and using the right supplies, you can effectively remove dirt and grime without damaging the pad's surface or its LED lighting. Whether you're a gaming enthusiast, a professional designer, or a regular computer user, maintaining a clean and vibrant mouse pad can enhance both the visual appeal of your workspace and the precision of your mouse movements.
In this comprehensive guide, we will walk you through the step-by-step process of cleaning your RGB mouse pad, from gathering the necessary supplies to reconnecting the pad after cleaning. By the end of this tutorial, you'll have the knowledge and confidence to keep your RGB mouse pad looking and performing at its best. So, let's dive into the details and learn how to revitalize your RGB mouse pad with a simple cleaning routine.
Step 1: Gather the necessary supplies
Before you begin the cleaning process, it's essential to gather the appropriate supplies to ensure a thorough and safe cleaning experience. Here's what you'll need:
- Mild detergent: Opt for a gentle, non-abrasive detergent, such as dish soap or a mild laundry detergent. Avoid using harsh chemicals or bleach, as they can damage the fabric and LED components of the mouse pad.
- Soft-bristled brush or sponge: Select a soft-bristled brush or a sponge to effectively remove dirt and stains without causing damage to the surface of the mouse pad.
- Warm water: Prepare a bowl or basin of warm water to create a cleaning solution with the mild detergent. The warm water will help loosen dirt and grime for easier removal.
- Lint-free cloth: Have a lint-free cloth or microfiber towel on hand for drying the mouse pad after cleaning. This will help prevent lint or fibers from sticking to the surface.
- Optional: Rubbing alcohol: If there are stubborn stains or spills on the mouse pad, rubbing alcohol can be used sparingly to spot clean the affected areas. However, it's important to test a small, inconspicuous area first to ensure compatibility with the material.
By gathering these supplies, you'll be well-equipped to tackle the cleaning process effectively and safely, ensuring that your RGB mouse pad remains in pristine condition throughout the cleaning procedure.
Step 2: Unplug and remove any cables
Before initiating the cleaning process, it’s crucial to unplug and remove any cables connected to the RGB mouse pad. This precautionary step ensures the safety of the electrical components and prevents any potential damage during the cleaning process. Follow these simple steps to unplug and detach the cables:
- Power off your computer: Shut down your computer or laptop to eliminate any electrical current flowing through the USB ports.
- Unplug the USB cable: Carefully unplug the USB cable connected to the RGB mouse pad from the USB port on your computer or the power source.
- Remove any additional cables: If your RGB mouse pad has additional cables for power or lighting control, disconnect them as well. Ensure that all cables are detached to allow for thorough cleaning without any obstructions.
By unplugging and removing the cables, you create a safe and unobstructed environment for the subsequent cleaning steps. This precaution not only protects the electrical components of the mouse pad but also minimizes the risk of tangling or damaging the cables during the cleaning process. Once the cables are safely disconnected, you can proceed with the next steps to effectively clean the RGB mouse pad and restore its pristine condition.
Step 3: Spot clean any stains
Spot cleaning is an essential step in the process of rejuvenating your RGB mouse pad, especially if it has specific areas with noticeable stains or spills. Follow these steps to effectively spot clean any stains on the mouse pad:
- Identify the stained areas: Carefully examine the surface of the mouse pad to pinpoint any visible stains, spills, or areas of discoloration. Take note of the location and extent of the stains to target them effectively during the spot cleaning process.
- Create a cleaning solution: In a small bowl, mix a small amount of mild detergent with warm water to create a gentle cleaning solution. Ensure that the detergent is thoroughly dissolved in the water to avoid leaving any residue on the mouse pad.
- Dip a soft-bristled brush or sponge: Dip a soft-bristled brush or a sponge into the cleaning solution, ensuring that it is damp but not dripping. Gently wring out any excess liquid to prevent over-saturation of the mouse pad.
- Blot the stained areas: Lightly blot the stained areas with the damp brush or sponge, applying gentle pressure to lift the stains without spreading them further. Avoid vigorous rubbing, as it may damage the fabric or LED components of the mouse pad.
- Rinse with clean water: After spot cleaning the stained areas, use a separate lint-free cloth dampened with clean water to rinse the treated areas. This helps remove any residual detergent and ensures a thorough cleaning process.
- Dry the spot-cleaned areas: Use a dry lint-free cloth or a microfiber towel to gently pat and absorb excess moisture from the spot-cleaned areas. Allow the mouse pad to air dry completely before proceeding to the next steps.
By following these spot cleaning steps, you can effectively address specific stains and spills on your RGB mouse pad, restoring its overall cleanliness and visual appeal. Once the spot cleaning process is complete, you can proceed with the subsequent steps to ensure a thorough cleaning of the entire mouse pad surface.
Step 4: Hand wash the mouse pad
Hand washing your RGB mouse pad is a crucial step in the cleaning process, allowing you to remove accumulated dirt, oils, and grime from the entire surface. Follow these steps to effectively hand wash your mouse pad:
- Fill a basin with warm, soapy water: Prepare a basin or sink with warm water and add a small amount of mild detergent. Swirl the water to ensure that the detergent is evenly distributed and dissolved.
- Submerge the mouse pad: Gently submerge the entire mouse pad in the soapy water, ensuring that it is fully immersed. Allow the mouse pad to soak for a few minutes to loosen dirt and oils from the fabric.
- Gently agitate the water: Using your hands, gently agitate the water and mouse pad to help dislodge dirt and grime from the fabric. Avoid vigorous scrubbing or twisting, as it may damage the LED components or the fabric itself.
- Spot clean any remaining stains: If there are remaining stains or spots after the initial hand washing, use a soft-bristled brush or sponge to spot clean those areas with the soapy water solution.
- Rinse the mouse pad: After hand washing, thoroughly rinse the mouse pad with clean water to remove any residual detergent and ensure that the fabric is completely clean.
- Gently squeeze out excess water: Carefully squeeze the mouse pad to remove excess water without wringing or twisting it. Avoid applying excessive pressure, as it may misshape the mouse pad or damage the LED components.
By hand washing your RGB mouse pad with a gentle detergent, you can effectively remove dirt and oils from the fabric without compromising the integrity of the LED lighting. This method ensures a thorough cleaning of the entire surface, preparing the mouse pad for the final steps of the cleaning process.
Step 5: Rinse and dry the mouse pad
After hand washing the RGB mouse pad, it’s essential to proceed with rinsing and drying to ensure that the fabric is thoroughly cleaned and free from any residual detergent or moisture. Follow these steps to effectively rinse and dry your mouse pad:
- Rinse with clean water: Thoroughly rinse the entire mouse pad with clean water to remove any remaining detergent and ensure that the fabric is completely clean. Pay close attention to areas that were spot cleaned to ensure that all traces of detergent are removed.
- Gently squeeze out excess water: Carefully squeeze the mouse pad to remove excess water without wringing or twisting it. It’s important to avoid applying excessive pressure, as it may misshape the mouse pad or damage the LED components.
- Blot with a lint-free cloth: Place the mouse pad on a clean, flat surface and use a lint-free cloth or a microfiber towel to gently blot and absorb excess moisture from the surface. Press down on the mouse pad to facilitate the absorption of water without rubbing the fabric vigorously.
- Air dry the mouse pad: Allow the mouse pad to air dry completely in a well-ventilated area, ensuring that it is laid flat to maintain its original shape. Avoid using heat sources such as hair dryers or direct sunlight, as they may damage the fabric and LED components.
- Ensure thorough drying: Before proceeding to reconnect the mouse pad, ensure that it is completely dry to the touch. Check for any damp areas and allow additional drying time if necessary to prevent moisture from being trapped within the fabric.
By following these rinsing and drying steps, you can ensure that your RGB mouse pad is thoroughly cleansed and free from any residual moisture, preparing it for the final step of reconnecting and resuming its functionality in your workspace or gaming setup.
Step 6: Reconnect the mouse pad
Once your RGB mouse pad has been thoroughly cleaned and dried, it’s time to reconnect it to your computer or power source, allowing you to resume its functionality and enjoy a refreshed workspace or gaming environment. Follow these steps to safely reconnect your mouse pad:
- Inspect the cables: Before reconnecting the mouse pad, carefully inspect the USB cable and any additional cables to ensure that they are free from damage or tangles. Straighten out any kinks or loops in the cables to facilitate a smooth connection.
- Plug in the USB cable: Gently plug the USB cable of the RGB mouse pad into an available USB port on your computer or a compatible power source. Ensure that the connection is secure but not forced, avoiding any undue pressure on the port or the cable.
- Connect any additional cables: If your RGB mouse pad has supplementary cables for power or lighting control, reconnect them to their respective ports or power sources as per the manufacturer’s instructions.
- Verify the connection: Once the cables are securely connected, verify that the RGB mouse pad is receiving power and that the LED lighting, if applicable, is functioning as expected. Test the mouse pad by moving your mouse across its surface to ensure smooth and accurate tracking.
- Adjust the lighting settings: If your RGB mouse pad offers customizable lighting effects, take this opportunity to adjust the settings to your preference using the manufacturer’s provided software or controls. Personalize the lighting to complement your workspace or gaming setup.
By carefully reconnecting your RGB mouse pad and verifying its functionality, you can seamlessly reintegrate it into your computer setup, ready to enhance your computing experience with its refreshed appearance and optimized performance.
Conclusion
Cleaning and maintaining your RGB mouse pad is a simple yet essential aspect of preserving its functionality and visual appeal. By following the step-by-step process outlined in this guide, you’ve learned how to effectively revitalize your mouse pad and keep it in optimal condition. From gathering the necessary supplies to reconnecting the mouse pad, each step contributes to a thorough cleaning routine that ensures the longevity and performance of your RGB mouse pad.
Regularly cleaning your RGB mouse pad not only removes dirt, stains, and grime but also contributes to a hygienic and visually pleasing workspace or gaming environment. The customizable LED lighting of RGB mouse pads adds an aesthetic dimension to your setup, making it even more important to maintain its cleanliness and vibrancy.
Remember to incorporate this cleaning routine into your regular maintenance schedule to ensure that your RGB mouse pad remains in top condition. By using mild detergents, gentle cleaning techniques, and allowing thorough drying, you can effectively preserve the fabric and LED components of the mouse pad without compromising their integrity.
Whether you’re a gaming enthusiast, a creative professional, or a regular computer user, a clean and vibrant RGB mouse pad can elevate your computing experience and contribute to a visually appealing workspace. By dedicating a small amount of time to the care and maintenance of your mouse pad, you can enjoy its benefits for years to come.
With the knowledge and insights gained from this guide, you’re now equipped to maintain a pristine and functional RGB mouse pad, enhancing both the aesthetics and performance of your computer setup. By incorporating these cleaning practices into your routine, you can ensure that your RGB mouse pad continues to complement your workspace with its vibrant lighting and smooth surface, contributing to a comfortable and enjoyable computing experience.


