Introduction
Printing shipping labels is an essential part of the process for anyone selling products online. It not only helps you save time but also ensures that your packages are accurately labeled and ready for shipping.
When it comes to printing shipping labels, PayPal offers a convenient solution that streamlines the entire process. If you’re using PayPal for your online transactions, you can easily create and print shipping labels directly from your account.
In this article, we will guide you through the step-by-step process of printing shipping labels from PayPal. Whether you’re a small business owner or an individual seller, this feature can greatly simplify your shipping operations.
By taking advantage of PayPal’s integrated shipping label generator, you can save yourself the hassle of manually filling out shipping forms or using third-party shipping platforms. With just a few clicks, you can have your shipping labels ready to go, allowing you to focus on other aspects of your business.
No matter the size or volume of your online sales, printing shipping labels from PayPal can be a game-changer. It offers a convenient, efficient, and cost-effective solution that will help streamline your shipping process and improve customer satisfaction.
Now, let’s dive into the details and learn how to print shipping labels from your PayPal account, step by step.
Why Printing Shipping Labels from PayPal is Convenient
Printing shipping labels from PayPal offers a range of advantages that make it a convenient option for online sellers. Here are some reasons why you should consider utilizing this feature:
- Integration with PayPal transactions: Since PayPal is already a popular payment platform for online businesses, being able to print shipping labels directly from your PayPal account streamlines the process. You can easily access transaction details, including buyer and shipping information, without the need for manual data entry.
- Time-saving: With PayPal’s shipping label feature, you can save valuable time. Instead of manually entering customer information and package details, you can simply select the transaction and generate the label with just a few clicks. This time-saving advantage allows you to focus on other business operations.
- Cost-effective: PayPal provides discounted shipping rates through its partnerships with major carriers such as USPS, UPS, and FedEx. This means you have access to competitive shipping prices without the need for individual carrier accounts or negotiating separate contracts. The cost savings can significantly impact your bottom line, especially for businesses with high shipping volumes.
- Automatic order updates: Printing shipping labels through PayPal automatically updates the transaction status and notifies buyers about the shipping details. This helps improve customer satisfaction by keeping them informed and allowing them to track their packages easily.
- Easy package tracking: When you print a shipping label from PayPal, the tracking number is automatically provided. You can effortlessly share this information with your customers, enabling them to monitor the progress and delivery of their orders. This transparency enhances the overall buying experience and builds trust with your customers.
In summary, printing shipping labels from PayPal offers a range of conveniences, including streamlined integration, time-saving benefits, cost-effective shipping rates, automatic order updates, and easy package tracking. By taking advantage of this feature, you can simplify your shipping process and provide a better experience for your customers.
Step 1: Log in to Your PayPal Account
The first step to printing shipping labels from PayPal is to log in to your PayPal account. If you don’t already have an account, you can easily create one by visiting the PayPal website and following the registration process.
Once you have your PayPal account credentials, follow these steps:
- Open your preferred web browser and go to www.paypal.com.
- Click on the “Log In” button located at the top right corner of the page.
- Enter your email address or mobile number associated with your PayPal account.
- Click on the “Next” button.
- Enter your account password.
- Click on the “Log In” button to access your PayPal account.
Make sure that you enter your login credentials accurately to ensure a smooth login process. If you encounter any issues, you can use the “Having trouble logging in?” link to reset your password or retrieve your account information.
Once you have successfully logged in to your PayPal account, you are ready to proceed to the next step and start printing your shipping labels.
Step 2: Go to the “Activity” Tab
After logging in to your PayPal account, the next step is to navigate to the “Activity” tab. This is where you can access all your transaction history and locate the specific transaction for which you want to print a shipping label.
Follow these steps to find the “Activity” tab:
- Once you are logged in to your PayPal account, you will be directed to the account overview page.
- Look for the “Activity” tab in the top menu navigation. It is typically located in the second row of menu options.
- Click on the “Activity” tab to access your transaction history.
By clicking on the “Activity” tab, you will be able to view a list of your recent transactions including payments received, payments sent, and other activities associated with your PayPal account.
Keep in mind that you can also use the search bar within the “Activity” tab to look for a specific transaction. Simply enter relevant details such as the buyer’s name, transaction ID, or item name to narrow down your search results.
Once you have located the transaction for which you want to print a shipping label, you can proceed to the next step of the process.
Step 3: Locate the Transaction for Which You Want to Print a Shipping Label
Once you have accessed the “Activity” tab in your PayPal account, the next step is to locate the specific transaction for which you want to print a shipping label.
Follow these steps to find the transaction:
- On the “Activity” page, you will see a list of your recent transactions, with the most recent transactions appearing at the top.
- Scroll through the list or use the search bar to find the transaction you need.
- If you remember specific details about the transaction, such as the buyer’s name, item description, or transaction date, you can use that information to quickly locate the transaction.
PayPal provides various details about each transaction in the list, including the buyer’s name, transaction date, transaction ID, and payment status. Take your time to review the information carefully to ensure that you are selecting the correct transaction for generating the shipping label.
If you still cannot find the transaction you are looking for, make sure to double-check your search criteria or adjust the search filters to refine your results. It’s crucial to locate the correct transaction to avoid any issues with shipping labels or package delivery.
Once you have successfully located the transaction, you can proceed to the next step and access the transaction details to print the shipping label.
Step 4: Click on the Transaction Details
After finding the transaction you want to print a shipping label for, the next step is to click on the transaction details to access the necessary information and options.
Follow these steps to access the transaction details:
- Once you have located the desired transaction in your PayPal account’s “Activity” tab, click on the transaction itself.
- This action will open a new page or pop-up window displaying the detailed information about the transaction.
- On this page, you will find various details related to the transaction, such as the payment status, buyer’s information, item description, and more.
By clicking on the transaction, you will be able to view all the relevant information you need to proceed with printing the shipping label. Take a moment to review the details to ensure accuracy and correctness.
Additionally, this is also the page where you can access other options related to the transaction, such as refunding the payment or contacting the buyer through PayPal’s messaging system. However, for the purpose of printing a shipping label, focus on the shipping-related details and options.
Now that you have accessed the transaction details, you can proceed to the next step and select the option to print the shipping label.
Step 5: Select the “Print Shipping Label” Option
Once you have accessed the transaction details page in your PayPal account, the next step is to select the option to print the shipping label. This feature allows you to generate a shipping label with all the necessary information for delivering the package to the buyer.
Follow these steps to select the “Print Shipping Label” option:
- On the transaction details page, look for an option or button that says “Print Shipping Label” or something similar. The exact wording may vary slightly depending on your PayPal account layout and version.
- Click on the “Print Shipping Label” option to proceed to the label creation process.
By selecting the “Print Shipping Label” option, you are triggering the label generation process using the transaction’s information. This process ensures that the shipping label includes the correct buyer’s address, package weight, and other relevant details.
It’s important to note that you might be prompted to confirm your action or agree to specific terms and conditions related to printing shipping labels. Follow the prompts and provide any required information to move forward.
Once you have selected the “Print Shipping Label” option, you are ready to enter the specific details for your package and proceed with creating the label. This step will be covered in detail in the following sections.
Continue to the next step to learn how to choose the shipping carrier and package type for your shipment.
Step 6: Choose the Shipping Carrier and Package Type
After selecting the “Print Shipping Label” option, you will be directed to a page where you can choose the shipping carrier and package type for your shipment. This step is crucial as it determines the available shipping options and rates for your package.
Follow these steps to choose the shipping carrier and package type:
- On the shipping label creation page, you will see a list of available shipping carriers supported by PayPal, such as USPS, UPS, FedEx, and more.
- Select the desired shipping carrier from the available options. It’s important to choose a carrier that best suits your needs in terms of delivery speed, pricing, and any additional services you require.
- Once you have selected the shipping carrier, choose the appropriate package type based on the dimensions and weight of your package. Common package types include envelopes, small/medium/large boxes, and custom package options.
PayPal provides the necessary information and guidelines for selecting the appropriate package type. Pay attention to any specific size or weight restrictions mentioned by the carrier to ensure that your package meets the requirements for the selected option.
By choosing the shipping carrier and package type, you are narrowing down the available shipping options and preparing to enter the specific details of your package, such as the weight and dimensions.
Keep in mind that the rates and services offered by each carrier may vary, so consider factors such as cost, delivery speed, tracking options, and insurance coverage when making your selection.
Once you have chosen the shipping carrier and package type, you can proceed to the next step and enter the shipping details and package weight.
Step 7: Enter the Shipping Details and Package Weight
After selecting the shipping carrier and package type, the next step is to enter the shipping details and package weight. This information is crucial for generating an accurate shipping label and ensuring the package is delivered correctly.
Follow these steps to enter the shipping details and package weight:
- On the shipping label creation page, you will find fields where you can input the shipping details, including the recipient’s address and your return address. Make sure to enter the addresses correctly to avoid any delivery issues.
- Fill in the recipient’s address, including the street address, city, state, and ZIP code. Double-check the accuracy of the address to ensure that the package reaches the intended destination.
- Next, provide your return address details, which will be used for any return shipments or if there are issues with the delivery. Make sure to include your complete return address, including the street address, city, state, and ZIP code.
- Enter the package weight in the designated field. It’s important to provide the accurate weight of the package as it affects the shipping cost and determines the appropriate shipping method.
- Pay attention to any additional shipping options or services provided by the carrier, such as insurance, signature confirmation, or delivery instructions. These options may incur additional fees but can provide added peace of mind and security for your shipment.
Take your time to enter the shipping details and package weight accurately. The information you provide will be used to generate the shipping label, so any errors or omissions can lead to delivery delays or issues.
Once you have entered the shipping details and package weight, review the information carefully to ensure its accuracy. If everything looks correct, you are ready to proceed to the next step and review the shipping label details before printing.
Step 8: Review and Confirm the Shipping Label Details
After entering the shipping details and package weight, it’s important to review and confirm the shipping label details before proceeding to print. This step ensures that all the information is accurate and that there are no mistakes or omissions on the label.
Follow these steps to review and confirm the shipping label details:
- On the shipping label creation page, take a moment to review all the entered details, including the recipient’s address, return address, package weight, and any additional shipping options or services selected.
- Double-check the accuracy of the addresses, ensuring that the recipient’s address is correct and complete to facilitate proper delivery.
- Verify that the package weight is accurate, as it determines the shipping cost and the appropriate shipping method for your shipment.
- If you have selected any additional shipping options or services, confirm that they are correct and necessary for your package.
- Pay attention to any notes or warnings provided by the carrier regarding the selected shipping options or services. Make any necessary adjustments or changes based on these guidelines.
Reviewing the shipping label details is a critical step to ensure that your package is correctly labeled and ready for shipment. Taking the time to verify the information reduces the risk of delivery errors and ensures a smooth shipping process.
If you notice any errors or need to make changes to the shipping details or package weight, most shipping label creation pages will allow you to edit the information before finalizing the label. Make any necessary adjustments to ensure accuracy.
Once you are confident that all the shipping label details are correct and accurate, you can proceed to the next step and print the shipping label.
Step 9: Print the Shipping Label
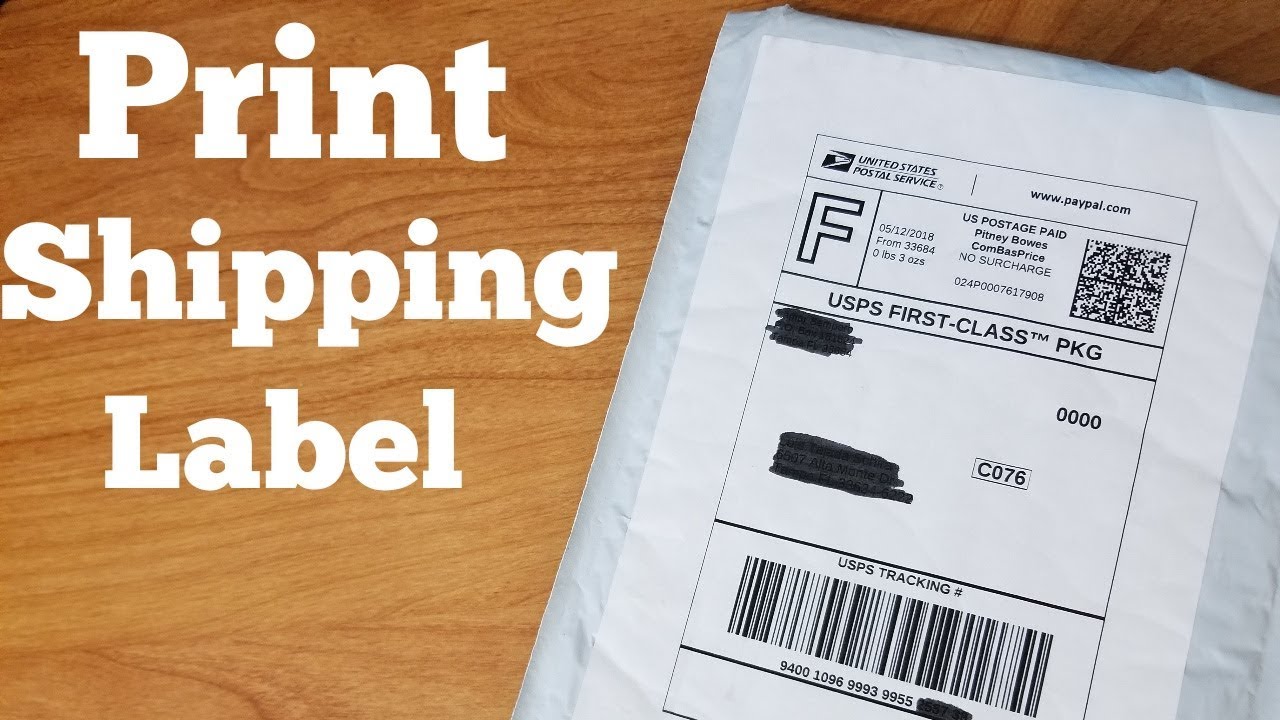
After reviewing and confirming the shipping label details, the next step is to print the label. This will generate a printable file containing all the necessary information for shipping your package.
Follow these steps to print the shipping label:
- On the shipping label creation page, look for a button or option that says “Print Label” or something similar.
- Click on the “Print Label” button to initiate the printing process.
- Depending on your printer setup and preferences, you may have different options for printing the label. Choose the appropriate printer and adjust any settings, such as print quality or number of copies, as needed.
- Click on the “Print” button to start the printing process.
Make sure that your printer is connected and properly set up before attempting to print the shipping label. Check that you have enough paper and ink in your printer to avoid any printing interruptions.
Once you have printed the shipping label, carefully cut it out and ensure that it is clearly visible and securely affixed to your package. You can use tape or adhesive labels to attach the label securely, making sure that it is not crumpled or obstructed in any way.
It’s advisable to keep a digital copy of the label for your records, in case you need to reference it or re-print it in the future. This can be done by saving the label file on your computer or taking a screenshot of the label before printing.
With the shipping label printed and attached to your package, you are ready to proceed with shipping your item to the buyer. Ensure that you follow any additional instructions provided by the shipping carrier for drop-off or collection.
That concludes Step 9: Printing the Shipping Label. The next and final step is to attach the shipping label to your package.
Step 10: Attach the Shipping Label to Your Package
After printing the shipping label, the final step is to attach it securely to your package. Properly affixing the label ensures that it is visible, legible, and protected throughout the shipping process.
Follow these steps to attach the shipping label to your package:
- Carefully cut out the printed shipping label along the designated edges.
- Inspect the label to ensure that it is clear and easy to read. Check for any smudges, tears, or damage that could affect its scanning or legibility.
- Clean the surface of your package where you intend to attach the label. Ensure that it is dry and free of any dirt, dust, or moisture that could compromise the label’s adhesive or readability.
- Peel off the backing of the label’s adhesive, if applicable, to expose the sticky side.
- Position the label on your package, aligning it properly on a flat surface. Ensure that the barcode and recipient’s address are facing outward and are clearly visible.
- Press down firmly on the label to securely attach it to the package. Smooth out any wrinkles or bubbles to ensure a clean and secure bond.
- If needed, you can use transparent tape or adhesive labels to further secure the label and protect it from damage or tampering.
It’s important to attach the shipping label in a way that it will not easily come off during transit. The label should be securely attached without any loose edges or flapping corners that could impede scanning or cause handling issues.
Additionally, consider adding any necessary packaging materials, such as bubble wrap or padding, to ensure the protection and safety of your package while in transit.
Once the shipping label is securely attached to your package, you are now ready to drop off your package at the designated carrier facility or schedule a pickup. Follow the instructions provided by the shipping carrier to ensure a smooth and successful shipment.
Congratulations! You have completed all ten steps to print and attach a shipping label to your package using PayPal. Your package is now ready to be shipped to the buyer, ensuring a seamless and efficient shipping process.
Conclusion
Printing shipping labels from your PayPal account offers a convenient and efficient solution for online sellers. It streamlines the process of creating and printing shipping labels, saving you time and effort. By following the step-by-step guide outlined in this article, you can easily print shipping labels directly from your PayPal account.
We began by highlighting the importance of printing shipping labels and how PayPal provides a convenient solution for online sellers. We then walked you through the ten steps involved in printing a shipping label from PayPal:
- Logging in to your PayPal account
- Navigating to the “Activity” tab
- Locating the specific transaction
- Accessing the transaction details
- Selecting the “Print Shipping Label” option
- Choosing the shipping carrier and package type
- Entering the shipping details and package weight
- Reviewing and confirming the shipping label details
- Printing the shipping label
- Attaching the shipping label to your package
By following these steps, you will be able to generate and attach accurate shipping labels to your packages, ensuring smooth and successful deliveries to your customers.
Printing shipping labels from PayPal offers several benefits, including integration with your PayPal transactions, time savings, cost-effectiveness, automatic order updates, and easy package tracking. These advantages contribute to a streamlined and efficient shipping process, enhancing customer satisfaction and improving your overall business operations.
In conclusion, take advantage of PayPal’s feature to print shipping labels directly from your account, and simplify your shipping process. Equip yourself with the knowledge and steps outlined in this article to make the most out of this convenient tool provided by PayPal.


