Choosing the Right Microphone
When it comes to recording acoustic guitar, choosing the right microphone is crucial in capturing the rich and natural sound of the instrument. With a wide range of options available, it can be overwhelming to know which microphone will best suit your needs. Here are some factors to consider when selecting a microphone for recording acoustic guitar:
1. Condenser vs. Dynamic: Condenser microphones are commonly used for recording acoustic guitar due to their sensitivity and ability to capture delicate nuances. They are ideal for capturing the subtle details of an acoustic guitar’s tone. On the other hand, dynamic microphones are more rugged and can handle higher sound pressure levels, making them suitable for live performances.
2. Polar Pattern: The polar pattern of a microphone determines its sensitivity to sound from different directions. For recording acoustic guitar, a cardioid polar pattern is often preferred. This pattern captures sound from the front and rejects most sound from the sides and rear, minimizing unwanted ambient noise.
3. Budget: Consider your budget when choosing a microphone. While there are high-end options available, there are also affordable microphones that can still deliver excellent results for recording acoustic guitar.
4. Personal Preference: Ultimately, personal preference plays a significant role in choosing a microphone. The sound you want to achieve and the style of music you play can help inform your decision. Experiment with different microphones to find the one that suits your taste and captures the essence of your playing.
Remember to read reviews, listen to audio samples, and seek advice from fellow musicians and audio engineers when making your decision. Each microphone will have its own unique sonic characteristics, so take the time to find the one that best complements the sound of your acoustic guitar.
Different Types of Microphones for Recording Acoustic Guitar
When it comes to recording acoustic guitar, there are several types of microphones to choose from. Each type has its own characteristics and can produce different sonic results. Here are some common types of microphones used for recording acoustic guitar:
1. Condenser Microphones: Condenser microphones are highly sensitive and capture the nuances and subtleties of acoustic guitar tones. They are often the preferred choice for recording acoustic guitar due to their ability to accurately reproduce the instrument’s natural sound. They come in various diaphragm sizes, with small-diaphragm condensers capturing more detail and large-diaphragm condensers providing a warmer sound.
2. Ribbon Microphones: Ribbon microphones are known for their smooth and vintage sound. They excel at capturing the warmth and character of acoustic guitars. However, they are more delicate and require careful handling to avoid damage to the ribbon element.
3. Dynamic Microphones: Dynamic microphones are rugged and can handle higher sound pressure levels, making them ideal for capturing the powerful strums and percussive elements of acoustic guitar playing. They may not be as sensitive as condenser microphones, but they offer durability and can be a great choice for live recordings or situations where a more robust sound is desired.
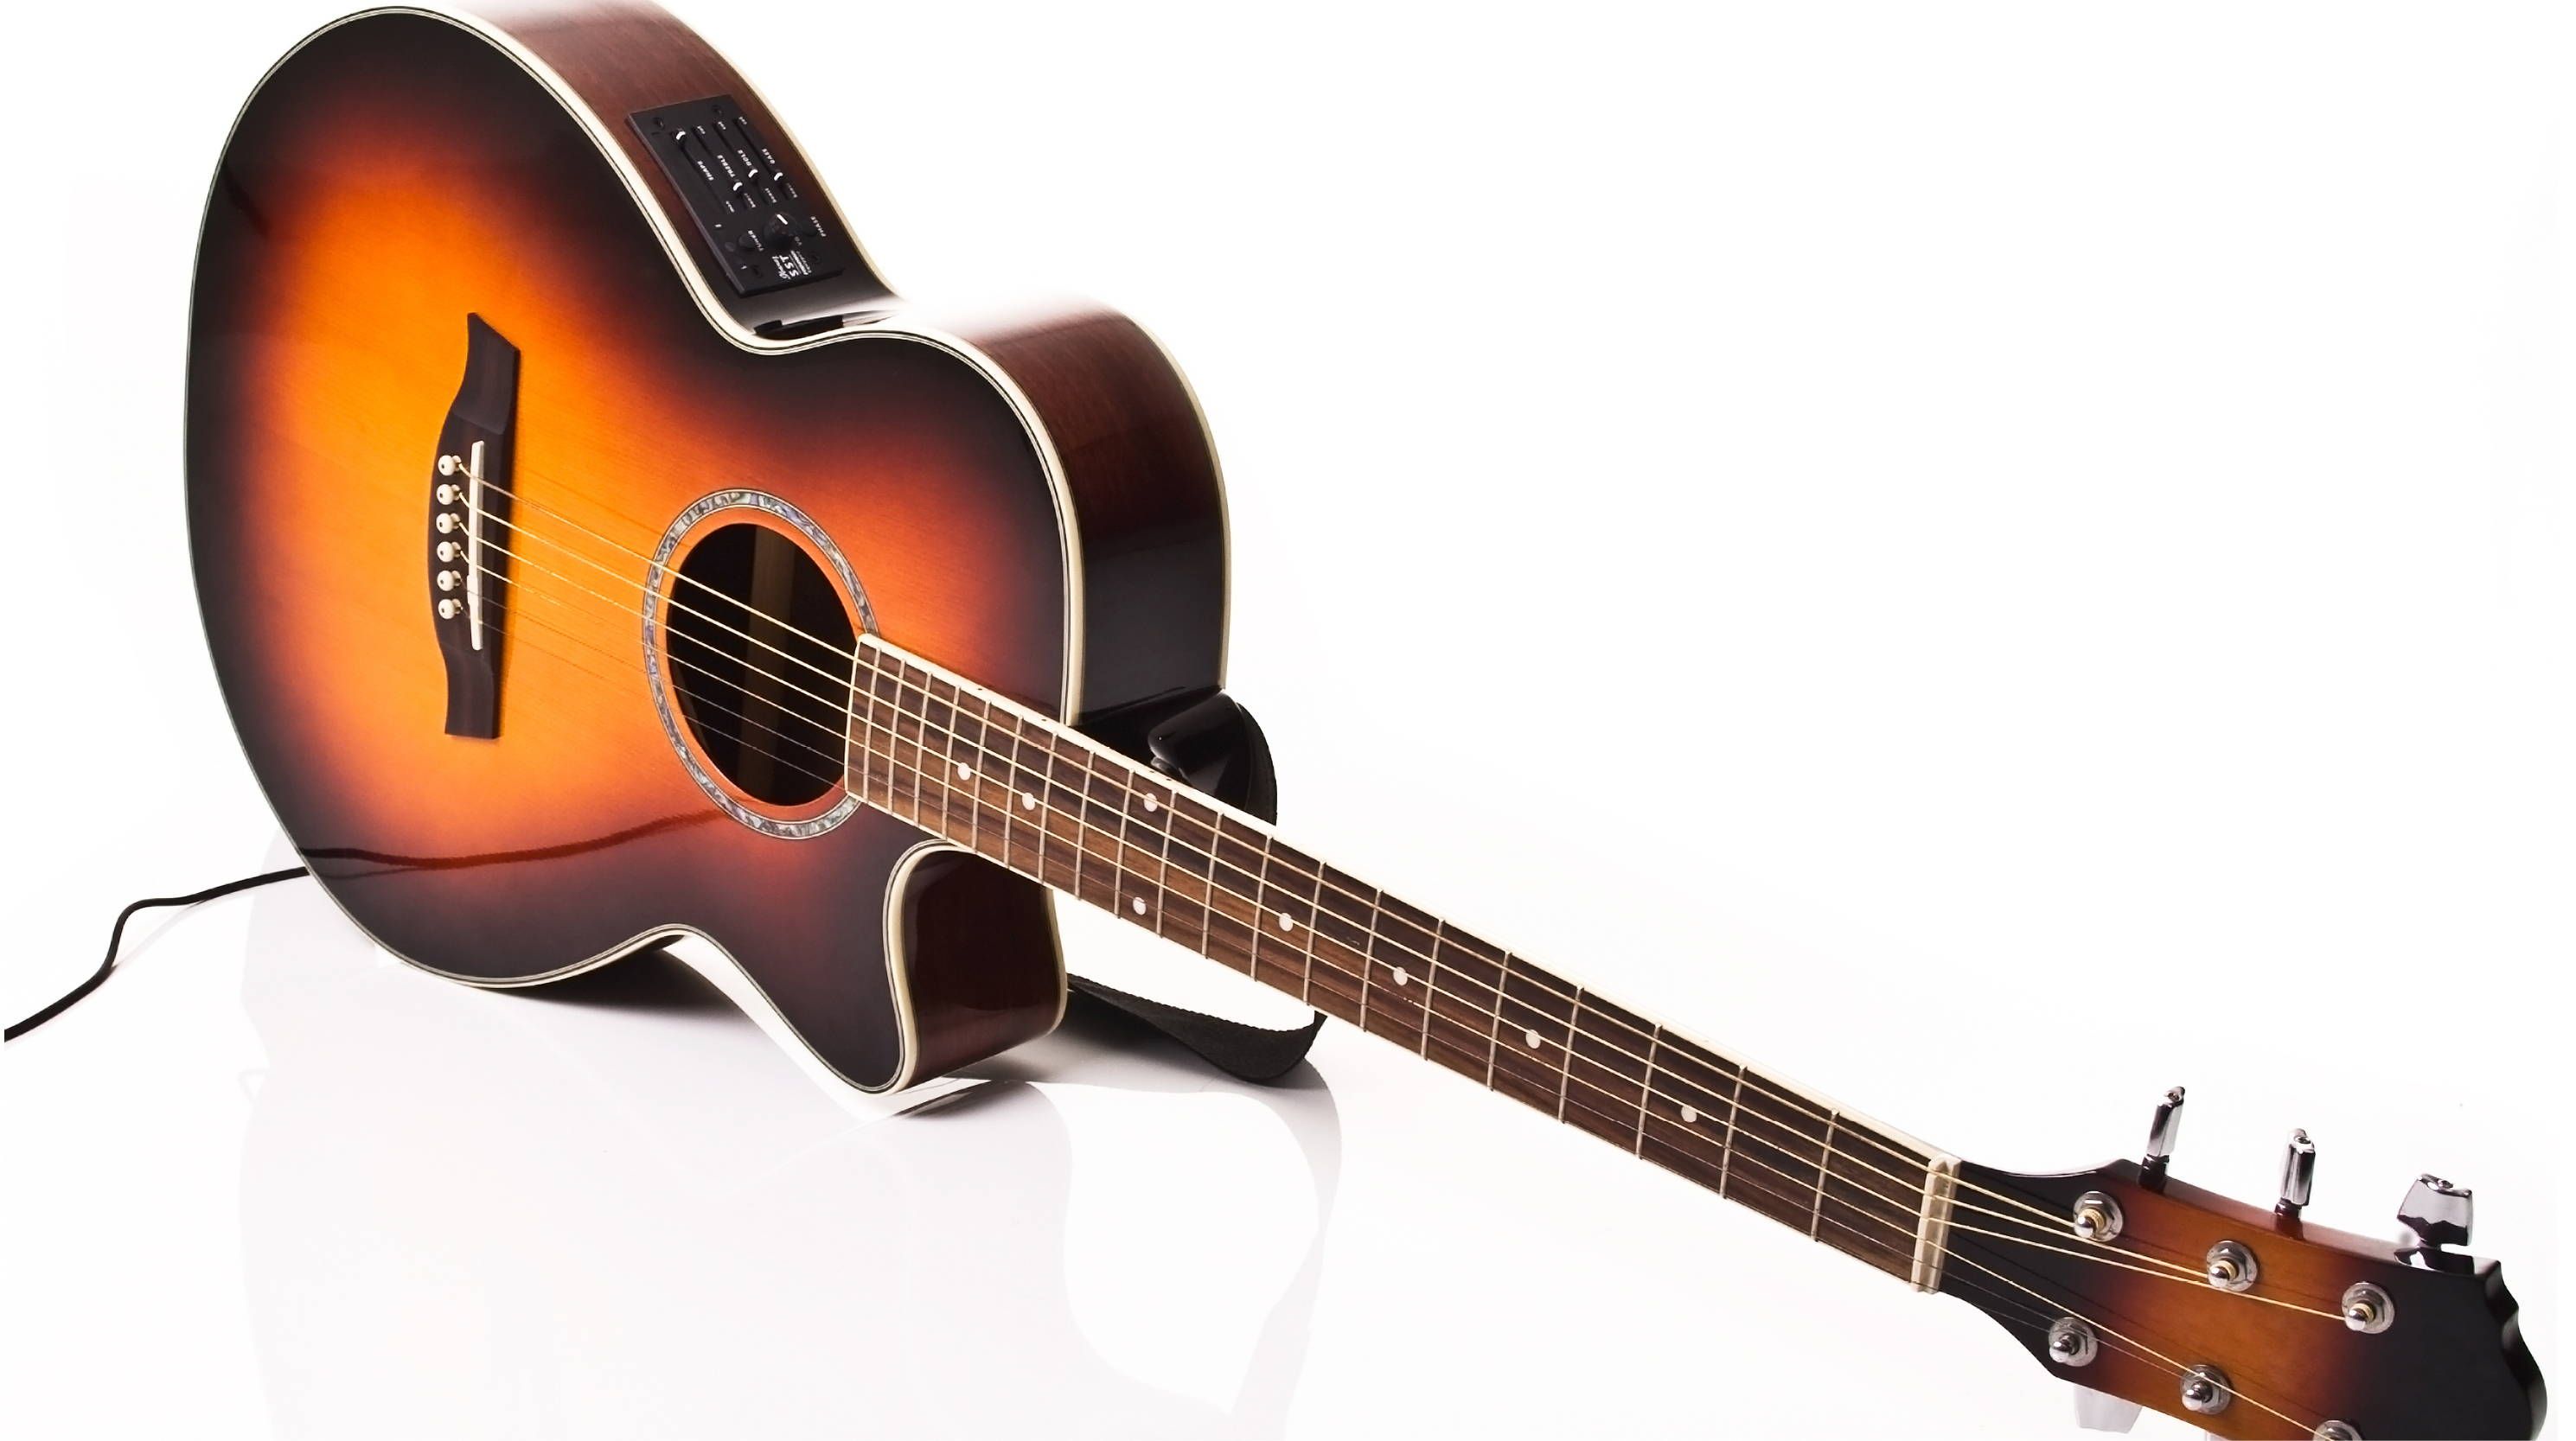
4. Piezo Pickups: Piezo pickups are commonly found in acoustic guitar pickups and are specifically designed to capture the vibrations of the guitar’s strings. They can be mounted inside the guitar or attached to the soundboard. Piezo pickups are often used in conjunction with a preamp to amplify the signal and provide tonal control.
5. Contact Microphones: Contact microphones are attached directly to the body of the acoustic guitar, allowing for a unique and intimate sound capture. They excel at capturing the percussive elements and resonances of the instrument, making them popular for fingerstyle or percussive playing techniques.
Each type of microphone has its own sonic characteristics and can contribute to the overall sound of the recorded acoustic guitar. Experimenting with different microphone types can help you find the one that best suits your playing style and desired sound.
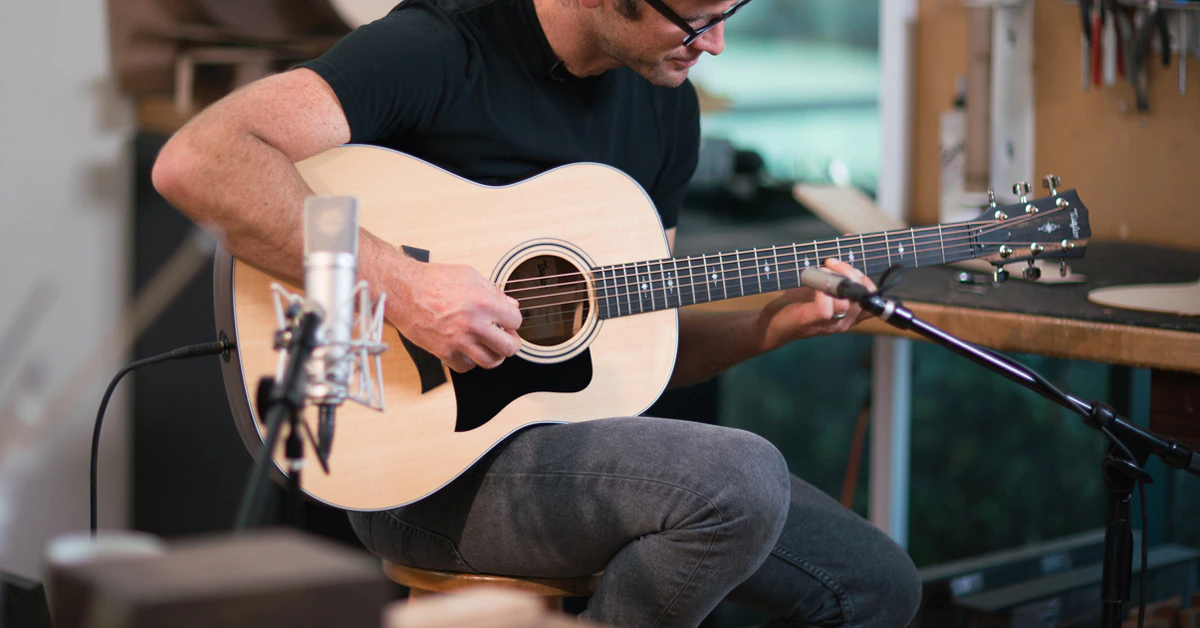
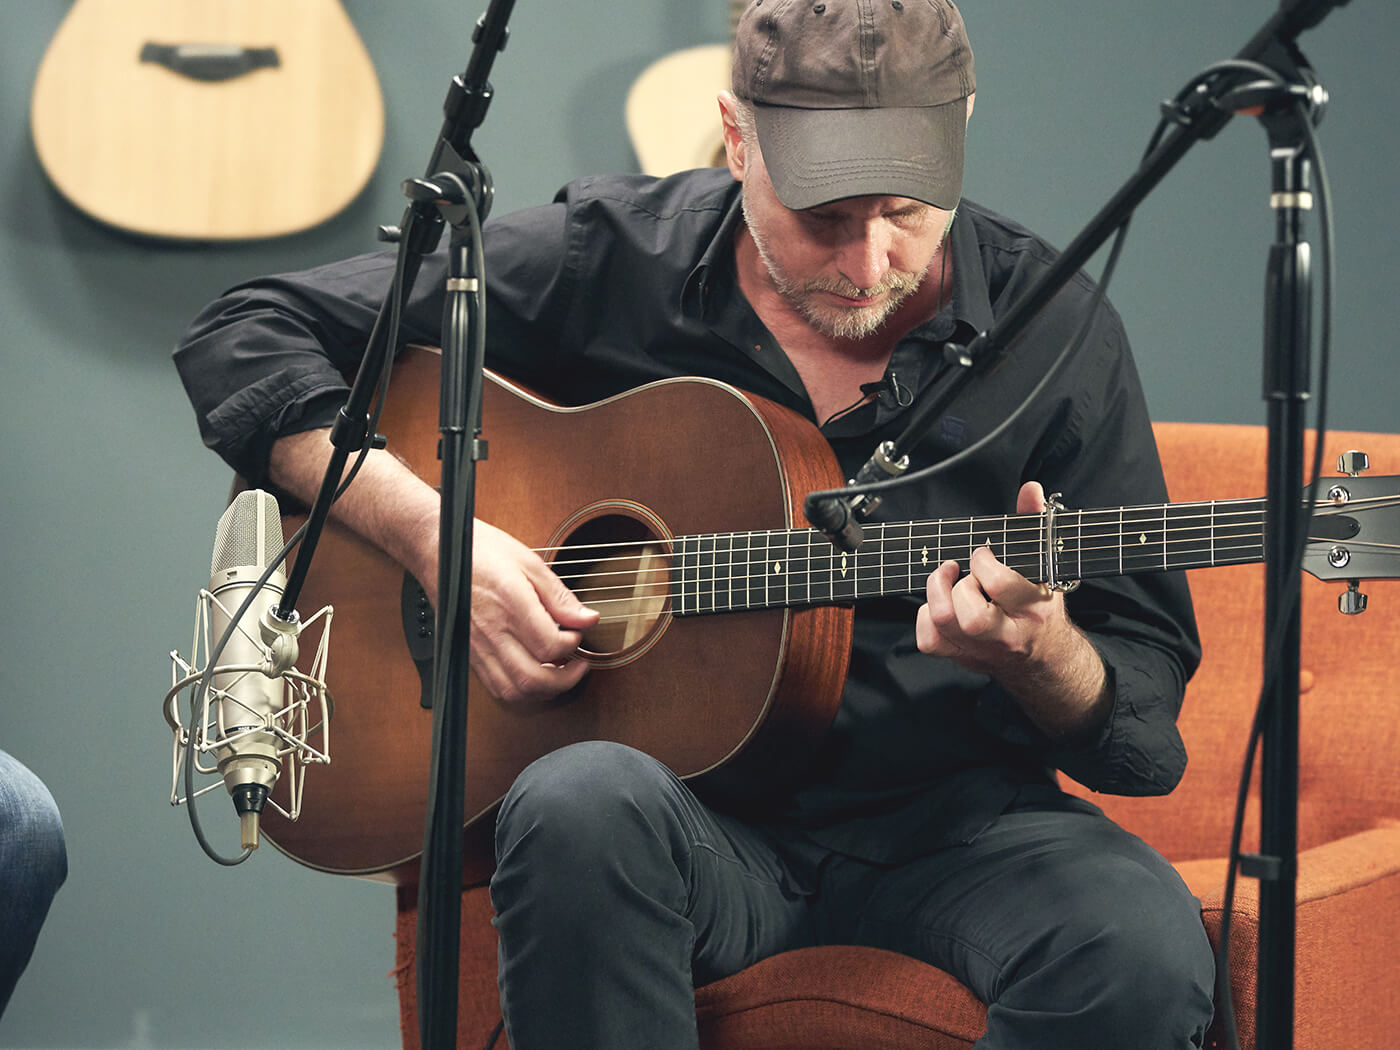
Microphone Placement Techniques for Acoustic Guitar
Proper microphone placement is essential for capturing the best possible sound when recording acoustic guitar. The placement of the microphone can greatly affect the tone, balance, and overall clarity of the instrument. Here are some popular microphone placement techniques to consider:
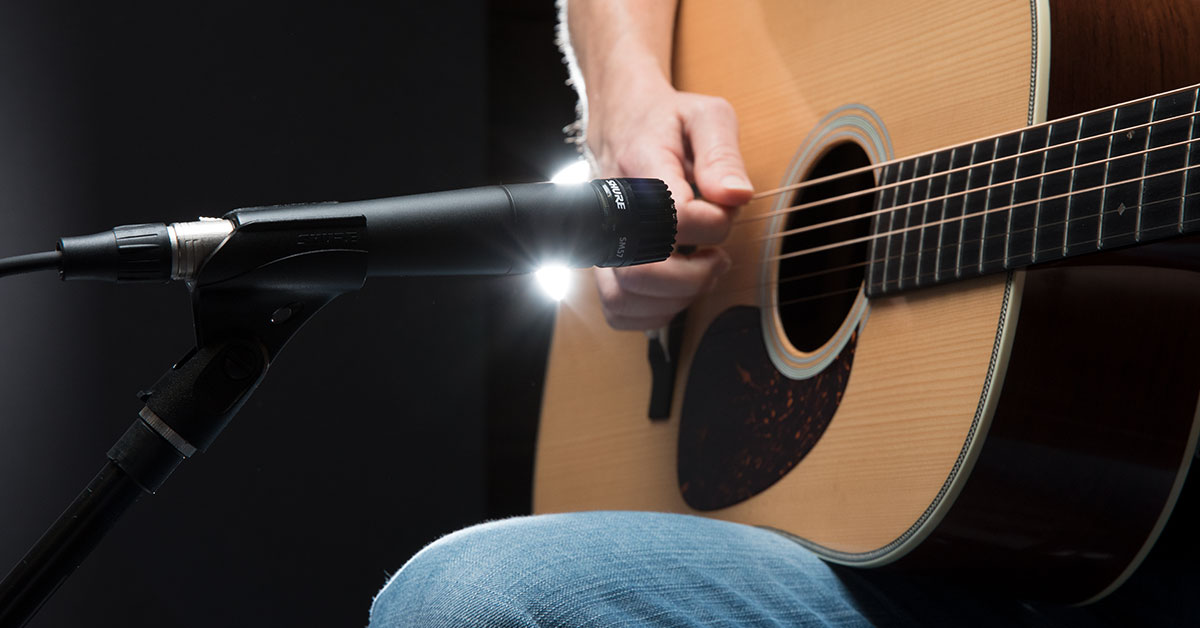
1. Close-Mic Placement: Placing the microphone close to the soundhole or the 12th fret of the acoustic guitar can result in a focused and direct sound. This technique is suitable for capturing the full body and resonance of the instrument. Experiment with different distances and angles to find the sweet spot that captures the desired tone.
2. Off-Axis Placement: Placing the microphone slightly off-axis from the sound source can help reduce harshness and minimize string and fret noise. Positioning the microphone at an angle toward the body of the guitar can add warmth and depth to the sound.
3. Stereo Techniques: Using two microphones in a stereo configuration can create a wider and more immersive sound image. Common stereo techniques include the XY technique, ORTF technique, and spaced pair technique. Stereo miking can capture the nuances and spatial characteristics of acoustic guitar in a more natural and realistic way.
4. Room Mic Placement: Placing a microphone further away from the guitar to capture the ambience and natural reverberation of the room can add depth and spaciousness to the recording. Experiment with different distances and positions to find the right balance between the direct sound and the room ambiance.
5. Blending Multiple Microphones: Combining the sound of multiple microphones can provide a more comprehensive and balanced representation of the acoustic guitar. Use different microphone types and placement techniques to capture different elements of the instrument, such as the body resonance, string definition, and room sound. Mix and blend these signals during post-production to achieve the desired sound.
Remember, there are no fixed rules when it comes to microphone placement for recording acoustic guitar. The placement should be based on the desired sound, the room acoustics, and the specific characteristics of the instrument. Take the time to experiment and listen critically to achieve the best possible sound that complements the unique qualities of your acoustic guitar.
Using a Pickup or Preamp for Acoustic Guitar Recording
In addition to using microphones, another option for recording acoustic guitar is to utilize a pickup or a preamp. These tools allow for a direct signal capture from the instrument, providing a different tonal characteristic and versatility in the recording process. Here are some considerations when using a pickup or preamp for acoustic guitar recording:
1. Pickup Types: There are several types of pickups available for acoustic guitars. The most common ones include undersaddle pickups, soundboard transducers, and magnetic pickups. Each pickup type has its own unique sound properties. Undersaddle pickups are known for their natural and balanced tone, while soundboard transducers capture the body resonance and provide a fuller sound. Magnetic pickups offer a different tonal color, adding warmth and character to the instrument. Experiment with different pickup types to find the one that complements your playing style and desired sound.
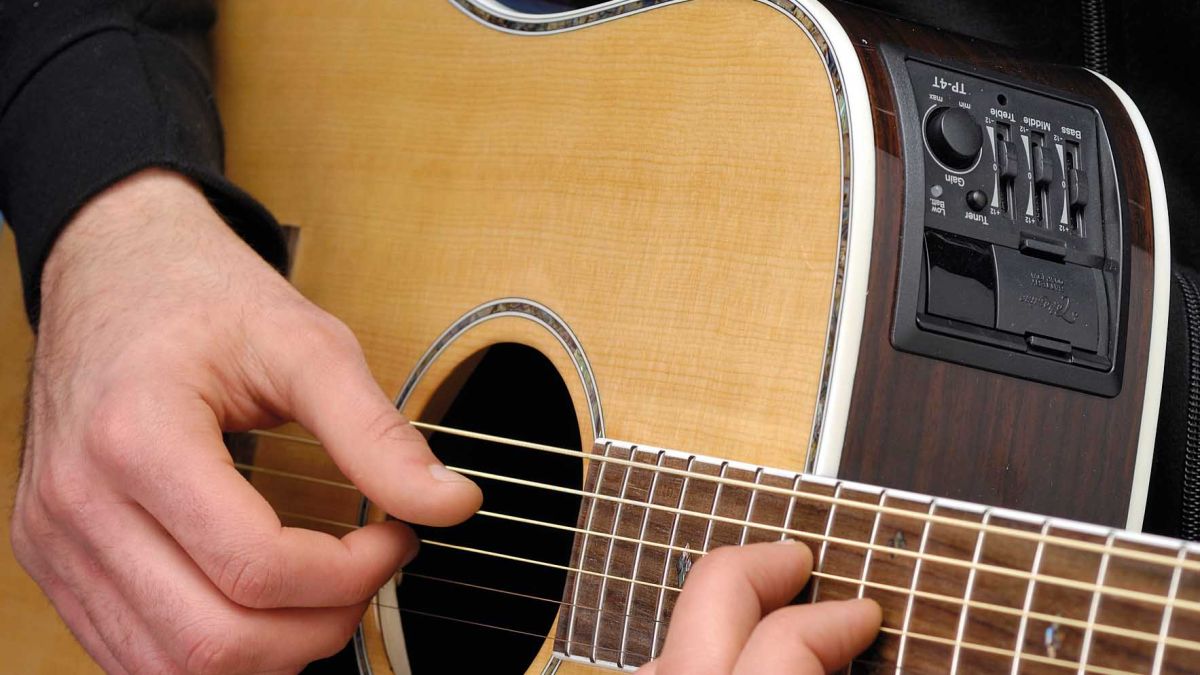
2. Preamp Functions: If you’re using an active pickup or a piezo pickup, it will require a preamp to amplify the signal and adjust the tonal characteristics. Preamps often come with EQ controls, volume control, and other tone-shaping features. Take the time to familiarize yourself with the functions of the preamp to fine-tune the sound and achieve the desired tone.
3. Blending with Microphones: Combining a pickup signal with a microphone signal can provide a more balanced and textured sound. This technique allows for more control over the recorded sound, as you can blend the direct and ambient sound sources during the mixing process. Experiment with different mic and pickup placements to find the right balance and tone.
4. DI Box: When using a pickup for recording, it is often necessary to connect the guitar’s output to an audio interface or mixer. In this case, using a DI (Direct Injection) box can help ensure a clean and balanced signal transfer. A DI box can also provide impedance matching and ground isolation for optimal signal quality.
5. Acoustic Preamp/EQ: For more advanced control over the tone and signal of your acoustic guitar, consider using an acoustic preamp or EQ pedal. These devices offer features like notch filters, EQ adjustments, and tone shaping controls to further enhance the sound of your pickup signal.
Using a pickup or preamp can provide a convenient and reliable way to capture the sound of your acoustic guitar in a recording setting. Experiment with different pickup types, preamp settings, and blending techniques to achieve the desired tone and bring out the unique characteristics of your instrument.
The Importance of Room Acoustics in Recording Acoustic Guitar
When recording acoustic guitar, the room in which you record plays a significant role in the sound quality and overall tone of the recording. The acoustics of the room can greatly enhance or detract from the natural sound of the instrument. Here are some reasons why room acoustics are important in recording acoustic guitar:
1. Reverberation: The size, shape, and construction materials of a room affect its reverberation characteristics. A room with too much reverb can result in a muddy and indistinct sound, while a room with too little can make the recording sound dry and lifeless. Finding a balance between the two is crucial to achieving a natural and pleasing sound.
2. Reflections: The surfaces in the room, such as walls, ceilings, and floors, can cause reflections that affect the tone and clarity of the recorded acoustic guitar. Proper room acoustic treatment, such as the use of diffusers and absorbers, can help control these reflections, minimizing unwanted artifacts and ensuring a more accurate representation of the instrument’s sound.
3. Room Modes: Every room has its own set of resonant frequencies, known as room modes. These modes can cause certain notes or frequencies to be emphasized or canceled out, resulting in uneven and unbalanced sound reproduction. Understanding the room modes and positioning the microphone and the guitarist accordingly can help mitigate these issues.
4. Ambience: The natural ambience of a room can contribute to the overall character and depth of the recorded acoustic guitar. A lively room with pleasing ambience can enhance the sense of space and create a more immersive listening experience. Conversely, a room with poor ambience can make the recording sound flat and uninspiring.
5. Sound Isolation: Room acoustics also play a role in isolating the recorded sound from external noises. A well-insulated room can help minimize unwanted background noise, ensuring a clean and focused recording of the acoustic guitar.
Consideration of room acoustics should be an integral part of the recording process for acoustic guitar. It is important to evaluate the acoustics of the room, make adjustments as necessary, and optimize the space to achieve the best possible sound quality. This may involve adding acoustic treatment, rearranging furniture, or even changing the recording location to a different room or even a different space altogether.
By taking the time to understand and address room acoustics, you can capture the true essence and full potential of your acoustic guitar recordings, allowing your music to resonate more effectively with listeners.
Essential Accessories for Recording Acoustic Guitar
Recording acoustic guitar requires more than just a microphone and an audio interface. There are several essential accessories that can greatly enhance the recording process and ensure optimal sound quality. Here are some accessories that you should consider when recording acoustic guitar:
1. Microphone Stand: A reliable and adjustable microphone stand is a must-have accessory. It allows you to position the microphone precisely and securely, ensuring consistent placement during recording sessions. Look for a sturdy stand with a boom arm for added flexibility.
2. Pop Filter: A pop filter is a screen that is placed in front of the microphone to reduce plosive sounds and unwanted bursts of air caused by pronouncing certain letters. It helps to achieve a cleaner and more intelligible recording, especially when capturing vocals along with the acoustic guitar.
3. Shock Mount: A shock mount is used to suspend the microphone, isolating it from vibrations and handling noise. It prevents unwanted rumbles and vibrations from being picked up by the microphone, resulting in a cleaner and more professional sound.
4. Cables: High-quality cables are essential for maintaining the integrity of the audio signal. Look for cables with good shielding and durable connectors to minimize interference and ensure reliable connections between your microphone, preamp, and audio interface.
5. Headphones: A good pair of headphones is crucial for monitoring your recordings. They allow you to hear the details and nuances of the acoustic guitar sound, ensuring accurate monitoring and making it easier to detect any potential issues or inconsistencies during the recording process.
6. Direct Box (DI Box): If you’re using a pickup for recording acoustic guitar, a DI box can be a valuable accessory. It converts the unbalanced high-impedance signal from the pickup to a balanced low-impedance signal, making it compatible with audio interfaces and mixers. A DI box also helps to eliminate ground loop noise and provides a cleaner signal for recording.
7. Acoustic Treatment: Proper acoustic treatment in your recording space can significantly improve the sound quality of your recordings. Acoustic panels, bass traps, and diffusers can help control reflections, absorb unwanted frequencies, and provide a more balanced and controlled acoustic environment for recording.
8. Monitor Speakers: While headphones are essential for close monitoring, having a pair of quality monitor speakers allows you to hear your recordings in a different context. They provide a more accurate representation of the final mix, allowing you to make more informed decisions during the recording and mixing process.
Investing in these essential accessories not only improves the quality of your acoustic guitar recordings but also enhances your overall recording experience. They provide the necessary tools for accurate monitoring, effective isolation, and optimal signal flow, resulting in professional and polished recordings.
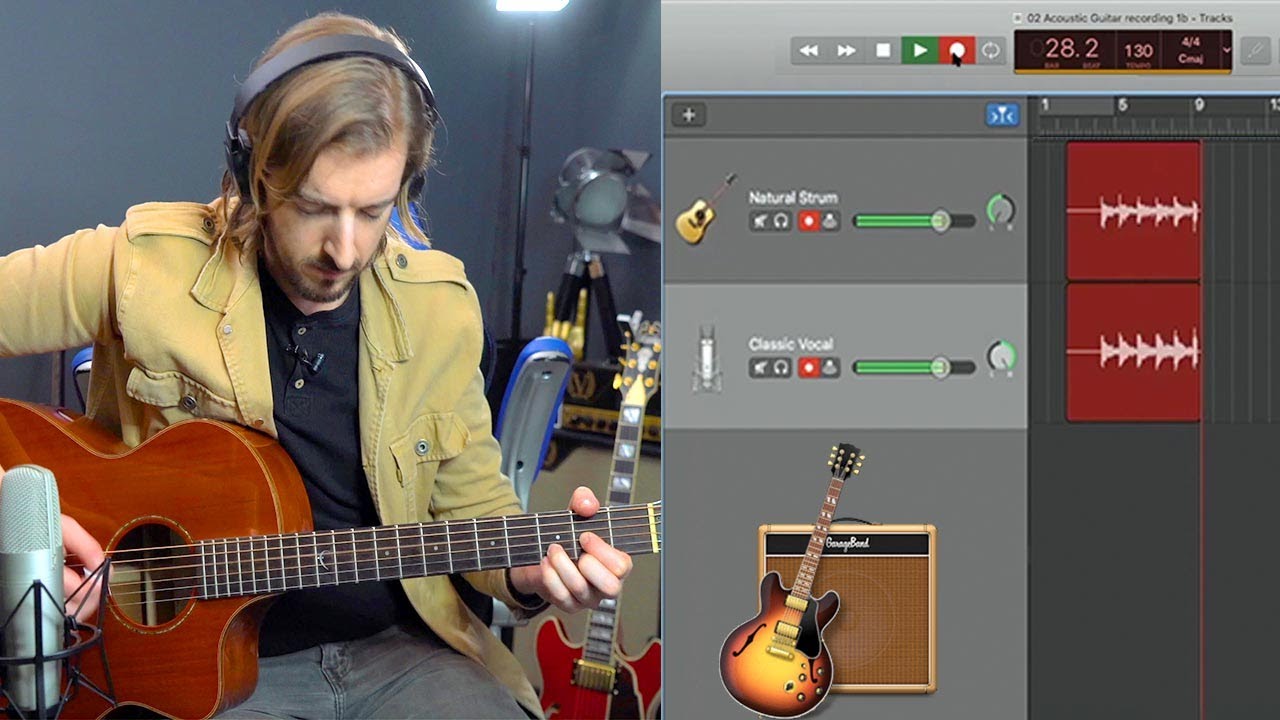
Recording Software and Setup for Acoustic Guitar
When it comes to recording acoustic guitar, having the right recording software and setup can make a significant difference in capturing and producing high-quality recordings. Here are some important considerations for recording software and setup:
1. Recording Software: Choosing the right recording software is essential. There are many options available, ranging from simple and user-friendly programs to professional-grade digital audio workstations (DAWs). Look for software that offers the necessary features for recording, editing, and mixing, as well as compatibility with your operating system and audio interface.
2. Audio Interface: An audio interface is a crucial component of your recording setup. It connects your acoustic guitar and microphone to your computer, converting analog signals into digital data. Invest in a quality audio interface with good preamps and sufficient inputs and outputs to accommodate your recording needs.
3. Microphone Selection: Choose the microphone(s) that best suit your acoustic guitar and recording goals. Consider the sound characteristics you want to capture and the microphone’s frequency response. Test and experiment with different microphones to find the one that provides the desired tone and captures the nuances of your acoustic guitar.
4. Signal Chain and Routing: Establishing a clean signal chain and proper routing is important for achieving excellent recording results. Connect your microphone or pickup to the audio interface using high-quality cables. Ensure that your levels are properly set and adjust the gain on your audio interface to avoid clipping and distortion.
5. Monitor Setup: Set up your monitors or headphones properly in your recording environment. Position them at ear level and create an equilateral triangle between yourself and the two speakers. This ensures accurate stereo imaging and allows you to monitor your recordings more effectively.
6. Monitoring and Playback: Use headphones or monitor speakers to critically listen and monitor your recordings. This helps you assess the quality of your recordings, identify any issues or inconsistencies, and make adjustments as necessary. Regularly check your recordings by listening back on different audio devices to ensure a well-balanced and accurate sound.
7. Take Advantage of Software Tools: Recording software offers a range of tools and effects to enhance your acoustic guitar recordings. Experiment with features such as EQ, compression, reverb, and delay to enhance the tone and add depth to your recordings. However, use these tools judiciously, aiming to enhance the natural sound rather than to mask any recording imperfections.
Remember, the recording software and setup should work together seamlessly to capture the true essence of your acoustic guitar. Take the time to configure and optimize your recording environment, familiarize yourself with the software features, and experiment with different settings to achieve the best possible sound quality in your recordings.
Tips for Getting the Best Sound from Your Acoustic Guitar Recording
Recording acoustic guitar can be a rewarding experience when you achieve a beautiful and natural sound. Here are some tips to help you get the best sound from your acoustic guitar recording:
1. Choose the Right Room: Select a recording space that has a pleasing acoustic environment. Avoid rooms with excessive reverb or echo that can muddy your recording. Alternatively, consider using acoustic treatment to improve the sound quality in your recording space.
2. Experiment with Microphone Placement: Try different microphone placement techniques to find the sweet spot that captures the desired tone of your acoustic guitar. Move the microphone closer or further away, change the angle, and experiment with placement around the soundhole, the 12th fret, or a combination of both.
3. Pay Attention to the Room Ambience: Consider the natural ambience of your recording space. If the room has a pleasant sound, experiment with microphone placement to capture the room’s natural reverberation and ambience. This can add depth and character to your recordings.
4. Use Multiple Microphones: Experiment with using multiple microphones to capture different aspects of your acoustic guitar. Combining a close mic with a room mic can provide a wider and more immersive sound. Blend the signals during mixing to achieve the desired balance between direct sound and room ambience.
5. Take Care of String Noise: Acoustic guitars can produce unwanted noise from sliding fingers, fret squeaks, and string buzz. To minimize these noises, pay attention to your playing technique and consider using lighter touch and smoother movements. It can also be helpful to position the microphone strategically to avoid capturing excessive string noise.
6. Consider Using a Preamp: Adding a preamp to your signal chain can help enhance the sound of your acoustic guitar recording. A preamp can add warmth, depth, and clarity to the signal, bringing out the natural beauty of your instrument.
7. Experiment with Different Picks and Fingerpicking Styles: The choice of pick and playing technique can significantly affect the tone of your acoustic guitar. Experiment with different picks and try various fingerpicking styles to achieve the desired sound and texture in your recording.
8. Record in a Controlled Environment: Minimize background noise and distractions by recording in a quiet environment. Close windows, turn off fans or air conditioners, and inform others in the vicinity to avoid unnecessary noise interference during your recording session.
9. Keep an Eye on Recording Levels: Monitoring and managing recording levels is important to avoid clipping and distortion. Ensure that the input levels are set properly, giving enough headroom for dynamics while avoiding excessive peaks.
10. Take Your Time and Experiment: Don’t be afraid to experiment and take your time to find the sound that best reflects your acoustic guitar playing style. Try different techniques, microphone placements, and equipment configurations to discover the unique sound that captures the essence of your performance.
By following these tips and experimenting with different approaches, you can achieve the best possible sound in your acoustic guitar recordings. Remember to trust your ears, be patient, and enjoy the process of recording the natural beauty of your instrument.
Post-production Techniques for Acoustic Guitar Recording
Post-production is a crucial step in the recording process that allows you to refine and enhance the sound of your acoustic guitar recordings. Here are some post-production techniques to consider:
1. Editing: Use editing software to clean up any unwanted noises or mistakes in your recording. Trim any unnecessary gaps, remove background noise, and edit out any clicks, pops, or extraneous sounds. This will ensure a polished and professional final product.
2. EQ: Equalization (EQ) is a powerful tool for shaping the tonal balance of your acoustic guitar recording. Use EQ to enhance the desired frequencies and reduce any unwanted resonances or harshness. Experiment with gentle boosts or cuts to find the sweet spot that brings out the best qualities of your acoustic guitar.
3. Compression: Applying compression can help control the dynamic range of your acoustic guitar recording, ensuring a more consistent and balanced sound. Use compression to tame any peaks and add sustain, or add subtle compression to even out the overall performance. Be mindful not to overcompress, as it may result in a loss of natural dynamics.
4. Reverb and Ambience: Adding a touch of reverb or ambience can give your acoustic guitar recording a sense of space and depth. Experiment with different reverb settings to find the right amount and decay time that enhances the natural sound of your acoustic guitar without overwhelming it.
5. Stereo Imaging: If you have recorded your acoustic guitar with multiple microphones, consider panning them to create a wider stereo image. This adds spatial dimension and a more immersive listening experience. Be mindful of maintaining a balanced and coherent sound by adjusting the pan positions accordingly.
6. Effects and Creative Processing: Depending on the style of your music, you may want to experiment with additional effects and creative processing to add character and enhance the sound of your acoustic guitar. This could include using chorus, delay, modulation, or other effects to create unique textures and tones.
7. Volume and Automation: Use volume automation to adjust the levels of different sections or parts of your acoustic guitar recording. This can help highlight certain passages, control dynamics, and ensure a balanced mix. Pay attention to transitions between sections to maintain a smooth and natural sound.
8. Stereo Enhancement: Consider using stereo enhancement techniques to widen the stereo field of your acoustic guitar recording. This can be achieved through techniques such as stereo spreaders, stereo wideners, or doubling tracks to create a more spacious and immersive sound.
9. Mastering: Lastly, apply mastering techniques to finalize and prepare your acoustic guitar recording for distribution. This may involve adjusting the overall EQ, compression, and volume levels to ensure consistency across different playback systems and platforms.
Remember, the goal of post-production is to enhance the natural sound of your acoustic guitar recording while maintaining its authenticity. It’s important to approach each step of the process with intention and a critical ear, making subtle adjustments that bring out the best qualities of your acoustic guitar performance.
Troubleshooting Common Issues in Acoustic Guitar Recording
While recording acoustic guitar can result in beautiful and natural sound, it can sometimes present challenges that need to be addressed. Here are some common issues that you may encounter during acoustic guitar recording and how to troubleshoot them:
1. Background Noise: Your recording may be plagued by unwanted background noise such as electronic interference or room ambience. To reduce background noise, make sure you are recording in a quiet environment, away from sources of interference. Consider using noise reduction plugins or applying noise gates during the post-production process to mitigate any persistent noise.
2. String Buzz and Fret Noise: Acoustic guitars can produce string buzz and fret noise, especially when playing with more aggressive techniques. To minimize these issues, focus on technique and try adjusting your playing position or finger placement. If the issue persists, experiment with different microphone placements and angles to capture a more balanced sound with reduced emphasis on fret noise.
3. Imbalanced Frequencies: Your recording may exhibit imbalanced frequencies, with some frequencies overpowering others. This can result in a tonally uneven sound. Address this issue by utilizing equalization (EQ) during the post-production stage. Identify the frequencies that require adjustment and use EQ to boost or cut specific ranges to achieve a more balanced and even sound.
4. Excessive Resonance or Muddiness: If your recording sounds muddy or exhibits excessive resonances, it may be due to unfavorable room acoustics. Consider using acoustic treatment techniques such as adding absorptive materials or diffusers to improve the sound quality in your recording space. Additionally, experiment with microphone placement to find the position that minimizes these unwanted resonances.
5. Overwhelming Low-End or Boomy Sound: A recording with too much low-end can result in a loss of clarity and definition. To address this issue, consider adjusting the microphone placement or using a high-pass filter during post-production to reduce excessive low frequencies. The goal is to maintain a balanced and well-defined low-end that supports the overall tonal balance of the acoustic guitar recording.
6. Inconsistent Levels: Inconsistent levels during recording can lead to variations in volume between different sections or parts of your acoustic guitar performance. To address this, pay careful attention to your playing dynamics and microphone positioning. During post-production, use volume automation or compression to even out the levels and achieve a more balanced and consistent recording.
7. Lack of Depth and Space: Your recording may sound flat or lacking in depth and space. This could be a result of improper microphone placement or room acoustics. Try experimenting with different microphone techniques like stereo miking or using room ambience during the recording phase. During post-production, apply reverb or other spatial effects to create a sense of depth and space in your mix.
By understanding and addressing these common issues, you can troubleshoot and improve the quality of your acoustic guitar recordings. Remember to approach each issue with patience and experimentation, utilizing techniques and tools available during both the recording and post-production stages to achieve the best possible sound from your acoustic guitar.