Introduction
Resetting your Samsung S20 Ultra can be a useful solution for various issues, such as sluggish performance, app malfunctions, or persistent software glitches. It's akin to giving your device a fresh start, often resolving problems that may have arisen over time. However, it's crucial to approach this process with caution, as it will erase all data and settings on your device. Therefore, it's essential to back up your data before proceeding with the reset.
In this comprehensive guide, we will walk you through the step-by-step process of resetting your Samsung S20 Ultra. Whether you're experiencing persistent software issues or simply want to restore your device to its original state, this guide will provide you with the necessary instructions to carry out the reset effectively.
By following the outlined steps, you can ensure that your personal data is safeguarded and that the reset process is executed smoothly. After the reset, you'll be able to set up your device again, restoring it to a state where you can enjoy optimal performance and functionality.
So, if you're ready to embark on this journey to rejuvenate your Samsung S20 Ultra, let's dive into the step-by-step guide for resetting your device. Remember, taking the time to back up your data and follow the instructions diligently will help you navigate this process with confidence and peace of mind.
Step 1: Back Up Your Data
Before initiating the reset process on your Samsung S20 Ultra, it's crucial to safeguard your personal data by creating a comprehensive backup. This step ensures that your photos, videos, contacts, messages, and other essential information are preserved and can be restored after the reset. Here's a detailed guide on how to back up your data effectively:
1.1. Utilize Samsung Cloud
Samsung provides a convenient and secure cloud storage solution, known as Samsung Cloud, which enables users to back up their data seamlessly. To utilize this feature, follow these steps:
- Open the Settings app on your Samsung S20 Ultra.
- Scroll down and tap on "Accounts and backup."
- Select "Samsung Cloud" and sign in with your Samsung account.
- Once signed in, navigate to the "Backup and restore" section.
- Choose the data types you wish to back up, such as contacts, photos, videos, and documents.
- Tap "Back up now" to initiate the backup process.
1.2. Use Google Account
In addition to Samsung Cloud, you can leverage your Google account to back up essential data, including contacts, calendar events, photos, and more. Here's how to back up your data using your Google account:
- Access the Settings app on your Samsung S20 Ultra.
- Scroll down and tap on "Accounts and backup."
- Select "Backup and restore" and ensure that the "Back up my data" option is enabled.
- Tap on "Google Account" and sign in with your Google credentials.
- Once signed in, you can choose the data types to back up, such as app data, call history, device settings, and more.
1.3. Transfer Media to External Storage
To ensure the safety of your media files, such as photos, videos, and music, consider transferring them to an external storage device, such as a microSD card or a computer. This additional step provides an extra layer of protection for your media, allowing you to easily transfer them back to your device after the reset.
By diligently backing up your data using the aforementioned methods, you can proceed with the reset process confidently, knowing that your valuable information is securely preserved. Taking the time to back up your data ensures that you can seamlessly restore your device to its previous state, minimizing the risk of data loss during the reset process.
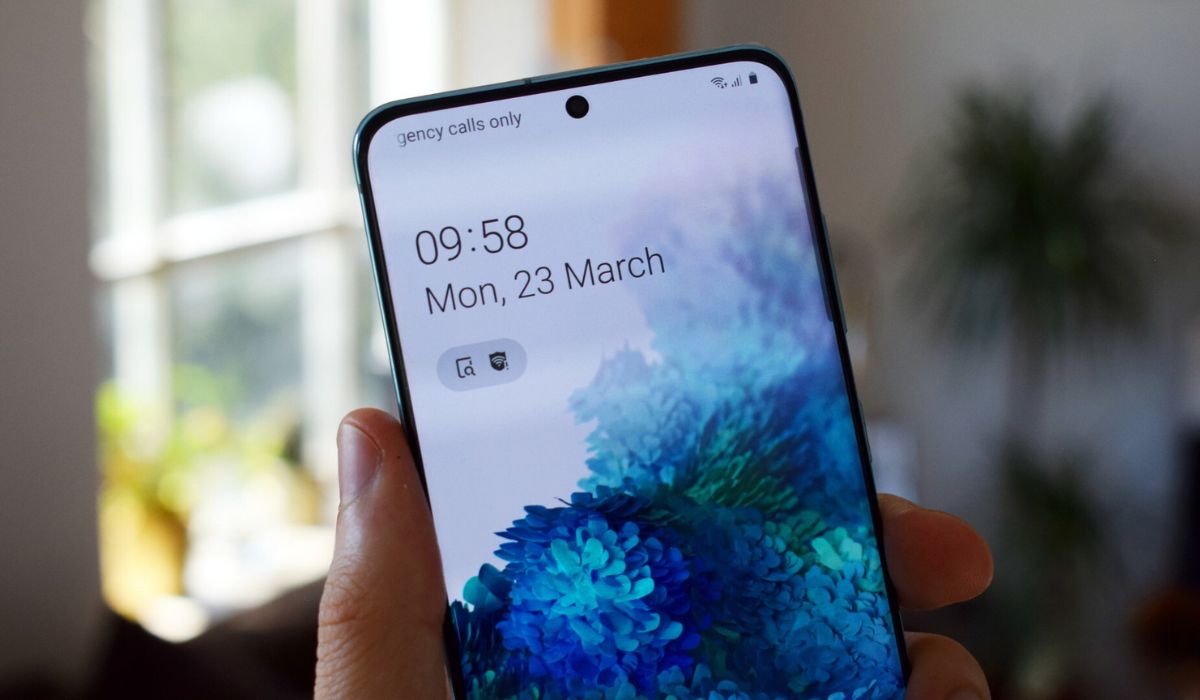
Step 2: Accessing the Settings Menu
Accessing the Settings menu on your Samsung S20 Ultra is the pivotal starting point for initiating the reset process. This menu serves as the control center for various device settings, allowing you to customize and manage your device's configurations. Here's a detailed walkthrough on how to access the Settings menu with ease.
-
Navigate to the Home Screen: If you're not already on the Home screen, press the Home button or swipe up from the bottom of the screen to access it.
-
Open the Settings App: Look for the gear-shaped Settings icon on your Home screen or in the app drawer. Tap on the icon to launch the Settings app.
-
Scroll Through the Settings: Once inside the Settings app, you'll be greeted with a plethora of options and configurations. You can scroll through the various categories, such as Connections, Display, Sounds and vibration, and more, to explore the settings available for customization.
-
Access Additional Settings: To delve deeper into specific settings, tap on the desired category. For instance, if you wish to adjust display settings, tap on the "Display" category to access options related to brightness, screen resolution, and more.
-
Locate the General Management Section: In the Settings menu, navigate to the "General management" category, which houses essential device management options.
-
Select Reset: Within the "General management" section, locate and tap on the "Reset" option. This is where you'll find the necessary settings to initiate the factory data reset process.
By following these steps, you can effortlessly access the Settings menu on your Samsung S20 Ultra, setting the stage for the subsequent steps involved in the reset process. Navigating the Settings menu empowers you to take control of your device's configurations and perform essential tasks, such as the factory data reset, with confidence and ease.
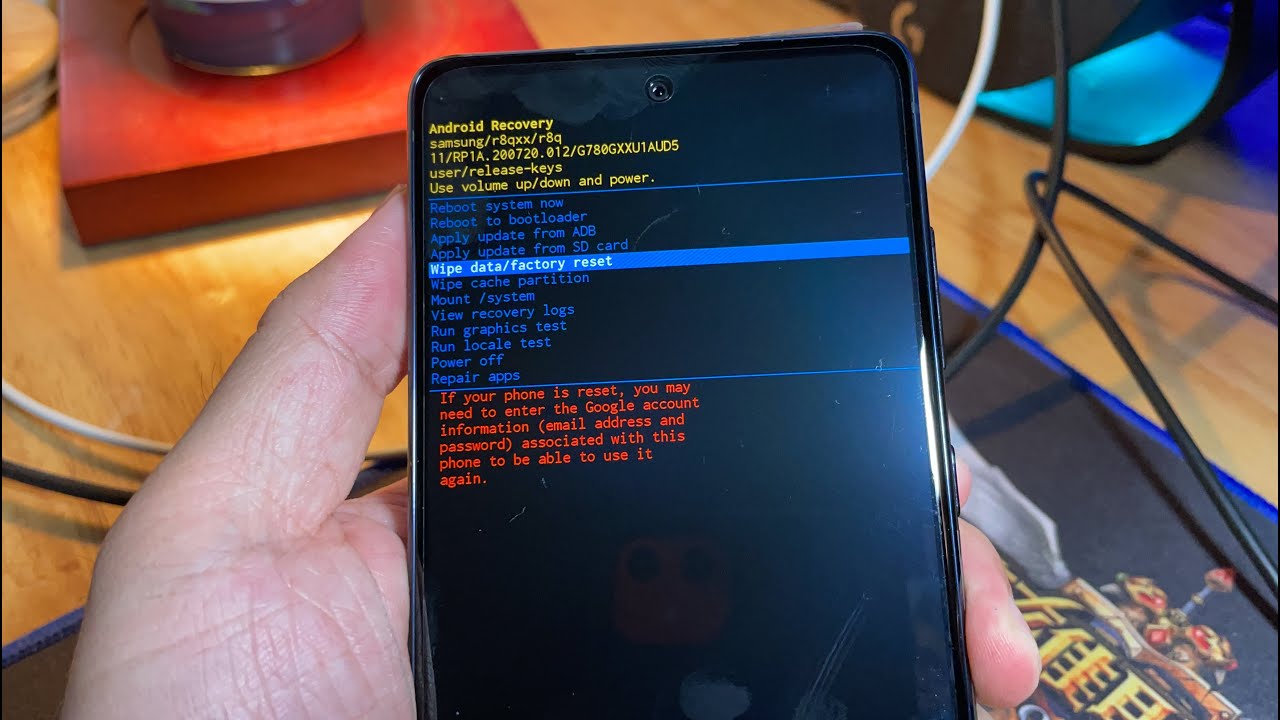
Step 3: Factory Data Reset
The factory data reset is a pivotal step in the process of rejuvenating your Samsung S20 Ultra. This procedure effectively wipes all data and settings from your device, restoring it to its original factory state. It's essential to approach this step with caution, as it irreversibly erases all personal data, including apps, contacts, photos, and customized settings. Here's a detailed guide on how to execute the factory data reset on your Samsung S20 Ultra:
-
Initiate the Reset Process: Within the "Reset" section of the Settings menu, you'll find the option to perform a factory data reset. Tap on "Factory data reset" to proceed with this crucial step.
-
Review the Consequences: Before proceeding, the device will provide a comprehensive overview of the data that will be erased during the reset. It's imperative to carefully review this information to ensure that you're fully aware of the implications of the reset.
-
Backup Reminder: At this stage, the device will prompt you to ensure that you've backed up your essential data. This serves as a final reminder to safeguard your personal information before proceeding with the reset.
-
Initiate the Reset: Once you've acknowledged the consequences and ensured that your data is backed up, you can proceed with the factory data reset. The device will request your security credentials, such as your PIN, pattern, or password, to authenticate the reset process.
-
Confirmation: After entering your security credentials, the device will require your confirmation to proceed with the reset. This serves as a final checkpoint to prevent accidental initiation of the reset process.
-
Executing the Reset: Upon confirming the reset, the device will commence the process of erasing all data and settings. This may take a few minutes to complete, during which the device will display a progress indicator.
-
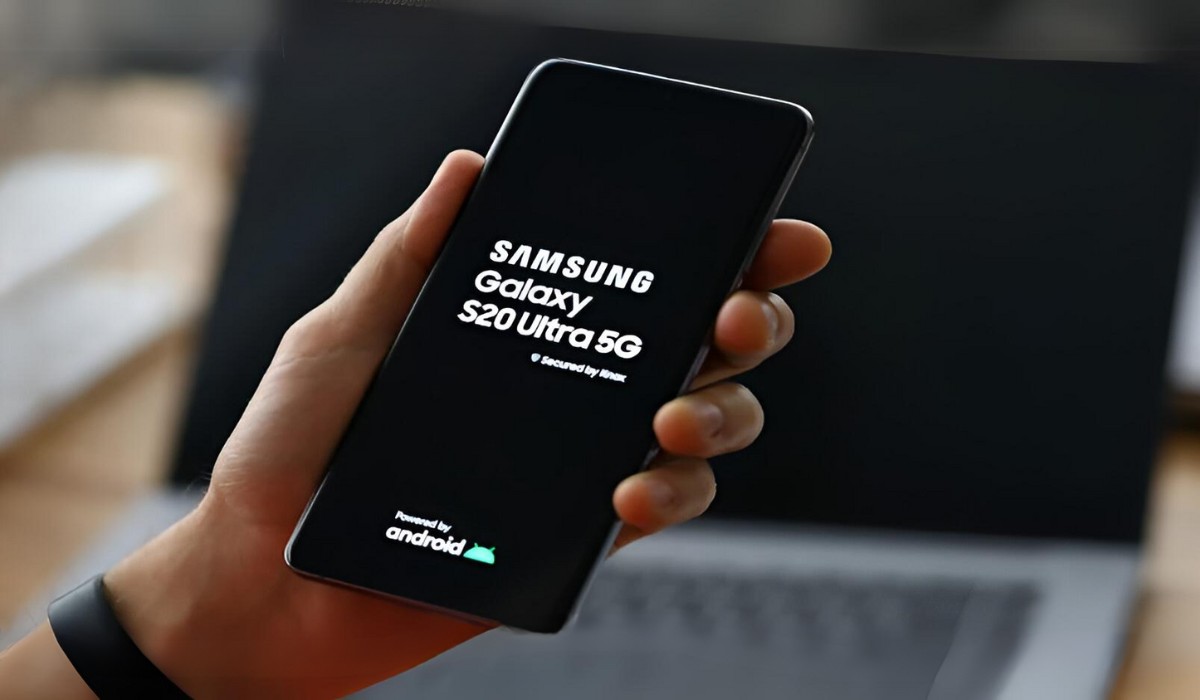
Completion: Once the factory data reset is finalized, your Samsung S20 Ultra will reboot, signaling the successful completion of the reset process. The device will be restored to its original factory state, devoid of any personal data or customizations.
By meticulously following these steps, you can effectively execute the factory data reset on your Samsung S20 Ultra. It's crucial to approach this process with care and attention to detail, ensuring that you're fully prepared for the consequences of the reset. With the factory data reset completed, your device will be primed for a fresh start, free from the software issues that may have previously hindered its performance.
Step 4: Confirming the Reset
After initiating the factory data reset on your Samsung S20 Ultra, the confirmation stage serves as a crucial checkpoint to ensure that the reset is deliberate and intentional. This step is designed to prevent accidental initiation of the reset process, providing users with a final opportunity to confirm their decision before the irreversible erasure of data and settings takes place.
Upon reaching the confirmation stage, the device will prompt you to verify your intent to proceed with the reset. This serves as a safeguard against unintended actions, ensuring that the reset is carried out with full awareness of its consequences. The confirmation dialogue typically includes a detailed overview of the data and settings that will be erased during the reset, reiterating the impact of the process on the device's state.
At this juncture, it's essential to carefully review the information presented in the confirmation dialogue. By thoroughly assessing the implications of the reset, users can reaffirm their decision with confidence, knowing that they are fully informed about the consequences of the reset. This deliberate approach underscores the importance of user consent in executing the factory data reset, aligning with the principles of data privacy and security.
Once you've reviewed the confirmation details and reaffirmed your decision to proceed with the reset, the device will prompt you to enter your security credentials, such as your PIN, pattern, or password. This additional authentication step adds an extra layer of security, ensuring that only authorized users can initiate the reset process. By requiring user authentication at this stage, the device upholds the integrity of the reset procedure, mitigating the risk of unauthorized or accidental resets.
Upon entering the required security credentials, the device will prompt you to confirm your intent once again. This dual confirmation mechanism reinforces the deliberate nature of the reset process, emphasizing the significance of user consent and awareness. By acknowledging the confirmation prompts and providing the necessary authentication, users can proceed with the reset confidently, knowing that their decision is deliberate and well-informed.
By meticulously adhering to the confirmation process, users can ensure that the factory data reset is executed intentionally and securely. This deliberate approach underscores the gravity of the reset process, emphasizing the importance of user consent and awareness at every stage. With the confirmation completed, the reset process moves forward, culminating in the restoration of the Samsung S20 Ultra to its original factory state.
Step 5: Setting Up Your Device Again
After successfully completing the factory data reset on your Samsung S20 Ultra, the subsequent step involves setting up your device again to restore its functionality and personalize its configurations. This pivotal phase allows you to reconfigure your device according to your preferences, reinstall essential apps, and restore backed-up data, ensuring a seamless transition to a rejuvenated device.
Here's a comprehensive guide on how to set up your Samsung S20 Ultra after the factory data reset:
5.1. Language and Region Selection
Upon rebooting your device, you'll be prompted to select your preferred language and region. This initial step sets the foundation for the device's localization and language settings, ensuring that the user interface is tailored to your linguistic and regional preferences.
5.2. Wi-Fi and Network Configuration
To enable essential connectivity features, such as internet access and network services, you'll need to connect your device to a Wi-Fi network or configure mobile data settings. This step ensures that your device is equipped with the necessary connectivity to proceed with the setup process.
5.3. Google Account Sign-In
Signing in with your Google account is integral to accessing a myriad of services, such as Gmail, Google Drive, and the Play Store. By entering your Google credentials, you can seamlessly integrate your account with the device, enabling synchronization of essential data and access to a wide array of Google services.
5.4. Restoring Backed-Up Data
If you backed up your data using Samsung Cloud or your Google account, you can initiate the restoration process at this stage. By selecting the backup source and specifying the data types to restore, you can seamlessly retrieve your contacts, photos, app data, and more, ensuring that your device reflects your personalized data and settings.
5.5. App Installation and Customization
Reinstalling essential apps and customizing their settings is a pivotal aspect of setting up your device again. By accessing the Play Store, you can download and install your preferred apps, adjusting their configurations to align with your usage patterns and preferences.
5.6. Security and Privacy Settings
Configuring security features, such as screen lock options, biometric authentication, and privacy settings, is crucial to safeguarding your device and personal data. By customizing these settings, you can enhance the security and privacy of your device, ensuring a secure and personalized user experience.
5.7. Personalization and Customization
Customizing the device's interface, including wallpapers, themes, and display settings, allows you to personalize your device according to your aesthetic preferences. This step adds a touch of individuality to your device, creating a tailored user experience that resonates with your style.
By meticulously following these steps, you can effectively set up your Samsung S20 Ultra after the factory data reset, ensuring that your device is restored to a state where you can enjoy optimal performance, personalized configurations, and seamless connectivity. This comprehensive setup process empowers you to tailor your device according to your preferences, creating a user experience that aligns with your individual needs and usage patterns.
Conclusion
In conclusion, the process of resetting your Samsung S20 Ultra is a transformative journey that empowers you to rejuvenate your device, address persistent software issues, and restore it to its original factory state. By following the step-by-step guide outlined in this comprehensive walkthrough, you've gained the knowledge and confidence to navigate the reset process with diligence and precision.
The pivotal first step of backing up your data serves as a safeguard, ensuring that your valuable photos, contacts, messages, and other essential information are securely preserved before initiating the reset. Leveraging Samsung Cloud, your Google account, and external storage options provides a comprehensive backup strategy, allowing you to seamlessly restore your data after the reset.
Accessing the Settings menu on your Samsung S20 Ultra empowers you to take control of your device's configurations and prepare for the subsequent steps involved in the reset process. Navigating the Settings menu with ease sets the stage for executing the factory data reset with confidence and precision.
The factory data reset itself is a critical phase that requires careful consideration and deliberate action. By meticulously reviewing the consequences, ensuring that your data is backed up, and proceeding with caution, you can execute the reset with full awareness of its implications. The confirmation stage serves as a pivotal checkpoint, emphasizing the importance of user consent and deliberate intent throughout the reset process.
After successfully completing the factory data reset, setting up your device again allows you to restore its functionality, personalize its configurations, and seamlessly transition to a rejuvenated device. From language and region selection to app installation and customization, this phase empowers you to tailor your device according to your preferences, creating a user experience that resonates with your individual needs.
By embracing this transformative process, you've embarked on a journey to revitalize your Samsung S20 Ultra, ensuring that it operates at its full potential and delivers a seamless user experience. The knowledge and insights gained from this guide equip you with the tools to navigate the reset process with confidence, ensuring that your device is primed for optimal performance and personalized functionality.
As you embark on this journey of device rejuvenation, remember that the careful execution of each step ensures a smooth and successful reset, culminating in a device that reflects your preferences and operates at its peak. With your Samsung S20 Ultra reset and reinvigorated, you can look forward to a seamless user experience and optimal performance, free from the software issues that may have previously hindered its functionality.