Introduction
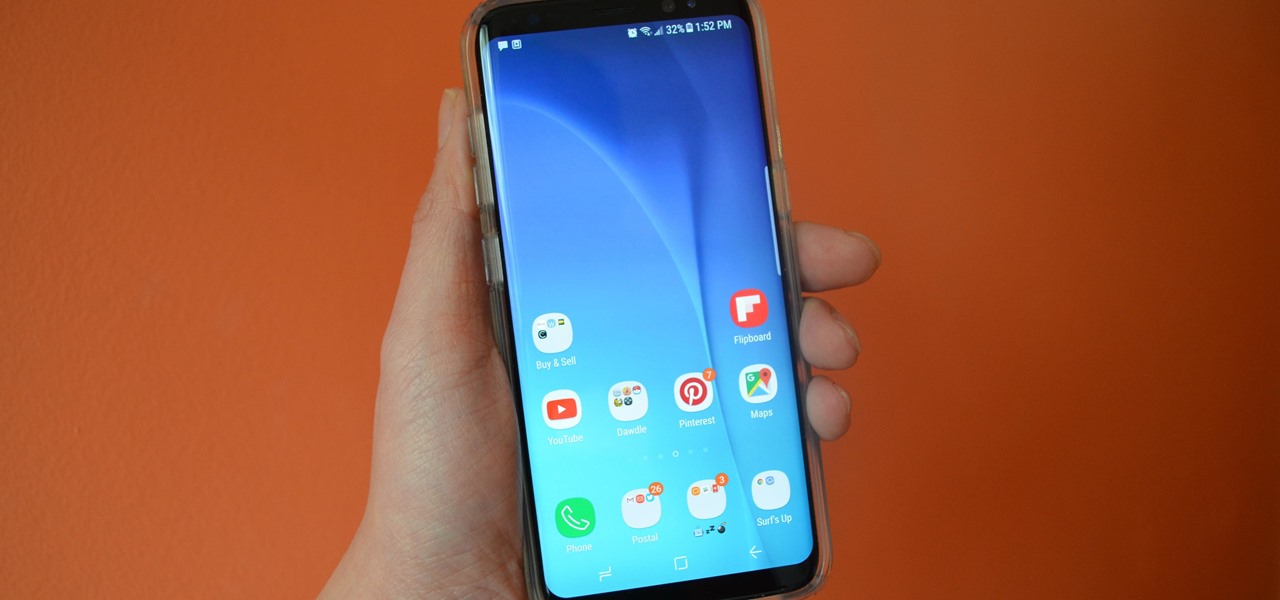
Installing a SIM card in a Samsung Galaxy S8 Plus is a fundamental step in setting up the device for use. The SIM card, short for Subscriber Identity Module, is essential for connecting to a mobile network, enabling users to make calls, send text messages, and access mobile data. Whether you're setting up a new Galaxy S8 Plus or replacing an existing SIM card, understanding the process is crucial.
In this comprehensive guide, we will walk you through the step-by-step process of installing a SIM card in your Galaxy S8 Plus. By following these instructions, you'll be able to seamlessly integrate the SIM card into your device, ensuring that it functions optimally and connects to your preferred mobile network.
The Galaxy S8 Plus, with its sleek design and advanced features, has garnered widespread acclaim among smartphone users. However, despite its cutting-edge technology, the process of installing a SIM card remains a basic yet critical aspect of utilizing the device to its full potential. With this guide, you'll gain the knowledge and confidence to navigate this essential step with ease.
As we embark on this tutorial, it's important to note that the SIM card installation process may vary slightly depending on the specific model of the Galaxy S8 Plus. Therefore, it's advisable to refer to the user manual accompanying your device for any model-specific instructions. Additionally, ensure that you have a compatible SIM card from your mobile service provider to complete the installation successfully.
Now, let's dive into the step-by-step process of installing a SIM card in your Galaxy S8 Plus, ensuring that you can seamlessly integrate the card and begin enjoying the full functionality of your device.
Step 1: Gather the necessary tools
Before embarking on the process of installing a SIM card in your Galaxy S8 Plus, it's essential to gather the necessary tools to ensure a smooth and successful installation. Here are the items you'll need:
-
SIM Card Removal Tool or Paperclip: The Galaxy S8 Plus features a SIM card tray that requires a specialized tool or a paperclip to access. This tool is crucial for ejecting the SIM card tray and accessing the slot where the SIM card will be inserted.
-
Compatible SIM Card: Ensure that you have a compatible SIM card provided by your mobile service provider. The SIM card is a small, rectangular card that contains your unique subscriber information and is essential for connecting to the mobile network.
-
User Manual: While not a physical tool, having the user manual for your Galaxy S8 Plus at hand can provide valuable guidance and reference throughout the installation process. The user manual contains specific instructions and illustrations related to SIM card installation, tailored to your device model.
By gathering these essential tools and resources, you'll be fully equipped to proceed with the subsequent steps of installing the SIM card in your Galaxy S8 Plus. This preparation ensures that you can navigate the installation process with confidence and precision, setting the stage for seamless integration of the SIM card into your device.
With the necessary tools at your disposal, you're ready to move on to the next step of the installation process, where you'll locate the SIM card tray on your Galaxy S8 Plus. This foundational preparation sets the stage for a successful SIM card installation, allowing you to harness the full functionality of your device and connect to your preferred mobile network seamlessly.
Step 2: Locate the SIM card tray
Locating the SIM card tray is a crucial step in the process of installing a SIM card in your Galaxy S8 Plus. The SIM card tray houses the slot where the SIM card will be inserted, and it's essential to identify its precise location on the device. Here's a detailed guide to help you locate the SIM card tray with ease.
-
Turn Off the Device: Before proceeding, ensure that your Galaxy S8 Plus is powered off. This precautionary step is important to prevent any potential disruption during the SIM card installation process.
-
Identify the SIM Card Tray Slot: The SIM card tray slot is typically located on the upper edge of the device. Look for a small pinhole or a narrow slot that indicates the presence of the SIM card tray. On the Galaxy S8 Plus, the SIM card tray is positioned adjacent to the top microphone.
-
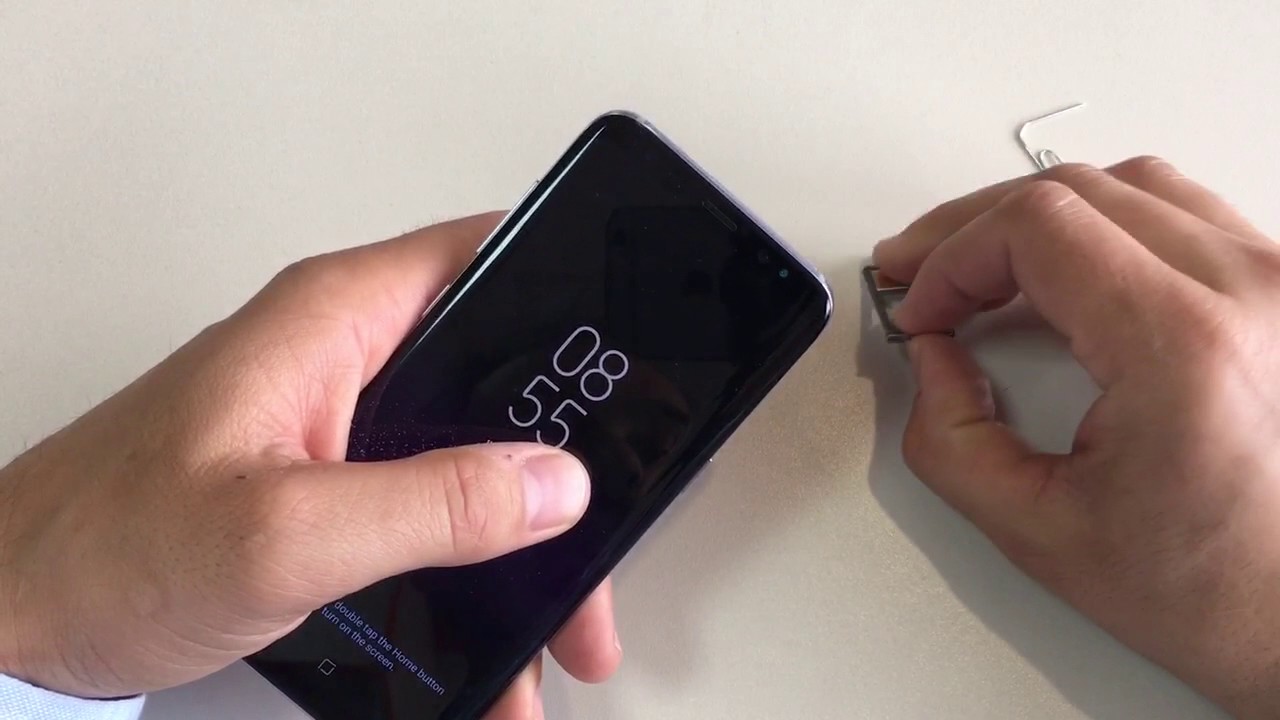
Use the SIM Card Removal Tool: Once you've identified the location of the SIM card tray, it's time to use the SIM card removal tool or a paperclip to access the tray. Insert the removal tool into the provided pinhole or slot and apply gentle pressure to release the SIM card tray.
-
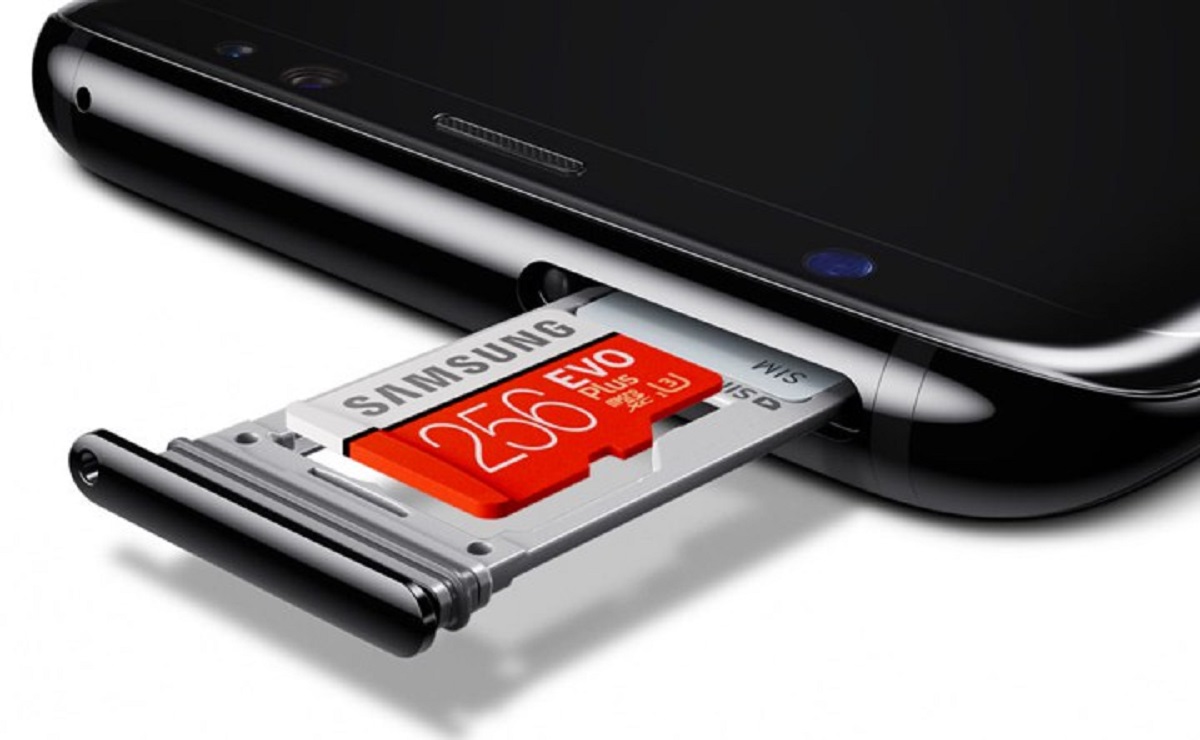
Eject the SIM Card Tray: Upon inserting the removal tool, you'll feel a slight resistance as the SIM card tray is ejected from the device. Carefully pull out the tray, ensuring that you handle it with care to avoid any damage.
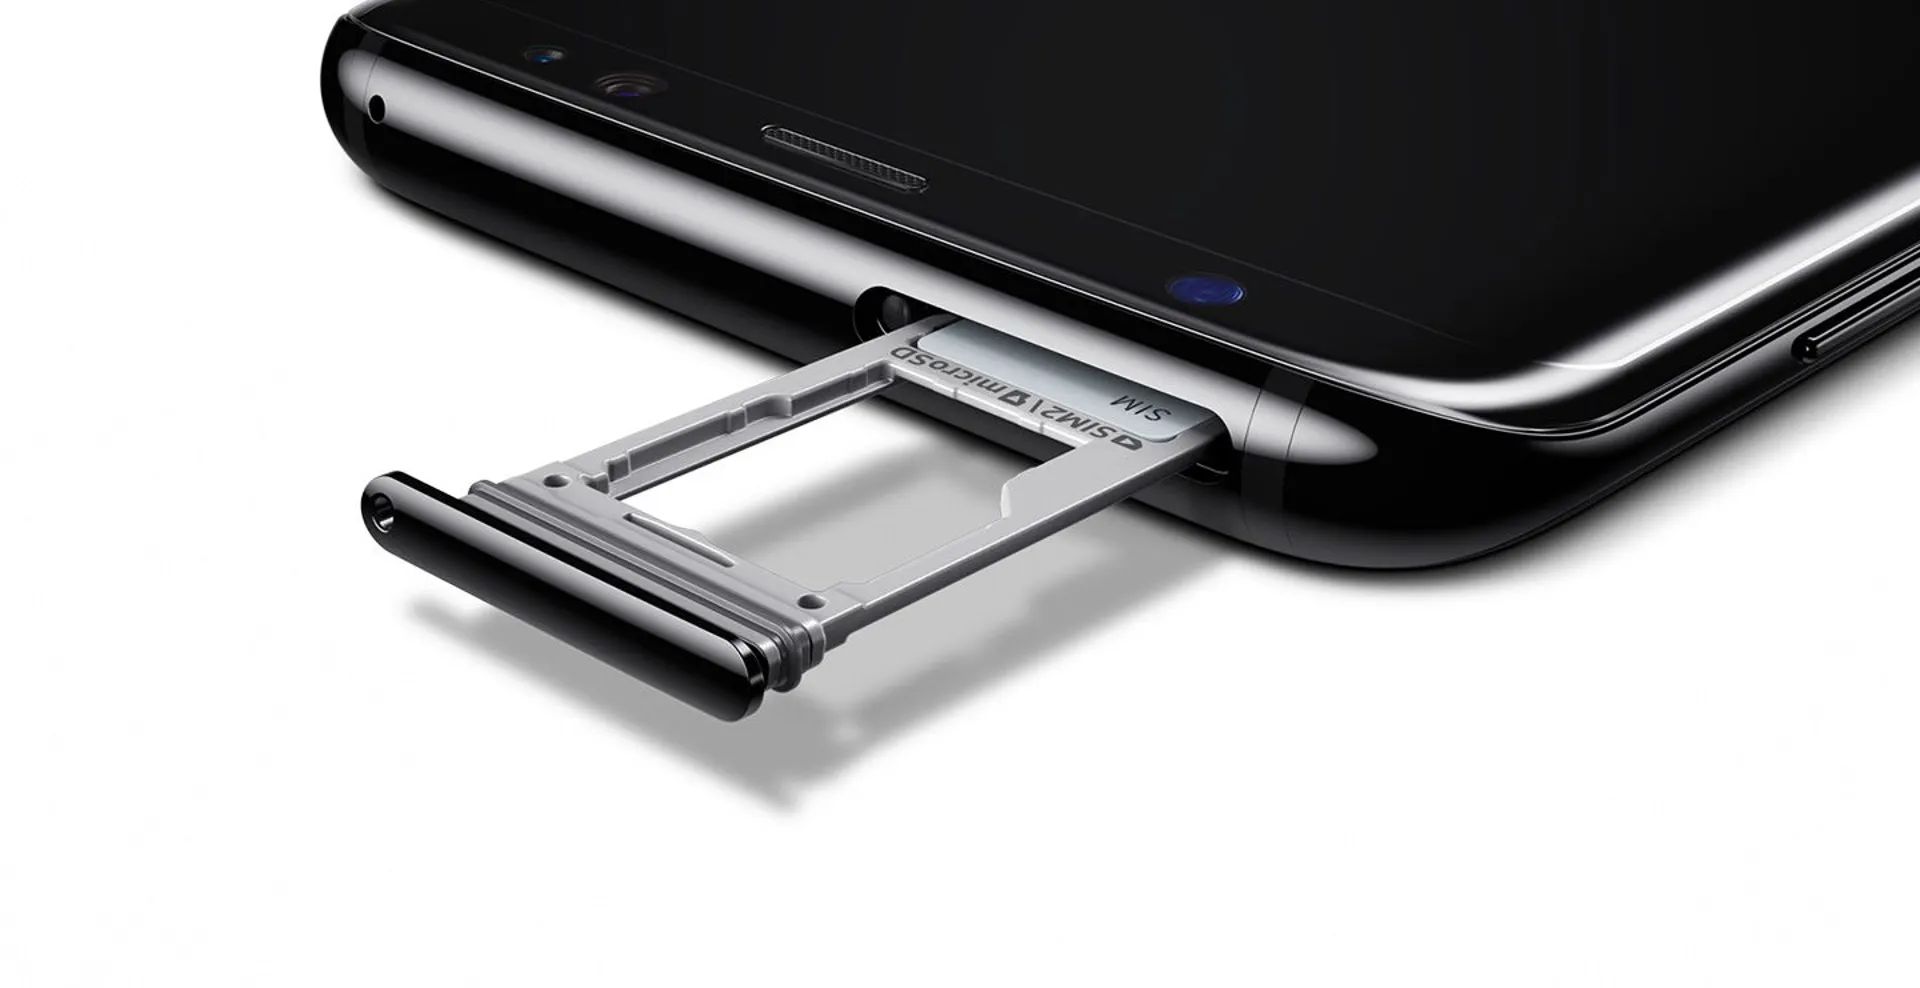
-
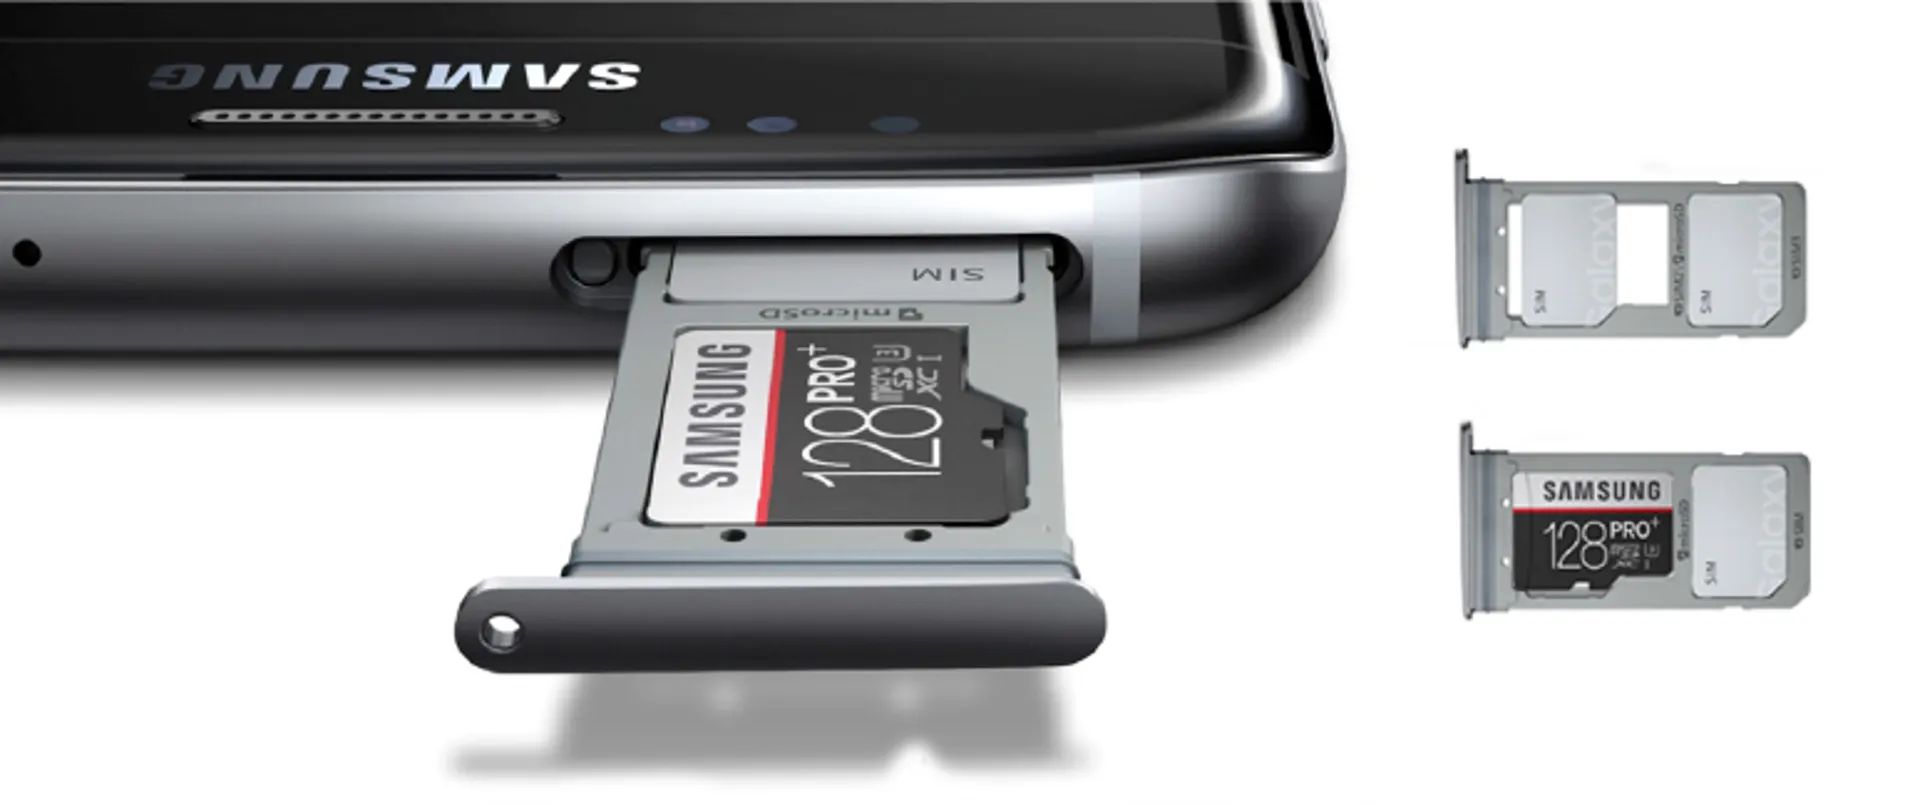
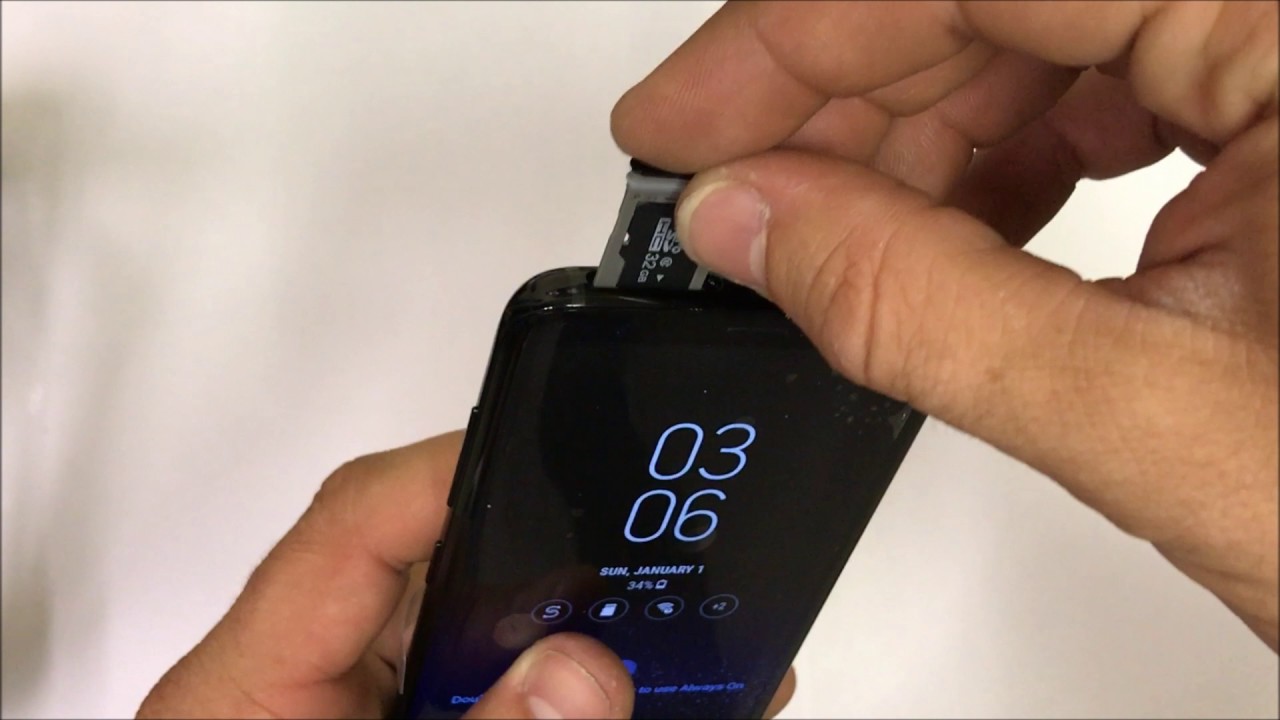
Observe the Tray Configuration: As the SIM card tray is ejected, take note of its configuration, including the positioning of the SIM card slot and any additional slots for a microSD card, if applicable. This observation will guide you in correctly orienting the SIM card for insertion.
By following these steps, you'll successfully locate the SIM card tray on your Galaxy S8 Plus, setting the stage for the subsequent step of inserting the SIM card into the designated slot. This foundational stage of the installation process ensures that you can proceed with confidence and precision, paving the way for seamless integration of the SIM card into your device.
Step 3: Insert the SIM card
With the SIM card tray successfully ejected from your Galaxy S8 Plus, the next critical step is to insert the SIM card into the designated slot. This process requires attention to detail and precision to ensure that the SIM card is correctly positioned for seamless functionality. Here's a detailed guide to help you navigate the process of inserting the SIM card with ease.
-
Prepare the SIM Card: Before proceeding with the insertion, carefully remove the SIM card from its packaging. Take a moment to inspect the SIM card, ensuring that it is free from any damage or deformities that may hinder its insertion into the tray.
-
Position the SIM Card: Hold the SIM card with the gold contacts facing downward and the notched corner aligned with the corresponding notch on the SIM card tray. This alignment is crucial for ensuring that the SIM card fits securely into the slot without any resistance.
-
Insert the SIM Card: Gently place the SIM card into the designated slot within the SIM card tray, ensuring that it sits flush and level with the tray's surface. Apply light pressure to ensure that the SIM card is securely positioned within the slot, ready to establish the essential connection with your mobile network.
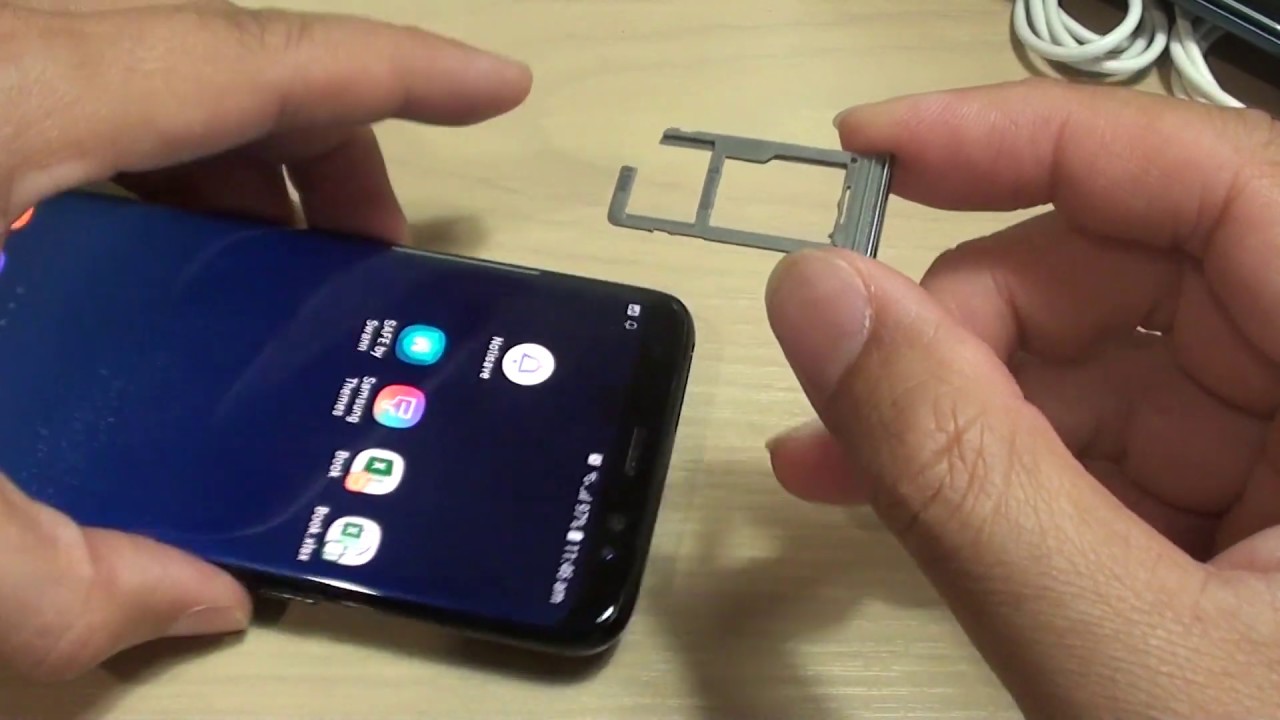
-
Reinsert the SIM Card Tray: With the SIM card correctly inserted, carefully reposition the SIM card tray back into its slot on the device. Ensure that the tray aligns seamlessly with the designated opening and gently push it back into place until it sits flush with the device's edge.
-
Power On the Device: Once the SIM card tray is securely reinserted, power on your Galaxy S8 Plus to initiate the activation and recognition of the SIM card. Upon powering on the device, it will establish the necessary connection with the mobile network, enabling you to make calls, send messages, and access mobile data seamlessly.
By following these steps, you'll successfully insert the SIM card into your Galaxy S8 Plus, setting the stage for the device to establish a vital connection with your mobile network. This foundational stage of the installation process ensures that you can proceed with confidence, knowing that the SIM card is seamlessly integrated and ready to facilitate your communication and connectivity needs.
Step 4: Power on the device
After successfully inserting the SIM card into your Galaxy S8 Plus, the next pivotal step is to power on the device, initiating the activation and recognition of the SIM card by the mobile network. This phase marks the culmination of the SIM card installation process, setting the stage for seamless connectivity and functionality. Here's a detailed guide to help you navigate the process of powering on your device with precision and confidence.
-
Press and Hold the Power Button: Located on the right side of your Galaxy S8 Plus, the power button serves as the gateway to activating the device. Press and hold the power button until you see the Samsung logo appear on the screen, indicating that the device is powering on.
-
Observe the Startup Sequence: As the device powers on, observe the startup sequence, which includes the display of the Samsung logo followed by the loading of the device's operating system. This sequence signifies that the device is initializing and preparing to establish the essential connection with your mobile network.
-
Enter the Unlock Code (if applicable): If your SIM card is associated with a PIN or unlock code for security purposes, the device may prompt you to enter this code upon startup. Carefully enter the code using the on-screen keypad, ensuring accuracy to successfully unlock the SIM card and enable network connectivity.
-
Wait for Network Recognition: Upon powering on the device, the Galaxy S8 Plus will initiate the process of recognizing and connecting to the mobile network associated with your SIM card. This recognition phase may take a few moments as the device establishes the necessary communication with the network provider.
-
Confirm Network Connectivity: Once the device has recognized the SIM card and established network connectivity, you'll observe the network signal bars or indicators displayed on the screen. This visual confirmation signifies that your Galaxy S8 Plus is successfully connected to the mobile network, ready to facilitate calls, messages, and data usage.
By following these steps, you'll seamlessly power on your Galaxy S8 Plus, allowing the device to recognize and establish the vital connection with your mobile network. This pivotal phase marks the culmination of the SIM card installation process, ensuring that your device is fully equipped to meet your communication and connectivity needs with ease and efficiency.
Conclusion
Congratulations! You have successfully completed the process of installing a SIM card in your Galaxy S8 Plus, setting the stage for seamless connectivity and communication. By following the comprehensive steps outlined in this guide, you've gained the knowledge and confidence to navigate this essential aspect of device setup with precision and ease.
The installation of a SIM card is a foundational step that enables your Galaxy S8 Plus to connect to the mobile network, empowering you to make calls, send messages, and access mobile data. With the SIM card seamlessly integrated into your device, you can now harness the full potential of the Galaxy S8 Plus, leveraging its advanced features and connectivity capabilities.
As you power on your device, you'll witness the culmination of the installation process as the Galaxy S8 Plus recognizes and establishes the vital connection with your mobile network. The network signal indicators on the screen serve as a visual confirmation of successful connectivity, signaling that your device is ready to facilitate your communication needs with efficiency and reliability.
It's important to note that the process of installing a SIM card may vary slightly depending on the specific model of the Galaxy S8 Plus. Therefore, it's advisable to refer to the user manual accompanying your device for any model-specific instructions or considerations.
With the SIM card seamlessly integrated into your Galaxy S8 Plus, you're now poised to explore the myriad capabilities of the device, from staying connected with loved ones to accessing online resources on the go. The successful installation of the SIM card ensures that your device is fully equipped to meet your communication and connectivity needs, empowering you to make the most of your smartphone experience.
In conclusion, the installation of a SIM card in your Galaxy S8 Plus marks a pivotal milestone in setting up the device for optimal functionality. By following this guide, you've not only completed the installation process but also gained valuable insights into the foundational aspects of device setup, enhancing your overall understanding of mobile technology.
With the SIM card seamlessly integrated, your Galaxy S8 Plus is ready to embark on its journey as your trusted companion, keeping you connected, informed, and empowered in the digital realm. Here's to a seamless and fulfilling experience with your Galaxy S8 Plus, fueled by the power of connectivity and communication.