Introduction
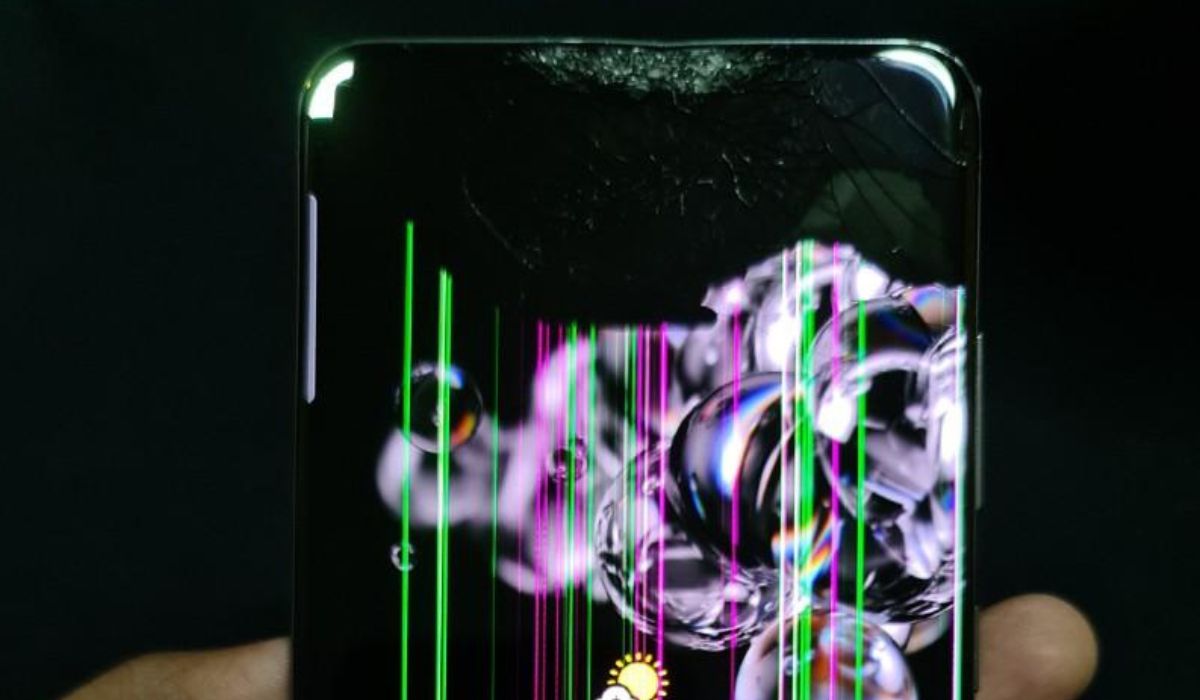
When faced with a broken screen on your Samsung S20, the frustration and uncertainty of how to proceed can be overwhelming. However, there is a solution that can help you regain control of your device and protect your personal data: performing a factory reset. This comprehensive guide will walk you through the step-by-step process of executing a factory reset on your Samsung S20, even with a broken screen.
A factory reset is a powerful tool that restores your device to its original state, erasing all data, settings, and applications. It can be a lifesaver in situations where your phone is malfunctioning or when you need to ensure that your personal information remains secure. By following the instructions outlined in this guide, you can confidently navigate through the process of performing a factory reset on your Samsung S20, despite the obstacle of a broken screen.
Whether your screen is unresponsive to touch or completely shattered, this guide will equip you with the knowledge and tools necessary to initiate a factory reset. By the end of this walkthrough, you will have a clear understanding of the steps involved and the reassurance that your personal data will be protected throughout the process.
Now, let's embark on this journey to regain control of your Samsung S20 and restore peace of mind. With the right guidance and a bit of patience, you can successfully execute a factory reset, even with a broken screen. Let's dive into the first step to prepare for the factory reset process.
Step 1: Prepare for the Factory Reset
Before initiating the factory reset process on your Samsung S20 with a broken screen, it's crucial to make necessary preparations to ensure a smooth and successful execution. Despite the challenge posed by the damaged screen, taking these preparatory steps will set the stage for a seamless factory reset.
-
Backup Your Data: As a precautionary measure, it's essential to back up any important data stored on your Samsung S20. This includes photos, videos, documents, and any other files that you deem valuable. While a factory reset erases all data on the device, having a backup ensures that your essential information remains secure and accessible after the reset.
-
Charge Your Device: Ensure that your Samsung S20 is sufficiently charged before proceeding with the factory reset. A stable power source is vital to prevent any interruptions during the reset process. If your device has a severely damaged screen, it's advisable to charge it using a reliable power source to ensure that it has ample battery power for the reset.
-
Gather Necessary Tools: Since the screen is broken, you'll need to rely on a computer to execute the factory reset using ADB (Android Debug Bridge) commands. Make sure you have a compatible USB cable to establish a connection between your Samsung S20 and the computer. Additionally, ensure that the computer has the necessary drivers installed to recognize your device.
-
Create a Comfortable Workspace: Set up a comfortable and well-lit workspace where you can connect your Samsung S20 to the computer and execute the factory reset process. A clutter-free environment will help you focus on the task at hand and minimize any potential distractions.
By diligently preparing for the factory reset, you can mitigate potential challenges and ensure a more efficient and successful execution of the process. With these preliminary steps completed, you are now ready to proceed to the next stage, which involves connecting your phone to a computer to initiate the factory reset.
Step 2: Connect the Phone to a Computer
Connecting your Samsung S20 to a computer is a crucial step in the process of performing a factory reset, especially when the phone's screen is broken. This connection enables you to utilize ADB commands to initiate the reset, bypassing the need for direct interaction with the device's touchscreen. Here's a detailed walkthrough of the process:
-
Prepare the Computer: Ensure that you have access to a computer with a working USB port. It's recommended to use a desktop or laptop running a Windows, macOS, or Linux operating system. Additionally, make sure that the computer is powered on and not in sleep mode to facilitate a seamless connection with your Samsung S20.
-
Install ADB Drivers (if necessary): If you haven't previously connected an Android device to your computer, you may need to install the ADB (Android Debug Bridge) drivers. These drivers enable the computer to recognize and communicate with your Samsung S20. You can download the ADB drivers from the official Android developer website and follow the installation instructions provided.
-
Connect the Phone: Using a compatible USB cable, connect your Samsung S20 to the USB port on the computer. Ensure that the cable is securely plugged into both the phone and the computer to establish a stable connection. If your phone's screen is unresponsive, you may need to rely on tactile feedback to locate the USB port and make the connection.
-
Enable File Transfer Mode (if prompted): Upon connecting your Samsung S20 to the computer, you may receive a prompt on the phone's screen asking you to select a USB connection mode. If possible, use tactile feedback to navigate through the options and select "File Transfer" or "Transfer files" mode. This mode allows the computer to access the phone's storage, a necessary step for executing ADB commands.
-
Verify the Connection: Once the phone is connected, navigate to the computer's file explorer or terminal and check if the device is recognized. You can do this by accessing the list of connected devices or running a command to verify the presence of your Samsung S20. A successful connection confirmation indicates that the computer is ready to communicate with your phone.
By following these steps, you can establish a reliable connection between your Samsung S20 and the computer, laying the groundwork for the subsequent stages of the factory reset process. With the connection in place, you are now prepared to proceed to the next step, which involves enabling USB debugging on your device to facilitate the execution of ADB commands.
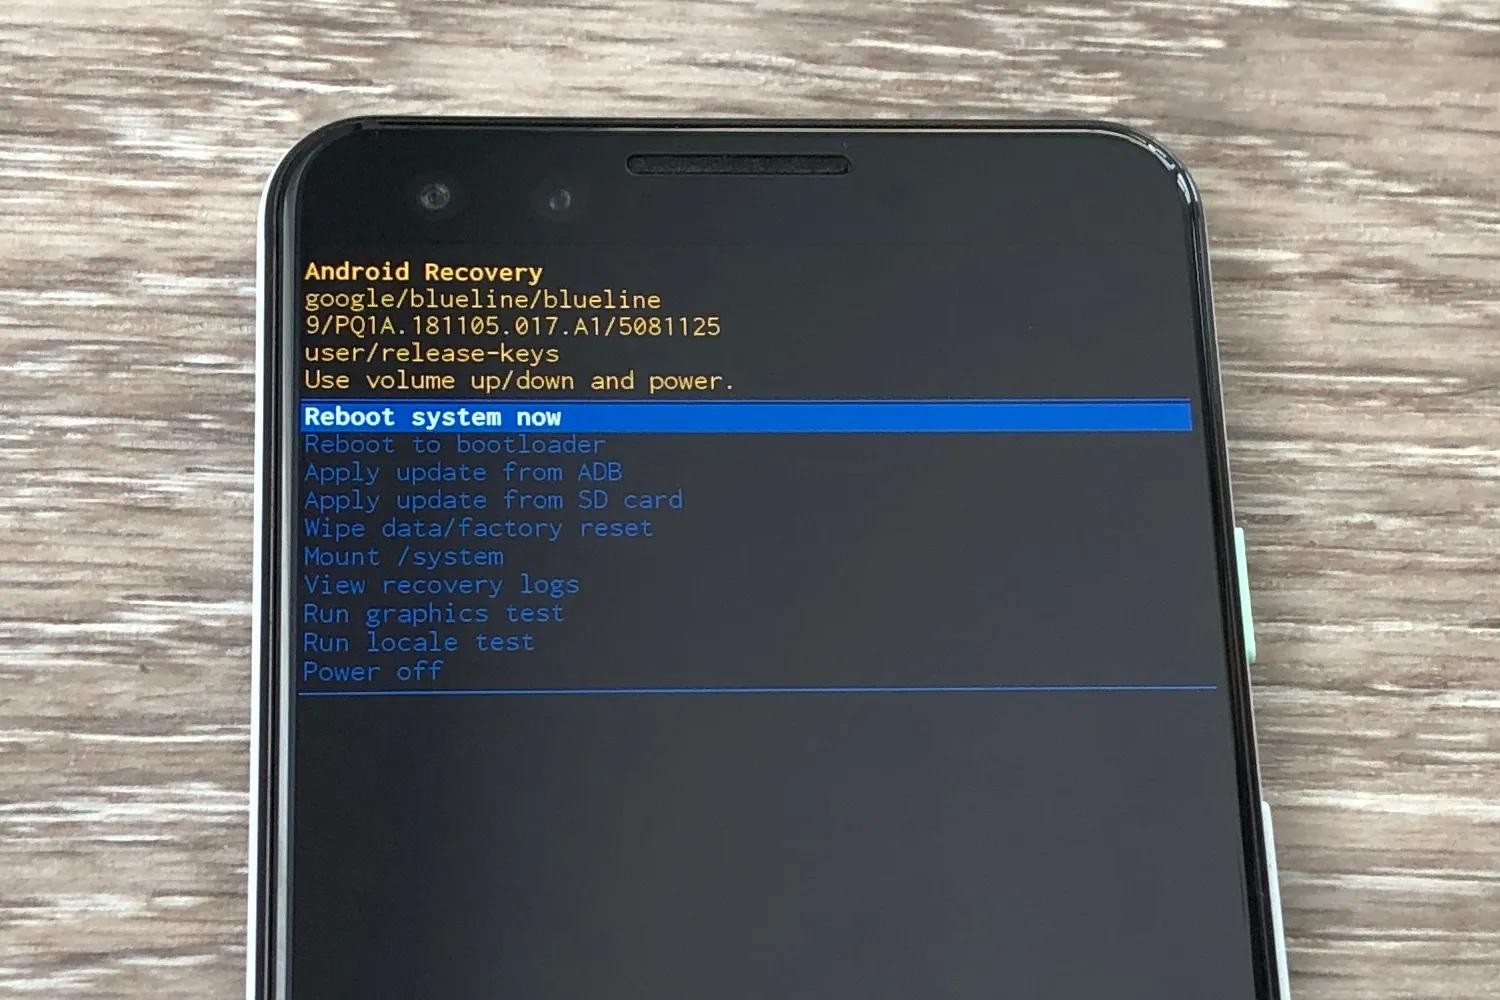
Step 3: Enable USB Debugging
Enabling USB debugging on your Samsung S20 is a pivotal step in the process of performing a factory reset, particularly when the device's screen is unresponsive or shattered. USB debugging allows the computer to communicate with the phone at a deeper level, enabling the execution of advanced commands through the Android Debug Bridge (ADB). Despite the challenge posed by the broken screen, you can navigate through the following steps to enable USB debugging:
-
Access Developer Options: USB debugging is a feature housed within the Developer Options menu on Android devices. To access this menu on your Samsung S20, you'll need to navigate to the Settings app. However, with a broken screen, traditional touch interactions may not be feasible. In such cases, you can rely on alternative methods to access Developer Options, such as using a USB OTG (On-The-Go) adapter to connect a USB mouse to your phone and navigate the settings.
-
Enable Developer Options: If you haven't previously enabled Developer Options on your Samsung S20, you can do so by tapping on the "About phone" or "Software information" section within the Settings app. Locate the "Build number" and tap on it multiple times (usually seven times) until you see a message confirming that Developer Options have been enabled.
-
Access Developer Options: Once Developer Options are enabled, navigate back to the main Settings menu and locate the newly unlocked Developer Options section. This menu houses a plethora of advanced settings that are typically hidden from regular users to prevent accidental changes that could impact the device's performance.
-
Enable USB Debugging: Within the Developer Options menu, locate the "USB debugging" setting and toggle it on. You may encounter a prompt requesting permission to enable USB debugging. If the screen is partially functional, use tactile feedback to grant the necessary permission. In cases where the screen is entirely unresponsive, the previous step of enabling Developer Options using a USB mouse will facilitate the activation of USB debugging.
-
Verify USB Debugging Status: Once USB debugging is enabled, it's essential to verify its status to ensure that the setting has been successfully activated. You can do this by connecting your Samsung S20 to the computer and running a simple ADB command to confirm the device's recognition. If the computer recognizes your phone and grants the necessary permissions, USB debugging is functioning as intended.
By following these steps, you can successfully enable USB debugging on your Samsung S20, despite the challenge posed by a broken screen. With USB debugging activated, you are now equipped to proceed to the next stage, which involves utilizing ADB commands to initiate the factory reset process.
Step 4: Use ADB Commands to Factory Reset
With USB debugging enabled and your Samsung S20 successfully connected to the computer, you are now poised to utilize ADB (Android Debug Bridge) commands to initiate the factory reset process. ADB commands allow you to interact with your device from the computer's command line, bypassing the need for direct touchscreen interaction. Despite the challenge posed by the broken screen, executing ADB commands empowers you to perform a factory reset with precision and control. Here's a detailed walkthrough of the steps involved in using ADB commands to factory reset your Samsung S20:
-
Open Command Prompt or Terminal: On your computer, launch the Command Prompt (Windows) or Terminal (macOS or Linux) application. These command-line interfaces provide the platform for executing ADB commands and communicating with your connected Samsung S20.
-
Navigate to the ADB Directory: If you haven't already added the ADB executable to your system's PATH variable, you'll need to navigate to the directory where the ADB executable is located. This is typically the platform-tools folder within the Android SDK installation directory. Alternatively, you can specify the full path to the ADB executable when running commands.
-
Verify Device Connection: Run the command "adb devices" to verify that your Samsung S20 is recognized and listed as a connected device. If the device is successfully detected, you can proceed to the next step. If not, ensure that the USB connection is secure and that USB debugging is enabled on your phone.
-
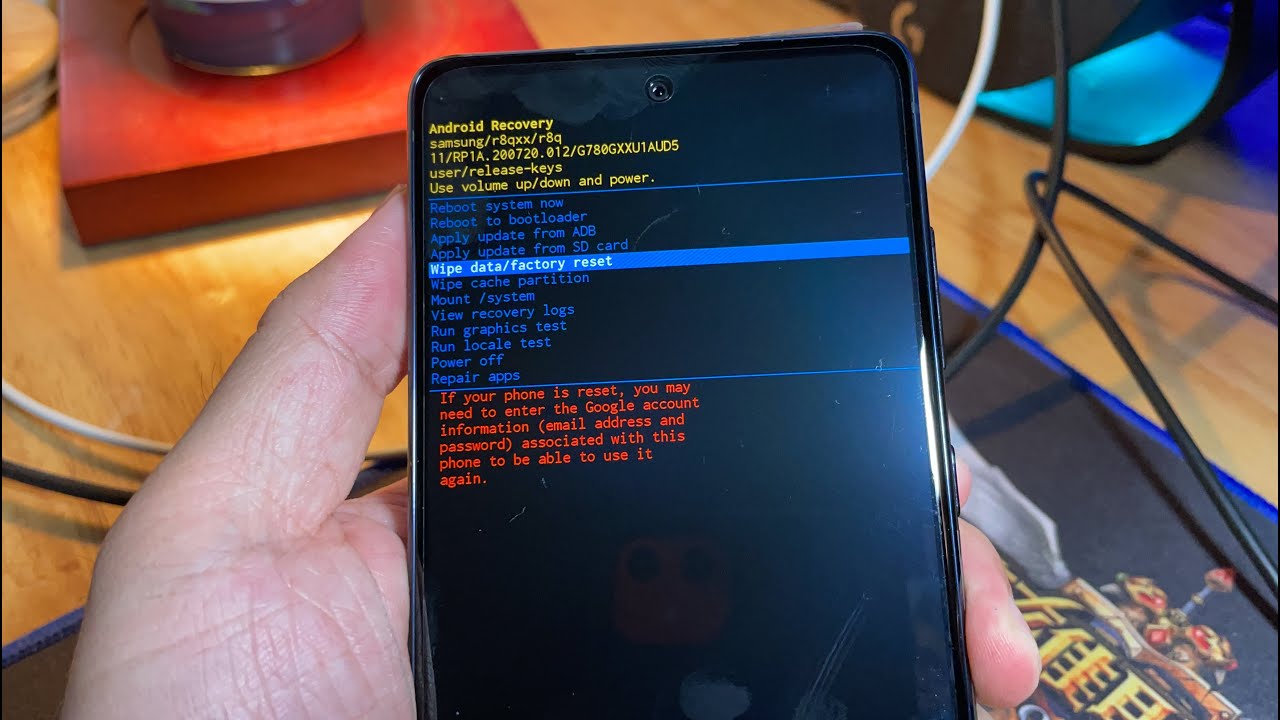
Initiate the Factory Reset: The ADB command to perform a factory reset is "adb shell recovery –wipe_data". This command instructs your Samsung S20 to enter recovery mode and erase all user data and settings. Execute this command in the Command Prompt or Terminal window, and wait for the process to commence.
-
Confirm the Factory Reset: Depending on your device's specific recovery mode interface, you may need to navigate through a series of on-screen prompts to confirm the factory reset. If your screen is partially functional, use tactile feedback to navigate and confirm the reset. In cases where the screen is entirely unresponsive, the ADB command triggers the reset process without requiring direct visual confirmation.
By following these steps, you can effectively utilize ADB commands to initiate a factory reset on your Samsung S20, even with a broken screen. This method empowers you to regain control of your device and ensure the protection of your personal data. With the factory reset process underway, you are now on the path to restoring your Samsung S20 to its original state, free from the constraints imposed by the broken screen.
Step 5: Confirm the Factory Reset
Upon initiating the factory reset using ADB commands, the confirmation stage plays a crucial role in ensuring that the process proceeds as intended. While the specific confirmation steps may vary based on the device's recovery mode interface, the overarching goal remains consistent: to affirm the user's intent to erase all data and settings, thereby initiating the factory reset. In the context of a Samsung S20 with a broken screen, the confirmation process may necessitate alternative approaches to navigate through the on-screen prompts or bypass visual interactions entirely.
For devices with partially functional screens, tactile feedback becomes instrumental in confirming the factory reset. Users can rely on a combination of physical button presses and screen taps to navigate the recovery mode interface and select the option to proceed with the reset. This tactile interaction may involve a series of sequential inputs to ensure that the confirmation prompt is acknowledged, thereby initiating the erasure of data and settings.
In cases where the screen is entirely unresponsive, the ADB command executed to trigger the factory reset circumvents the need for direct visual confirmation. Once the command is issued, the device enters the reset process without requiring user intervention via the broken screen. This approach streamlines the confirmation stage, allowing the reset to proceed seamlessly despite the screen's impairment.
It's important to note that the confirmation of a factory reset signifies a point of no return, as all user data and settings will be irreversibly erased. As such, users should exercise caution and ensure that they have backed up any essential data prior to confirming the reset. Additionally, the confirmation stage serves as a safeguard against accidental resets, requiring deliberate user input to proceed with the erasure process.
By navigating through the confirmation stage, whether through tactile interactions on a partially functional screen or via the streamlined ADB command execution for unresponsive screens, users can finalize the initiation of the factory reset. This pivotal step marks the transition towards the restoration of the Samsung S20 to its original state, unencumbered by the limitations imposed by the broken screen.
With the factory reset confirmation completed, the device embarks on the erasure process, culminating in the restoration of its default settings and the removal of all user data. This pivotal stage represents the culmination of the meticulous preparatory steps and the precise execution of ADB commands, ultimately leading to the successful initiation of the factory reset process, even in the face of a broken screen.
Conclusion
In navigating the intricate process of performing a factory reset on a Samsung S20 with a broken screen, the journey has been marked by meticulous preparation, resourceful adaptation, and precise execution. Despite the challenges posed by the impaired screen, the comprehensive guide has equipped users with the knowledge and tools necessary to initiate a factory reset with confidence and control.
The preparatory steps, including data backup, device charging, and workspace organization, laid the foundation for a seamless execution of the factory reset process. By diligently attending to these preliminary measures, users mitigated potential challenges and ensured a more efficient and successful reset, safeguarding their essential data in the process.
The pivotal stage of connecting the Samsung S20 to a computer, despite the broken screen, exemplified the resourcefulness required to overcome the obstacle. By establishing a reliable connection and enabling USB debugging, users harnessed the power of ADB commands to interact with their devices from the computer, circumventing the need for direct touchscreen interaction.
Enabling USB debugging, despite the screen's impairment, underscored the adaptability and determination inherent in the process. Whether through alternative methods of accessing Developer Options or leveraging tactile feedback to navigate the settings, users successfully activated USB debugging, unlocking the pathway to executing advanced commands through the Android Debug Bridge.
The utilization of ADB commands to initiate the factory reset represented the culmination of meticulous preparation and resourceful adaptation. By executing precise commands from the computer's command line, users bypassed the limitations imposed by the broken screen, empowering them to initiate the reset process with precision and control.
The confirmation stage, whether navigated through tactile interactions or streamlined ADB command execution, marked the pivotal transition towards the restoration of the Samsung S20 to its original state. This stage underscored the deliberate intent and caution required to proceed with the irreversible erasure of data and settings, ensuring a deliberate and informed approach to the factory reset.
In conclusion, the journey to perform a factory reset on a Samsung S20 with a broken screen has been a testament to resilience, adaptability, and meticulous attention to detail. By navigating through the preparatory steps, connection establishment, USB debugging, ADB command execution, and confirmation stage, users have demonstrated the ability to overcome challenges and safeguard their personal data, ultimately restoring their devices to a state of control and security.