Introduction
Browser history plays a crucial role in our digital lives, as it keeps track of the websites we visit, the searches we conduct, and the pages we view. However, there are instances when we accidentally delete or lose our browsing history, leading to frustration and the potential loss of important information. Whether you need to retrieve a recently closed tab, recover deleted browsing history, or investigate someone’s online activities, being able to recover browser history is a valuable skill.
In this article, we will explore various methods to recover browser history and help you regain access to your lost or deleted browsing data. While the specific steps may vary depending on the browser and device you are using, these methods will provide you with a general roadmap to recovery.
Why is it important to recover browser history? Your browsing history contains a wealth of information that can be helpful in several scenarios. Firstly, if you accidentally closed a tab containing important information or a website you were working on, being able to recover the browser history can save you the time and effort of searching for it again. Secondly, if you suspect that someone has tampered with your browsing history or you want to monitor the online activities of your children or employees, being able to recover browser history can provide valuable evidence.
Now that we understand the importance of recovering browser history, let’s delve into the methods you can use to retrieve this valuable information. From utilizing built-in browser features to employing third-party data recovery software, we’ll explore various techniques to cater to different scenarios and browser types.
Why do you need to recover browser history?
Understanding why you might need to recover browser history can help you grasp the importance and value of this process. Here are a few key reasons why you may find yourself in need of retrieving your browsing history:
1. Accidental closure of tabs: It’s not uncommon to accidentally close a tab while browsing, especially when multitasking or navigating through numerous open tabs. If you closed a tab containing crucial information or a website you were previously viewing, recovering the browser history can save you the time and frustration of trying to remember and revisit the page.
2. Recovering deleted browsing history: Whether intentionally or unintentionally, you may have cleared your browsing history, only to later realize that you needed to revisit a specific website or review the pages you visited. By recovering deleted browsing history, you can regain access to this valuable information.
3. Investigative purposes: In certain situations, such as investigating unauthorized access to your computer or monitoring the online activities of your children or employees, recovering browser history can provide important insights. It allows you to review the websites visited and the actions performed, enabling you to gather evidence or ensure compliance with your company’s policies.
4. Restoration after system crashes or data loss: System crashes, hardware failures, and data loss incidents can lead to the loss of your browsing history. By recovering the browser history, you can restore the previously accessed websites and ensure that you don’t lose any valuable information.
5. Compliance and legal requirements: In certain legal scenarios, you may be required to provide evidence from your browsing history. By being able to recover browser history, you can address these compliance and legal requirements, ensuring you have the necessary information to support your case.
By understanding the various reasons why you may need to recover browser history, you can appreciate the significance of this process. Whether it’s for personal convenience, investigative purposes, or compliance with legal requirements, having the ability to retrieve previous browsing data can be invaluable in a variety of situations.
Methods to recover browser history
There are several methods you can employ to recover browser history, depending on the specific circumstances and the device or browser you are using. Here, we will explore five common methods to help you regain access to your lost or deleted browsing data:
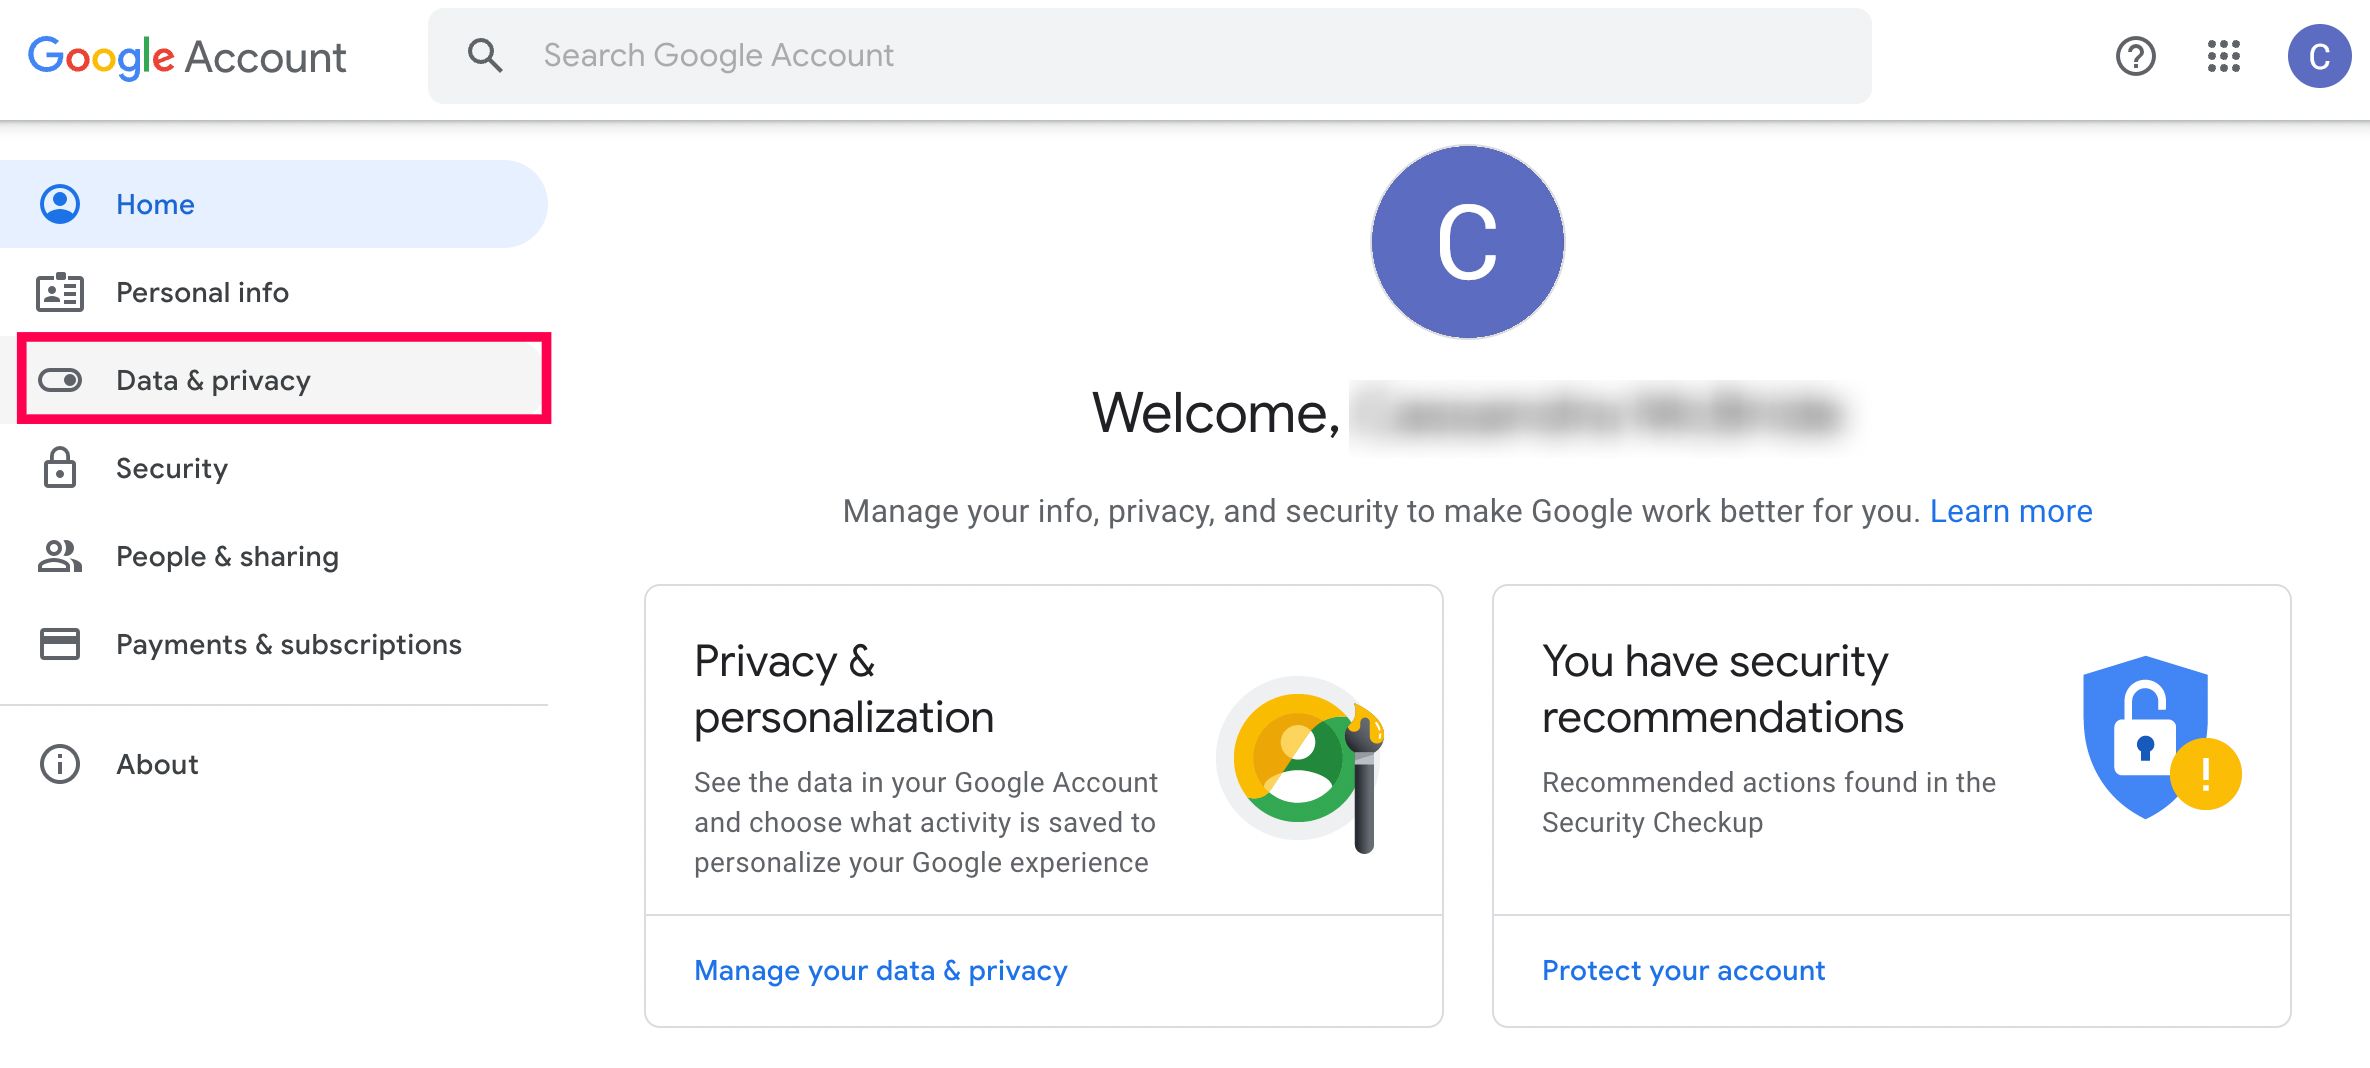
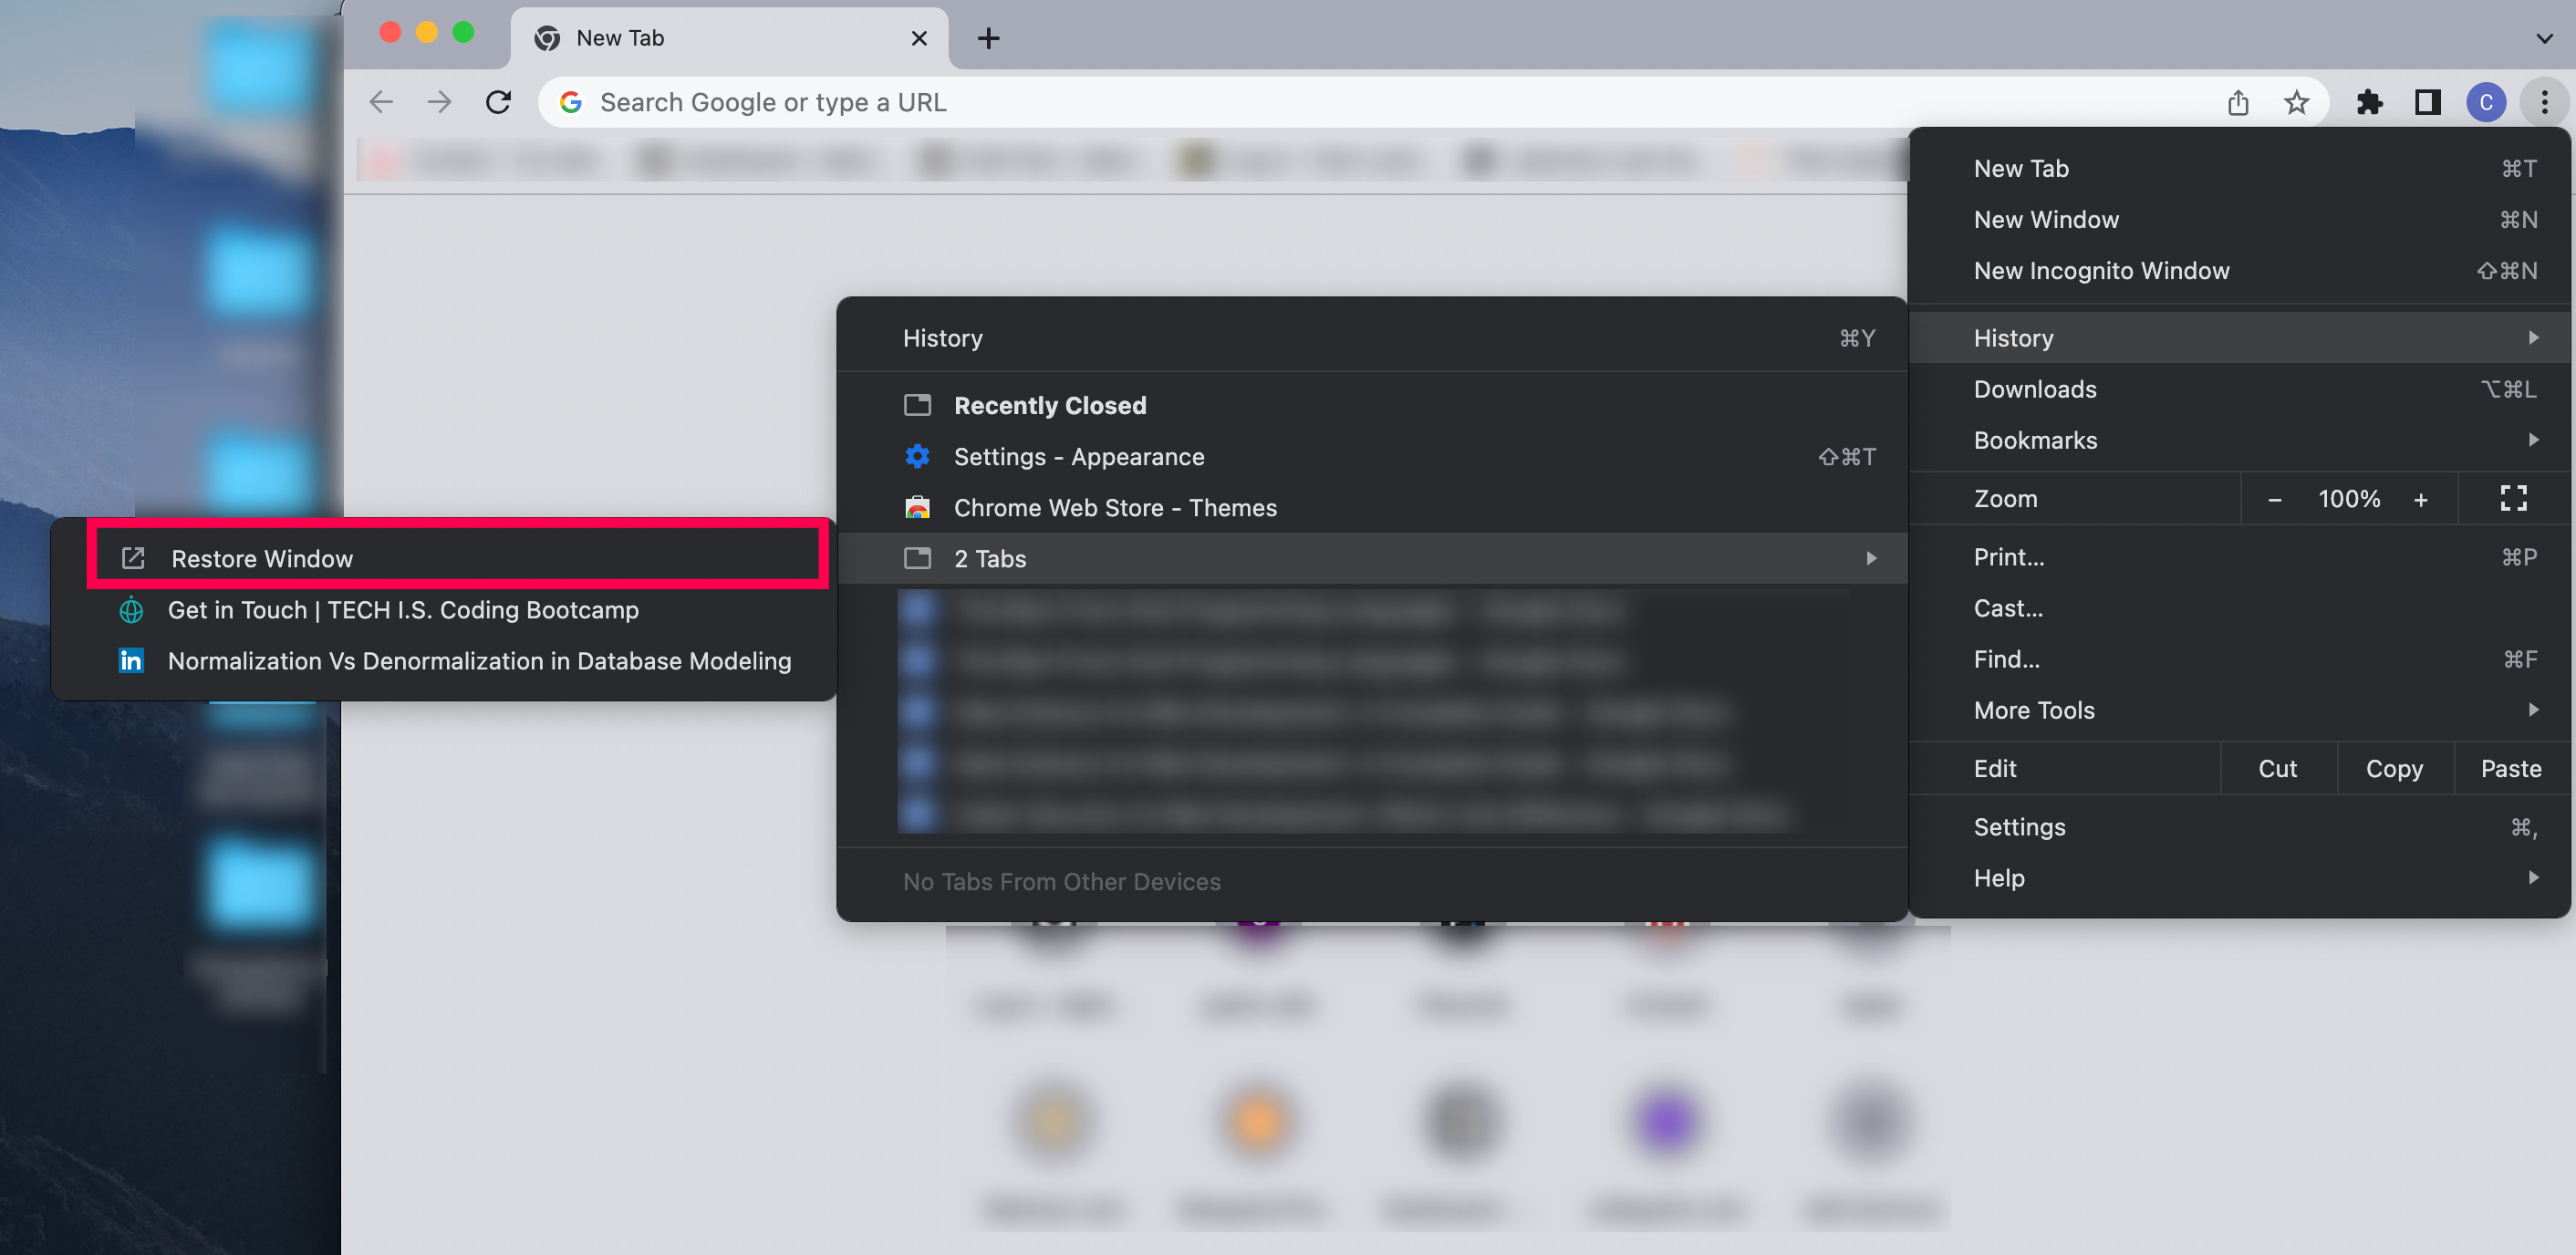
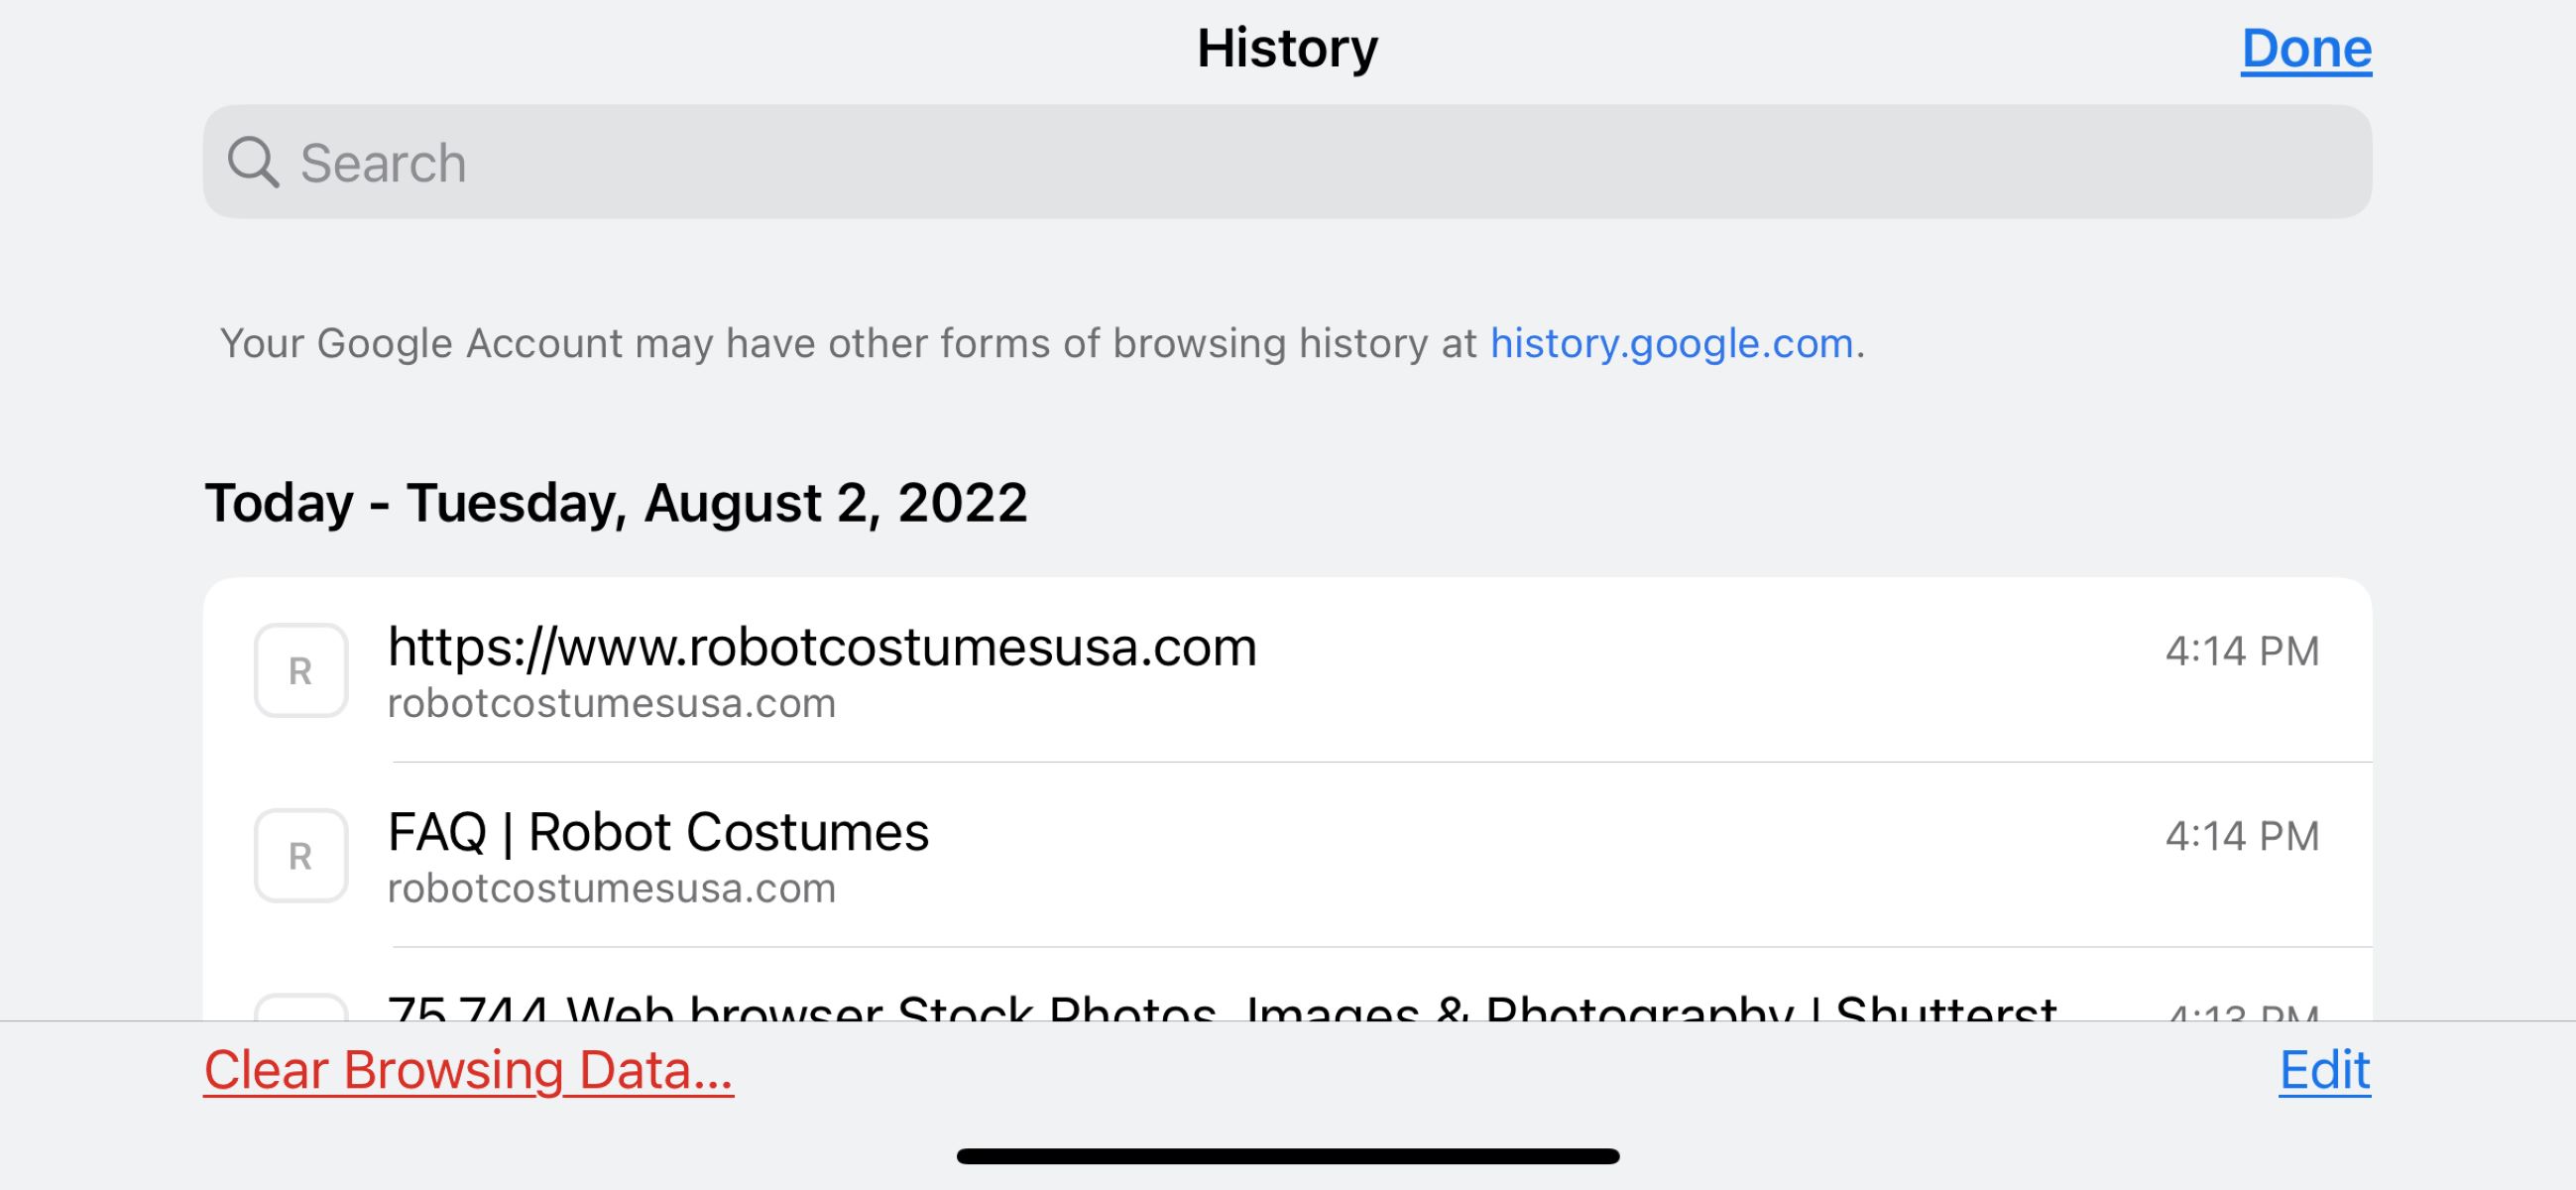
1. Using the browsing history feature: The first method to try is using the built-in browsing history feature in your web browser. Most browsers, such as Chrome, Firefox, and Safari, keep a record of the websites you visit. To access the browsing history, simply click on the history icon or press the keyboard shortcut (e.g., Ctrl+H for Chrome). From there, you can browse through your recent history and restore any closed tabs or revisit previously visited websites.
2. Checking the DNS cache: The DNS cache stores information about recently accessed websites, including the IP addresses. By accessing the DNS cache, you may uncover previously visited sites even if they are not present in the browsing history. To check the DNS cache, open the Command Prompt or Terminal and enter the appropriate command for your operating system. For example, on Windows, you can use the command “ipconfig /displaydns” to view the DNS cache.
3. Utilizing system restore points: If you are using a Windows operating system, you can try restoring your computer to a previous state using system restore points. This method can potentially restore your browser history along with other system settings and files. To use system restore, search for “System Restore” in the Start Menu and follow the prompts to select a restore point that precedes the loss of your browser history.
4. Employing data recovery software: In cases where the browsing history has been permanently deleted or lost due to system crashes or hardware failures, data recovery software can help. There are various data recovery tools available that specialize in recovering lost files, including browser history. These software programs scan your computer’s storage devices and attempt to recover the deleted data. It’s important to note that the success of data recovery will depend on several factors, such as the extent of the data loss and the efficiency of the software.
5. Contacting your Internet Service Provider (ISP): If all other methods fail, you can consider reaching out to your Internet Service Provider (ISP). In certain cases, ISPs may have logs of your browsing history that can be retrieved upon request. Keep in mind that this method may involve formal procedures and compliance with legal requirements, depending on the jurisdiction and circumstances.
By exploring these methods, you can increase your chances of recovering your browser history. Remember to choose the method that aligns with your specific situation and be diligent in following the instructions provided. It’s important to note that the success of these methods may vary based on factors such as browser settings, device configurations, and the time elapsed since the deletion or loss of browsing history.
Method 1: Using the browsing history feature
One of the easiest and most straightforward ways to recover browser history is by utilizing the browsing history feature built into your web browser. This method is applicable to popular browsers such as Chrome, Firefox, Safari, and Edge. Here’s how you can use the browsing history feature to recover your lost or deleted browsing data:
1. Open your web browser and look for the history icon, usually represented by a clock or three horizontal lines. You can usually find it in the toolbar or the browser settings menu.
2. Click on the history icon, and a drop-down menu will appear, displaying a list of recently visited websites and pages. The history is typically organized by date and time, allowing you to easily navigate through your browsing chronology.
3. Scroll through the list of websites to find the one you want to recover. You can also use the search bar within the browsing history feature to search for specific websites or keywords related to the content you are trying to retrieve.
4. Once you locate the desired website or page, simply click on it to open it in a new tab or window, allowing you to access and revisit the content you thought was lost.
If you accidentally closed a tab, you can also use the “Recently closed tabs” or “Recently closed” option within the browsing history feature to restore the closed tab and regain access to the website or page you were on before it was closed. This can save you the time and effort of manually searching for the website or trying to remember the URL.
Note that the browsing history feature may have limitations in terms of the duration for which browsing data is stored. Depending on your browser settings, older entries may be automatically deleted to optimize performance and storage. In such cases, the browsing history feature may not be able to recover very old or deleted browsing data.
By leveraging the built-in browsing history feature of your web browser, you can easily recover recently accessed websites, restore accidentally closed tabs, and retrieve valuable information that would have otherwise been lost.
Method 2: Checking the DNS cache
In addition to utilizing the browsing history feature, you can also recover browser history by checking the DNS cache. The Domain Name System (DNS) cache stores information about recently accessed websites, including their IP addresses. Checking the DNS cache can help you uncover previously visited sites, even if they are not present in the browsing history. Here’s how you can check the DNS cache on your computer:
1. Open the Command Prompt or Terminal window on your computer. On Windows, you can do this by pressing the Windows key, typing “Command Prompt,” and selecting the Command Prompt app from the search results. On macOS, you can simply go to Applications -> Utilities -> Terminal.
2. Once the Command Prompt or Terminal window is open, type the appropriate command to view the DNS cache. The command to use depends on your operating system. For Windows, you can use the command “ipconfig /displaydns” and press Enter. On macOS and Linux, you can use the command “sudo dscacheutil -cachedump” and enter your administrator password when prompted.
3. After executing the command, a list of websites and their corresponding IP addresses will be displayed. Scan through the list to find the websites you want to recover.
4. Once you have located the websites in the DNS cache, you can manually enter the URL in your browser’s address bar to revisit them.
It’s important to note that the DNS cache may not contain the complete browsing history, but rather a subset of recently accessed websites. Additionally, the DNS cache can vary in persistence across different operating systems and network configurations. Therefore, this method may be more effective for recovering recently visited sites rather than those accessed a long time ago.
While checking the DNS cache can be a useful technique to recover browsing history, it does require some technical knowledge and familiarity with command-line interfaces. If you are not comfortable using the Command Prompt or Terminal, it’s recommended to consult with an IT professional for assistance.
By checking the DNS cache on your computer, you can uncover previously visited websites and access the content you thought was lost, complementing the browsing history feature and expanding your options for recovering browser history.
Method 3: Utilizing system restore points
Another method to recover browser history is by utilizing system restore points. System restore points are created by the Windows operating system and serve as snapshots of your computer’s settings and configuration at a specific point in time. By reverting your system to a previous restore point, you can potentially restore your browser history along with other system settings and files. Here’s how you can utilize system restore points to recover your browsing data:
1. On your Windows computer, press the Windows key and search for “System Restore.” Click on the “Create a restore point” or “System Restore” option in the search results.
2. In the System Properties window, click on the “System Restore” button. This will open the System Restore wizard.
3. In the System Restore wizard, select the option that says “Restore my computer to an earlier time” and click “Next.”
4. The wizard will display a list of available restore points. These restore points are created automatically by the system or can be manually created by you. Select a restore point that predates the deletion or loss of your browser history. If needed, you can click on the “Scan for affected programs” option to see what changes will be made to your system during the restore process.
5. Follow the prompts in the wizard to confirm your restore point selection and begin the restoration process. Your computer will be restarted, and the restoration will commence.
Once the system restore process is complete, your computer will be reverted to the state it was in at the selected restore point. This means that your browser history and other system settings will be restored to their previous state, allowing you to access the browsing data that was lost or deleted.
It’s important to note that using system restore points will affect all the programs and system configurations that have changed since the selected restore point. Therefore, it’s recommended to create a backup of any important files or data before proceeding with the system restoration.
Furthermore, system restore points are not available on all versions of Windows or may be disabled by default. Make sure to check if system restore is enabled on your computer and if there are restore points available before relying on this method for recovering browser history.
By utilizing system restore points, you can potentially recover your browser history along with other system settings and files, providing a comprehensive solution for data recovery in case of browser history loss.
Method 4: Employing data recovery software
If other methods fail or if you are dealing with a more severe case of browser history loss, employing data recovery software can be a viable option. Data recovery software specializes in retrieving lost or deleted files, including browser history. Here’s how you can use data recovery software to recover your lost browsing data:
1. Research and select a reputable data recovery software program. There are various options available, such as Recuva, EaseUS Data Recovery Wizard, and Disk Drill. Make sure to choose software that is compatible with your operating system and has positive user reviews.
2. Download and install the selected data recovery software on your computer. Follow the installation instructions provided by the software manufacturer.
3. Run the data recovery software and select the appropriate scan option. Most data recovery software programs offer a quick scan and a deep scan option. It’s recommended to start with the quick scan as it is faster, but if it doesn’t yield the desired results, you can then proceed with the deep scan.
4. Choose the storage device where your browsing history was stored. This could be the main hard drive, a specific partition, or an external storage device if you were using one.
5. Initiate the scanning process. The data recovery software will scan the selected storage device and search for any recoverable files, including your browser history. The scanning process can take some time depending on the size of the storage device and the extent of the data loss.
6. After the scan is complete, the data recovery software will present you with a list of recoverable files. Look for files related to your browser history, such as browser cache files or cookies. You can typically preview the files before proceeding with the recovery process.
7. Select the browser history files you want to recover and choose the desired location for the recovered files. It’s important to save the recovered files to a different storage device to prevent overwriting any existing data on the original storage device.
8. Proceed with the file recovery process. The data recovery software will restore the selected files to the specified location. Once the recovery process is complete, you can access the recovered files and hopefully retrieve your lost browsing history.
Keep in mind that the success of data recovery using software depends on several factors, such as the timing of the data loss and the efficiency of the software. It’s also essential to minimize any further usage of the affected storage device to avoid overwriting the lost data.
By employing data recovery software, you can have a higher chance of recovering your lost browser history, even in more complex data loss scenarios.
Method 5: Contacting your Internet Service Provider (ISP)
In certain situations, when all other methods to recover browser history fail, you can consider contacting your Internet Service Provider (ISP) for assistance. Your ISP may have logs of your browsing history that can be retrieved upon request. Here’s how you can go about contacting your ISP to potentially recover your browsing data:
1. Locate the contact information for your Internet Service Provider. This information is typically available on their website or can be found on your internet service bill.
2. Call or email your ISP’s customer support team and explain the situation. Inform them that you are trying to recover your browsing history and inquire if they have the capability to provide you with access to your historical internet logs.
3. Depending on your ISP and their policies, they may require you to complete a formal request or provide specific details for verification purposes. Follow their instructions and provide any requested information.
4. Once your request is submitted, the ISP will review it and determine if they can grant you access to your browsing history logs. Note that the process may take some time, especially if there are legal and privacy considerations involved.
5. If your ISP approves your request, they will provide you with the necessary information or steps to access your browsing history logs. Follow their instructions to retrieve the requested data.
It’s important to mention that contacting your ISP for browsing history recovery is not always a guaranteed solution. The availability and retention of browsing history logs can vary depending on the ISP and legal requirements. Additionally, there may be limitations on the amount of historical data that can be retrieved.
Privacy and legal considerations also come into play when requesting browsing history logs from your ISP. Make sure to familiarize yourself with any applicable laws or regulations in your jurisdiction, and ensure that your request aligns with those guidelines. In some cases, you may need to provide valid reasons or satisfy specific legal requirements for your ISP to fulfill your request.
By contacting your Internet Service Provider, you have the opportunity to recover your browser history through their available logs and archives. However, the success of this method depends on the specific policies and capabilities of your ISP, as well as any legal and privacy considerations that may apply.
Conclusion
Recovering browser history can be a valuable skill when you accidentally delete or lose your browsing data. Throughout this article, we explored various methods to help you regain access to your lost or deleted browsing history.
We started by emphasizing the importance of recovering browser history, whether to retrieve recently closed tabs, recover deleted browsing history, or investigate someone’s online activities. Understanding the value of browsing history can motivate us to explore the available recovery methods.
We then discussed five common methods to recover browser history:
1. Using the browsing history feature of your web browser, which allows you to access recently visited websites and restore closed tabs.
2. Checking the DNS cache, where the Domain Name System stores information about recently accessed websites.
3. Utilizing system restore points, which allow you to revert your computer to a previous state and potentially restore your browser history.
4. Employing data recovery software, specifically designed to retrieve lost or deleted files, including browser history.
5. Contacting your Internet Service Provider (ISP) to inquire about accessing their logs of your browsing history.
Each method has its own strengths and limitations, and the effectiveness may vary depending on the circumstances and the specific browser and device you are using.
It’s crucial to remember that the success of recovering browser history depends on factors such as timing, previous settings, and available data. Therefore, it’s always recommended to act promptly and exercise caution to increase the chances of successful recovery.
Lastly, it’s essential to respect privacy laws and consult with professionals when necessary, especially when dealing with sensitive information or legal requirements.
By understanding the methods outlined in this article and applying them intelligently, you can increase your chances of recovering your browser history and regaining access to valuable browsing data. Remember to choose the method that suits your specific situation, and never hesitate to seek professional assistance if needed.