Introduction
Welcome to the digital age, where capturing memories has become easier than ever. With smartphones equipped with powerful cameras, we now have the ability to take countless photos of our loved ones, favorite places, and special moments. However, as our photo collections continue to grow, managing and organizing them becomes a daunting task. Luckily, Google Photos is here to help!
Google Photos is a free and user-friendly platform that allows you to store, organize, and access your photos from anywhere. Whether you’re switching to a new device, freeing up storage on your phone, or simply looking for a reliable way to keep your photos safe, Google Photos has got you covered.
In this article, we will guide you through the process of moving your photos to Google Photos, step by step. We’ll show you how to sign in to Google Photos, install the app on your device, and upload your photos effortlessly. Additionally, we will explore how you can organize, access, and manage your photos on multiple devices, as well as take advantage of the various features and settings offered by Google Photos.
So, if you’re ready to declutter your device and embark on a seamless photo management journey, let’s get started with the simple yet important first step: signing in to your Google Photos account.
Step 1: Sign in to Google Photos
Before you can start uploading your photos to Google Photos, you’ll need to sign in to your Google account. If you already have a Google account, such as a Gmail or YouTube account, you can use the same login credentials to access Google Photos. Here’s how:
- Open your preferred web browser on your computer or launch the Google Photos app on your mobile device.
- If using a web browser, navigate to https://photos.google.com. If using the app, simply open it.
- Click on the “Sign in” button or tap “Get Started” on the app’s home screen.
- Enter your Google account email address or phone number associated with your account.
- Next, enter your password. Make sure to double-check for any typos or ensure that the caps lock isn’t accidentally on.
- Click on the “Next” button or tap “Next” on the app.
- If you have previously set up two-step verification for your Google account, you may also need to enter a verification code at this stage.
- Once you’ve successfully entered your login credentials, you’ll be signed in to Google Photos, and you can start exploring the various features and settings.
If you don’t have a Google account, you can easily create one by clicking “Create account” or tapping “Sign up” on the Google Photos app. Follow the on-screen prompts to set up your account, and then proceed to sign in using the steps mentioned above.
Signing in to Google Photos is a crucial first step as it establishes a secure connection between your Google account and the platform. It allows you to seamlessly access your uploaded photos from any device with an internet connection, making it convenient for you to organize, edit, and share your memories effortlessly.
Step 2: Install Google Photos app on your device
In order to fully utilize Google Photos’ features and seamlessly manage your photos, it is recommended to install the Google Photos app on your device. Whether you have an Android or iOS device, the process is simple. Follow the steps below to get started:
- Visit the app store on your device, such as the Google Play Store for Android or the App Store for iOS.
- Search for “Google Photos” using the search bar at the top of the app store.
- Look for the official Google Photos app, which is usually denoted by the familiar Google icon.
- Once you have located the app, click on the “Install” button for Android or the “Get” button for iOS.
- Wait for the app to download and install on your device. The progress can be tracked by viewing the download icon.
- Once the installation is complete, you will see the Google Photos app icon on your home screen or app drawer.
- Tap on the app icon to launch it.
By installing the Google Photos app on your device, you gain the ability to easily access Google Photos with just a tap. This provides you with a more convenient and efficient experience when it comes to uploading and managing your photos.
Furthermore, having the app installed allows you to take advantage of additional features, such as automatic photo backups and syncing. These features ensure that your photos are securely stored in the cloud and can be accessed from any device with the Google Photos app installed and signed in to your account.
Now that you have successfully installed the Google Photos app on your device, you are ready to move on to the next step: allowing access to your device’s photos.
Step 3: Allow access to your device’s photos
Now that you have installed the Google Photos app on your device, the next step is to grant the app access to your device’s photos. This will allow Google Photos to scan and upload the photos from your device to your Google Photos account. Follow the instructions below based on your device type:
Android Devices:
- Open the Google Photos app on your Android device.
- You will be prompted to give the app permission to access your photos. Tap on “Allow” or “Grant” to proceed.
- If you accidentally tapped on “Deny” or did not see the prompt, no need to worry. You can still grant access by following these additional steps:
- Open the Settings app on your Android device.
- Scroll down and tap on “Apps & notifications” or a similar option.
- Look for “Google Photos” in the list of installed apps and tap on it.
- Tap on “Permissions” or a similar option.
- Enable the toggle for “Storage” to allow the app to access your device’s photos.
iOS Devices:
- Open the Google Photos app on your iOS device.
- You will be prompted to give the app permission to access your photos. Tap on “OK” to proceed.
- If you accidentally tapped on “Don’t Allow” or did not see the prompt, no need to worry. You can still grant access by following these additional steps:
- Open the Settings app on your iOS device.
- Scroll down and tap on “Privacy”.
- Tap on “Photos”.
- Locate “Google Photos” in the list of apps and tap on it.
- Choose the option “Read and Write” to allow the app to access your device’s photos.
Granting access to your device’s photos is essential for the Google Photos app to efficiently upload and organize your photo library. It ensures that all the photos stored on your device are synchronized with your Google Photos account, making them accessible across different devices and providing a secure backup solution.
With access granted, you are now ready to proceed to the next step: choosing the photos you want to upload to Google Photos.
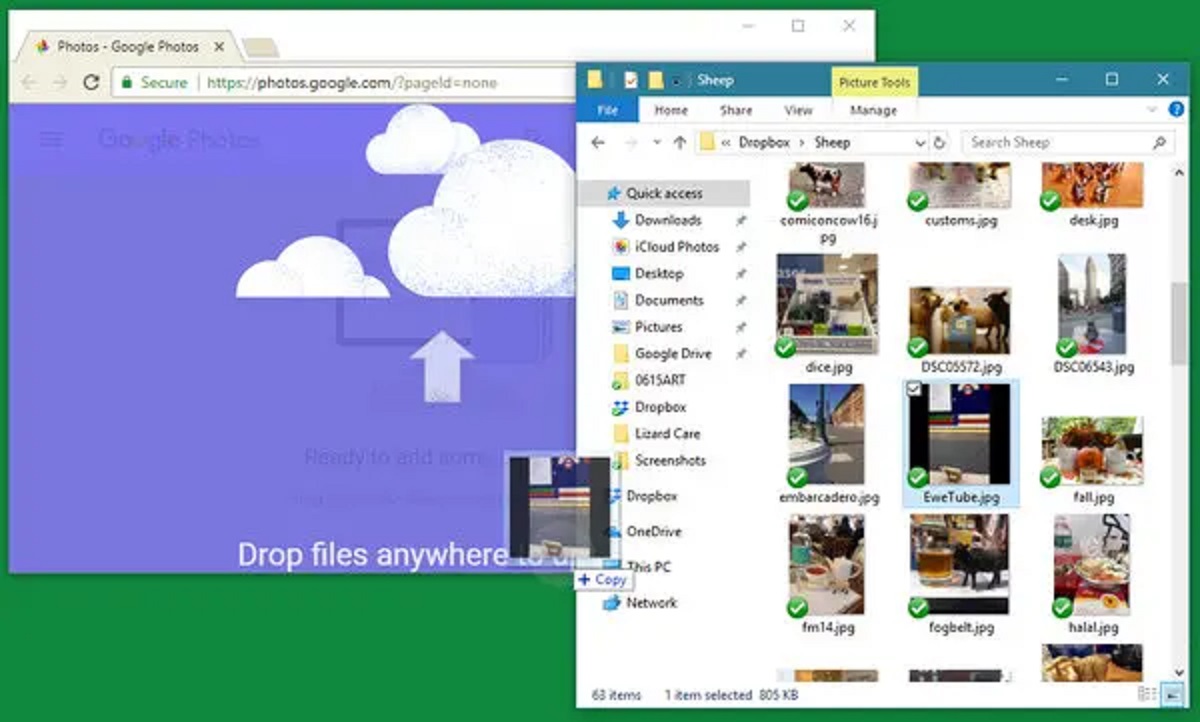
Step 4: Choose the photos you want to upload
Now that you have granted the Google Photos app access to your device’s photos, it’s time to select the specific photos you want to upload to your Google Photos account. Whether you want to upload a few select photos or your entire photo library, Google Photos provides various options to make the selection process effortless:
Uploading Individual Photos:
- Open the Google Photos app on your device.
- Navigate to the folder or album where the desired photo is located.
- Tap on the photo you want to upload to select it.
- If you want to select multiple photos, tap on the square icon at the top-right corner of each photo to mark them as selected.
- Once you have selected all the photos you want to upload, tap on the “Upload” or “Share” icon, usually represented by an arrow pointing upward.
- Google Photos will start uploading the selected photos to your Google Photos account. The progress can be viewed in the app or notification bar.
Uploading Entire Photo Albums:
- If you prefer to upload entire photo albums or folders, you can do so by selecting the albums or folders themselves instead of individual photos.
- Open the Google Photos app on your device.
- Navigate to the main Albums/Folders screen, where all your albums and folders are listed.
- Long-press on the album or folder you want to upload.
- Select “Upload” or “Share” from the options that appear.
- Google Photos will begin uploading the entire album or folder, along with its contents, to your Google Photos account.
By providing the flexibility to choose individual photos or entire albums for uploading, Google Photos ensures that you have control over which photos are transferred to your account. This allows you to organize and manage your photos effortlessly, making it easier to find and share them in the future.
Once the upload process is complete, you can move on to the next step: selecting the upload option to transfer your chosen photos to Google Photos.
Step 5: Select the Upload option
After choosing the photos you want to upload to Google Photos, the next step is to select the upload option that suits your needs. Google Photos offers several methods to transfer your selected photos to your Google Photos account:
Automatic Backup:
If you want a seamless and hassle-free way to upload your photos, enabling automatic backup is the way to go. With this option, Google Photos will automatically back up all the photos on your device whenever it is connected to Wi-Fi and charging. Follow these steps to enable automatic backup:
- Open the Google Photos app on your device.
- Tap on your profile picture or initial at the top-right corner of the screen.
- Select “Photos settings” or “Settings” from the drop-down menu.
- Tap on “Back up & sync”.
- Enable the toggle switch for “Back up & sync”.
- Toggle on the options for “Upload photos” and “Upload videos” if desired.
- Adjust any additional settings, such as choosing the upload quality, folder exclusions, or including RAW files.
Manual Upload:
If you prefer to have more control over the uploading process, you can choose to manually upload your selected photos. This gives you the opportunity to review and choose which specific photos to upload before transferring them. Here’s how to manually upload photos:
- Open the Google Photos app on your device.
- Tap on the “Upload” or “Add” icon, usually represented by a plus (+) symbol.
- Navigate to the folder or album where your selected photos are located.
- Select the photos you want to upload by tapping on them.
- Once you’ve selected all the desired photos, tap on the “Upload” or “Done” button, usually located at the top-right corner of the screen.
- Google Photos will begin the manual upload process, transferring the selected photos to your Google Photos account. The progress can be monitored in the app or notification bar.
By providing both automatic and manual upload options, Google Photos caters to different preferences and needs. Whether you want a hands-off approach or prefer to manually curate your photo upload, Google Photos has you covered.
Once you have selected the appropriate upload option and initiated the transfer of your chosen photos, you can move on to the next step: organizing your photos in Google Photos.
Step 6: Organize your photos in Google Photos
Now that your photos have been successfully uploaded to your Google Photos account, it’s time to organize them so that you can easily find and browse through your collection. Google Photos provides various features to help you organize your photos efficiently:
Albums:
One way to keep your photos organized is by creating albums. Albums act as virtual folders where you can group photos based on a specific event, theme, or any other criteria that make sense to you. To create an album in Google Photos, follow these steps:
- Open the Google Photos app or visit the Google Photos website.
- Select the photos you want to include in the album by tapping on them.
- Tap on the three-dot menu icon or the “More” option.
- Choose the “Add to album” or “Create album” option.
- Enter a name for the album and add any additional details or descriptions if desired.
- Select a cover photo for the album if you wish. This photo will be the thumbnail representing the album.
- Tap on the “Create” or “Done” button to create the album.
Tags and Keywords:
Adding tags or keywords to your photos is another effective way to organize them. These tags can help you quickly search for specific photos based on the people, places, or objects captured in them. Google Photos uses advanced image recognition technology to detect and suggest tags for your photos automatically. You can also manually add or edit tags as per your preference.
Search and Filtering:
Google Photos provides a powerful search feature that allows you to find specific photos with ease. You can search based on people, places, objects, or even specific dates. The filtering option enables you to narrow down your search results further by selecting specific criteria, such as photos with a certain color or photos taken in a specific location.
Assistant:
The Assistant feature in Google Photos provides helpful suggestions for organizing and enhancing your photos. It can automatically create collages, animations, and albums based on your photos. It also suggests features like creating shared albums or freeing up space on your device by removing backed-up photos.
By utilizing these organizing features, you can ensure that your photos are neatly categorized and easily accessible whenever you want to revisit your memories or share them with others.
Now that you have organized your photos in Google Photos, you are ready to explore the next step: accessing and managing your photos on multiple devices.
Step 7: Access and manage your photos on multiple devices
One of the fantastic advantages of using Google Photos is the ability to access and manage your photos across multiple devices. Whether you’re using a smartphone, tablet, or computer, Google Photos ensures that your entire photo library is seamlessly synchronized. Here’s how you can access and manage your photos on different devices:
Mobile Devices:
If you have Google Photos installed on your mobile devices, such as smartphones or tablets, follow these steps to access and manage your photos:
- Open the Google Photos app on your mobile device.
- Sign in to your Google account if you haven’t already done so.
- Your entire photo library, including all the photos you’ve uploaded, will be available for browsing and management.
- You can perform various actions such as editing, sharing, deleting, and organizing your photos directly from the app.
Computer:
If you prefer to access and manage your photos on a computer, follow these steps:
- Open a web browser on your computer.
- Visit the Google Photos website by typing https://photos.google.com in the address bar.
- Sign in to your Google account if you haven’t already done so.
- Your entire photo library will be accessible on the website’s interface.
- You can perform various actions such as editing, sharing, deleting, and organizing your photos directly from the website.
By accessing and managing your photos on multiple devices, you have the flexibility to work with your photos in a way that is most convenient for you. Whether you’re on the go or sitting at your desk, Google Photos ensures that your memories are readily available and easily manageable.
Now that you know how to access and manage your photos across different devices, it’s time to explore the additional features and settings offered by Google Photos. This will allow you to further enhance your photo management experience.
Step 8: Use additional features and settings in Google Photos
Google Photos offers a plethora of additional features and settings that can further enhance your photo management experience. These features provide advanced editing options, automated organization, and customization to suit your preferences. Let’s explore some of the key features and settings:
Editing Tools:
Google Photos provides powerful editing tools that enable you to enhance and modify your photos directly within the app or website. You can adjust brightness, contrast, saturation, apply filters, crop, rotate, and even remove unwanted objects or red-eye. These tools help you bring out the best in your photos without the need for third-party editing software.
Assistant Suggestions:
The Assistant feature in Google Photos provides intelligent suggestions and automated creations based on your photo library. It can create collages, animations, movies, and albums using your uploaded photos. Simply check the Assistant tab to view and act on these suggestions. You can save, edit, or dismiss Assistant creations according to your preference.
Shared Albums:
With Google Photos, you can easily share your photos with friends and family by creating shared albums. Simply select the photos, tap on the share icon, and choose the people you want to share the album with. You can also invite others to contribute their photos to the shared album, making it a collaborative collection of memories.
Customization Settings:
Google Photos allows you to customize various settings to tailor your photo management experience. You can choose the upload quality for your photos, enable or disable automatic backup and syncing, adjust the settings for face grouping, and manage the storage settings to optimize space on your device.
Explore Recommendations:
Google Photos provides “For You” recommendations to help you rediscover old memories and explore new possibilities with your photos. It suggests actions like sharing photos with specific people, creating animations, or trying out editing features based on your usage patterns.
By utilizing these additional features and settings, you can further personalize and streamline your photo management experience in Google Photos. Take the time to explore these options and make the most out of your stored memories.
Congratulations! You have successfully completed all the steps to move your photos to Google Photos, sign in, install the app, allow access to your device’s photos, choose the photos to upload, select the upload option, organize your photos, and access them on multiple devices. With Google Photos, you can now enjoy a seamlessly organized and easily accessible photo collection.
Conclusion
Congratulations on successfully moving your photos to Google Photos! You have taken an important step towards effectively managing and organizing your digital memories. With Google Photos, you now have a powerful tool at your disposal for storing, accessing, and sharing your photos effortlessly.
In this guide, we covered the step-by-step process of signing in to Google Photos, installing the app on your device, allowing access to your photos, selecting and uploading your desired photos, organizing them within albums, and accessing them on multiple devices. We also explored additional features such as editing tools, Assistant suggestions, shared albums, customization settings, and more.
By leveraging the features and capabilities of Google Photos, you can easily navigate through your photo library, find specific photos using tags and search options, share albums with friends and family, and customize your photo management experience to suit your preferences.
Remember that Google Photos offers unlimited free storage for high-quality photos and videos, making it an excellent choice for backing up your precious memories without worrying about running out of space on your device.
So, don’t let your photos get lost in the digital clutter. Take the time to explore the different features and settings offered by Google Photos to enhance your photo organization and management. Whether you’re a casual snapper, a photography enthusiast, or someone who simply wants to preserve their memories, Google Photos is a reliable and user-friendly solution for all your photo management needs.
Start organizing your photos, relive your favorite moments, and share them with your loved ones. Embrace the convenience of having your entire photo collection accessible anytime, anywhere, and enjoy the peace of mind that comes with knowing your memories are safely stored in the cloud.
So, go ahead and make the most of the powerful capabilities of Google Photos. Happy photo managing!