Introduction
NFC (Near Field Communication) technology has become increasingly popular in recent years, thanks to its ability to easily transfer data between devices with just a simple tap. One of the useful applications of NFC is with NFC tags, small physical objects that can store and transmit information.
An NFC tag is essentially a tiny microchip embedded in a sticker or card. When placed near an NFC-enabled device, such as a smartphone or tablet, the tag can initiate various actions, such as opening a website, launching an app, or even making a payment.
However, there may be instances when you want to copy an existing NFC tag. Perhaps you’ve misplaced the original tag and need a backup, or maybe you want to share the same functionality with a friend or colleague. Whatever the reason, being able to copy an NFC tag can be incredibly convenient.
In this article, we will guide you through the process of copying an NFC tag using a compatible device and an NFC tag copying app. By following these steps, you’ll be able to duplicate an NFC tag’s functionality in just a few simple clicks.
So, if you’re interested in learning how to copy an NFC tag, continue reading to find out how to do it like a pro.
What is an NFC Tag?
NFC (Near Field Communication) tags are small physical objects that contain an embedded microchip capable of storing and transmitting data. These tags are typically encased in a sticker or card format, making them easy to attach or carry around.
The technology behind NFC tags allows them to establish a wireless connection with compatible devices, such as smartphones or tablets, when brought into close proximity. This connection enables the transfer of information and the initiation of various actions with just a simple tap.
An NFC tag can store different types of data, including text, URLs, contact information, or even commands to launch specific applications. For example, a business may use NFC tags to provide customers with easy access to their website or contact details by simply tapping their smartphones on the tag. Similarly, public transportation systems may utilize NFC tags to allow passengers to quickly pay for their fares by tapping their transport cards on specialized readers.
The popularity of NFC technology has led to an increase in the use of NFC tags across numerous industries. From retail and marketing to access control and automation, NFC tags bring convenience and efficiency to various applications.
It’s important to note that NFC tags function in a passive manner, meaning they do not require a power source of their own. Instead, they rely on the energy transmitted by the NFC-enabled device to operate. This allows the tags to be low-cost and highly versatile in their applications.
With the ability to easily copy the functionality of an NFC tag, users can create duplicates that carry the same information and perform the same actions. This opens up possibilities for sharing access, replicating settings, or simply having backups in case of loss or damage.
Now that we understand what NFC tags are and their basic functionality, let’s explore the process of copying an NFC tag in the following sections.
Why Would You Want to Copy an NFC Tag?
Copying an NFC tag can be incredibly useful in a variety of scenarios. Here are some common reasons why you might want to create a duplicate NFC tag:
- Backup: Having a backup NFC tag ensures that you won’t lose the functionality and information stored on the original tag. If the original tag gets damaged, misplaced, or stops working, you can simply use the copied tag as a replacement.
- Sharing: Sometimes, you may want to share the convenience of an NFC tag with others. By creating a copy, you can easily distribute the tag’s functionality to friends, family, colleagues, or customers. This is particularly useful in cases where you have access control systems or promotional materials that require interaction with NFC tags.
- Multiple Locations: If you have specific actions associated with an NFC tag that you want to replicate in multiple locations, copying the tag becomes a practical solution. Instead of manually setting up each tag individually, you can copy the original tag’s functionality to ensure consistency across different locations.
- Maintaining Settings: Some NFC tags are used to adjust settings or configurations on devices. For example, an NFC tag can be programmed to adjust the volume, brightness, or Wi-Fi settings of a smartphone when tapped. By copying the tag, you can easily apply the same settings to multiple devices without having to set up each one manually.
- Convenience: Having multiple copies of an NFC tag can offer added convenience in various situations. Whether it’s for personal use at home or for business purposes, having duplicate tags can save time and effort by allowing seamless access to the desired functions.
Copying an NFC tag provides flexibility and versatility in how you use and share its functionalities. Whether you’re looking for backup options, enhanced accessibility, or seamless replication of actions in multiple locations, the ability to copy NFC tags simplifies these processes and opens up a range of possibilities.
Now that we understand why you might want to copy an NFC tag, let’s move on to the step-by-step process of how to do it.
How to Copy an NFC Tag
Copying an NFC tag involves a straightforward process that requires a compatible device and an NFC tag copying app. Follow the steps below to successfully duplicate the functionality of an NFC tag:
- Step 1: Find a Compatible Device
- Step 2: Install an NFC Tag Copying App
- Step 3: Launch the App
- Step 4: Choose the Copy Option
- Step 5: Place the Original Tag Near Your Device
- Step 6: Tap “Copy” in the App
- Step 7: Test the Copied NFC Tag
Ensure that you have an NFC-enabled device capable of reading and writing NFC tags. This could be a smartphone, tablet, or any other device that supports NFC technology.
Search for and install an NFC tag copying app from your device’s app store. There are numerous free and paid options available, so choose one that suits your needs and has good ratings and reviews.
Once the app is installed, open it on your device.
Select the “Copy” or “Clone” option within the app’s interface. This will initiate the process of copying an NFC tag.
Take the original NFC tag and place it in close proximity to your device’s NFC antenna. The location of the NFC antenna varies depending on the device model, so refer to your device’s user manual if you’re unsure where it’s located.
Once the original NFC tag is positioned correctly, tap the “Copy” button within the app. This will trigger the copying process, where the app will read the data from the original tag and save it.
After the copying process is completed, test the copied NFC tag by bringing it close to your device. It should initiate the same actions or display the same information as the original tag did.
Following these steps will allow you to successfully copy an NFC tag using a compatible device and an NFC tag copying app. Remember to position the original tag correctly and ensure it is within close proximity to the device’s NFC antenna for an effective copying process.
Now that you’re aware of the process involved in copying an NFC tag, you can enjoy the convenience of having duplicates for backup, sharing, or replicating functionality in different locations.
Step 1: Find a Compatible Device
Before you can start copying an NFC tag, you’ll need to ensure that you have a compatible device that supports NFC technology. NFC-enabled devices are becoming increasingly common, especially in smartphones and tablets. Here’s how to determine if your device is NFC-compatible:
Check the specifications:
Review the specifications of your device to see if it has NFC capabilities. You can find this information in the device’s user manual or by visiting the manufacturer’s website. Look for terms such as “NFC” or “Near Field Communication” under the connectivity or wireless section.
Look for the NFC symbol:
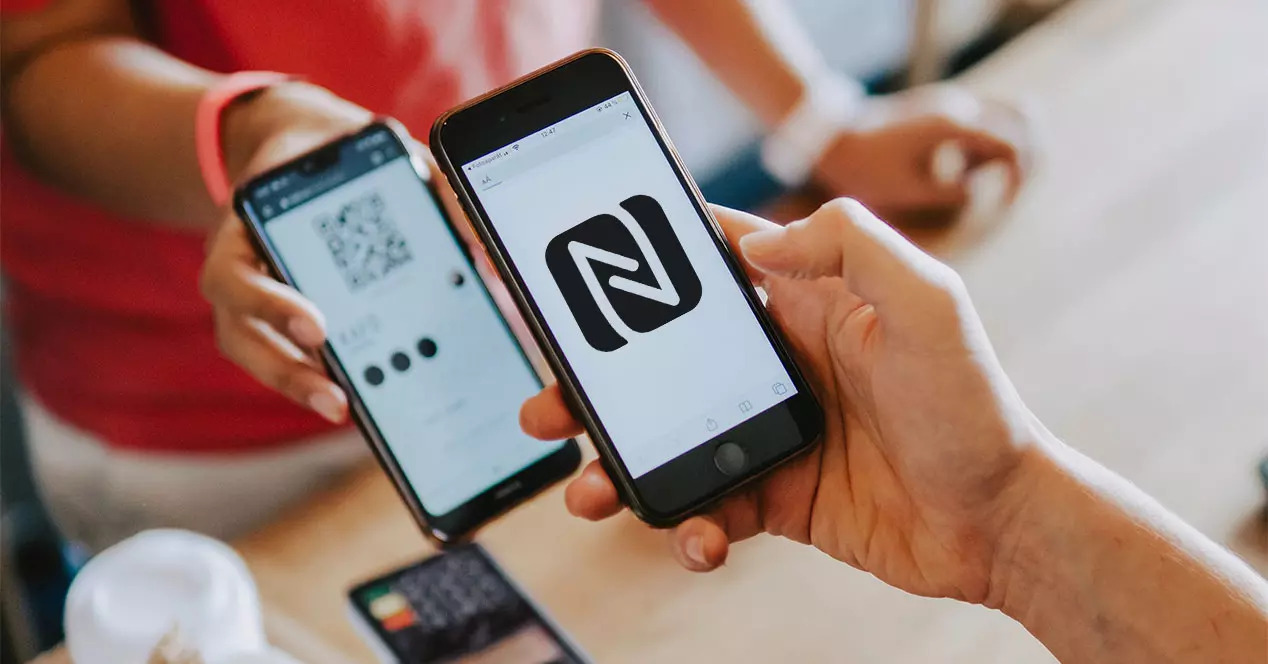
Inspect your device for the NFC symbol, which is typically represented by a stylized “N” logo. The symbol might be located on the back of the device, near the camera, or on the front in the case of some smartphones. This emblem indicates that the device is equipped with NFC technology.
Try the settings menu:
On Android devices, you can check if NFC is available by going to the settings menu. Look for an option like “Wireless & Networks” or “Connections,” and see if there is a toggle switch for NFC. If the switch exists, it means your device supports NFC.
On iOS devices, starting from iPhone 7 and above, NFC is available for certain functions such as Apple Pay, but it is limited to those specific use cases and not accessible for general NFC functionality.
Confirm with customer support:
If you’re still unsure whether your device is NFC-compatible, you can contact the manufacturer’s customer support. Provide them with the device’s model number and inquire about NFC capabilities.
Once you’ve determined that your device supports NFC, you’re ready to proceed with the next steps of copying an NFC tag. Remember, the copying process requires you to place the original tag near the device’s NFC antenna, so familiarize yourself with your device’s setup to ensure a smooth journey through the copying process.
Now that you know how to check for NFC compatibility on your device, you can move on to the next step of installing an NFC tag copying app.
Step 2: Install NFC Tag Copying App
After confirming that your device is NFC-compatible, the next step in copying an NFC tag is to install an NFC tag copying app. These apps are available on various mobile platforms and can be found in the respective app stores. Here’s how to install an NFC tag copying app:
1. Open your device’s app store:
Access the app store on your device. On Android devices, this is typically the Google Play Store, while iOS devices use the App Store.
2. Search for an NFC tag copying app:
Use the app store’s search function to find an NFC tag copying app. Popular options include “NFC Tools”, “TagMo”, or “NFC TagWriter”. Read user reviews and ratings to help you choose a reliable and user-friendly app.
3. Check the app’s compatibility:
Before installing the app, double-check that it is compatible with your device. The compatibility information is usually listed in the app store under the app’s description or technical details.
4. Install the app:
Click on the “Install” or “Get” button to begin the installation process. This may take a few moments depending on your internet connection speed.
5. Wait for the installation to complete:
Once the installation is complete, you will see the app’s icon on your device’s home screen or app drawer. Tap on the icon to launch the app.
Now that you have successfully installed an NFC tag copying app on your device, you’re ready to move on to the next step of launching the app and initiating the copying process. These apps provide intuitive interfaces with step-by-step instructions for copying NFC tags, making the process simple and accessible for users of all skill levels.
In the next step, we will guide you through launching the NFC tag copying app and selecting the appropriate option to copy an NFC tag.
Step 3: Launch the App
With the NFC tag copying app successfully installed on your device, it’s time to launch the app and get ready to copy an NFC tag. Follow these steps to launch the app:
1. Locate the app:
Locate the icon of the NFC tag copying app on your device’s home screen or app drawer. It is typically represented by the app’s logo or name.
2. Tap on the app’s icon:
Tap on the app’s icon to open it. The app will load and bring you to its main interface, where you can access the different features and options.
3. Grant necessary permissions:
Depending on the app and your device’s settings, you may be prompted to grant certain permissions for the app to work properly. These permissions could include access to the device’s NFC functionality, storage, or other relevant features. Follow the on-screen prompts and grant the necessary permissions when prompted.
4. Familiarize yourself with the app’s layout:
Take a moment to explore the app’s layout and interface. Each NFC tag copying app may have a slightly different layout, but they generally have sections or menus that allow you to choose the desired function, such as copying or cloning an NFC tag.
Now that the app is launched and ready, you’re one step closer to copying an NFC tag. In the next step, we will guide you on how to select the appropriate option within the app to start copying an NFC tag.
Step 4: Choose the Copy Option
Now that you have launched the NFC tag copying app, the next step is to choose the appropriate option within the app to initiate the copying process. Follow these steps to select the copy option:
1. Navigate to the copying function:
Explore the app’s interface to find the section or menu that allows you to perform the desired operation of copying an NFC tag. This may be labeled as “Copy”, “Clone”, or something similar.
2. Select the copy option:
Once you have located the copying function, tap on it to select it. You may be directed to a new screen or presented with further options related to the copying process.
3. Review any additional instructions:
Sometimes, the app may provide additional instructions or guidelines on how to proceed with the copying process. Read these instructions carefully to ensure that you follow the correct steps.
4. Confirm your selection:
After selecting the copy option and reviewing any additional instructions, you may need to confirm your choice before proceeding to the next step. This confirmation can be in the form of a button or prompt on the screen.
By choosing the copy option, you have indicated to the app that you want to duplicate the functionality of an NFC tag. The app will guide you through the subsequent steps to complete the copying process successfully.
In the next step, we will guide you through the process of placing the original NFC tag near your device to begin the copying process.
Step 5: Place the Original Tag Near Your Device
With the copy option selected in the NFC tag copying app, you are now ready to proceed to the actual copying process. This step involves placing the original NFC tag near your device’s NFC antenna. Follow these steps to ensure proper placement:
1. Locate the NFC antenna:
Take a moment to identify the location of the NFC antenna on your device. The NFC antenna is typically located on the back of the device, near the camera or logo, or on the front in the case of some smartphones. If you are unsure, consult your device’s user manual for guidance.
2. Hold the original NFC tag near the antenna:
Take the original NFC tag and hold it near the NFC antenna of your device. The distance between the tag and the antenna should be relatively close, usually within a few centimeters or inches. Ensure that there is proper contact between the tag and the device.
3. Maintain proximity throughout the copying process:
Keep the original NFC tag near the device’s NFC antenna throughout the copying process. This is crucial for a successful and accurate copying of the tag’s functionality. Avoid moving the tag too far away or disrupting the contact between the tag and the device.
Note: In some cases, with certain NFC tag copying apps, you may be required to follow specific instructions or gestures while placing the original tag near the device. Pay attention to the app’s prompts and instructions for the best results.
By positioning the original NFC tag properly near your device’s NFC antenna, you are preparing for the next step in the copying process: tapping the “Copy” button within the app. This will allow the app to read and save the data from the original tag to create a copy with the same functionality.
Now that the original tag is in place, let’s move on to the next step and tap the “Copy” button in the app to initiate the copying process.
Step 6: Tap “Copy” on the App
With the original NFC tag positioned near your device’s NFC antenna, it’s time to initiate the copying process by tapping the “Copy” button on the NFC tag copying app. Follow these steps to complete this step:
1. Locate the “Copy” button:
Within the NFC tag copying app, look for the “Copy” button. It is usually prominently displayed within the app’s interface. Take a moment to familiarize yourself with its location.
2. Tap the “Copy” button:
Once you have located the “Copy” button, tap on it with your finger. This action will indicate to the app that you are ready for it to begin the copying process.
3. Wait for the copying process to complete:
After tapping the “Copy” button, you may need to wait for a few seconds or minutes while the NFC tag copying app reads the data from the original tag and saves it. The length of time may vary depending on the app and the amount of data being transferred.
Note: It’s important to keep the original NFC tag in place near the device’s NFC antenna throughout the copying process. Any disruption or movement may interfere with the successful completion of the copying process.
By tapping the “Copy” button on the NFC tag copying app, you have initiated the copying process. The app will now read the data from the original NFC tag and save it, creating a duplicate tag that carries the same functionality and information.
In the next step, we will guide you through testing the copied NFC tag to ensure it behaves as expected.
Step 7: Test the Copied NFC Tag
After completing the copying process, the next step is to test the functionality of the copied NFC tag. This step ensures that the copied tag performs the same actions and provides the same information as the original tag. Follow these steps to test the copied NFC tag:
1. Bring your device near the copied NFC tag:
Take your device that has the NFC tag copying app installed and bring it close to the copied NFC tag. Ensure that the device’s NFC antenna is in proximity to the tag.
2. Observe the actions and information:
Once the device recognizes the copied NFC tag, observe its behavior. It should perform the same actions or provide the same information as the original tag. For example, if the original tag opens a website, the copied tag should also open the same website when tapped.
3. Verify the accuracy of the copied tag:
If possible, compare the actions or information provided by the copied tag with those of the original tag side by side. This will help ensure the accuracy of the copying process and confirm that the copied tag is functioning properly.
Note: In some cases, the copied NFC tag may require additional configuration or setup after the copying process. If this is the case, follow any instructions provided by the NFC tag copying app to complete the setup and fully utilize the functionality of the copied tag.
By testing the copied NFC tag, you can ensure that it behaves as expected and provides the same functionality as the original tag. This step helps verify the success of the copying process and allows you to confidently use the duplicated tag.
Congratulations! You have successfully copied an NFC tag using a compatible device and an NFC tag copying app. With the copied tag, you now have the flexibility to use it as a backup, share it with others, or replicate its functionality in different locations.
Conclusion
Copying an NFC tag can be a convenient and practical solution in various situations. Whether you need a backup, want to share the tag’s functionality, or replicate it in different locations, the process is relatively straightforward.
In this article, we explored the step-by-step process of copying an NFC tag. We started by ensuring that you have a compatible NFC-enabled device and installing an NFC tag copying app. Then, we guided you through launching the app, selecting the copy option, and placing the original tag near your device’s NFC antenna. We instructed you to tap the “Copy” button on the app to initiate the copying process and explained the importance of maintaining proximity throughout.
After the copying process, we advised testing the functionality of the copied NFC tag to ensure its accuracy in performing the desired actions or providing the intended information. This step validated the success of the copying process and confirmed the usability of the duplicated tag.
With the ability to copy NFC tags, you now have flexibility and convenience at your fingertips. You can create backups, share functionality, or replicate settings easily, all with just a simple tap.
So, the next time you find yourself in a situation where copying an NFC tag would be useful, follow the steps outlined in this article to successfully duplicate its functionality and enjoy the benefits it brings.
Now go ahead and copy those NFC tags like a pro!