Introduction
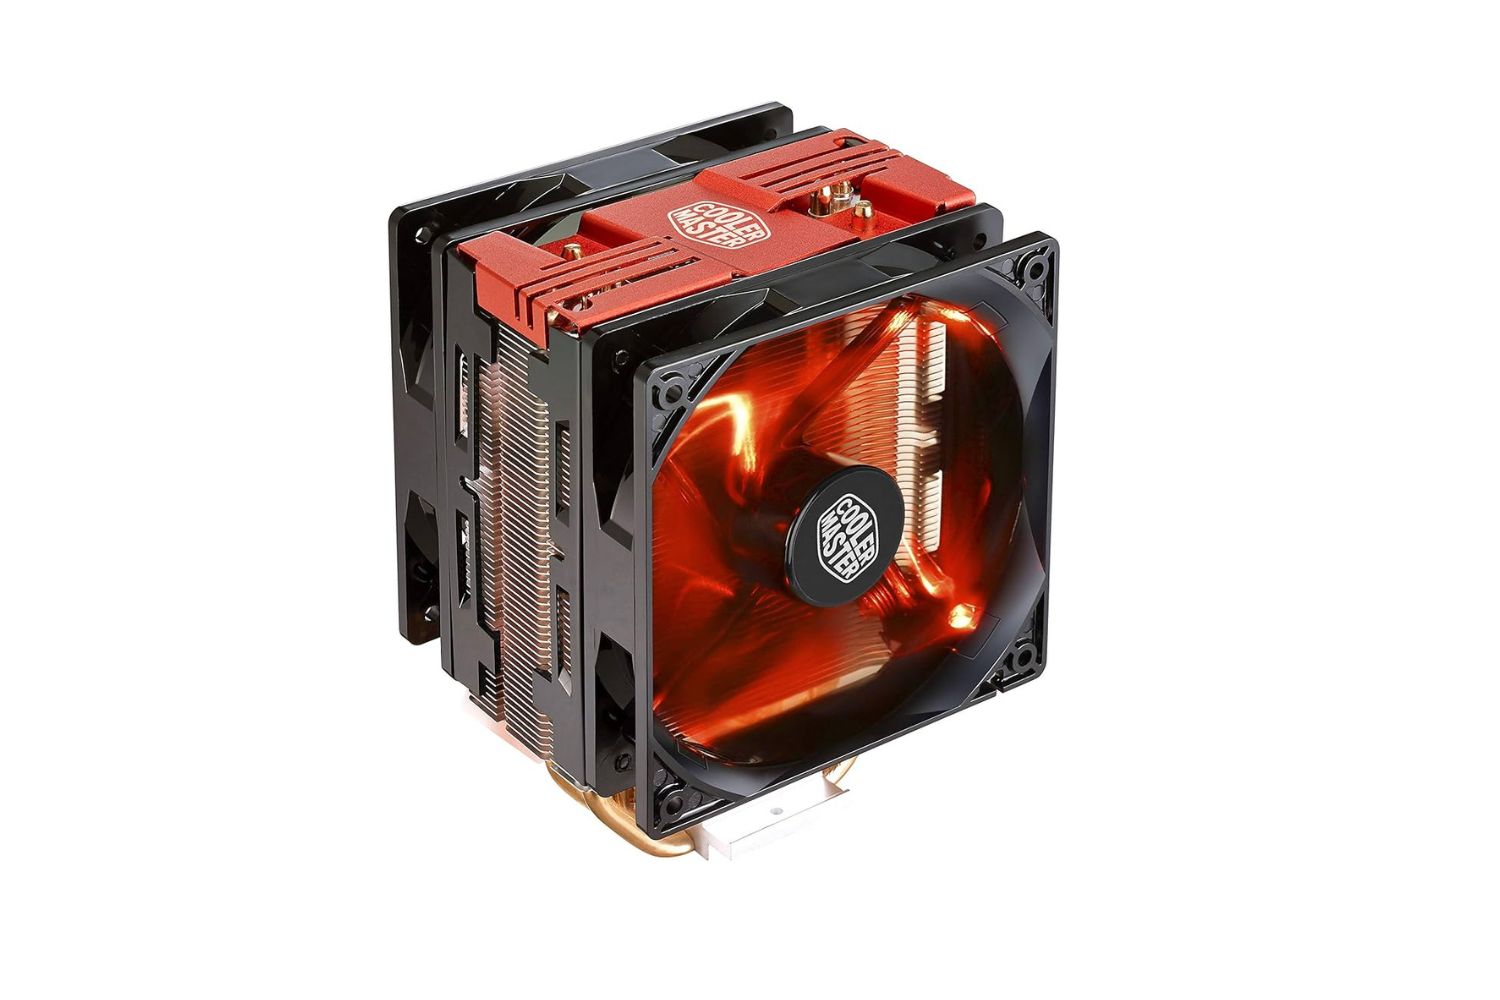
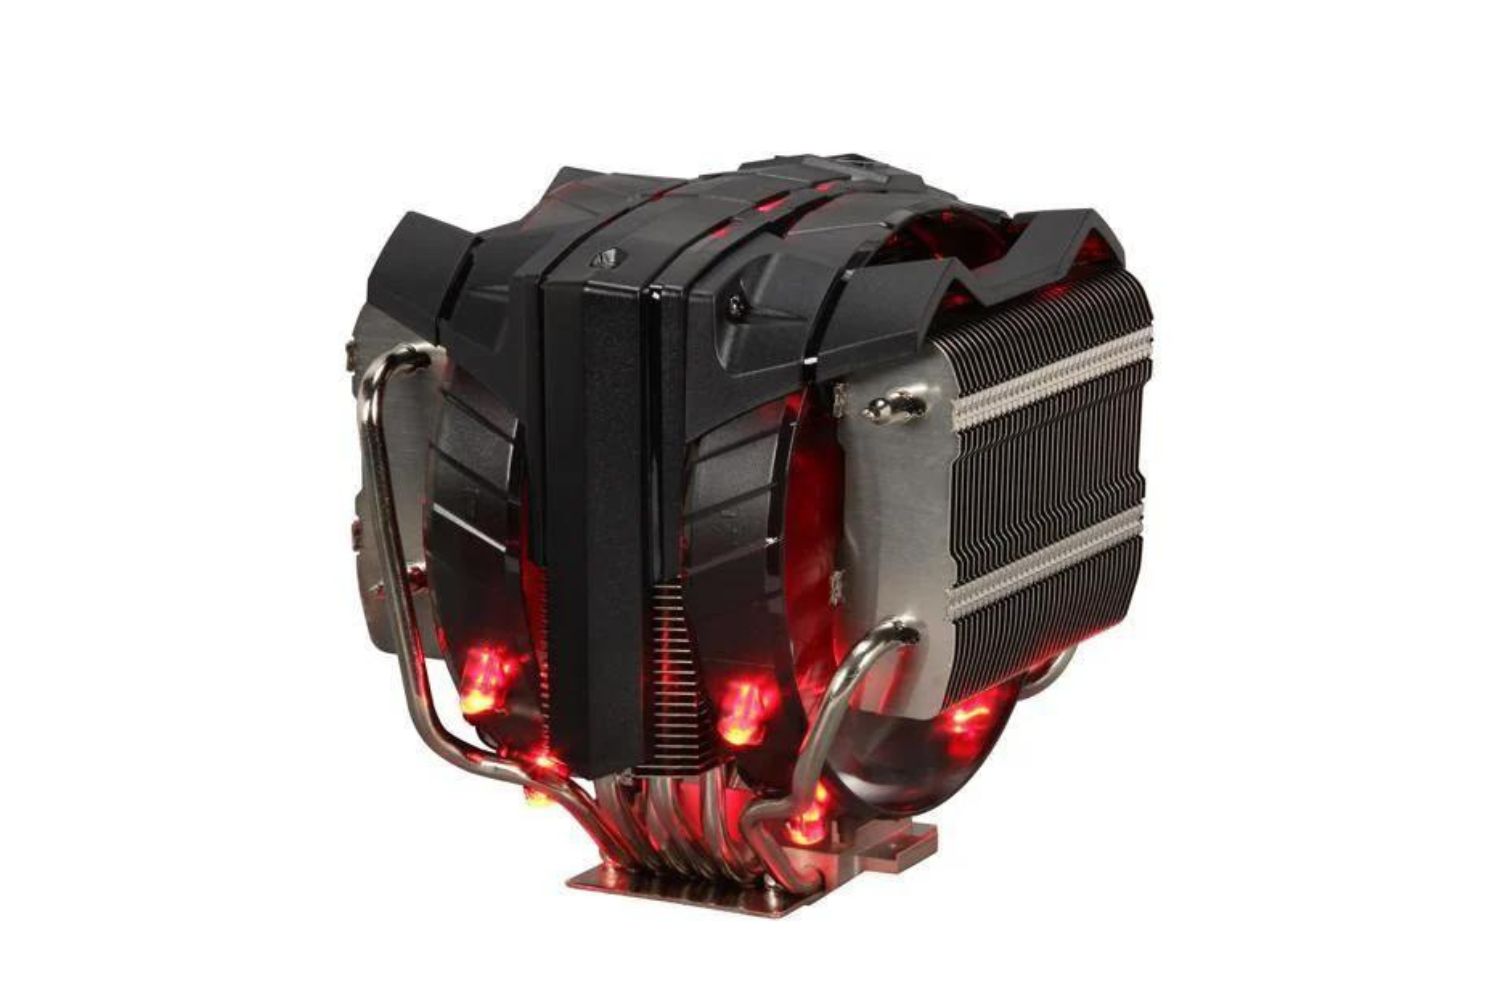
Welcome to our step-by-step guide on how to install the Cooler Master Hyper D92 CPU Cooler on an AM3+ socket. Whether you’re an avid gamer, a content creator, or simply looking to enhance the performance of your computer, a high-quality CPU cooler is essential in maintaining optimal temperatures and preventing overheating. The Cooler Master Hyper D92 offers excellent cooling performance and low noise levels, making it a popular choice among PC enthusiasts.
Installing a CPU cooler may seem like a daunting task, especially if you’re new to computer hardware. However, with the right tools and instructions, the process can be straightforward and hassle-free. In this guide, we’ll walk you through each step of the installation process, ensuring that you have all the information you need to successfully install the Cooler Master Hyper D92 CPU cooler.
Before we dive into the installation process, it’s important to note that each CPU cooler may have slightly different installation instructions. While this guide specifically focuses on the Cooler Master Hyper D92, the general principles and steps discussed can be applied to other CPU coolers as well.
It’s crucial to follow the manufacturer’s instructions carefully, as improper installation can lead to performance issues and potential damage to your CPU or motherboard. Additionally, we recommend consulting your motherboard’s manual for specific instructions related to your AM3+ socket.
Now that we’ve provided an overview of what to expect, let’s dive into the step-by-step process of installing the Cooler Master Hyper D92 CPU cooler on an AM3+ socket.
Step 1: Preparing for Installation
Before diving into the installation process, it’s crucial to ensure you have all the necessary tools and components. Here’s what you’ll need:
- Cooler Master Hyper D92 CPU cooler
- Thermal paste
- Cotton swabs or a lint-free cloth
- Isopropyl alcohol (optional, for cleaning the CPU)
- Screwdriver (usually Phillips head)
- Your AM3+ socket motherboard
- Your CPU
Once you have gathered all the required items, you can start preparing for the installation:
- Power down your computer: Before beginning any installation process, it’s essential to turn off your computer and unplug it from the power source. This will ensure your safety and prevent any potential damage to hardware components.
- Open the computer case: Depending on the design of your computer case, you may need to unscrew a panel to access the internals. Refer to your computer case’s manual for specific instructions on how to open it.
- Locate the CPU socket: Once the computer case is open, locate the CPU socket on your motherboard. In this guide, we are specifically focusing on the AM3+ socket, which is commonly found on AMD motherboards. Ensure you identify the correct socket before proceeding.
- Remove the current CPU cooler (if applicable): If you have an existing CPU cooler installed, you need to remove it before proceeding with the installation of the Cooler Master Hyper D92. Disconnect the fan’s power cable and unscrew any mounting brackets holding the cooler in place. Take note of the orientation of the cooler for reference during the new installation.
By following these initial preparation steps, you’ll be well-prepared to move onto the subsequent stages of installing the Cooler Master Hyper D92 CPU cooler. Stay tuned for the next steps to complete the installation process seamlessly.
Step 2: Removing the Old CPU Cooler
Now that you have prepared your computer and located the CPU socket, it’s time to remove the old CPU cooler. Follow these steps to ensure a smooth removal process:
- Disconnect the fan’s power cable: Locate the power cable connected to the CPU cooler’s fan. Gently unplug it from the motherboard to avoid any damage or strain on the connectors. Take note of the arrangement of the cables for reference during the reinstallation process.
- Unscrew the mounting brackets: Using a screwdriver (usually Phillips head), carefully unscrew the mounting brackets that secure the CPU cooler to the motherboard. Be cautious not to damage the motherboard or any other components while removing the screws.
- Remove the CPU cooler: Once the mounting brackets are removed, you can gently detach the CPU cooler from the CPU socket. Hold the cooler by its base and wiggle it slightly to loosen it. Avoid pulling on any cables or applying excessive force, as this may cause damage to the motherboard or CPU.
- Clean the CPU surface: Before installing the new CPU cooler, it’s essential to clean the surface of the CPU to remove any residual thermal paste. You can use cotton swabs or a lint-free cloth dipped in isopropyl alcohol (optional) to gently wipe off the old thermal paste. Ensure that the CPU surface is clean and free of any debris or residue.
Removing the old CPU cooler is a critical step in ensuring a successful installation of the Cooler Master Hyper D92. Take your time, follow these instructions carefully, and handle the components with caution to avoid any damage. Once the old CPU cooler is removed and the CPU surface is cleaned, you will be ready to move on to the next step of preparing the CPU socket for the installation of the new cooler.
Step 3: Preparing the CPU Socket
With the old CPU cooler removed, it’s time to prepare the CPU socket for the installation of the Cooler Master Hyper D92. Follow these steps to ensure proper preparation:
- Inspect the CPU socket: Take a moment to inspect the CPU socket on your motherboard. Ensure there are no bent pins or debris lodged in the socket. If you notice any bent pins, use a thin plastic or metal tool to carefully straighten them. Be gentle to avoid causing any further damage.
- Apply the backplate (if necessary): Some CPU coolers, including the Cooler Master Hyper D92, may require the installation of a backplate for added support. Consult the Cooler Master Hyper D92’s manual to determine if a backplate is needed for your specific motherboard socket. If required, line up the holes on the backplate with the corresponding screw holes on the motherboard and secure it using the provided screws.
- Prepare the mounting brackets: The Cooler Master Hyper D92 comes with mounting brackets that need to be attached to the CPU cooler. Refer to the cooler’s manual for specific instructions on how to attach the brackets. Follow the guidelines carefully to ensure proper alignment and stability during installation.
- Install the mounting brackets: Once the brackets are attached to the CPU cooler, align them with the holes on the CPU socket. Gently lower the cooler onto the socket, ensuring that the brackets are securely in place. Use the provided screws or fasteners to secure the CPU cooler to the brackets. Be cautious not to overtighten the screws, as it may damage the CPU or motherboard.
By following these steps, you will properly prepare the CPU socket for the installation of the Cooler Master Hyper D92 CPU cooler. Take your time and ensure that the backplate, mounting brackets, and CPU cooler are all aligned correctly. This will provide a sturdy and secure foundation for the cooler, ensuring optimal performance and longevity.
Step 4: Applying Thermal Paste
Thermal paste is a crucial component in ensuring efficient heat transfer between the CPU and the cooler. Follow these steps to properly apply thermal paste before installing the Cooler Master Hyper D92 CPU cooler:
- Prepare the thermal paste: Thermal paste usually comes in a small tube or syringe. Gently squeeze the tube to dispense a small amount of thermal paste onto the center of the CPU surface. Keep in mind that a pea-sized or rice-sized amount is typically sufficient.
- Spread the thermal paste: With a thermal paste spreading tool or a clean finger (ensuring it’s free of oils or debris), carefully spread the thermal paste over the surface of the CPU. Apply a thin, even layer, ensuring that the paste covers the entire surface without any gaps or excess paste extending beyond the CPU’s edges.
- Avoid over-application: It’s crucial not to apply too much thermal paste, as it can lead to poor heat transfer and potentially cause damage. Excess paste can ooze out from the sides when the cooler is installed, creating a messy and inefficient application.
- Double-check the coverage: After spreading the thermal paste, visually inspect the CPU surface to ensure that it is evenly coated. Make any necessary adjustments by adding a small amount of paste and spreading it as needed.
Properly applying thermal paste ensures that there is optimal contact and heat transfer between the CPU and the Cooler Master Hyper D92 CPU cooler. This step is critical in maximizing cooling efficiency and preventing overheating of the processor.
Now that you have applied thermal paste, we are ready to move on to the next step of installing the cooler mounting bracket. Stay tuned for step-by-step instructions on how to securely attach the Cooler Master Hyper D92 CPU cooler to the mounting bracket.
Step 5: Installing the Cooler Mounting Bracket
The cooler mounting bracket plays a crucial role in securely attaching the Cooler Master Hyper D92 CPU cooler to the CPU socket. Follow these steps to properly install the mounting bracket:
- Locate the mounting bracket: The Cooler Master Hyper D92 CPU cooler comes with a mounting bracket that needs to be installed on the backside of the motherboard. Refer to the cooler’s manual to identify the correct bracket for your specific CPU socket type.
- Align the bracket: Align the mounting bracket with the holes on the backside of the motherboard. Ensure the bracket is correctly positioned and lines up with the holes corresponding to your CPU socket.
- Secure the bracket: Once the bracket is properly aligned, use the provided screws or fasteners to secure it in place. Tighten the screws until the bracket is firmly attached to the motherboard. Be cautious not to over-tighten, as it may damage the motherboard.
- Double-check the installation: After securing the bracket, perform a visual inspection to ensure that it is properly installed and stable. Gently wiggle the bracket to ensure there is no excessive movement or looseness.
By following these steps, you will successfully install the mounting bracket for the Cooler Master Hyper D92 CPU cooler. It’s essential to take your time and ensure that the bracket is aligned correctly and securely fastened to the motherboard. This provides a stable base for attaching the CPU cooler in the next step.
Now that the mounting bracket is properly installed, we are ready to move on to the next step of attaching the Cooler Master Hyper D92 CPU cooler to the mounting bracket. Stay tuned for detailed instructions on how to complete the installation process and enjoy the efficient cooling performance provided by this high-quality cooler.
Step 6: Attaching the Cooler to the Mounting Bracket
With the mounting bracket securely installed, it’s time to attach the Cooler Master Hyper D92 CPU cooler to the bracket. Follow these steps to ensure a proper attachment:
- Prepare the CPU cooler: Ensure that the Cooler Master Hyper D92 CPU cooler is properly oriented. The fan should be facing in the desired direction for optimal airflow. Take note of the correct alignment to ensure a hassle-free installation.
- Align the cooler with the bracket: Carefully align the mounting holes on the CPU cooler with the screws or fasteners on the mounting bracket. Ensure that the cooler is positioned evenly and securely above the CPU socket.
- Secure the cooler to the bracket: Once aligned, use the provided screws or fasteners to attach the CPU cooler to the mounting bracket. Start by screwing in one corner screw partially to hold the cooler in place. Then, proceed to tighten the remaining screws diagonally, ensuring an even and secure attachment.
- Double-check the attachment: After securing all the screws, perform a visual inspection to ensure that the cooler is properly attached. Gently wiggle the cooler to check for any excessive movement or looseness. If everything is stable and secure, you can proceed to the next step.
It’s crucial to take your time and ensure that the Cooler Master Hyper D92 CPU cooler is securely attached to the mounting bracket. A proper attachment guarantees optimal cooling performance and prevents any potential damage to the CPU or motherboard.
Now that the cooler is successfully attached, we can move on to the next step of connecting the cooler to the CPU fan header. Stay tuned for detailed instructions on how to complete this final connection and power on your computer to test the Cooler Master Hyper D92 CPU cooler.
Step 7: Connecting the Cooler to the CPU Fan Header
With the Cooler Master Hyper D92 CPU cooler securely attached, it’s time to connect it to the CPU fan header on your motherboard. Follow these steps to ensure a proper connection:
- Locate the CPU fan header: Locate the CPU fan header on your motherboard. It is usually labeled “CPU_FAN” or something similar. Refer to your motherboard’s manual if you’re unsure of the exact location.
- Identify the cooler’s fan connector: Locate the fan connector on the Cooler Master Hyper D92 CPU cooler. It is usually a three-pin or four-pin connector labeled “CPU FAN” or something similar.
- Align the pins: Align the pins on the cooler’s fan connector with the corresponding holes on the CPU fan header. Ensure that the orientation is correct to avoid damaging the connector or header.
- Make the connection: Once aligned, press the cooler’s fan connector firmly onto the CPU fan header. Ensure that it is securely attached and there are no loose connections.
Connecting the cooler to the CPU fan header is important for proper control and monitoring of the cooler’s fan speed. It allows your motherboard to regulate the fan’s RPM based on CPU temperature, ensuring efficient cooling performance.
After making the connection, double-check to ensure that the cooler is securely attached and that the fan connector is properly inserted into the CPU fan header. This will prevent any loose connections that could potentially affect the performance of the cooler.
Now that the cooler is connected to the CPU fan header, we can proceed to the final step of powering on and testing the Cooler Master Hyper D92 CPU cooler. Stay tuned for detailed instructions on how to complete this final step and enjoy the enhanced cooling performance of your computer.
Step 8: Powering On and Testing the Cooler
With the Cooler Master Hyper D92 CPU cooler installed and connected, it’s time to power on your computer and test the cooler’s performance. Follow these steps to ensure a successful test:
- Reassemble your computer: Carefully reattach any panels or covers to your computer case that were removed during the installation process. Ensure that all connections are secure and that there are no loose cables inside the case.
- Plug in and power on your computer: Connect the power cable to your computer and plug it into a power outlet. Press the power button to turn on the computer.
- Monitor the CPU temperatures: Once your computer is powered on, you can monitor the CPU temperatures using software such as HWMonitor or Core Temp. Keep an eye on the temperatures to ensure that the Cooler Master Hyper D92 CPU cooler is effectively cooling your CPU.
- Listen for abnormal noises: While the computer is running, listen for any unusual noises coming from the CPU cooler. A well-installed cooler should operate quietly with minimal noise. If you notice any unusual or loud noises, it may indicate an issue that needs to be addressed.
- Perform stress tests (optional): If you want to further gauge the cooler’s performance, you can run stress tests or CPU-intensive tasks to push the limits of your CPU. Observe the temperatures during these tests to ensure that the cooler is keeping the CPU within safe operating temperatures.
By following these steps, you can power on and test the Cooler Master Hyper D92 CPU cooler to ensure it is effectively cooling your CPU. Monitoring temperatures and listening for abnormal noises are essential in identifying any potential issues and ensuring optimal performance.
If you notice any concerns, such as excessively high temperatures or abnormal noises, it’s recommended to double-check the installation and ensure everything is securely in place. If necessary, consult the Cooler Master Hyper D92 manual or contact customer support for assistance.
Congratulations! You have successfully installed and tested the Cooler Master Hyper D92 CPU cooler. Enjoy the enhanced cooling performance it provides, allowing your CPU to operate at optimal temperatures even during intense computing tasks.
Conclusion
Congratulations on successfully installing the Cooler Master Hyper D92 CPU cooler on your AM3+ socket! By following the step-by-step instructions provided in this guide, you have ensured optimal cooling performance for your computer’s CPU.
The Cooler Master Hyper D92 offers excellent cooling capabilities, low noise levels, and easy installation. With its efficient heat dissipation and reliable performance, you can enjoy extended periods of heavy computing or gaming without worrying about overheating issues.
Remember, proper installation is crucial for achieving the best results. Take your time to prepare the installation process, remove the old CPU cooler, prepare the CPU socket, apply thermal paste correctly, install the mounting bracket securely, attach the cooler to the bracket, connect it to the CPU fan header, and finally, power on and test the cooler.
Throughout the installation process, pay close attention to alignment, cleanliness, and stability to ensure optimal cooling efficiency and prevent any damage to your CPU or motherboard.
Now that your Cooler Master Hyper D92 CPU cooler is up and running, you can enjoy smoother performance, lower CPU temperatures, and a quieter computing experience.
If you need further assistance or have any questions, don’t hesitate to consult the Cooler Master Hyper D92 manual or reach out to their customer support for additional guidance. They will be happy to assist you.
Thank you for choosing the Cooler Master Hyper D92 CPU cooler and for following this step-by-step installation guide. We hope you find it helpful and that it allows you to maximize the performance and lifespan of your computer.


