Introduction
Welcome to this step-by-step guide on how to setup the Logitech G502 gaming mouse. The Logitech G502 is a popular choice among gamers for its exceptional performance, customization options, and ergonomic design. Whether you’re a casual gamer or a hardcore eSports enthusiast, proper setup is crucial to maximize your gaming experience.
In this guide, we will walk you through the process of unboxing the Logitech G502, connecting it to your computer, installing the required software, customizing button assignments and DPI settings, adjusting weight and balance, personalizing RGB lighting effects, creating and saving profiles, and testing and optimizing its performance.
Before we delve into the details, it’s important to note that the Logitech G502 is compatible with both Windows and Mac operating systems. Additionally, make sure you have a USB port available for connecting the mouse to your computer and a stable internet connection for downloading the Logitech G HUB software, which is necessary for customization options.
Now let’s get started with unboxing the Logitech G502 and setting it up for an immersive gaming experience!
Step 1: Unboxing the Logitech G502
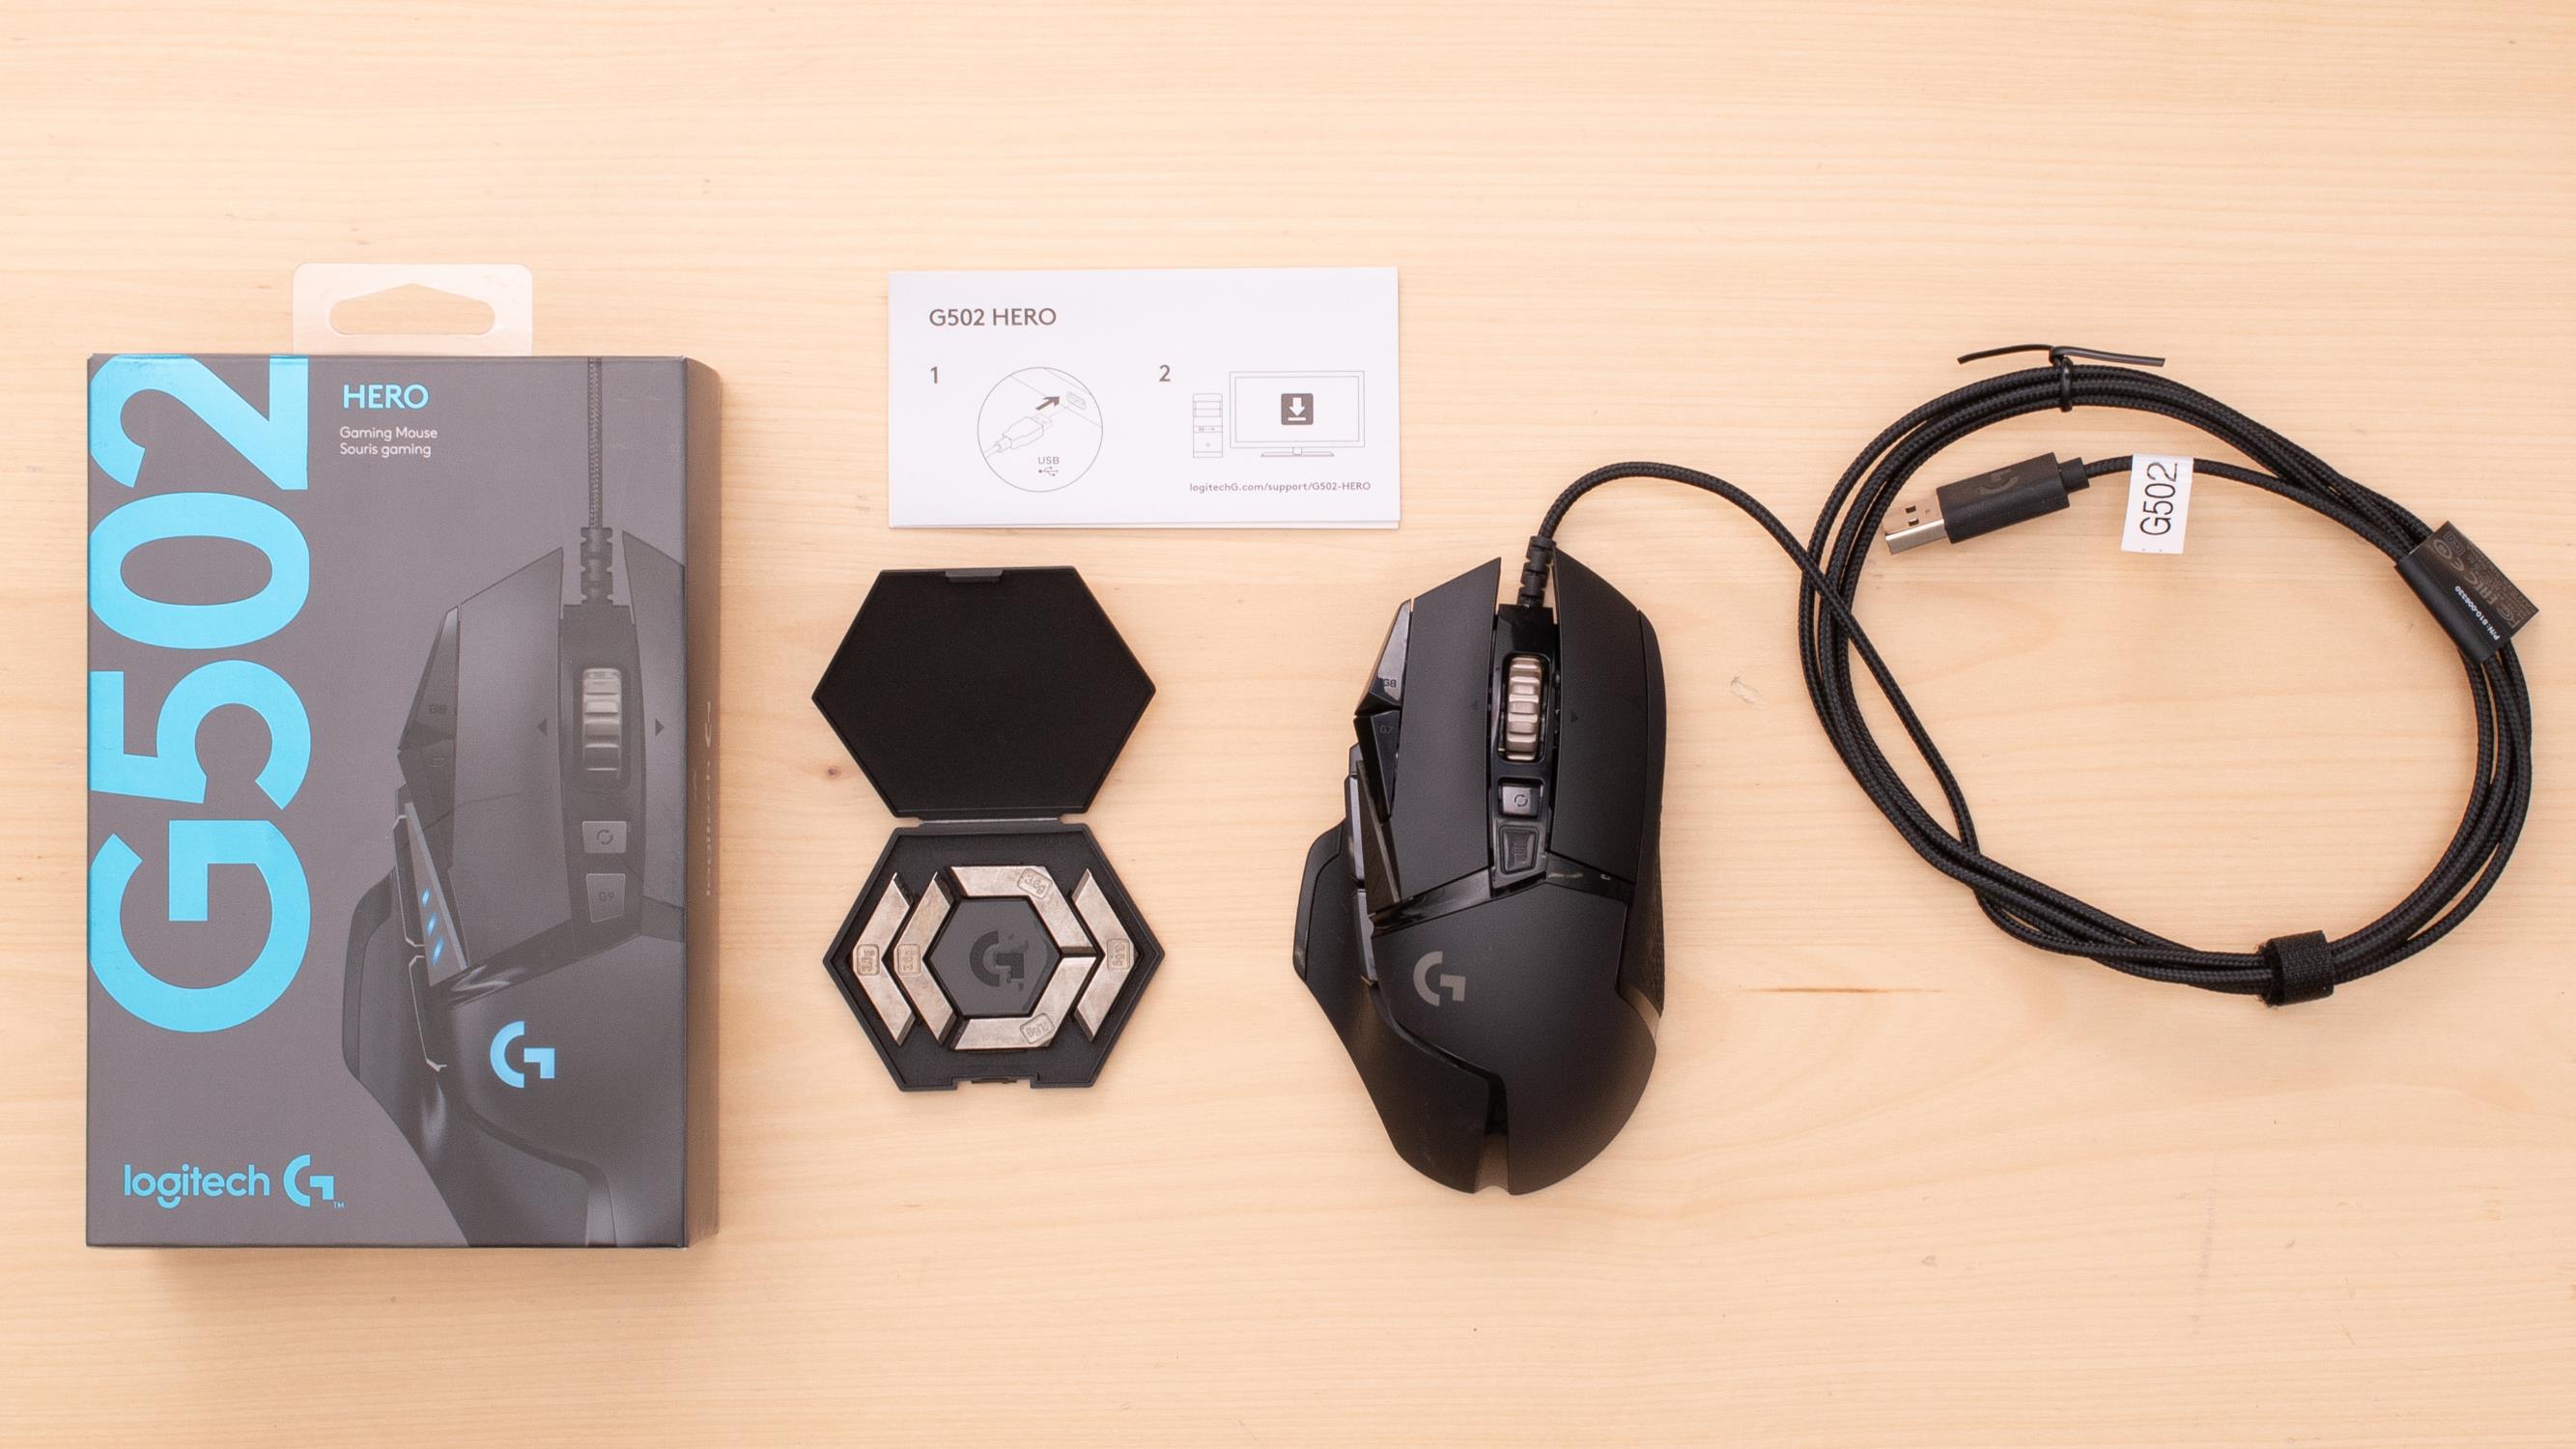
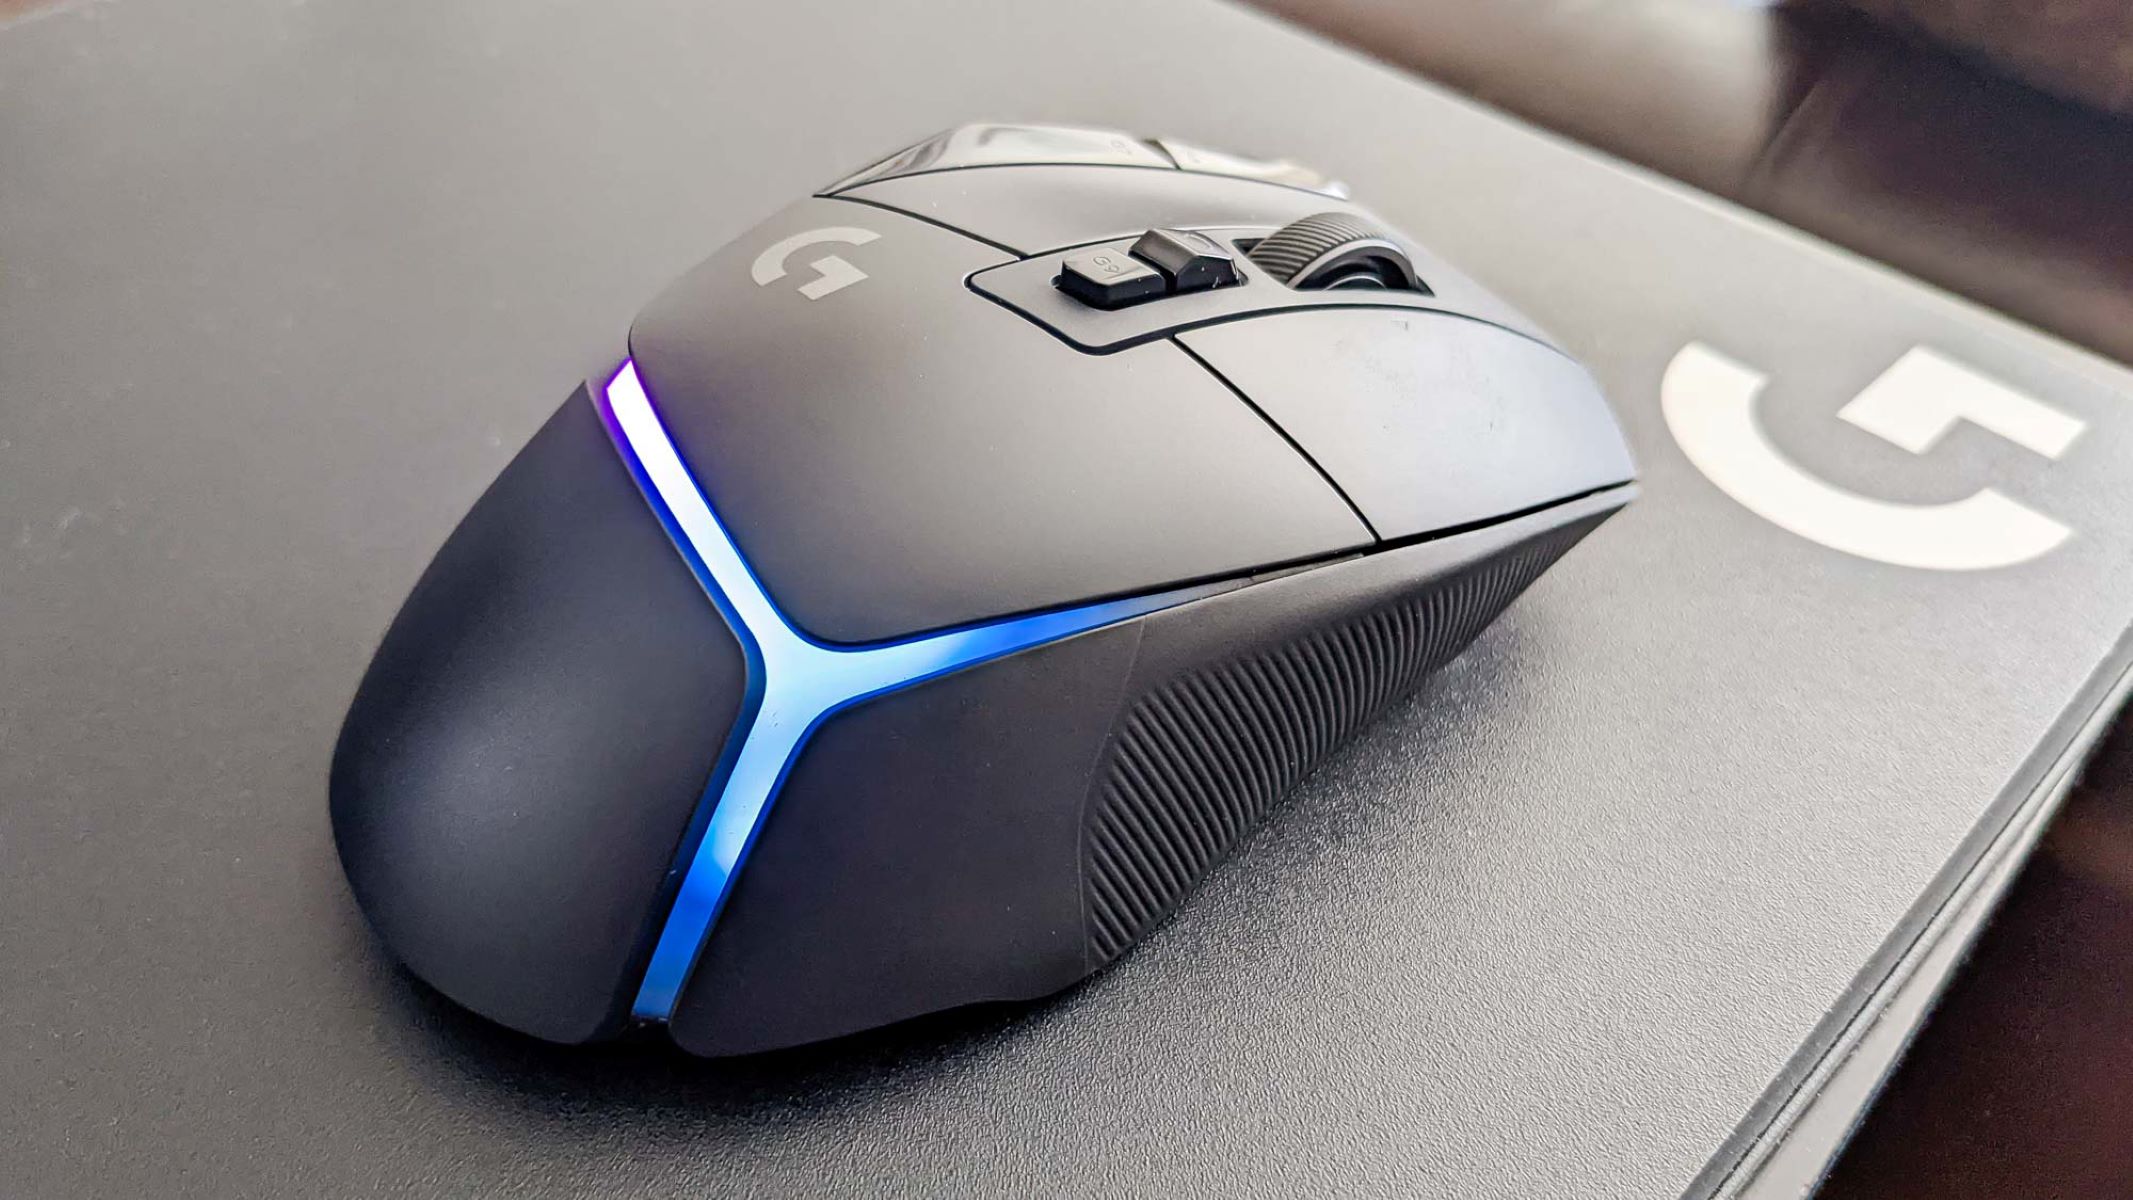
Before we begin using the Logitech G502 gaming mouse, let’s start by unboxing it. The first thing you’ll notice is the sleek and stylish packaging, reflecting the high-quality build of the mouse.
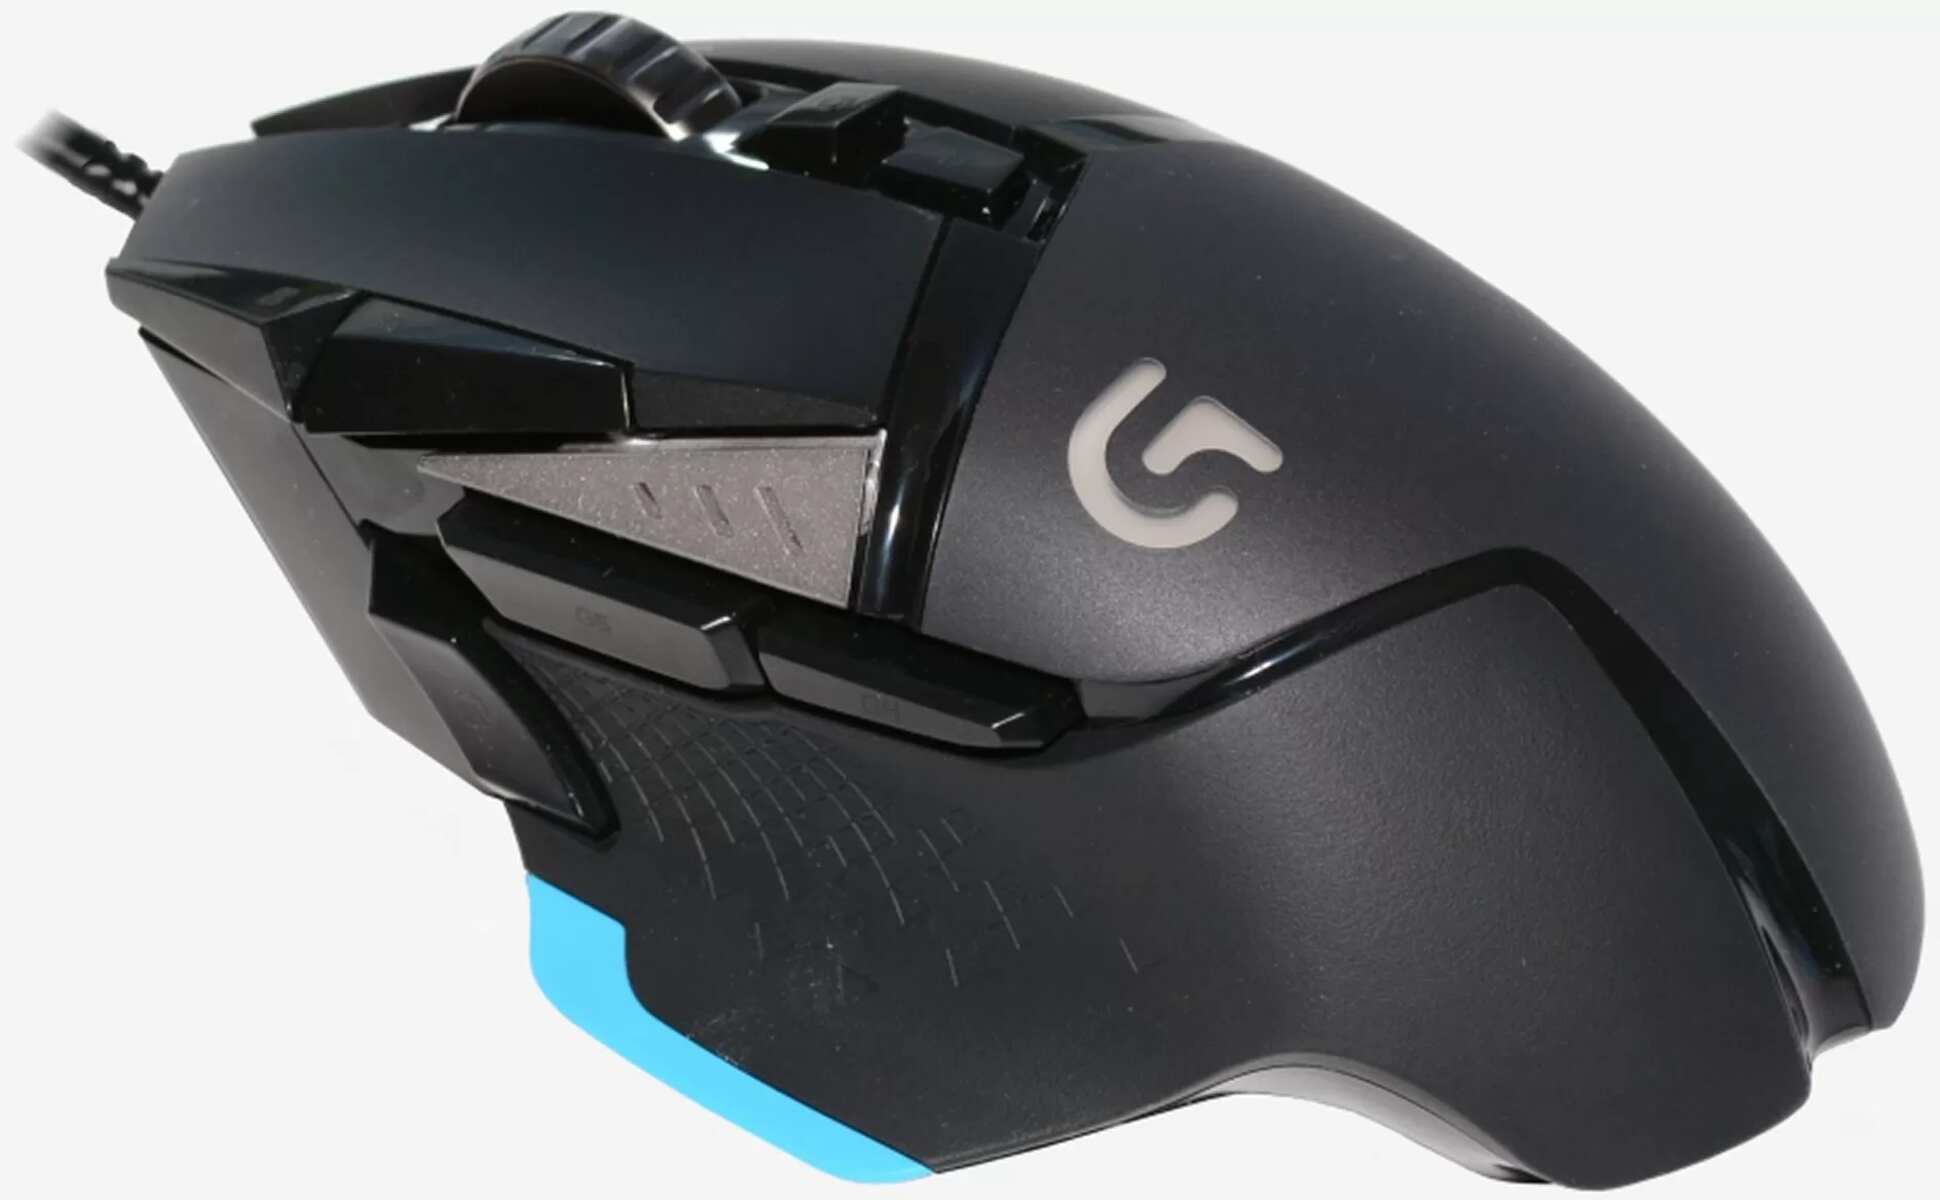
Open the box carefully, removing any plastic wrap or protective covers. Inside, you’ll find the Logitech G502 mouse nestled securely. Take a moment to appreciate the ergonomic design, featuring a comfortable grip and customizable button placement.
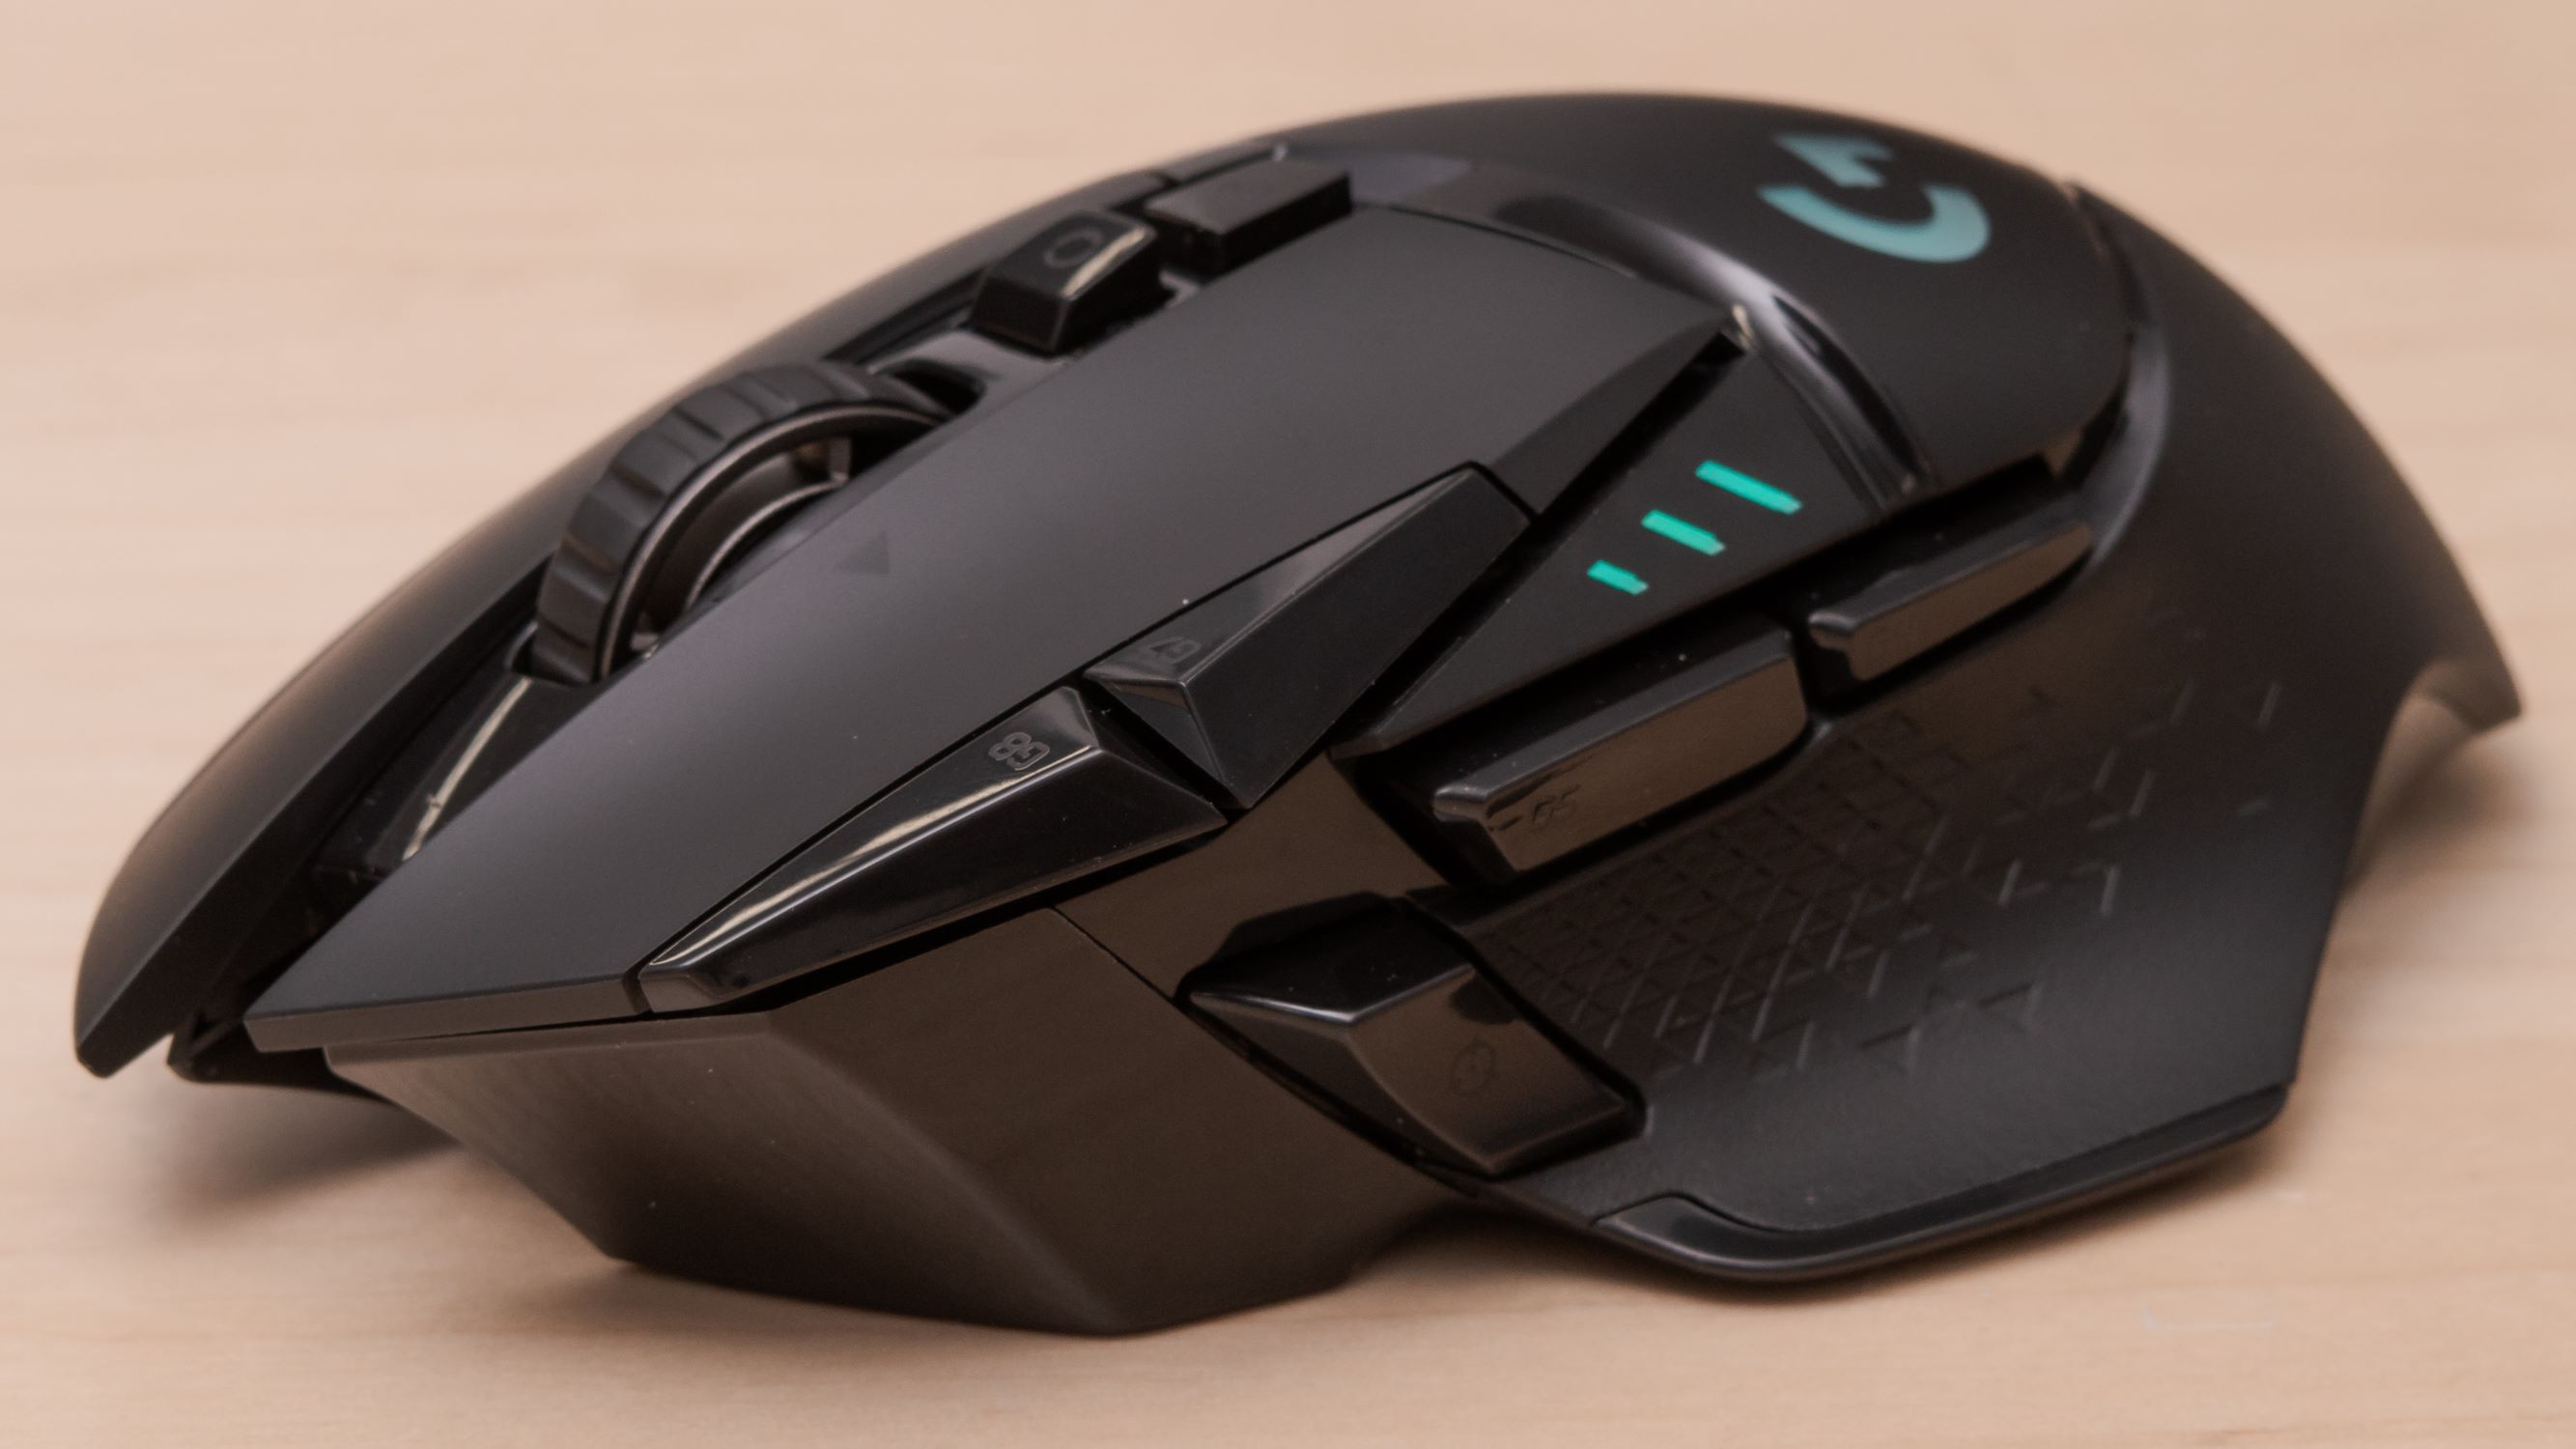
Aside from the mouse, you’ll discover some additional accessories. These may include removable weights, extra mouse feet, and user documentation. The removable weights allow you to adjust the mouse’s weight and balance according to your preference, providing a personalized gaming experience.
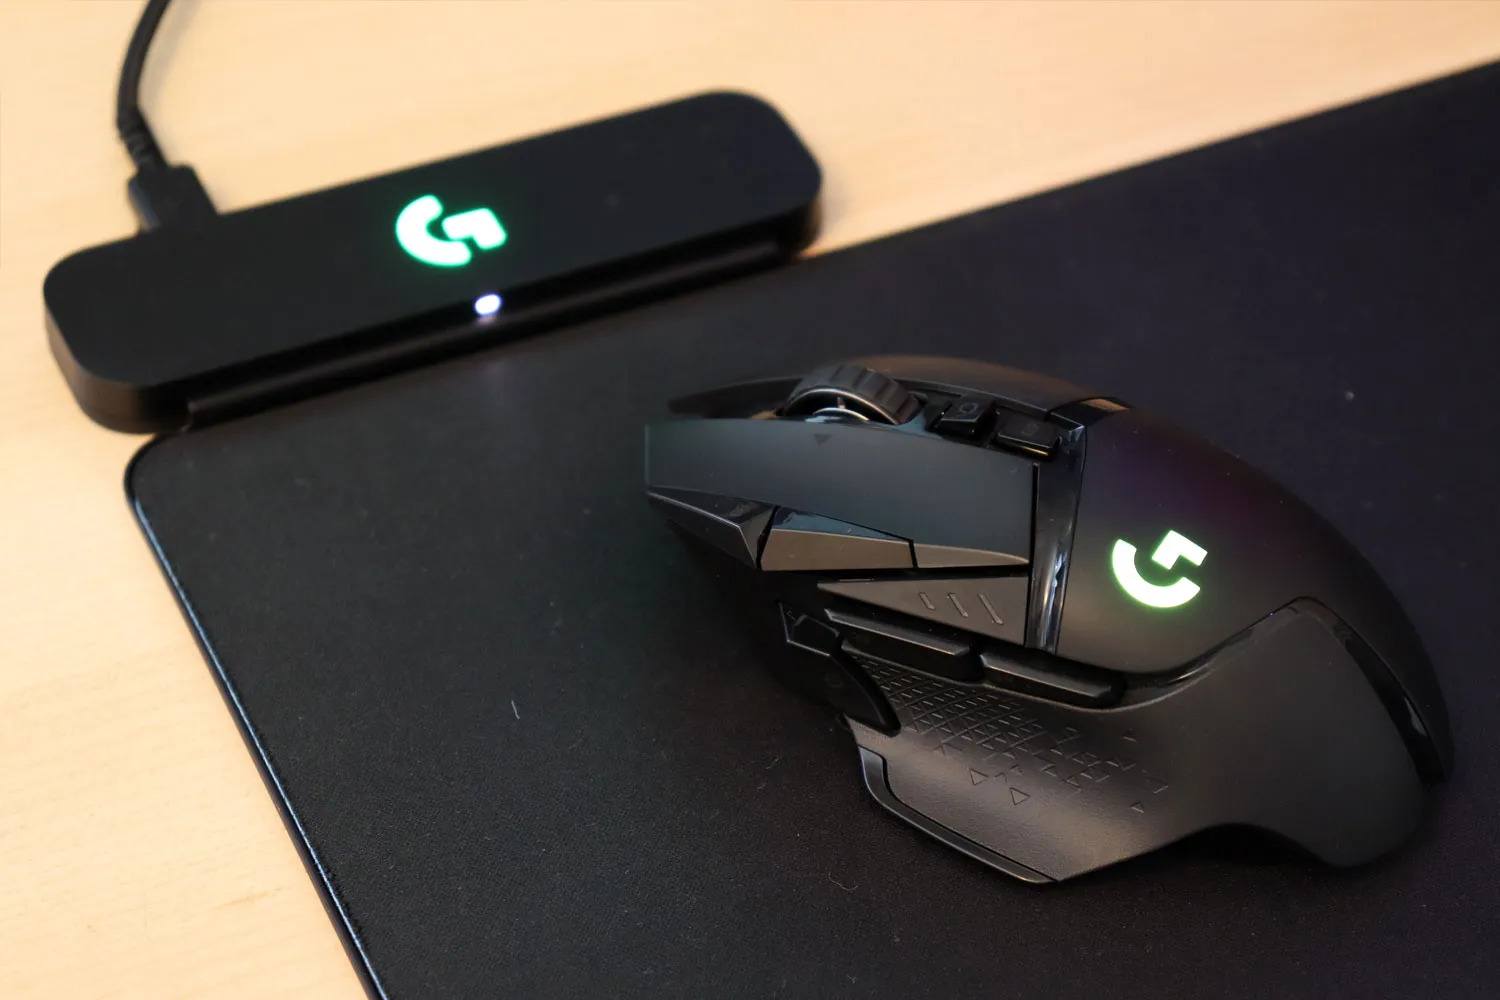
Now, carefully connect the Logitech G502 to your computer using the provided USB cable. Ensure that the cable is securely plugged into both the mouse and a free USB port on your computer. It’s worth noting that the Logitech G502 also offers wireless connectivity options for added flexibility, but for this guide, we’ll focus on the wired connection.
Once you have connected the mouse, you’ll notice that it lights up, showcasing its vibrant RGB lighting effects. The Logitech G502 boasts customizable lighting, allowing you to choose from a wide range of colors and effects to match your setup or gaming preferences.
Now that you have successfully unboxed and connected the Logitech G502, it’s time to move on to the next step: installing the Logitech G HUB software. This software serves as the control center for customizing your G502, enabling you to unlock its full potential. Let’s proceed to Step 2!
Step 2: Connecting the Logitech G502 to your computer
Now that you have unboxed the Logitech G502 and marveled at its sleek design, it’s time to connect it to your computer and unleash its gaming prowess. Connecting the mouse is a straightforward process that will have you up and running in no time.
Start by locating a free USB port on your computer. The Logitech G502 comes with a USB cable specifically designed for this purpose. Plug one end of the cable securely into the mouse, ensuring a tight connection. Then, insert the other end of the cable into the USB port, making sure it is fully inserted.
Once the mouse is connected, your computer will likely recognize it automatically. In some cases, you may need to install device drivers for the Logitech G502 to ensure proper functionality. If prompted, follow the on-screen instructions to complete the driver installation process.
If you prefer a wireless connection, the Logitech G502 also offers wireless functionality. To connect wirelessly, make sure the G502 is in pairing mode by following the instructions provided in the user manual. Then, activate the Bluetooth feature on your computer and search for available devices. Once the Logitech G502 appears in the list, select it to establish the connection.
Regardless of whether you choose a wired or wireless connection, it’s essential to ensure the stability of your connection. A stable connection is crucial for uninterrupted gaming sessions and optimal performance with the Logitech G502.
With the Logitech G502 now connected to your computer, you’re ready to move on to the next step: installing the Logitech G HUB software. This software will unlock a wealth of customization options and features that will enhance your gaming experience. Let’s proceed to Step 3!
Step 3: Installing Logitech G HUB software
Installing the Logitech G HUB software is crucial for unlocking the full potential of the Logitech G502 gaming mouse. This software serves as the control center for customizing and fine-tuning your G502 according to your preferences.
To get started, visit the official Logitech website and navigate to the support section. Look for the Logitech G HUB software and click on the download link that corresponds to your operating system.
Once the download is complete, locate the downloaded file and double-click on it to begin the installation process. Follow the on-screen instructions to proceed with the installation. Accept any terms and conditions and select the desired installation location if prompted.
During the installation process, the Logitech G HUB software will detect and recognize your Logitech G502 mouse. The software will install the necessary drivers and establish a connection with the mouse, enabling seamless communication between your computer and the G502.
Once the installation is complete, launch the Logitech G HUB software. You will be greeted with a user-friendly interface that provides easy access to a wealth of customization options and settings for your Logitech G502 mouse.
Through the Logitech G HUB software, you can assign custom functions to each button on the mouse, adjust the DPI settings to your desired sensitivity, and take advantage of advanced features such as macros and profiles.
Furthermore, the G HUB software allows you to manage lighting effects and create personalized RGB lighting schemes. Explore the various lighting options available and let your Logitech G502 shine in style.
It’s worth noting that the Logitech G HUB software requires an internet connection for full functionality. This ensures that you have access to the latest firmware updates and any additional features that Logitech might release in the future.
With the Logitech G HUB software successfully installed, you’re now one step closer to unleashing the full potential of your Logitech G502 mouse. In the next step, we will delve into customizing button assignments and DPI settings to tailor the mouse to your specific gaming needs. Let’s proceed to Step 4!
Step 4: Customizing button assignments and DPI settings
One of the standout features of the Logitech G502 gaming mouse is its customizable button assignments and DPI settings. In this step, we will explore how you can tailor these settings to suit your gaming preferences and playstyle.
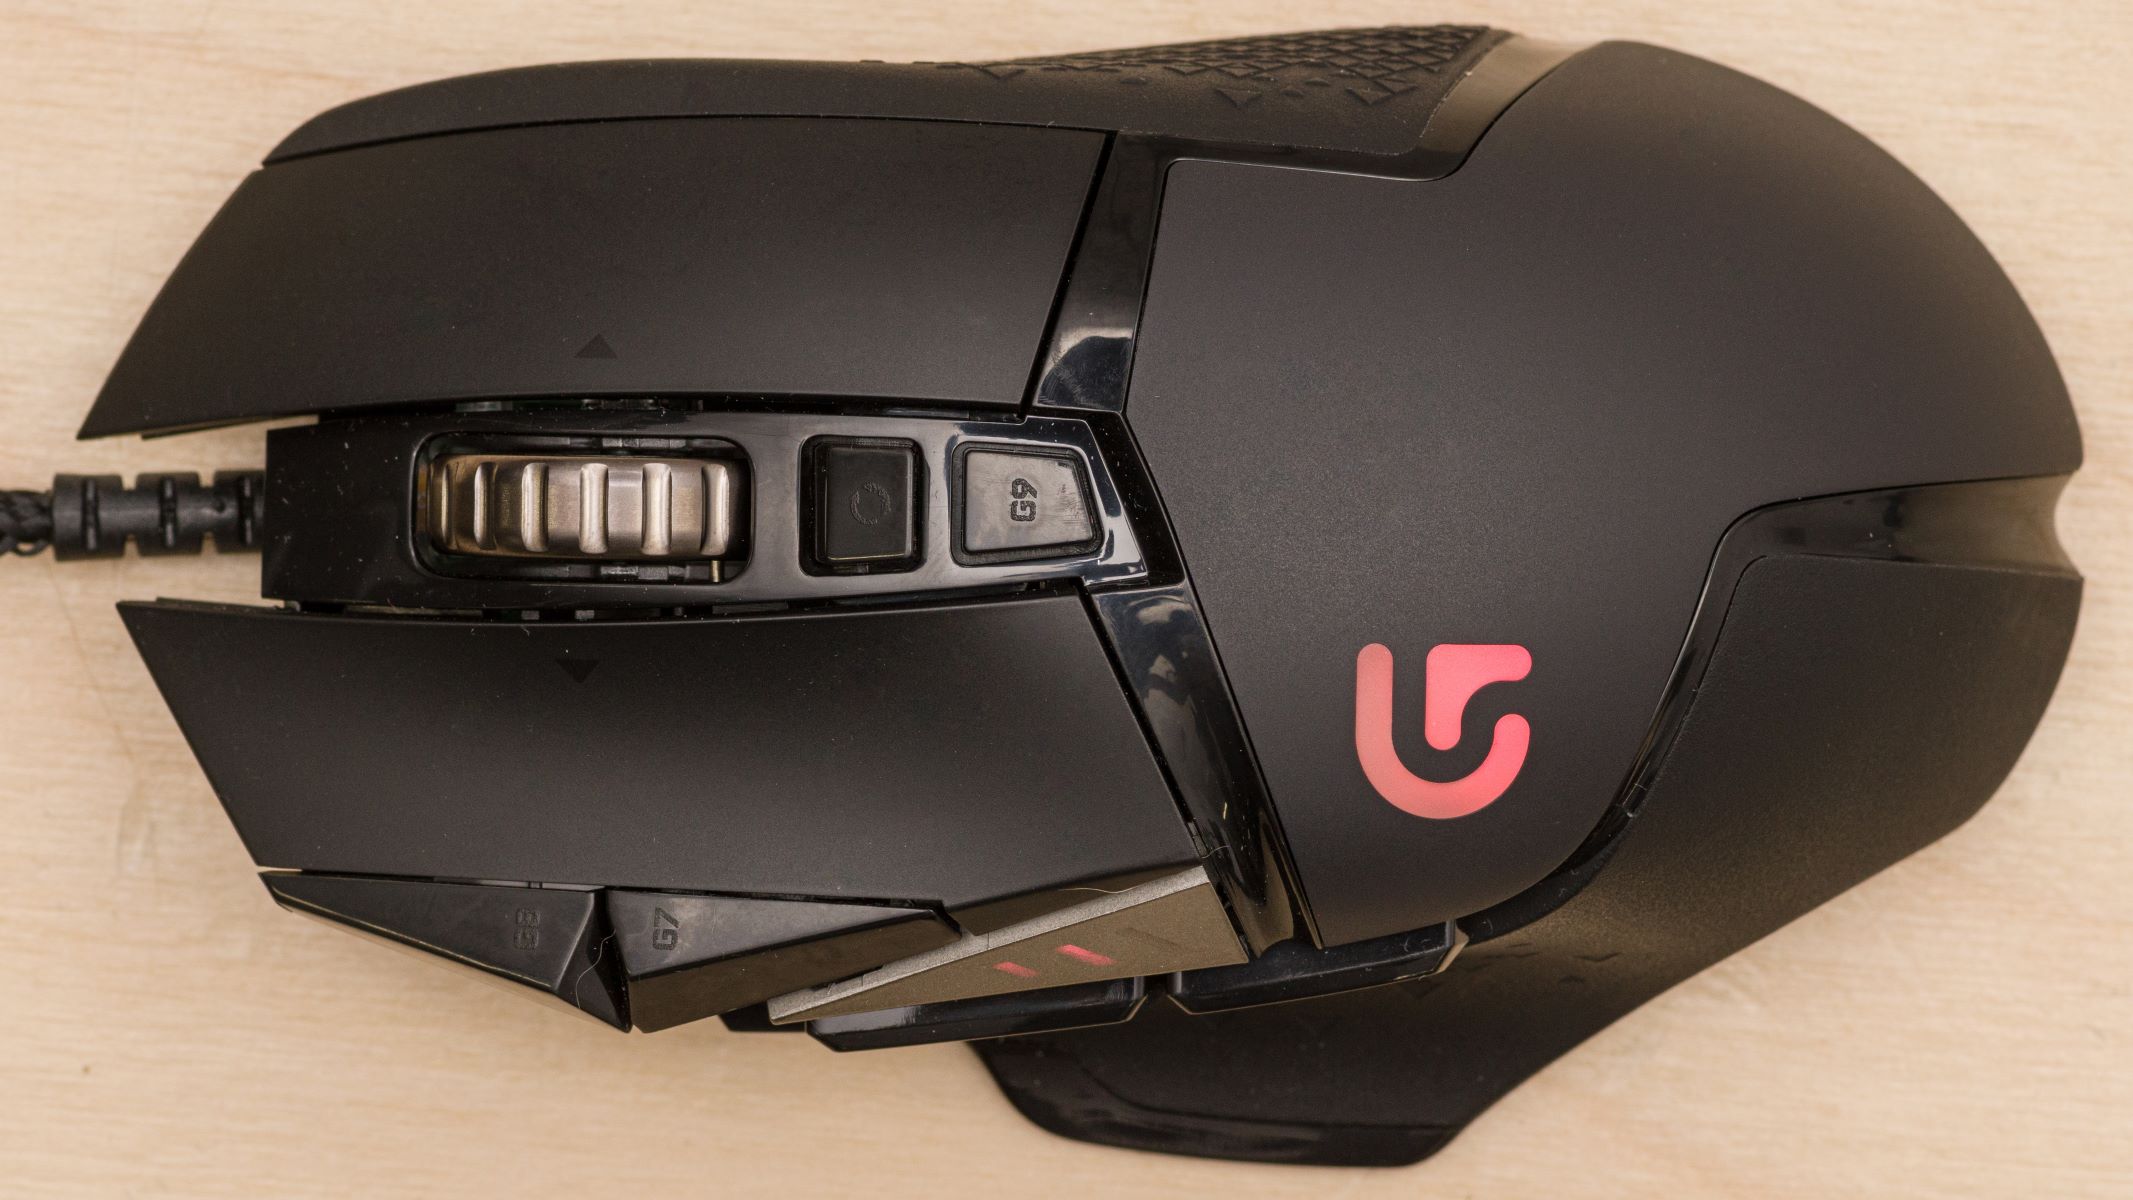
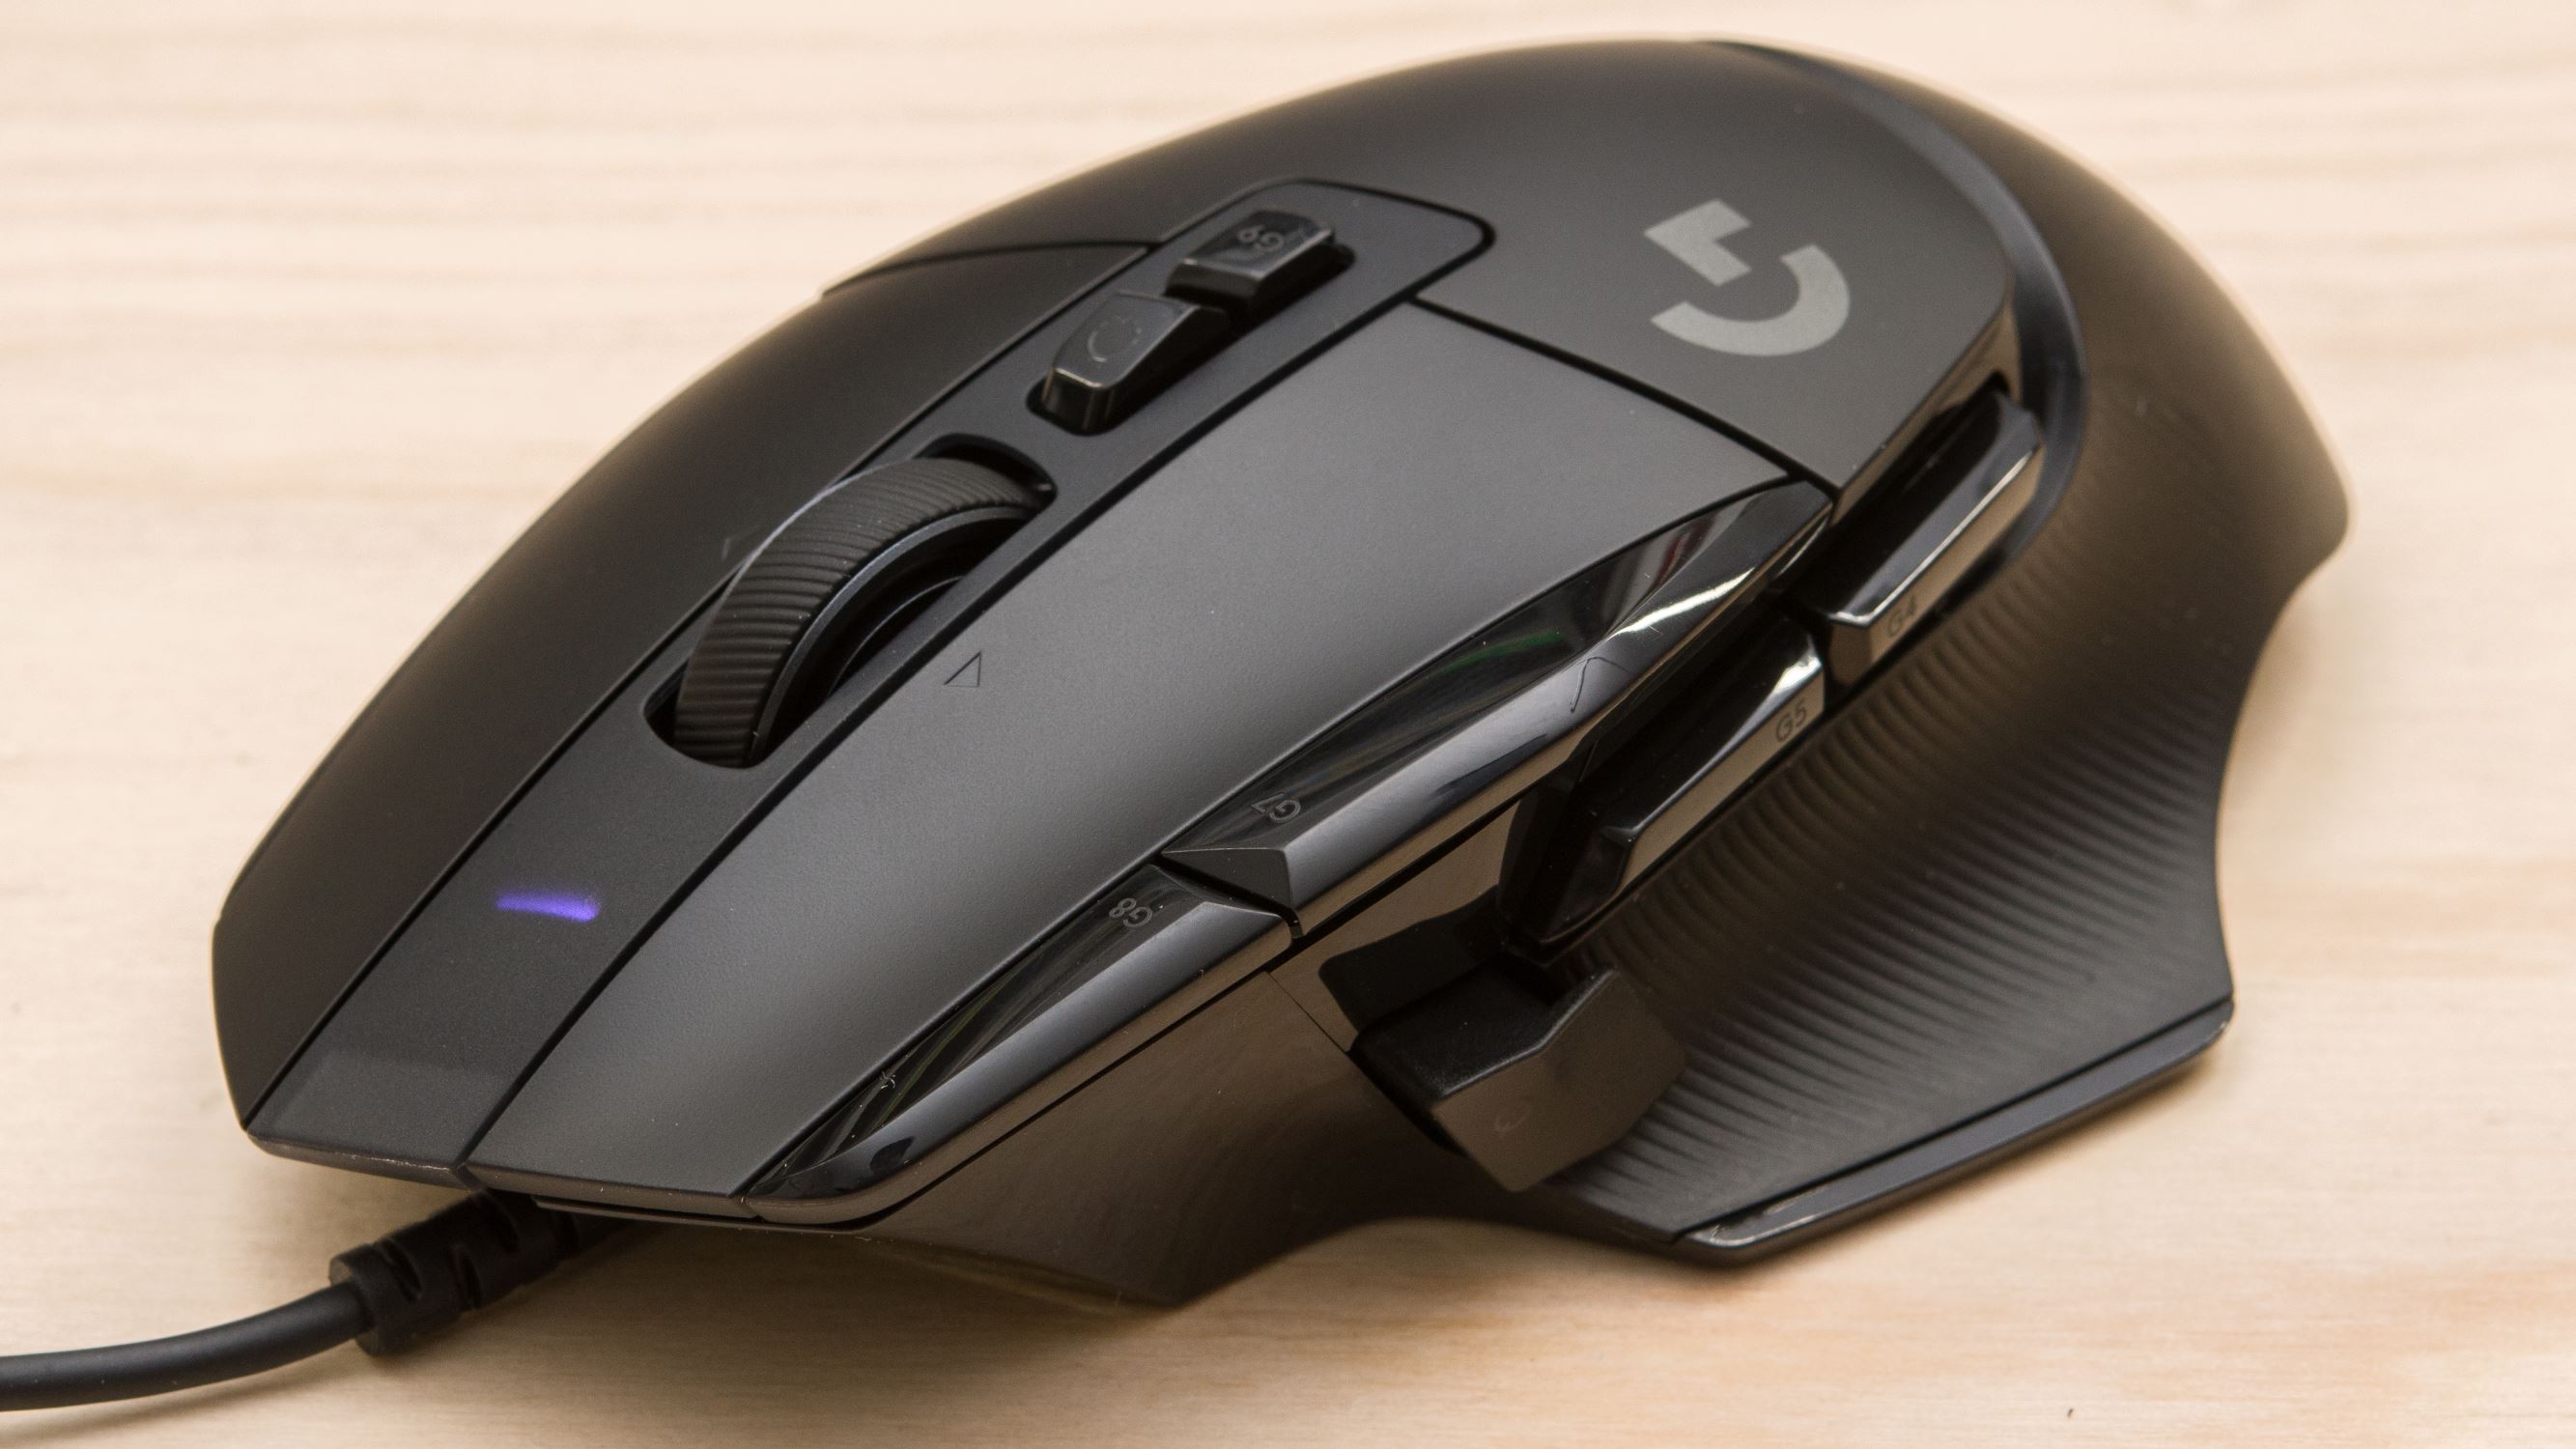
Launch the Logitech G HUB software on your computer and navigate to the section that allows you to configure button assignments. Here, you will see a graphical representation of the Logitech G502 mouse, indicating the various buttons that can be customized.
Click on each button to assign a function to it. The G HUB software provides a wide range of options, from simple commands like left-click or right-click, to complex macros and multi-key combinations. Experiment with different assignments to find the configuration that suits your playstyle best.
Furthermore, the Logitech G502 features a DPI (dots per inch) sensor, allowing you to adjust the sensitivity of the mouse on the fly. Higher DPI settings result in faster cursor movement, while lower settings provide more precision. Use the DPI settings in the G HUB software to define multiple DPI levels and assign them to a button for easy switching during gameplay.
Additionally, you can fine-tune other parameters such as scroll speed, scroll direction, and pointer speed to further customize your Logitech G502 experience. These settings can greatly impact your gameplay, so take the time to experiment and find the optimal configuration for your gaming needs.
Remember to save your button assignments and DPI settings once you are satisfied with the configuration. You can create multiple profiles within the G HUB software to switch between different setups for different games or tasks.
With the button assignments and DPI settings customized to your liking, you are now ready to enhance your gaming experience even further. In the next step, we will explore how to adjust the weight and balance of the Logitech G502 to achieve the perfect fit and feel. Let’s move on to Step 5!
Step 5: Adjusting weight and balance
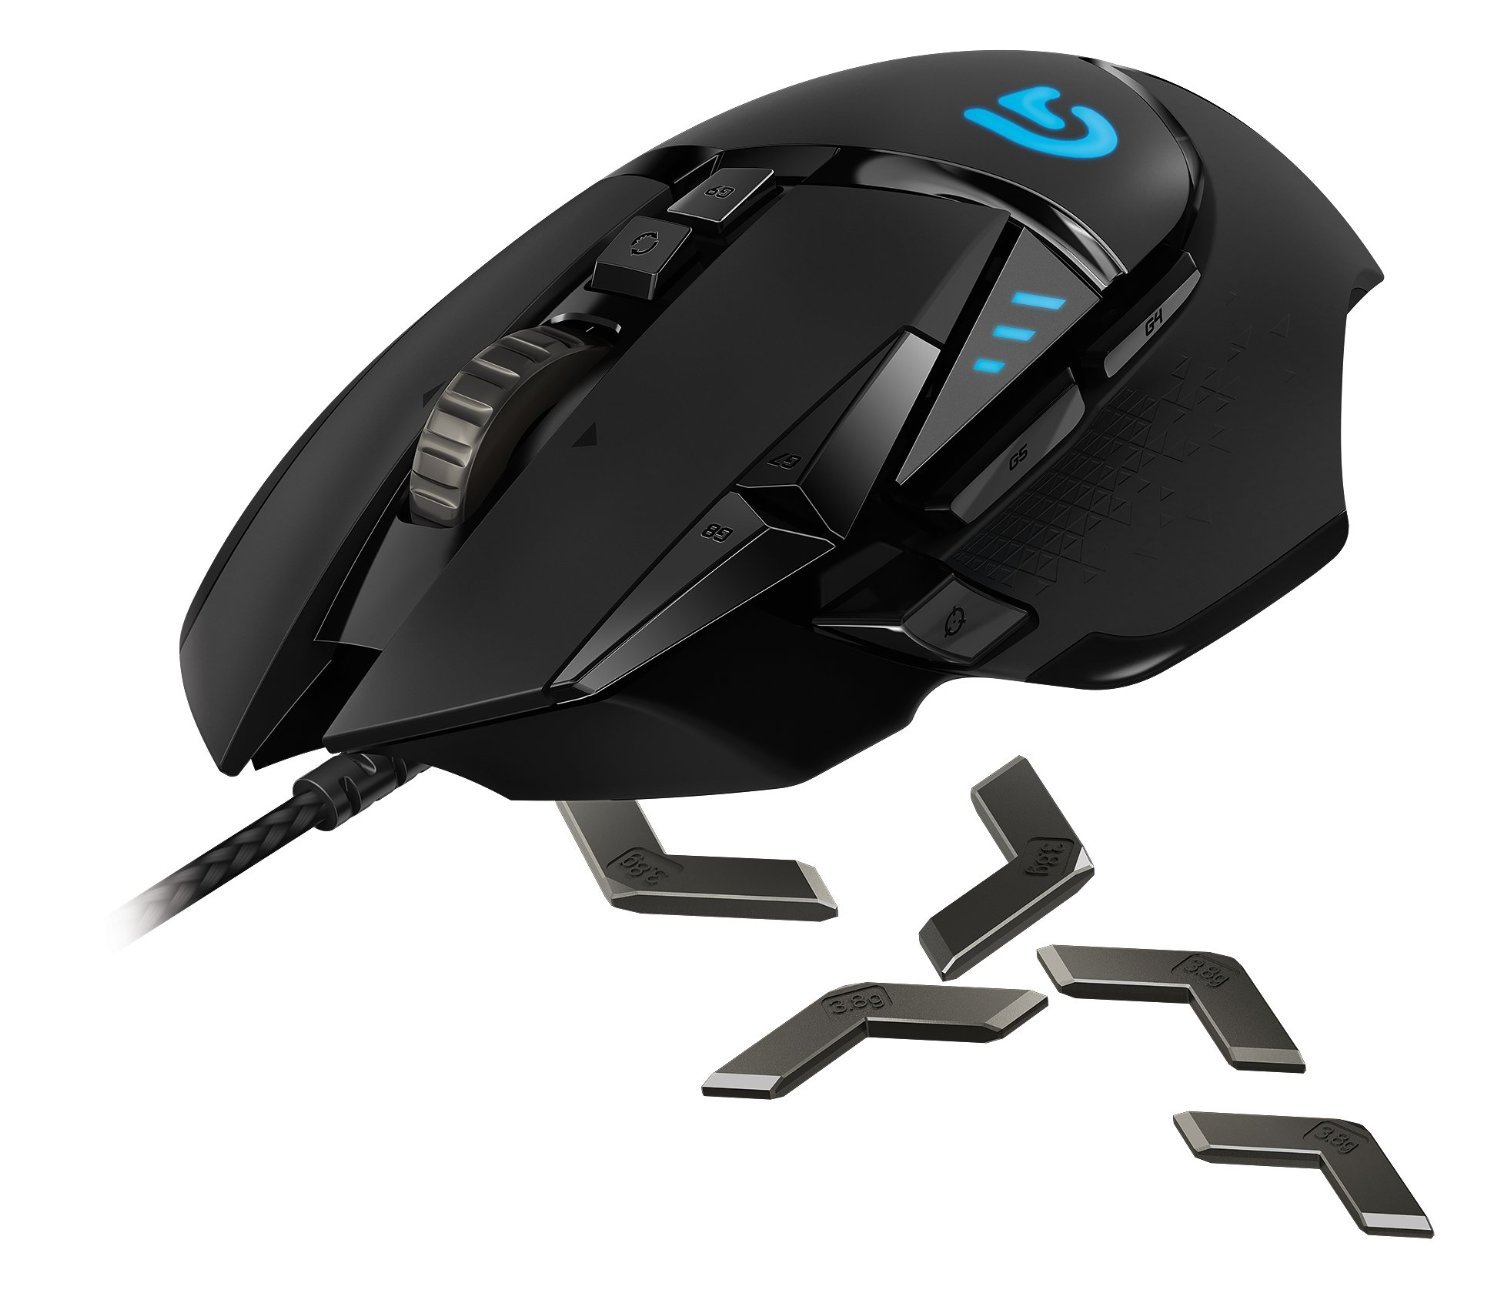
The Logitech G502 gaming mouse offers a unique customization feature that allows you to adjust its weight and balance according to your preference. In this step, we will explore how you can fine-tune these settings to achieve the perfect fit and feel for your hand.
Start by locating the removable weights that came with your Logitech G502. These weights are small metal discs that can be inserted into slots on the underside of the mouse. The mouse may have multiple slots, allowing you to distribute the weight in different areas.
Begin by removing any existing weights from the mouse if they are already installed. Then, experiment with different weight configurations by inserting the removable weights into the slots. Add or remove weights according to your preference until you find the weight that feels most comfortable and balanced for you.
Adjusting the weight of your Logitech G502 can have a significant impact on your gaming experience. Lighter weights may provide quicker movements and better control for fast-paced games, while heavier weights can offer stability and enhance precision for slower, more deliberate actions.
Additionally, consider the distribution of the weights. Placing more weights towards the back of the mouse can provide a more balanced feel, while placing them towards the front can offer increased precision and control. Experiment with different weight placements to find the balance that suits your gameplay style.
Once you have found the perfect weight and balance configuration, secure the weights in place by firmly pushing them into the slots. Ensure that they are snugly in place to avoid any shifting or rattling during use.
With the weight and balance of your Logitech G502 customized to your liking, you are now ready to dive deeper into personalization by exploring RGB lighting effects. Join us in Step 6 as we discover how to create stunning lighting schemes that match your gaming setup and style!
Step 6: Personalizing RGB lighting effects
Add a touch of personality and flair to your Logitech G502 gaming mouse by personalizing the RGB lighting effects. With the Logitech G HUB software, you have full control over the color, brightness, and patterns displayed by the mouse’s RGB lighting.
Launch the Logitech G HUB software on your computer and navigate to the section dedicated to lighting customization. Here, you will find a range of options to create stunning lighting schemes that match your gaming setup or reflect your personal style.
Start by choosing a base color for the mouse’s lighting. The G HUB software provides a spectrum of colors to choose from, allowing you to select your favorite hue or coordinate with your other gaming peripherals.
Next, experiment with different lighting effects and patterns. The G HUB software offers various options, such as a solid color, breathing effect, color cycle, and reactive lighting. These effects can create eye-catching visuals that add a dynamic element to your gaming experience.
Additionally, you have the option to synchronize the lighting effects on your Logitech G502 with other Logitech gaming peripherals that support RGB lighting. This coordinated lighting setup can create a cohesive aesthetic and enhance immersion during your gaming sessions.
Save your custom lighting profiles within the Logitech G HUB software, allowing you to switch between different lighting setups effortlessly. This feature is particularly useful if you have different lighting preferences for various games or activities.
Remember to apply the changes once you have finalized your lighting customization. Watch as your Logitech G502 gaming mouse comes to life with vibrant and personalized RGB lighting effects.
With your Logitech G502 now adorned with your preferred RGB lighting scheme, it’s time to take customization a step further in Step 7. Learn how to create and save profiles tailored to different gaming scenarios or tasks. Let’s move on!
Step 7: Creating and saving profiles
The Logitech G502 gaming mouse allows you to create and save profiles tailored to different gaming scenarios or tasks. This feature ensures that you have quick and easy access to your preferred settings and configurations when you switch between games or applications.
To create a profile, open the Logitech G HUB software and navigate to the profile section. Here, you can either create a new profile from scratch or duplicate an existing profile and customize it to your liking.
Start by giving your profile a descriptive name that helps you easily identify its purpose or associated game/application. This will come in handy when you need to switch between different profiles quickly.
Once you have named your profile, you can begin customizing it according to your gaming preferences. Adjust button assignments, DPI settings, lighting effects, and any other settings that you want to be specific to this profile.
Creating multiple profiles allows you to have different configurations for different games or tasks. For example, you might have one profile optimized for first-person shooters, with specific button assignments and higher DPI settings, and another profile for strategy games, with different button assignments and lower DPI settings for precise movements.
Save each profile after customizing it to your liking. You can create and save as many profiles as you need, ensuring that you have a tailored setup for every gaming scenario or application.
Additionally, the Logitech G HUB software allows you to assign specific profiles to games or applications. This means that whenever you launch a particular game or application, the associated profile will automatically be activated, ensuring you have the optimal settings for each experience.
Managing profiles within the G HUB software is straightforward. You can easily switch between profiles with a few clicks or set up automatic profile switching based on the game or application you launch.
With the ability to create and save profiles, your Logitech G502 gaming mouse becomes a versatile tool that adapts to your needs. In the final step, we will dive into testing and optimizing the performance of your Logitech G502 for the best gaming experience. Let’s move on to Step 8!
Step 8: Testing and optimizing performance
Now that you have customized your Logitech G502 gaming mouse to your liking, it’s time to put it to the test and optimize its performance for the best gaming experience. In this final step, we will explore how you can fine-tune the mouse’s settings and ensure smooth and precise operation.
Start by launching a game or application that you frequently use and feel comfortable with. This will give you a baseline to assess the performance of your Logitech G502.
Once in-game or in the application, take a moment to test the button assignments and familiarize yourself with their functions. Ensure that the assigned actions respond as expected and provide the desired in-game advantages.
Next, pay attention to the mouse’s DPI settings. Adjust the DPI levels to find the sensitivity that feels most comfortable and accurate for your gameplay style. Test different DPI settings and observe how they influence your cursor movement and aiming precision.
While testing, it’s essential to be aware of any customization adjustments that you may need to make. If you find that a particular button assignment is not working as intended or that the mouse’s sensitivity feels off, return to the Logitech G HUB software to refine the settings further.
Furthermore, take note of any lighting effects that might impact your gaming experience. Ensure that the chosen lighting scheme is visually appealing and does not distract or hinder your concentration during gameplay.
During your testing phase, it’s advisable to spend some time fine-tuning the settings and experimenting with different configurations until you find the optimal combination that suits your preferences and achieves the desired performance.
Finally, remember to regularly check for software updates and firmware upgrades for your Logitech G502. Logitech frequently releases updates that can improve performance, fix bugs, and introduce new features to ensure that you have the best possible gaming experience.
By thoroughly testing and optimizing the performance of your Logitech G502 mouse, you can unlock its full potential and enjoy seamless and precise gaming sessions. Feel free to revisit the customization options and make adjustments as needed to stay ahead of your competition.
With this, you have completed the setup process for your Logitech G502 gaming mouse. Now, go ahead and immerse yourself in your favorite games, knowing that your Logitech G502 is ready to deliver top-notch performance tailored to your exact specifications.
Happy gaming!
Conclusion
Congratulations! You have successfully completed the setup process for your Logitech G502 gaming mouse. By following the step-by-step guide in this article, you have customized and optimized your mouse to fit your preferences and gaming style.
Throughout the setup process, you unboxed the Logitech G502 and connected it to your computer, installed the Logitech G HUB software, customized button assignments and DPI settings, adjusted the weight and balance, personalized RGB lighting effects, created and saved profiles, and finally, tested and optimized the performance.
With its ergonomic design, advanced customization options, and precision tracking, the Logitech G502 is a powerful tool in the hands of any gamer. Its features, such as button assignment customization, DPI adjustment, weight and balance tuning, and RGB lighting personalization, allow you to create a tailored gaming experience that enhances your performance and enjoyment.
Remember to periodically check for software updates and firmware upgrades to ensure that you stay up to date with the latest enhancements and features from Logitech. This will ensure that your Logitech G502 continues to deliver top-notch performance as new technologies and optimizations become available.
Now, armed with your customized Logitech G502 gaming mouse, you are ready to unleash your gaming potential and take your gameplay to new heights. Whether you’re battling foes in intense first-person shooters, exploring vast open worlds, or strategizing your way to victory, your Logitech G502 will be your trusted companion on your gaming journey.
Thank you for following this guide, and happy gaming!