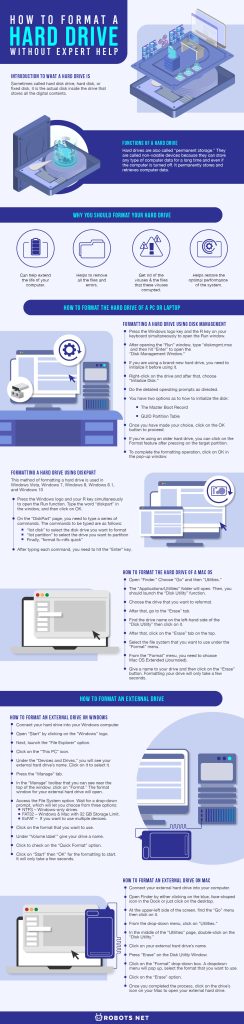
After several years of working on the same computer, we can’t avoid encountering some problems while using it. These problems include the computer’s performance slowing down, the computer not starting up, and encountering some errors. Many causes can lead to these occurring problems. However, one of the most common is the slowing down of the performance of the computer’s hard drive. While buying a new hard drive will instantly solve the problem, a few alterations here and there will result in a formatted hard drive. With that, our hard drive can work as efficiently as the new ones without the need to spend money. This is the reason why we need to format our hard drive. Because of that, we need to learn how to format a hard drive and don’t depend on an expert’s help.
In this article, we will discuss what a hard drive is, the reasons why you need to format it, and how to format your hard disk.
Introduction to What a Hard Drive Is

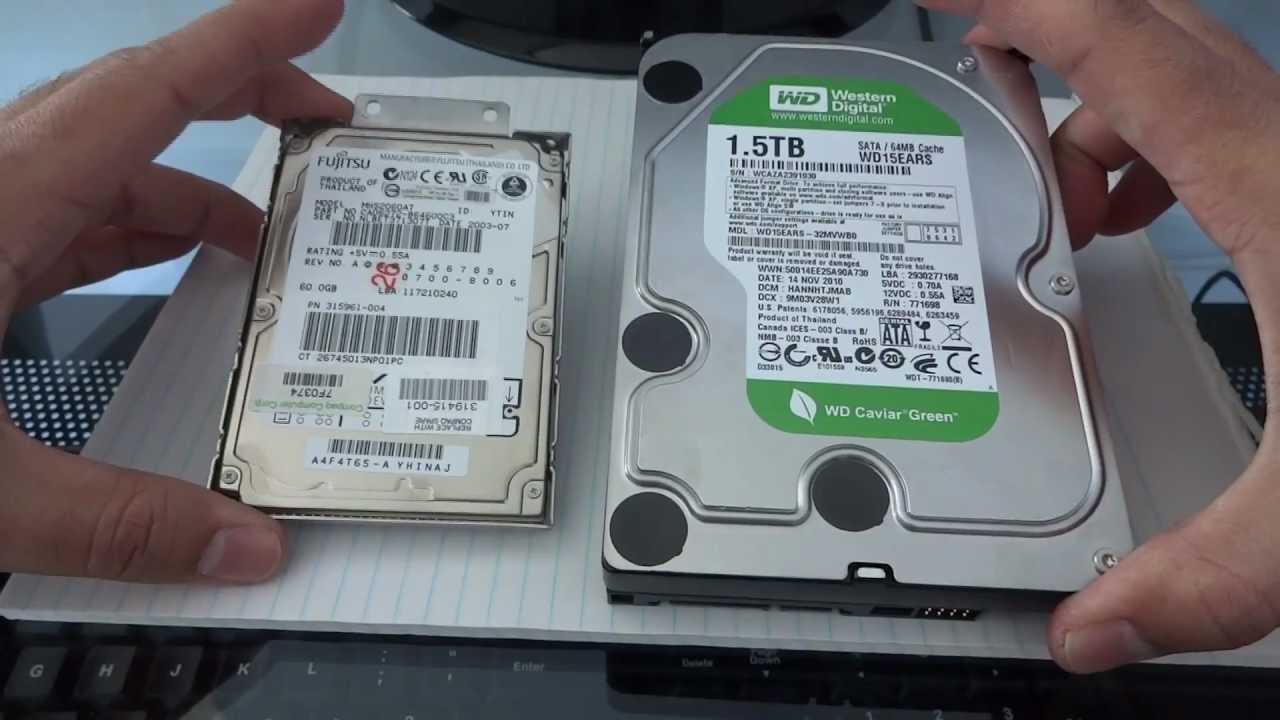
Sometimes called hard disk drive, hard disk, or fixed disk, it is the actual disk inside the drive that stores all the digital contents. These include the documents, pictures, music, personal files, and videos that we save. Also, it stores all the codes that are required for the operating system, the framework browsers that are used to connect to the internet, application preferences, and drivers for accessories. Hard drives can be internal or external and hold a specific amount of space. Usually, people talk about computer storage, but they are referring to the hard drive.
Functions of a Hard Drive
Hard drives are also called “permanent storage.” They are called non-volatile devices because they can store any type of computer data for a long time and even if the computer is turned off. It permanently stores and retrieves computer data. However, the amount of data that can be stored in the hard disk depends on its storage capacity. Different hard disks have a different amount of data storage capacity that is measured in terabytes (TB) or gigabytes (GB).
The physical size of a typical hard disk is slightly bigger than a hand. However, it can store more than 100 GB of data. The data is stored on the stack of the disks arranged in the solid encasement. The disks spin very fast varying from 5,500 up to 7,200 revolutions per minute (rpm) so that users can immediately access data from anywhere on the drive.
If you’re looking to add storage space for your computer or console, check out our list of the best external hard drives available.
Why You Should Format Your Hard Drive
After years of using your computer, the hard drive may experience malfunctions due to viruses, full storage, registry errors, and a need for operating system upgrades. For your computer to run efficiently and for its performance to improve, you need to format its hard drive. Formatting the hard drive can help extend the life of your computer. It also helps to remove all the files and errors. Moreover, reinstalling the operating system will help improve your computer’s performance, and you will be able to use a fresh and improved operating system.
Additionally, there’s a need to format the hard drive to get rid of the viruses and the files that these viruses corrupted. Furthermore, it is the best way to erase the unwanted data and the files that you don’t know exist. Besides, reformatting the hard disk drive will delete the harmful files, which helps restore the optimal performance of the system.
On the other hand, if you don’t format your hard disk, the damaged files and codes that run the operating system will slow down the functions of the computer. Also, you can’t avoid system crashes and virus attacks.
How to Format the Hard Drive of a PC or Laptop
There are three methods on how to format a hard drive on your PC and laptop. These are through Disk Management, DiskPart, and third-party software. These three methods are simple and easy to use.
Formatting a Hard Drive Using Disk Management
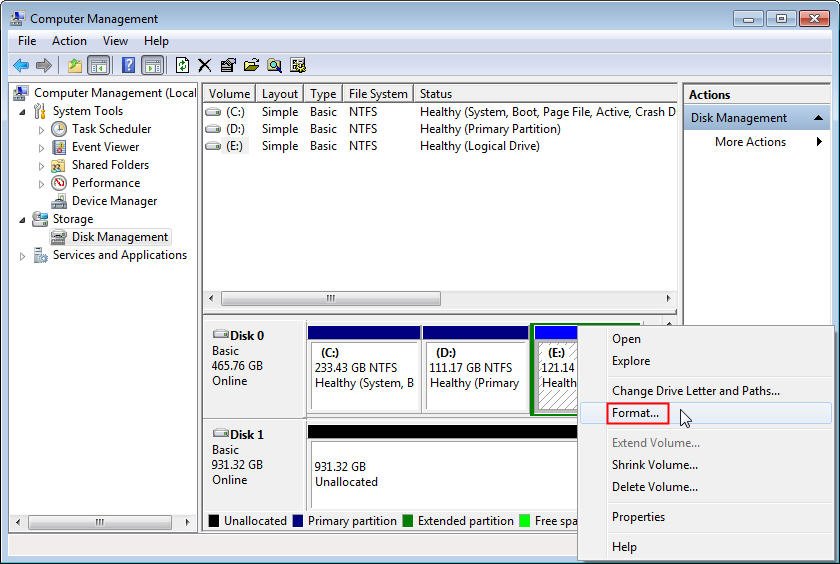
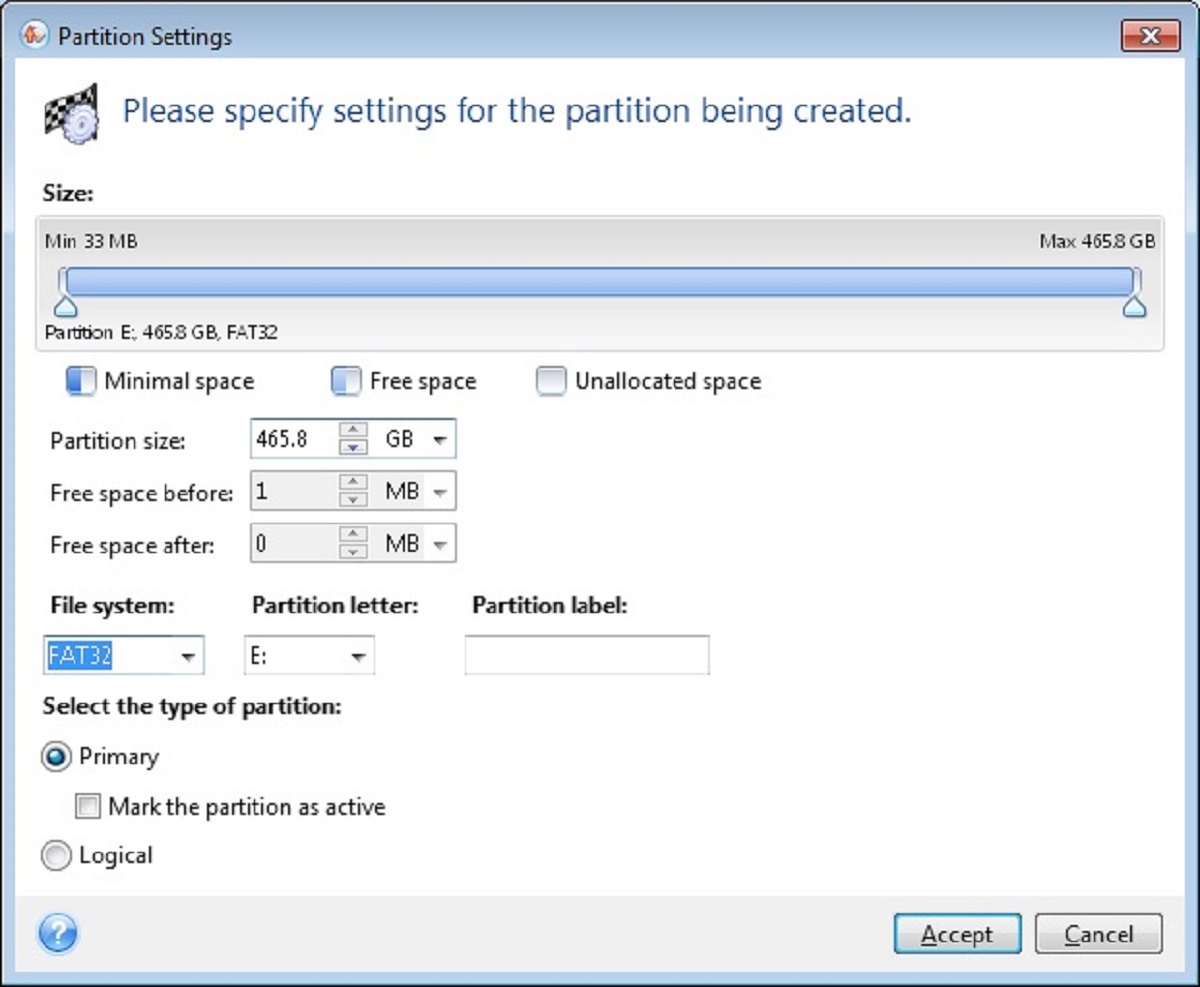
Photo by AOMEI on AOMEI Partition Assistant
Disk management is a great choice to format a hard drive if you don’t want to use third-party software.
- Press the Windows logo key and the R key on your keyboard simultaneously to open the Run window.
- After opening the “Run” window, type “diskmgmt.msc” and then hit “Enter” to open the “Disk Management Window.”
- If you are using a brand-new hard drive, you need to initialize it before using it.
- Right-click on the drive and after that, choose “Initialize Disk.”
- Do the detailed operating prompts as directed.
- You have two options as to how to initialize the disk:
- The Master Boot Record
- GUID Partition Table
- Once you have made your choice, click on the OK button to proceed.
- If you’re using an older hard drive, you can click on the Format feature after pressing on the target partition.
- In case that the drive contains several volumes, formatting a volume is possible to delete some useless data.
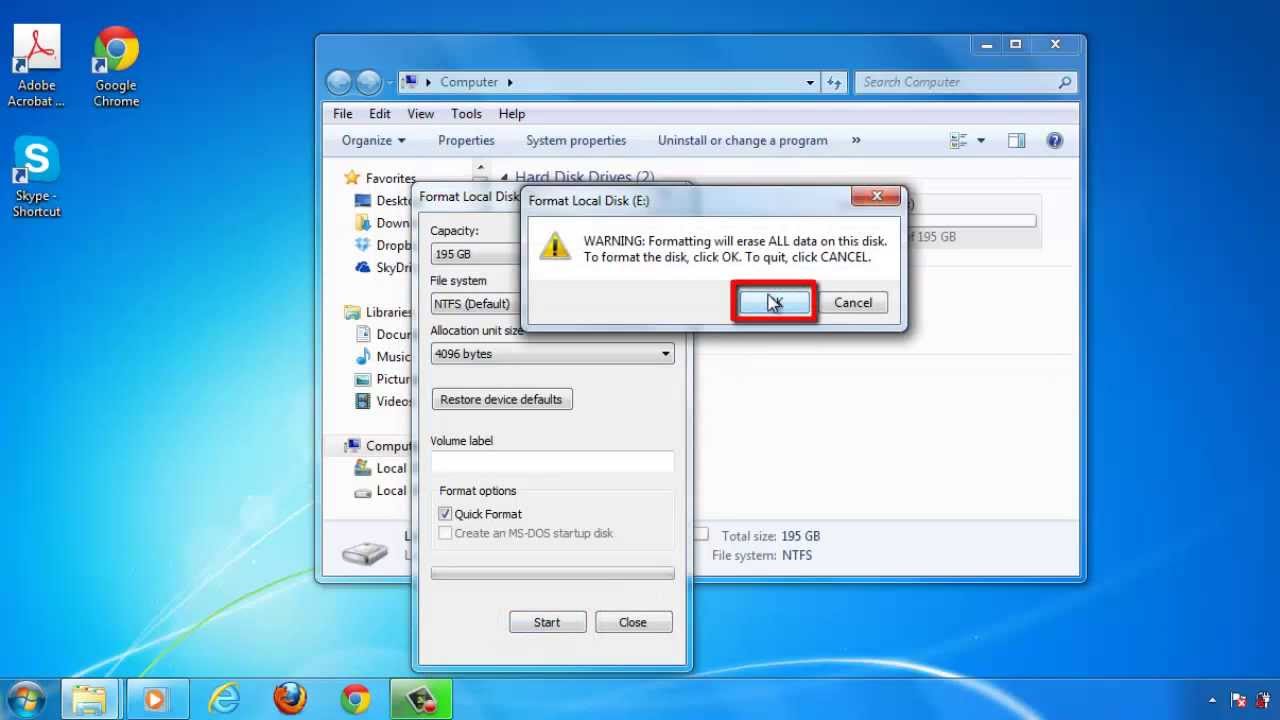
- For the partition, set the volume label, file system, and the allocation unit size. If you don’t do that, the default setting of the operation will be carried out. Click on OK once that’s done. Then, if you need to recover your data, you need to select the “Perform A Quick Format” option during the operation.
- To complete the formatting operation, click on OK in the pop-up window.
Formatting a Hard Drive Using DiskPart

This method of formatting a hard drive is used in Windows Vista, Windows 7, Windows 8, Windows 8.1, and Windows 10. It’s a simple tool that can be used to format a hard drive. Here are the steps on how to conduct this action.
- Press the Windows logo and your R key simultaneously to open the Run function. Type the word “diskpart” in the window, and then click on OK.
- On the “DiskPart” page, you need to type a series of commands. The commands to be typed are as follows:
- “list disk” to select the disk drive you want to format
- “list partition” to select the drive you want to partition
- Finally, “format fs=ntfs quick”
- After typing each command, you need to hit the “Enter” key.
An alternative to those steps can be done by using the search box of Windows 10. Type ”cmd” and right-click on “Command Prompt.” Then, choose “Run as administrator” to continue the process.
Type the following commands: “diskpart,” “list disk,” “select volume E,” (you can use other drive letters and change the label whatever pleases you), and “format fs=ntfs quick label=test.” After each command, you have to hit the “Enter” key. After finishing typing the commands, you can now exit the command line window.
Formatting a Hard Drive Using Third-Party Software
To format a hard drive, you can also use third-party software. One software that can help you is the MiniTool Partition Wizard. This software is convenient to use and competent. Many users also recommend this professional partition manager. This is because it has many powerful features, which include Data Backup, Disk Benchmark, Partition Recovery, Migrate OS to SSD, Clone Disk, and many others. All you need is to download the software and it is ready to be used right away.
- To get to the “MiniTool Partition Wizard” main interface, launch it.
- Choose the partition that you need to format. Afterward, look for the “Format Partition” feature from the action panel then click on it.
- Set the label, size, and file system of your preference. Then, click on “OK” to continue with the process.
- Your formatted partition can be previewed if you want to see if things were done correctly.
- If you are satisfied, you can now click on the “Apply” button to complete the operation.
- Voila, you’ve safely formatted your hard drive without any issues.
How to Format the Hard Drive of a Mac OS
- Open “Finder.” Choose “Go” and then “Utilities.”
- The “Applications/Utilities” folder will open. Then, you should launch the “Disk Utility” function.
- On the left-hand sidebar, choose the drive that you want to reformat.
- After that, go to the “Erase” tab.
- Find the drive name on the left-hand side of the “Disk Utility” then click on it.
- After that, click on the “Erase” tab on the top.
- Select the file system that you want to use under the “Format” menu.
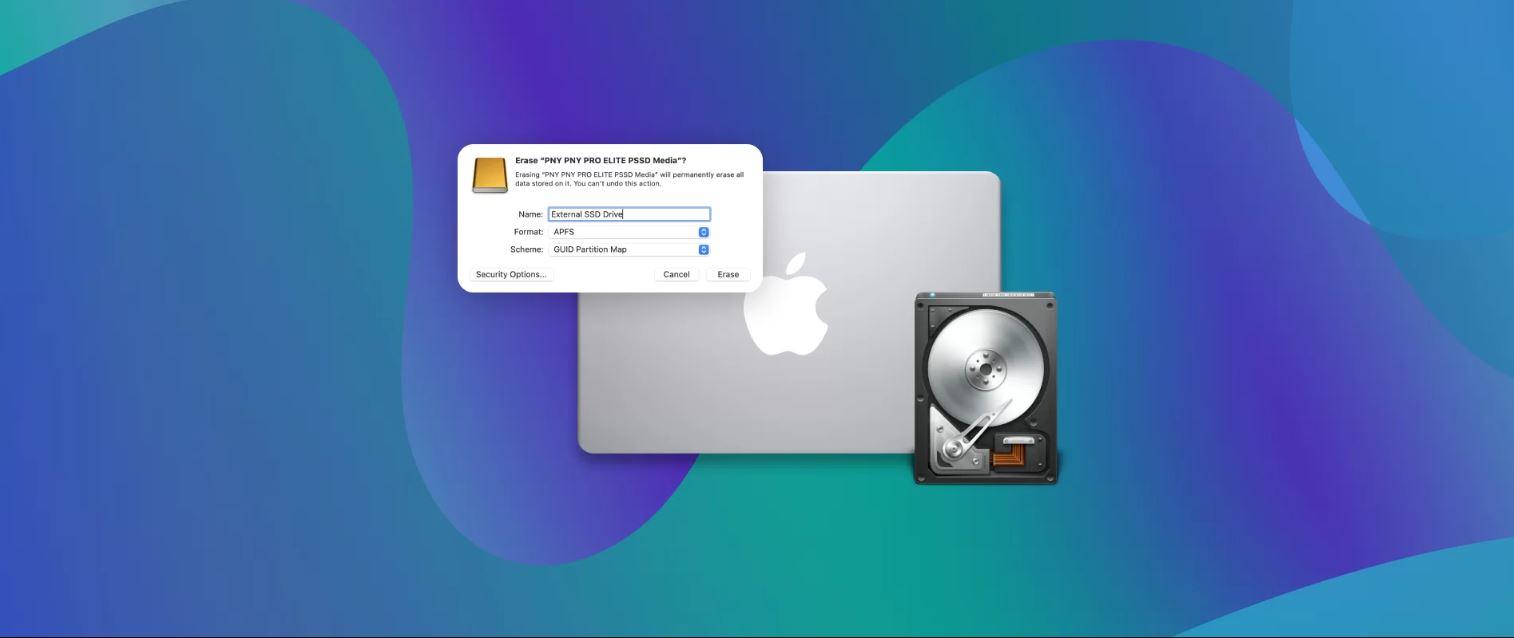
- From the “Format” menu, you need to choose Mac OS Extended (Journaled).
- Give a name to your drive and then click on the “Erase” button. Formatting your drive will only take a few seconds.
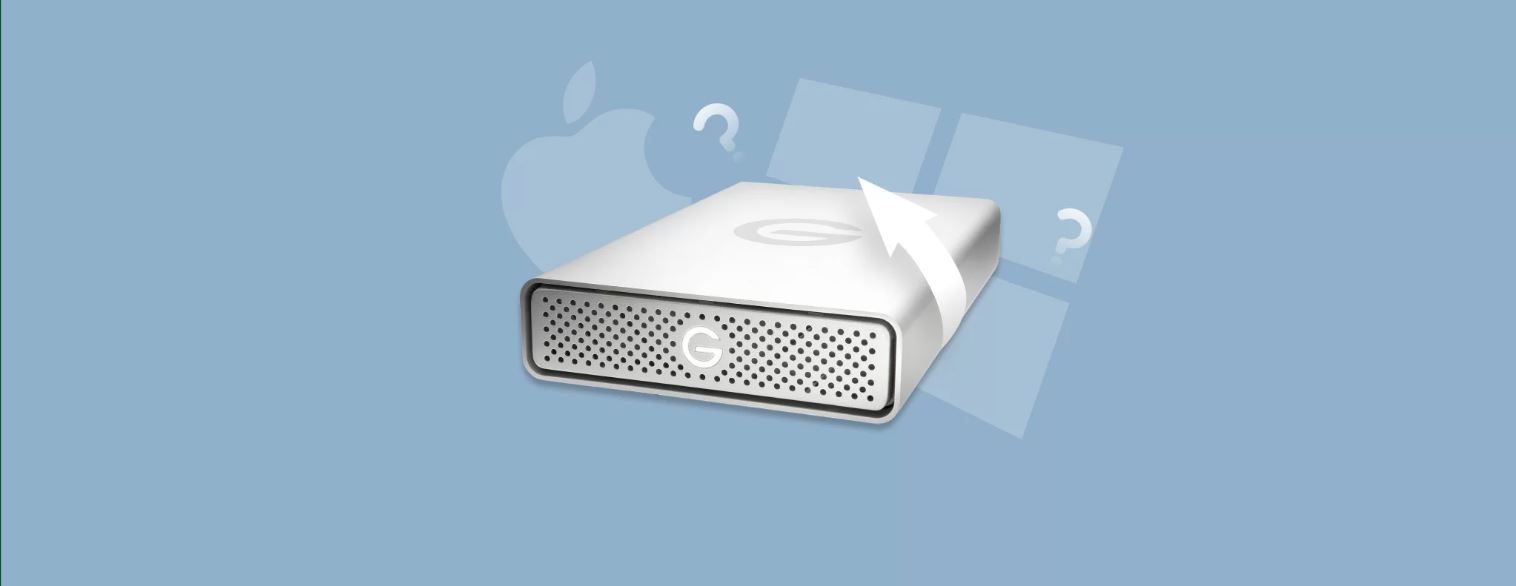
How to Format an External Drive

How to Format an External Drive on Windows
- Connect your hard drive into your Windows computer. Your computer will automatically detect your external hard drive once you plug it.
- Open “Start” by clicking on the “Windows” logo that you can find at the bottom-left corner of your computer screen.
- Next, launch the “File Explorer” option.
- Click on the “This PC” icon.
- Under the “Devices and Drives,” you will see your external hard drive’s name. Click on it to select it.
- Press the “Manage” tab, which is located at the upper-left side of the “This PC” window.
- In the “Manage” toolbar that you can see near the top of the window, click on “Format.” The format window for your external hard drive will open.
- Access the File System option. Wait for a drop-down prompt, which will let you choose from three options:
- NTFS – Windows-only drives
- FAT32 – Windows and Mac with 32 GB Storage Limit. Take note that individual file size is at not over 4 GB.
- ExFAT – For hard drives or if you want to use multiple devices.
- Click on the format that you want to use.
- Under “Volume label’” give your drive a name.
- Click to check on the “Quick Format” option.
- Click on “Start” then “OK” for the formatting to start. It will only take a few seconds. Also, you will be notified when formatting is done.
How to Format an External Drive on Mac
- Connect your external hard drive into your computer.
- Open Finder by either clicking on the blue, face-shaped icon in the Dock or just click on the desktop.
- At the upper-left side of the screen, find the “Go” menu then click on it.
- From the drop-down menu, click on “Utilities.”
- In the middle of the “Utilities” page, double-click on the “Disk Utility.”
- On the left sidebar, click on your external hard drive’s name.
- Press “Erase” on the Disk Utility Window.
- Click on the “Format” drop-down box. A dropdown menu will pop up and you’re choices will be:
-
- Mac OS Extended (Journaled) – default Mac format, only compatible with Mac.
- OS Extended (Journaled, Encrypted) – which is the encrypted version of the default Mac format.
- OS Extended (Case-sensitive, Journaled) – a version of the default Mac format, which approaches files that share a name differently due to case differences.
- Mac OS – case-sensitive, journaled, and encrypted version. This is the combination of Mac OS Extended (Journaled), Mac OS Extended (Journaled, Encrypted), and Mac OS Extended (Case-sensitive, Journaled).
- MS-DOS (FAT) – compatible with PC and Mac computers. Beware of the 4 GB file size limit.
- ExFAT – which is the recommended format option. Compatible with Mac and Windows.
Concluding Steps
- Select the format that you want to use.
- Click on the “Erase” option.
- Once you completed the process, click on the drive’s icon on your Mac to open your external hard drive.
How to Format an Xbox One Hard Drive

Using the MiniTool Partition Wizard on Windows
- Download and install the “MiniTool Partition Wizard.”
- After installation, proceed to launch the program to access the main interface.
- Choose the “Unallocated space” option on your Xbox One external hard drive.
- Then, you should choose the “Create Partition” feature.
- You can keep the setting at default and just press “OK.”
- Click on the “Apply” button.
Using Windows Disk Management on Windows
- Press the Windows key and the letter “R” on your keyboard simultaneously to open the “Run” window.
- After opening the “Run” window, type “diskmgmt.msc” in the “Run” box.
- Right-click on the “Unallocated space” part of your Xbox One external hard drive.
- Then, you can select the “New Simple Volume” option.
- You should then follow the instructions that will show up on your screen.
- Keep the default settings to continue the process.
Using Mac OS
- Open “Finder” and navigate to “Applications.”
- From the drop-down menu, find and click on “Utilities.”
- After that, click on “Disk Utility.”
- Under “External,” find the external hard drive.
- Click on “Partition.” It’s located on the top of the menu of your right panel.
- After that, click on the “+” button for you to be able to create a new partition.
- Click the “FAT” or “exFAT” file system on the format column.
- Confirm your creation of the new partition.
- All you have to do is wait for the Disk Utility process to finish.
How to Format Your PS4 Hard Drive
Here’s how you can format a hard drive for your PlayStation 4.
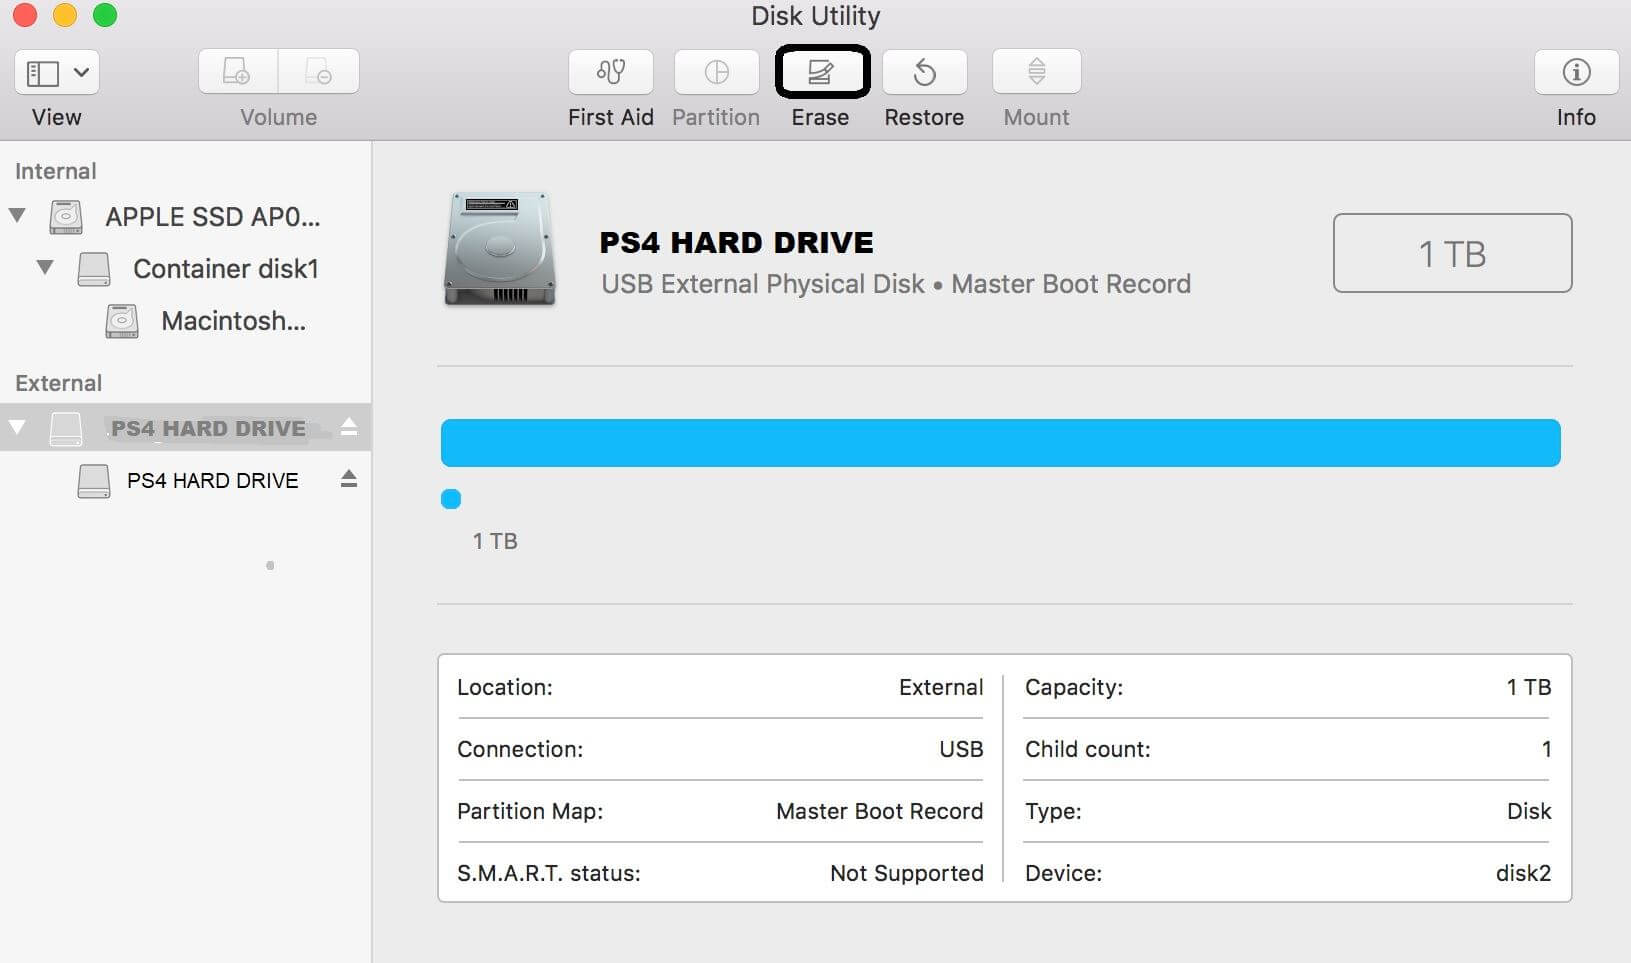
- Connect your PS4 hard drive to your computer.
- Launch the “Start” function and then look for “Disk Management.”
- Right-click on the hard drive that is tagged as “Unknown” and “Not Initialized.”
- After that, select “Initialize Disk.”
- Select the disk that you want to initialize by checking it.
- Select the partition style that you prefer. You can choose from the two options below:
- Master Boot Record (MBR) – suggested for hard drives that have below 2 TB space
- GUID Partition Table (GPT) – for hard drives that go over 2 TB
- Once you’ve selected the appropriate option, press the “OK” button.
- Press your right-click button on the “Unallocated space” option.
- After that, select the “New Simple Volume” option, and then click on the “Next” button.
- Under the “Simple volume size in MB” section, leave the default size, then click on “Next.”
- To select a letter for a new hard drive, use the “Assign the following drive letter.”
- Click on the “Next” button.
- Select FAT32 when you click on the “File system” drop-down menu.
- On the “Allocation unit size,” go on and choose the “Default” option.
- In the “Value label” field, type the name for your drive.
- Clear the “Perform a quick format” option for the system to format the drive fully.
- Clear the “Enable file and folder compression” option before proceeding. Press “Next” to continue the process.
- Click on the “Finish” button to finish the whole ordeal.
Things to Remember Before Formatting Your Hard Drive
- Run a virus utility program for the operating system to be cleaned up.
- Save all your movies, music, and important documents on a portable drive.
- Have a backup of your mail client.
- Create a backup copy of your drivers in case something goes wrong.
- Take note of all the software installed on your computer.
- Create a copy of your browser settings.
- Secure your original installation disks.
- Make a list of all the serial keys that you need.
Format Your Hard Drive With Ease
We must always bear in our mind that we need to take responsibility for the things that we own. We must always take care of them and do the necessary improvements if needed. Concerning the computer that we use, we can’t avoid encountering malfunctions, system crashes, and sluggish performance. We should not always rely on experts’ help because we can’t always trust them plus the fact that we need to spend a lot of money for their services. With that, we need to learn how to format our hard drive. This way, we won’t be worried if something goes wrong with our computer. Some tweaks here and there will do. It’s always important that we do things by ourselves so that we can learn a lot from them. Moreover, we’ll be able to help others, too.
If you’re looking for other guides such as how to free up disk space on your computer or how to free up disk space on Mac, we have guides that can help you out.